

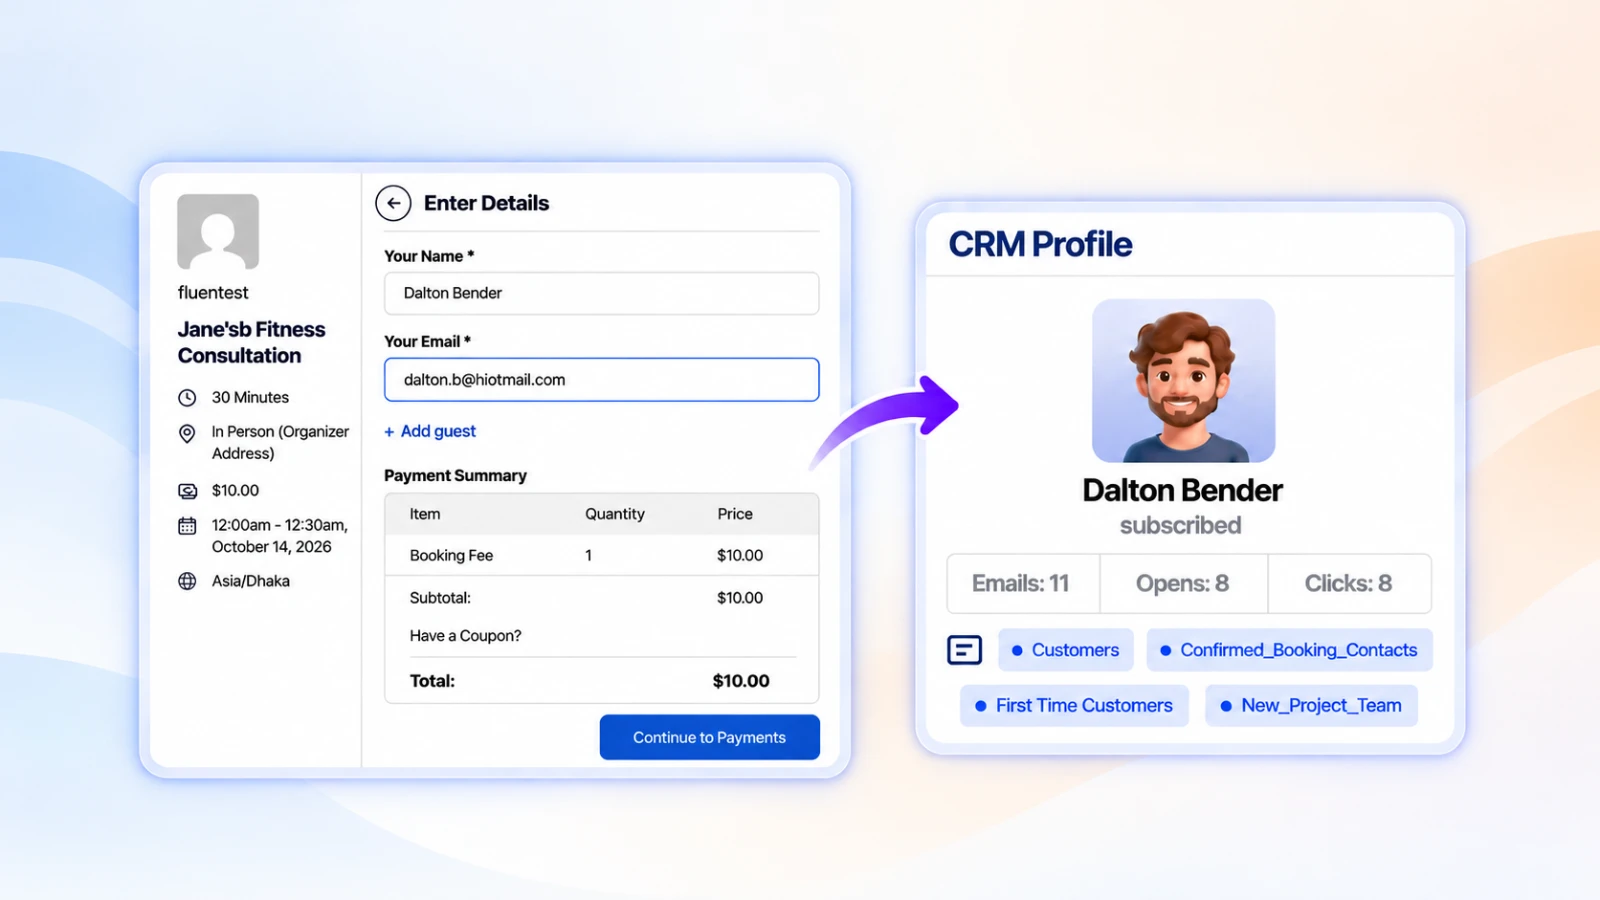
How to Automatically Tag and Segment Clients in FluentCRM When They Book an Appointment


Every booking tells you something about a client. They chose a service, picked a time, and may later complete, cancel, reschedule, or miss the appointment. Each of these actions gives you useful context about where the client stands and what may need to happen next.
The problem is that this information often stays in your booking system instead of becoming part of your customer follow-up. Without a clear way to organize it, it’s difficult to know which clients need a reminder, a rebooking prompt, or a follow-up message.
With FluentBooking and FluentCRM, you can turn booking activity into useful tags and segments based on the service booked, booking status, and client stage.
In this guide, you’ll build that structure and create five practical client segments to make follow-ups more relevant.
Why Booking Data is the Best Basis for Client Segmentation
Most segmentation combines information such as form fields, signup sources, and email engagement. Booking data is different because it reflects a specific action. A client chose a service, booked a time, and their appointment can later be completed, cancelled, rescheduled, or missed.
That makes booking data useful for the decisions that matter: who to thank, who to remind, who may need to rebook, and who may be ready for another service. It’s also the foundation for the idea that every booking needs a next step. You can’t send the right follow-up if you don’t know where each client stands.
Before You Start
You’ll need:
- FluentBooking Pro with at least one host and one event type set up
- FluentCRM installed and activated
- A simple tag plan for your services, booking statuses, and client lifecycle
It’s worth planning your tags before creating them. A clear structure makes your contacts easier to filter and helps prevent duplicate or inconsistent tags.
Step 1: Plan Your Tags Before You Build
Start by deciding which tags you actually need before creating them in FluentCRM. A clear structure makes your contacts easier to filter and prevents duplicate or inconsistent tags later. Without a plan, it’s easy to end up with several tags that mean the same thing, such as “Consultation,” “Consultation Call,” and “Consult-30.”
For most service businesses, three groups are enough:
| Group | What it tells you | Example tags |
| Service | What did the client book? | Service: Consultation, Service: Follow-up Session, Service: Haircut & Colour |
| Status | Where does their latest booking stand? | Status: Booked, Status: Completed, Status: Cancelled, Status: Rescheduled, Status: No-show |
| Client | What stage is the client in? | Client: First booking, Client: Past client, Client: Returning |
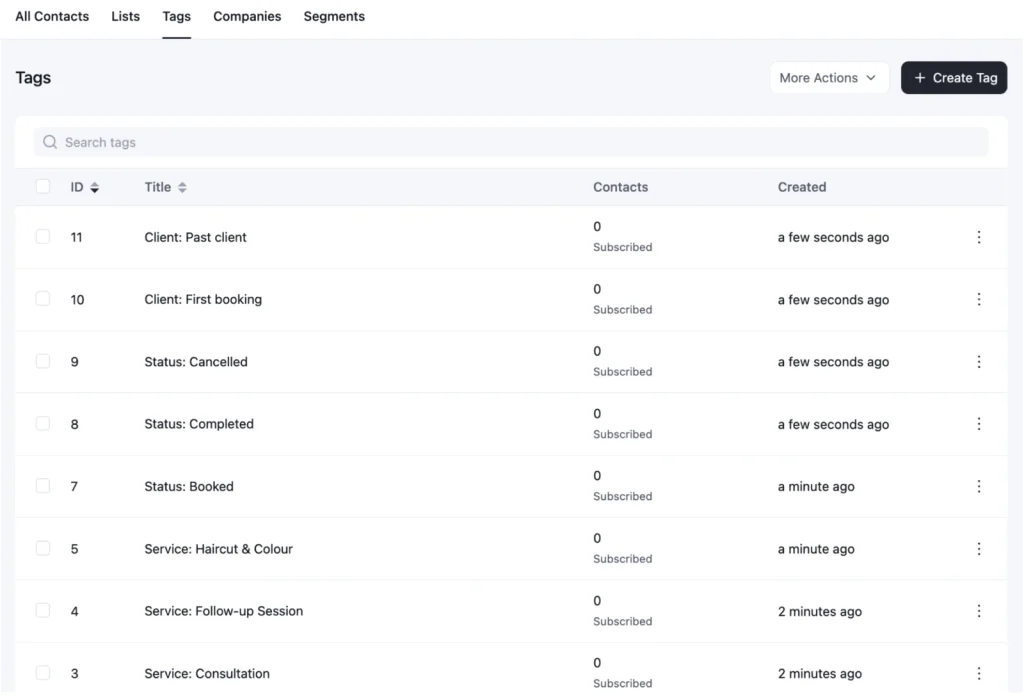
Two simple rules help keep this structure clean:
- Use prefixes. Keep the same naming format, such as Service:, Status:, and Client:, so related tags stay organized.
- Keep status tags current. A client should have a tag that reflects their latest booking status rather than collecting old status tags over time.
What about lists? Use a list for a broader group you email as a whole, such as “Clients” or “Clinic patients.” Use tags for details you want to filter, trigger actions from, or track at the contact level.
If you want to segment by something the booking form doesn’t capture yet, such as a goal, referral source, or preference, add a custom question to your booking form first.
Step 2: Connect Each Event Type to FluentCRM
The FluentCRM integration is configured for each event type, which lets you apply different tags based on the service a client books.
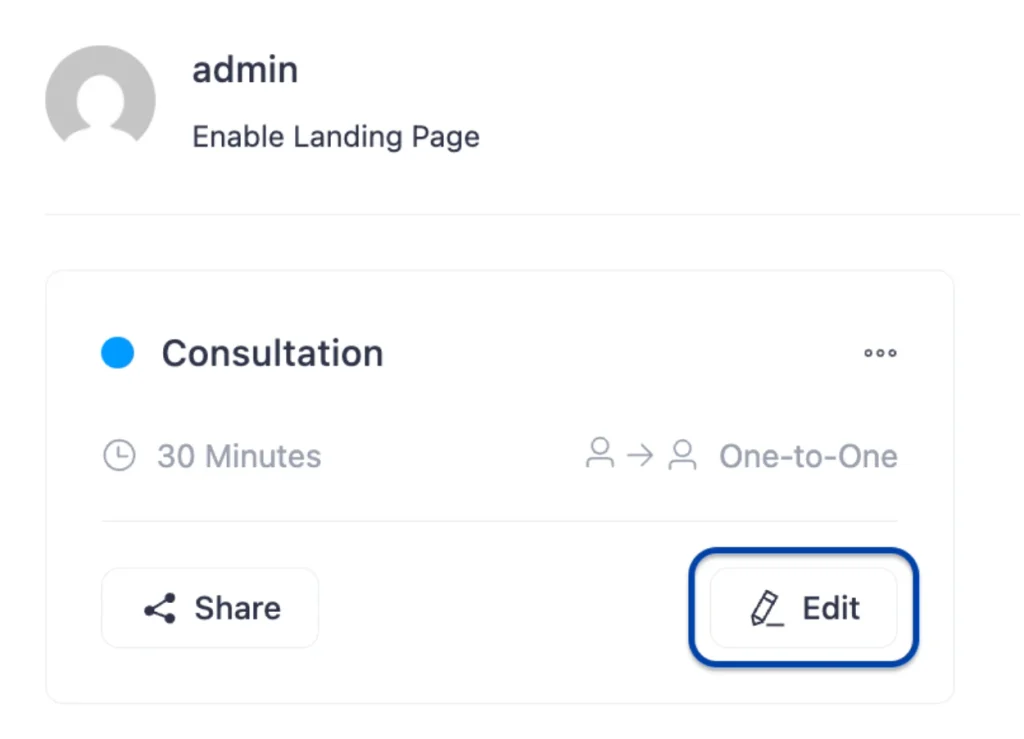
In FluentBooking, go to Booking Calendars, find the event type you want to connect, and click Edit.
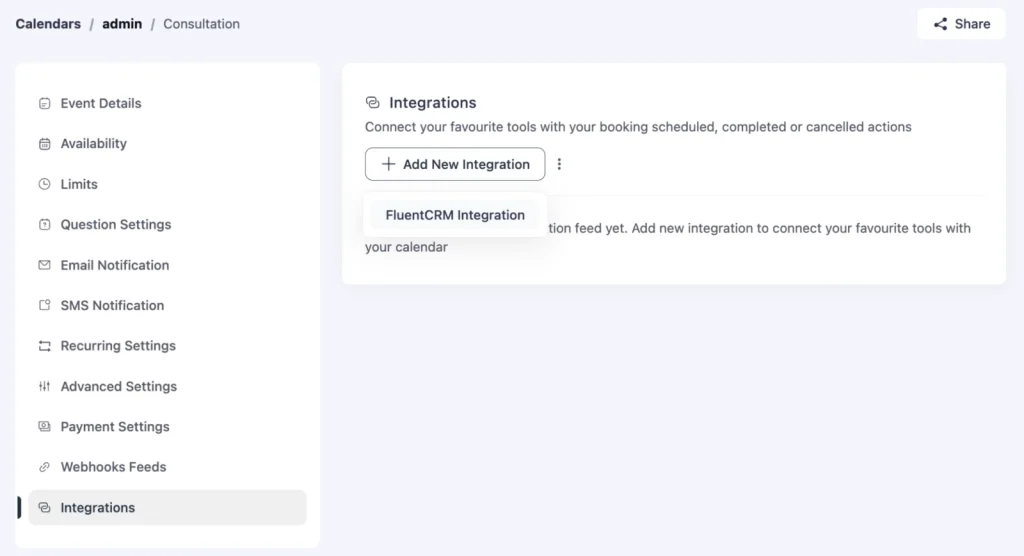
Open Integrations from the left sidebar and click Add New Integration. Then, select FluentCRM Integration from the list.
Map the booking fields to the matching FluentCRM contact fields, such as email, first name, and last name.
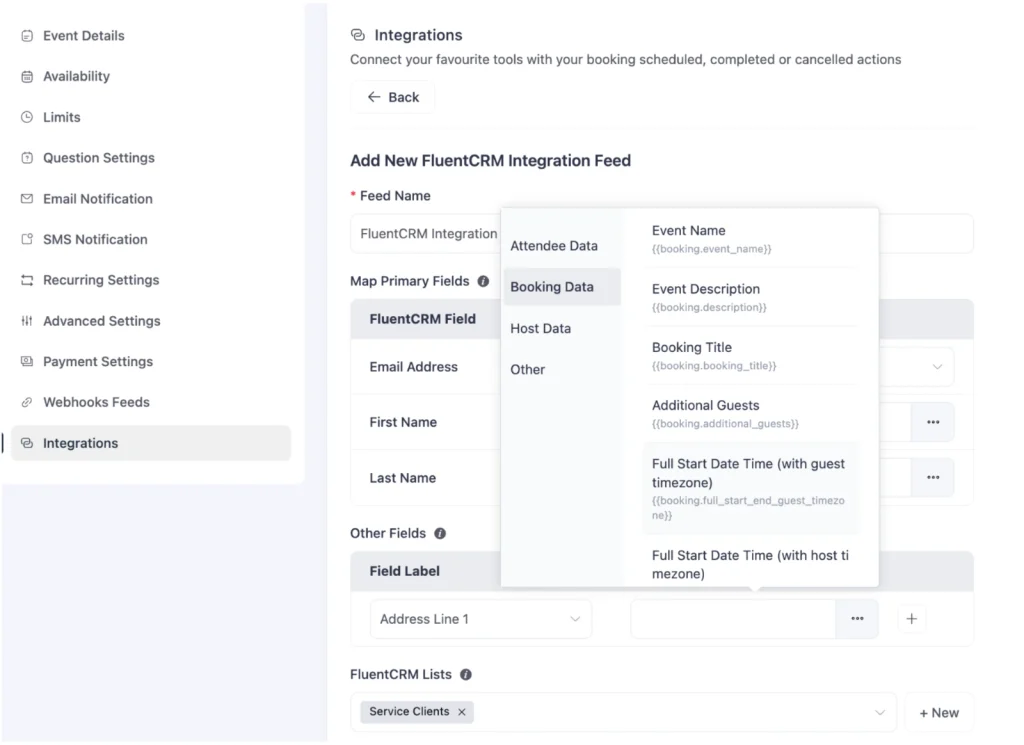
You can also control how new and existing contacts are handled, including whether existing contacts are updated and whether new contacts use double opt-in or force subscribe. These options should match your consent and subscription setup.
For every option in the integration settings, see the full FluentCRM integration guide.
Once the event type is connected, you can start applying service and status tags. FluentCRM integration with Flue…
Step 3: Tag Clients by the Service They Book
Once the event type is connected to FluentCRM, assign tags that describe what the client booked.
In the same integration feed:
- Select the relevant FluentCRM List, such as “Clients.”
- Add a service tag for the event type, such as Service: Consultation.
- Add the initial status tag, Status: Booked.
- Under Remove Contact Tags, remove any previous status tags: Status: Completed, Status: Cancelled, Status: Rescheduled, and Status: No-show. This helps keep the current status accurate when someone books again.
- Set the Event Trigger to Booking Confirmed.
- Make sure Enable This feed is turned on, then click Save Feed.
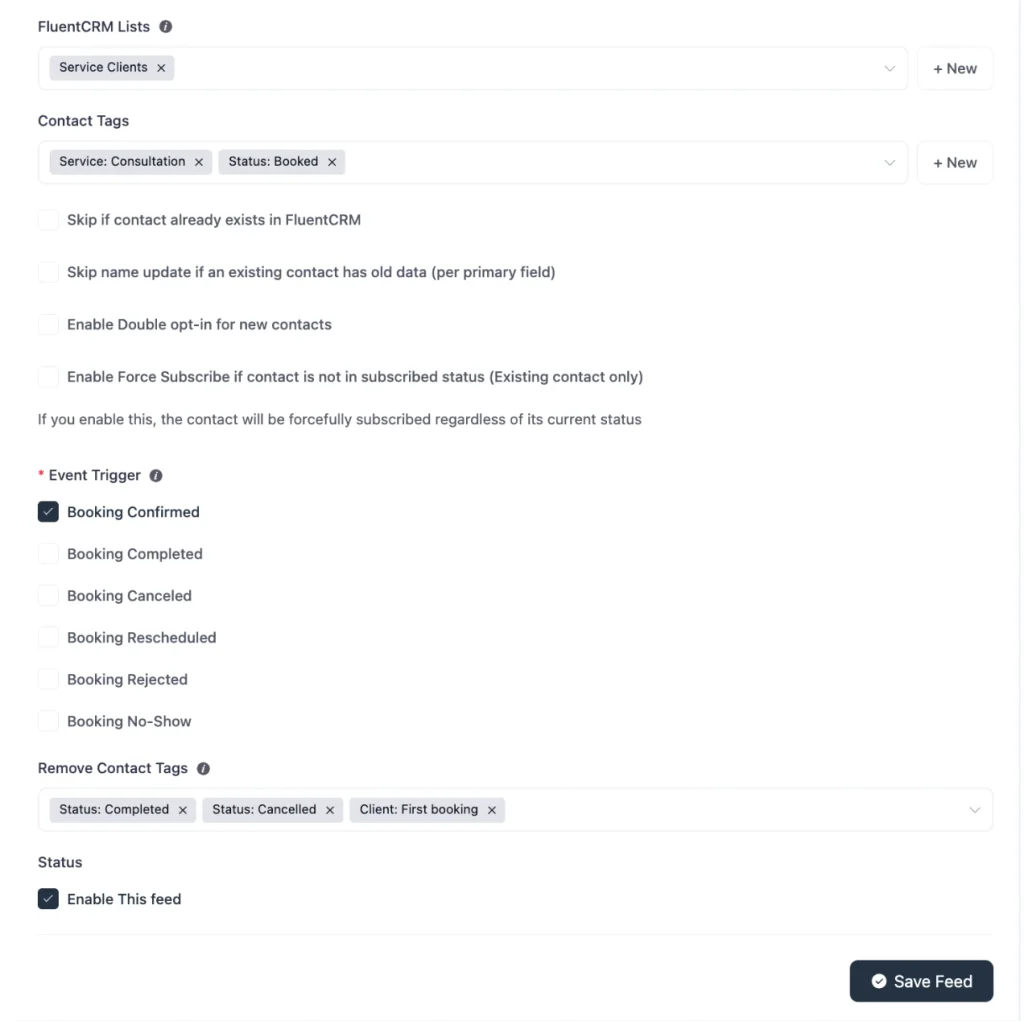
Repeat the setup for each event type, changing the service tag to match the appointment. For example:
- Service: Booking Confirmed
- Service: Booking Completed
- Service: Booking Cancelled
- Service: Booking Scheduling No-show
This way, each new booking carries the context of what the client booked, making it easier to organize contacts and decide what should happen next. FluentCRM integration with Flue…
Step 4: Keep Booking Status Tags Up to Date
A client’s booking status can change after the initial booking. To keep your segments accurate, update the status tag whenever that happens. FluentBooking can send different event triggers to FluentCRM, and each feed can add a new tag while removing the previous one.
Set up a feed for each status you want to track:
| Event Trigger | Add tag | Remove tag |
| Completed | Status: Completed, Client: Past client | Status: Booked |
| Canceled | Status: Cancelled | Status: Booked |
| Rescheduled | Status: Rescheduled | Status: Booked, Status: Cancelled |
| No Show | Status: No-show | Status: Booked |
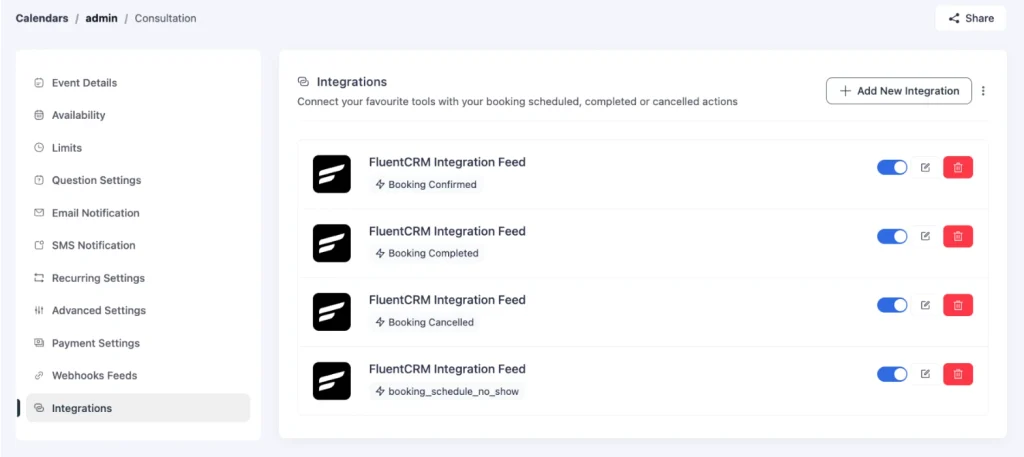
The goal is to keep one current status tag for each client’s latest booking. That way, a Status: No-show segment contains clients who missed their latest appointment rather than everyone who has ever missed one.
Client: Past client works differently. It’s never removed. It simply records that the person has completed at least one appointment, which you’ll use in the next step.
You don’t need to configure every status immediately. Start with the statuses that matter most to your workflow, then add others as needed. FluentCRM integration with Flue…
Step 5: Identify First-Time and Returning Clients
Service and status tags come directly from booking activity. Lifecycle tags need one additional step: identifying whether someone has booked before.
To identify first-time clients, create a feed on Booking Confirmed that adds Client: First booking. Turn on Skip if contact already exists in FluentCRM, so the tag is applied only to genuinely new contacts.
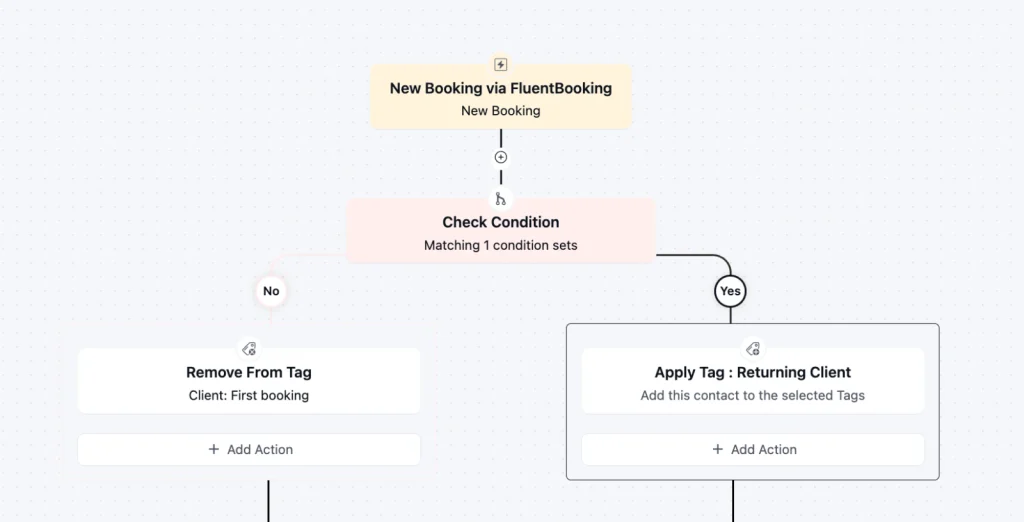
For returning clients, use a FluentCRM automation:
- Go to Automations → New Automation.
- Choose the Booking triggers and select New Booking.
- Add a condition: the contact has the tag Client: Past client.
- If yes, add Client: Returning and remove Client: First booking.
Because Client: Past client is added only after a completed appointment, a client’s first booking won’t meet this condition.
You can also skip this step at first. Service and status tags alone are enough to start building useful segments.
5 Client Segments to Build from Booking Data
Once your tags are in place, you can turn them into useful client segments. The most useful segments are the ones that lead to a clear action.
Here are five practical segments you can build from booking data:
| Segment | Tag or condition | Next step |
| Missed their last appointment | Status: No-show | Send a friendly message with a rebooking option |
| Cancelled and didn’t rebook | Status: Cancelled | Invite them to choose a new time |
| First-timers | Client: First booking + Status: Completed | Send a thank-you or review request |
| Regulars | Client: Returning | Encourage another booking, a referral, or another relevant follow-up |
| By service | Any Service: tag | Suggest the next relevant service or resource |
The important part isn’t creating as many segments as possible. It’s knowing what each segment tells you and what action should follow.
For example, a no-show segment may need a rebooking message, while clients who completed a specific service may be ready for a related follow-up. You can also learn more about reducing no-shows or explore more advanced segmentation in FluentCRM.
Turn Booking Data into Better Client Follow-ups
A booking gives you useful information about a client, and that information becomes more valuable when you use it to decide what happens next.
With a simple tagging and segmentation structure, you can keep track of the service a client booked, their current booking status, and where they are in their journey. That makes it easier to create relevant follow-ups instead of treating every contact the same.
You don’t need to build a complex system from the beginning. Start with one event type, define the tags you actually need, and connect the most important booking statuses to clear actions. Once the structure works, you can expand it across your other services.
Frequently Asked Questions
Ratul Hasan Ripon
I enjoy making complex ideas simple and engaging through my writing and designs. With a strong knowledge on content writing and SEO, I create technical content that’s both easy to understand and interesting.
Table of Content
Subscribe To Get
WordPress Guides, Tips, and Tutorials
Add your first comment to this post