

How to Set Up Sales Meeting Booking on Your WordPress Website


A smooth booking experience can make all the difference when someone is ready to speak with your sales team. Instead of exchanging multiple emails to find a suitable time, you can let prospects book meetings directly from your WordPress website based on your availability.
With the right booking plugin, you can automate scheduling, sync your calendar, send confirmation emails, and reduce no-shows without adding extra work to your day.
In this guide, we’ll walk you through the step-by-step process of setting up a sales meeting booking system on your WordPress website.
Why Your Website Needs a Sales Meeting Booking System
If your sales process still relies on emails, phone calls, or contact forms to schedule meetings, you’re likely spending more time coordinating schedules than having actual sales conversations. Every extra step between a prospect showing interest and booking a meeting creates an opportunity for delays, missed follow-ups, or even lost leads.
A sales meeting booking system removes that friction by allowing visitors to choose a convenient time based on your real-time availability. Once a meeting is booked, the system can automatically update your calendar, send confirmation emails, deliver reminders, and even generate video meeting links. This creates a smoother experience for both your team and your prospects.
Beyond saving time, an online booking system helps you respond to leads faster, reduce no-shows, avoid scheduling conflicts, and keep your sales pipeline moving efficiently. Whether you’re a freelancer, consultant, agency, or growing business, making it easy to book a meeting can improve both customer experience and conversion rates.
What You’ll Need Before Getting Started
Before you start setting up your sales meeting booking system, take a few minutes to prepare the tools you’ll need. Having everything ready beforehand will make the setup process much smoother and help you get your booking page up and running without interruptions.
You’ll need:
- A self-hosted WordPress website
- A WordPress appointment booking plugin
- A calendar account (such as Google Calendar or Outlook) to manage your availability
- A video meeting platform like Zoom or Google Meet, if you plan to host online sales meetings
In this guide, we’ll use FluentBooking to demonstrate each step, but you can follow a similar process with other WordPress booking plugins that offer comparable features.
How to Set Up Your Sales Meeting Booking on Your WordPress Site Step by Step
Now that you know why a sales meeting booking system is important, it’s time to set one up on your WordPress website. The process is straightforward and only takes a few steps. From creating your booking event to publishing it on your website, each step helps you build a seamless scheduling experience for your prospects while automating repetitive tasks for your sales team.
Let’s get started.
Install and Activate FluentBooking
Go to your WordPress dashboard → Plugins → Add New.
Search for a booking plugin that supports appointment scheduling, calendar syncing, and automated notifications. Install and activate the plugin.
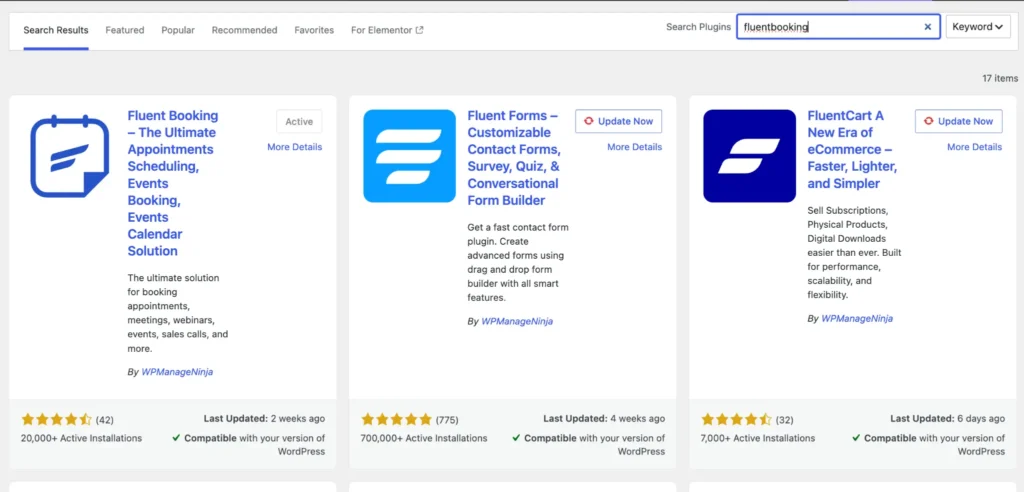
For this guide, we’ll use FluentBooking as an example, but you can use any WordPress booking plugin with similar features.
This gives you a centralized dashboard where you can create booking events, manage your availability, connect calendars, and automate your entire sales scheduling workflow.
Connect Your Calendar
The next step is to connect your Google Calendar or Outlook Calendar with FluentBooking.
Open your booking plugin’s settings and connect your preferred calendar, such as Google Calendar or Outlook Calendar.
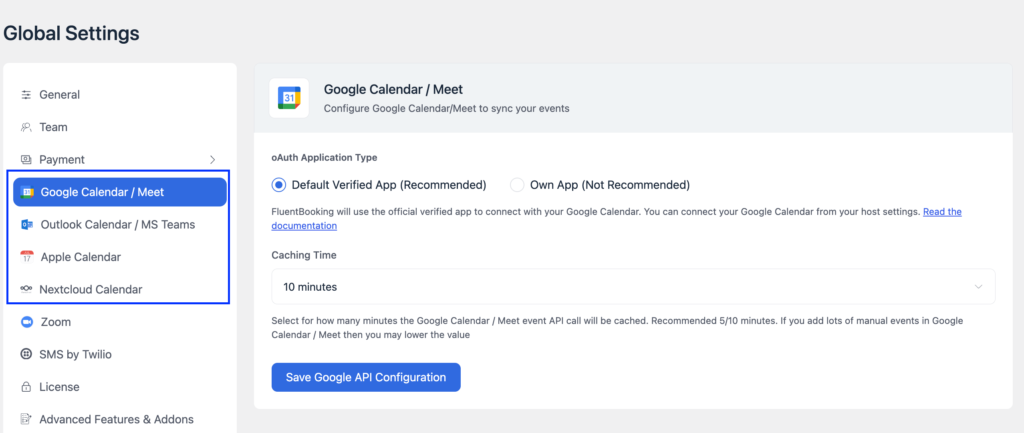
This keeps your availability up to date and prevents double bookings by syncing scheduled meetings automatically.
Create a Sales Meeting Event
Before creating your booking event, decide which sales calls you want prospects to book, such as discovery calls, product demos, or consultation sessions.
Go to Calendar → New Event (or the equivalent option in your plugin).
Choose the meeting type, such as One-to-One or Team Meeting, then enter the event name, description, meeting duration, location, and timezone.
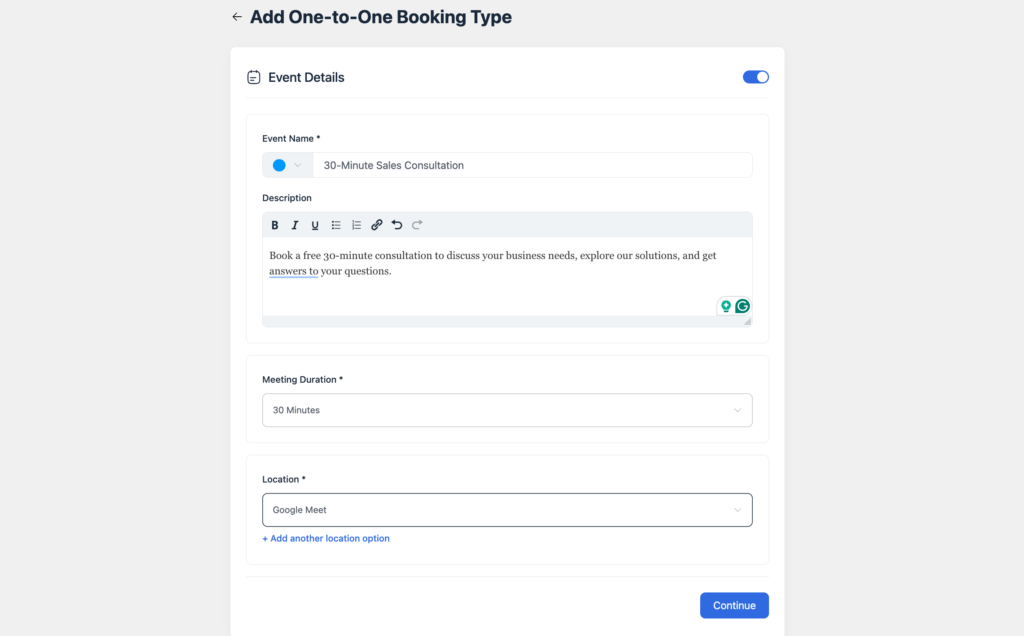
Click Continue to save the event.
Configure Your Availability
Open the Availability settings for your event.
Set your working days and available hours, then add any custom availability or unavailable dates if needed.
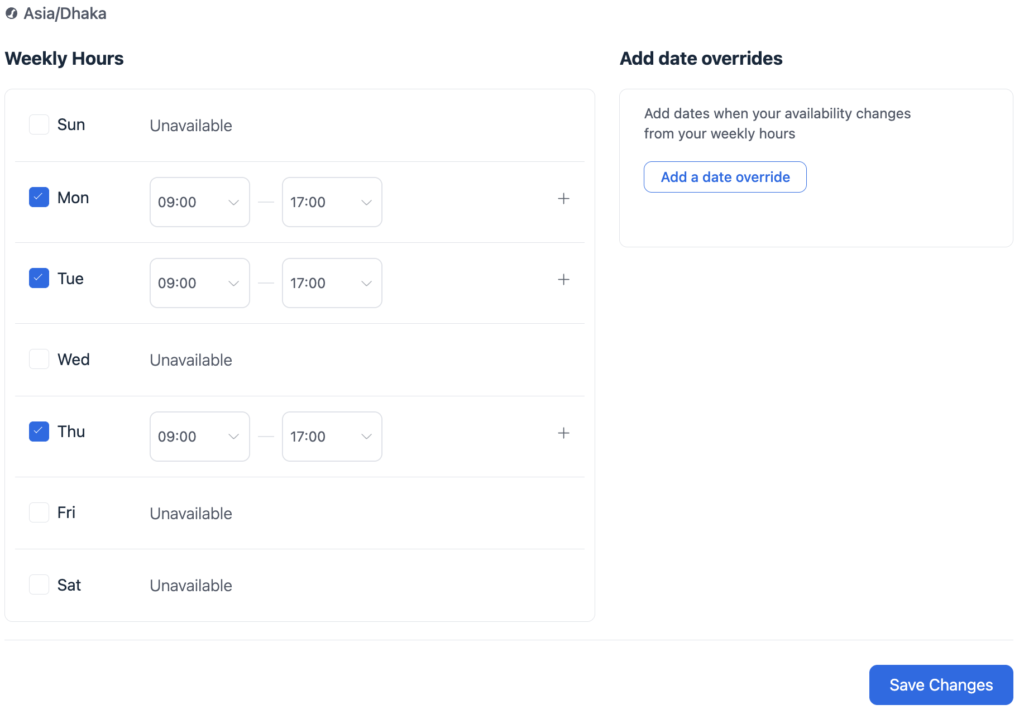
Click Continue to save your schedule.
Set up Booking Limits
Navigate to the Limits section.
Set buffer time before and after each meeting to avoid back-to-back appointments.
You can also limit how many sales meetings can be booked each day and define the minimum notice required before someone can book.
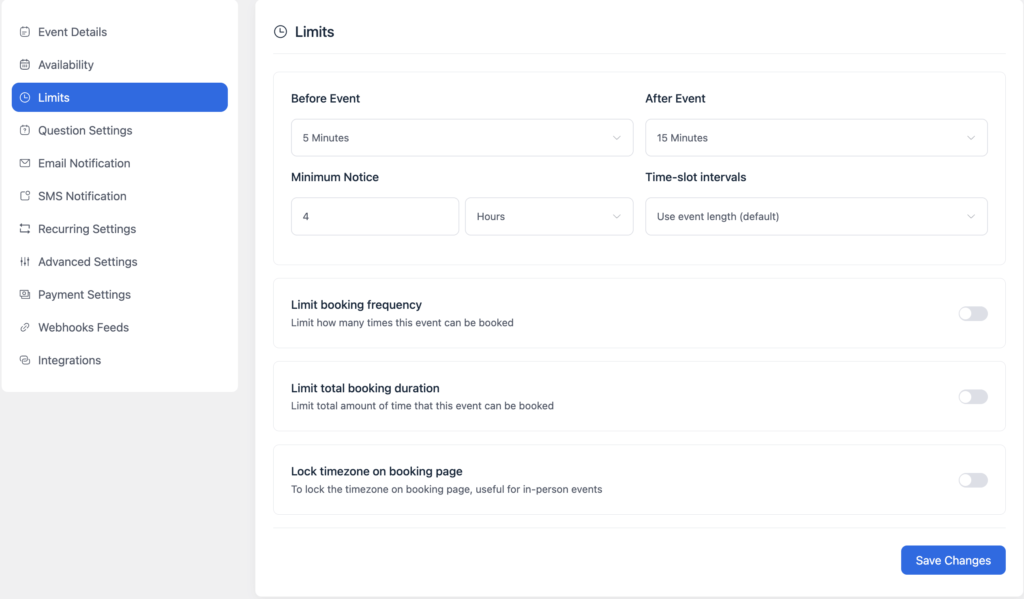
Customize the Booking Form
Use your booking form to qualify leads by asking a few relevant questions before the meeting.
Open the Question Settings or Booking Form section.
The default Name and Email fields are usually included automatically. Add custom questions such as Company Name, Phone Number, Business Website, Team Size, or “What would you like to discuss?” to gather information before the meeting.
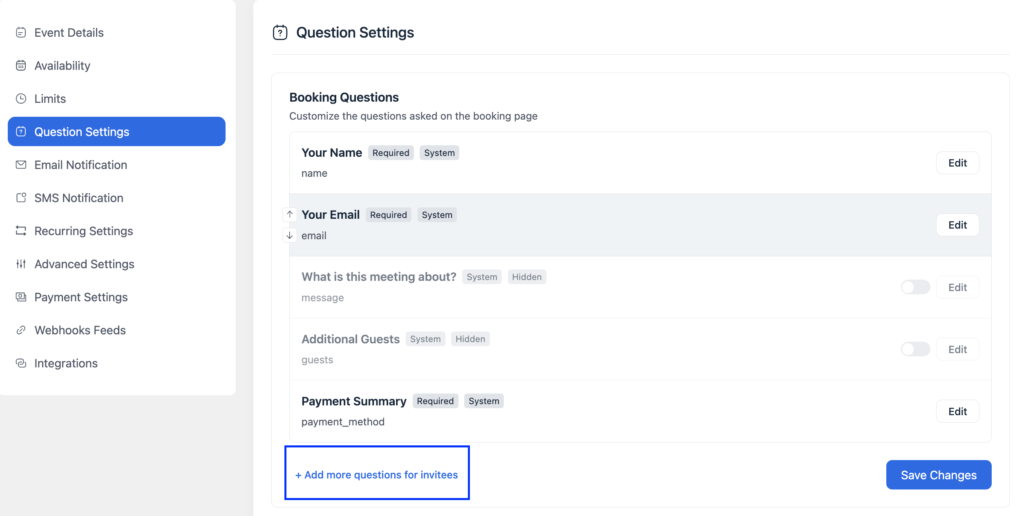
Save your changes once you’re done.
Configure Email Notifications & Reminders
Go to the Email Notifications settings.
Enable booking confirmations for both you and the attendee. Then configure reminder emails, such as one sent 24 hours before the meeting and another 30 minutes before it.
You can also customize the email subject and content to match your brand.
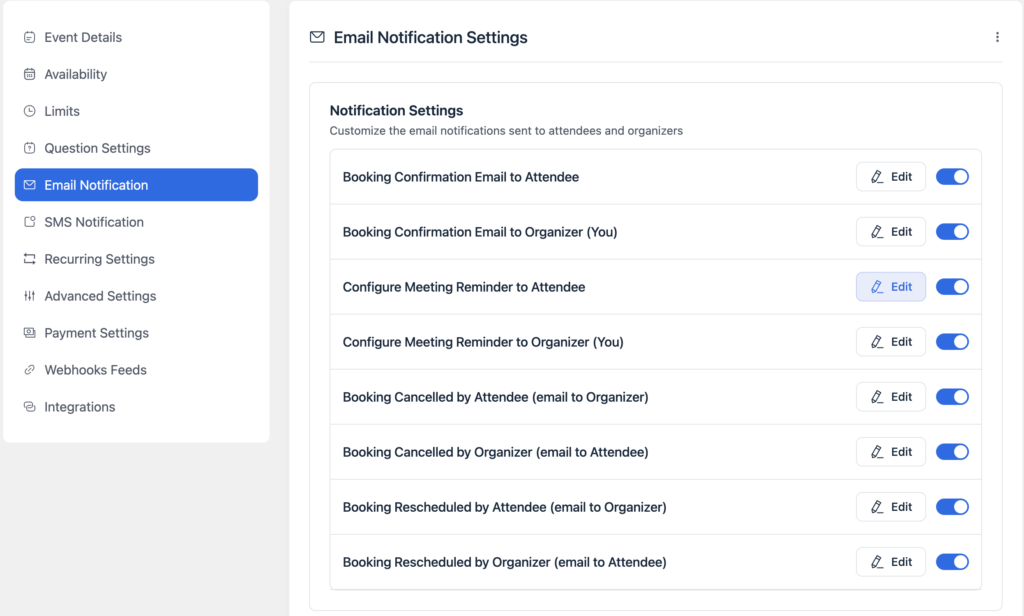
Save your notification settings.
Test the Booking Experience
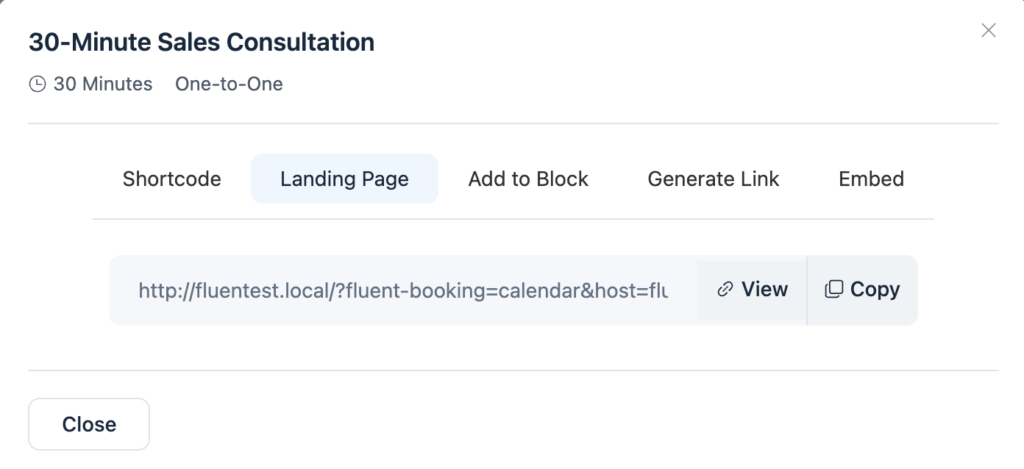
Go to Calendar → Share → Landing Page → View to open your booking page.
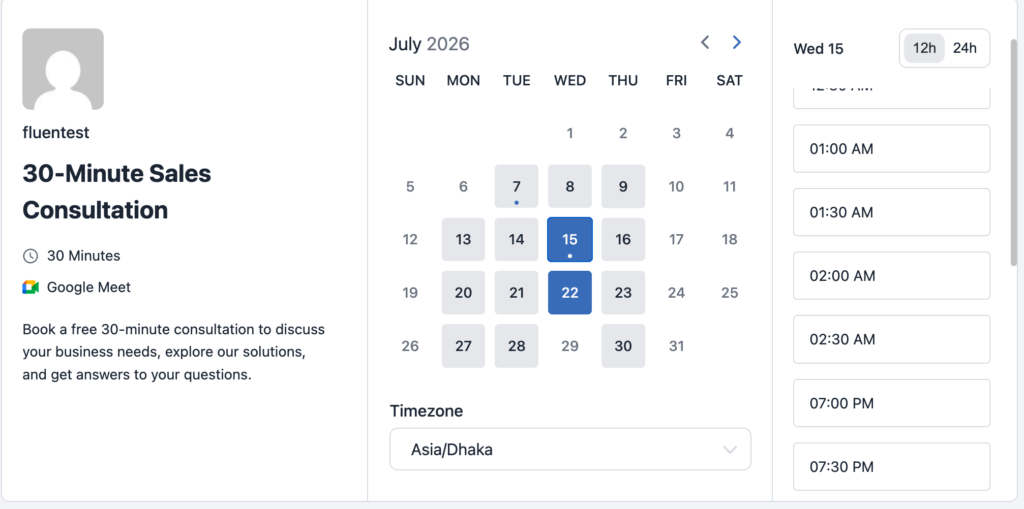
Your booking page will display all available dates and time slots. Select an available time that works for you.
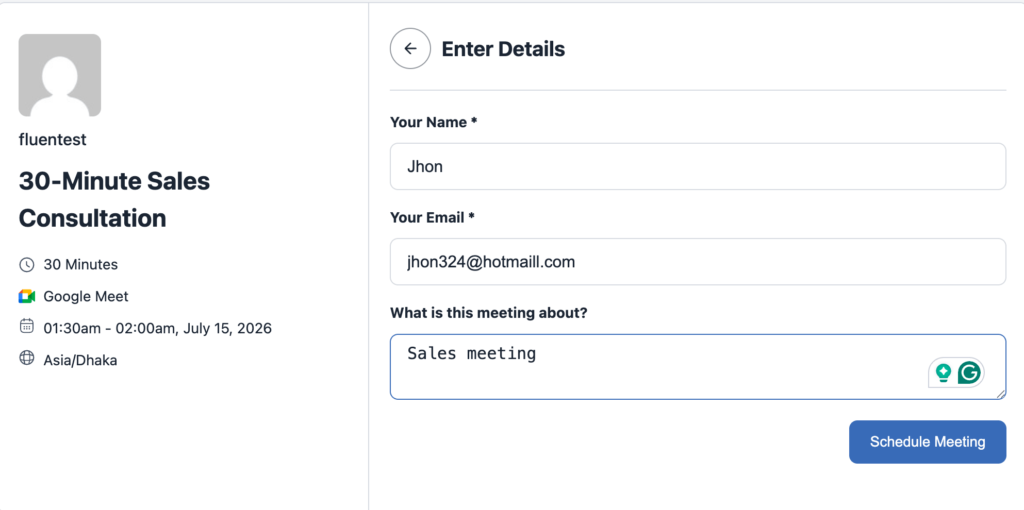
Next, fill in the booking form with sample attendee information, such as your name, email address, and any custom fields you’ve added. Once everything looks good, click Schedule Meeting.
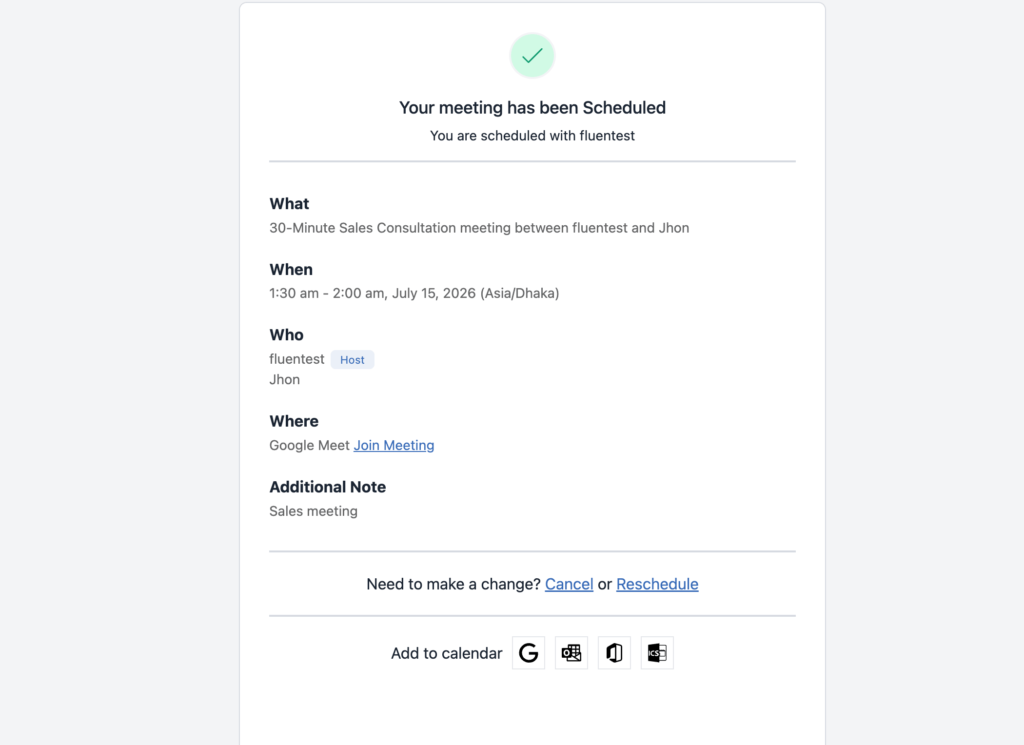
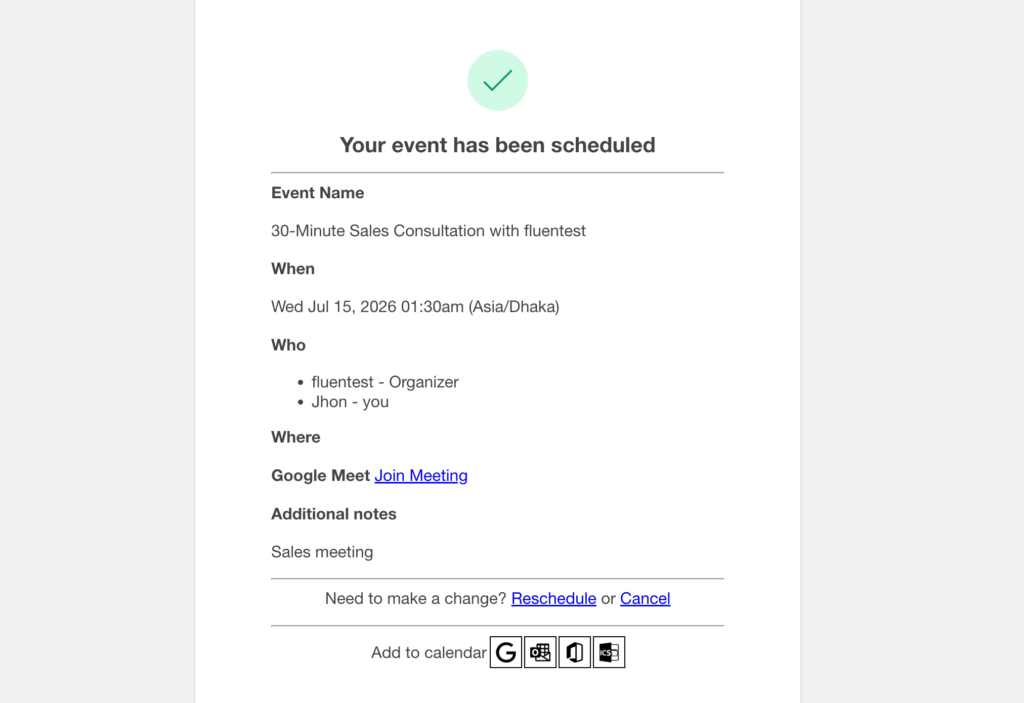
After submitting the form, you should see a confirmation message indicating that your meeting has been booked successfully.
Finally, check that the confirmation email has been sent to both the host and the attendee. If you’ve connected a calendar or video conferencing service, verify that the meeting appears on your calendar and that the meeting link has been generated correctly.
Publish Your Booking Page
After completing the setup, publish your booking event on your WordPress website. You can place it on a dedicated “Book a Demo” page, your contact page, or even a high-converting landing page where visitors are most likely to request a sales conversation. Making your booking page easy to find helps turn interested visitors into qualified sales meetings.
Common Mistakes to Avoid
Even with a booking system in place, a few small mistakes can lead to missed opportunities and a frustrating experience for both your team and your prospects. Here are some common pitfalls to watch out for:
Not Syncing Your Calendar
If your booking system isn’t connected to your calendar, you risk double bookings and scheduling conflicts. Always enable calendar syncing so your availability stays up to date.
Asking for Too Much Information
A long booking form can discourage potential customers from completing the process. Only ask for the information your sales team needs to prepare for the meeting.
A shorter form often leads to more completed bookings. These appointment-setting tips can help you improve your conversion rate.
Forgetting to Set Buffer Time
Scheduling meetings back-to-back can leave you with no time to prepare or wrap up the previous call. Adding buffer time between appointments helps you stay organized and on schedule.
Skipping Confirmation and Reminder Emails
Without automated notifications, attendees are more likely to forget their appointments. Sending confirmation and reminder emails helps reduce no-shows and keeps everyone informed.
Not Testing the Booking Flow
Before publishing your booking page, go through the entire process yourself. Test the booking form, calendar sync, email notifications, and meeting links to make sure everything works as expected.
Turn More Website Visitors into Sales Conversations
A sales meeting booking system helps you remove friction from your sales process by letting prospects schedule meetings directly from your WordPress website. Once everything is set up, your booking system can handle scheduling, calendar syncing, confirmations, and reminders automatically, giving your team more time to focus on closing deals.
If you’re looking to make the most of every booked meeting, check out our guide on sales meeting ideas for practical ways to keep your conversations engaging and productive. The easier you make it for prospects to book a meeting, the more opportunities you’ll have to turn visitors into customers.
Ratul Hasan Ripon
I enjoy making complex ideas simple and engaging through my writing and designs. With a strong knowledge on content writing and SEO, I create technical content that’s both easy to understand and interesting.
Table of Content
Subscribe To Get
WordPress Guides, Tips, and Tutorials

Add your first comment to this post