

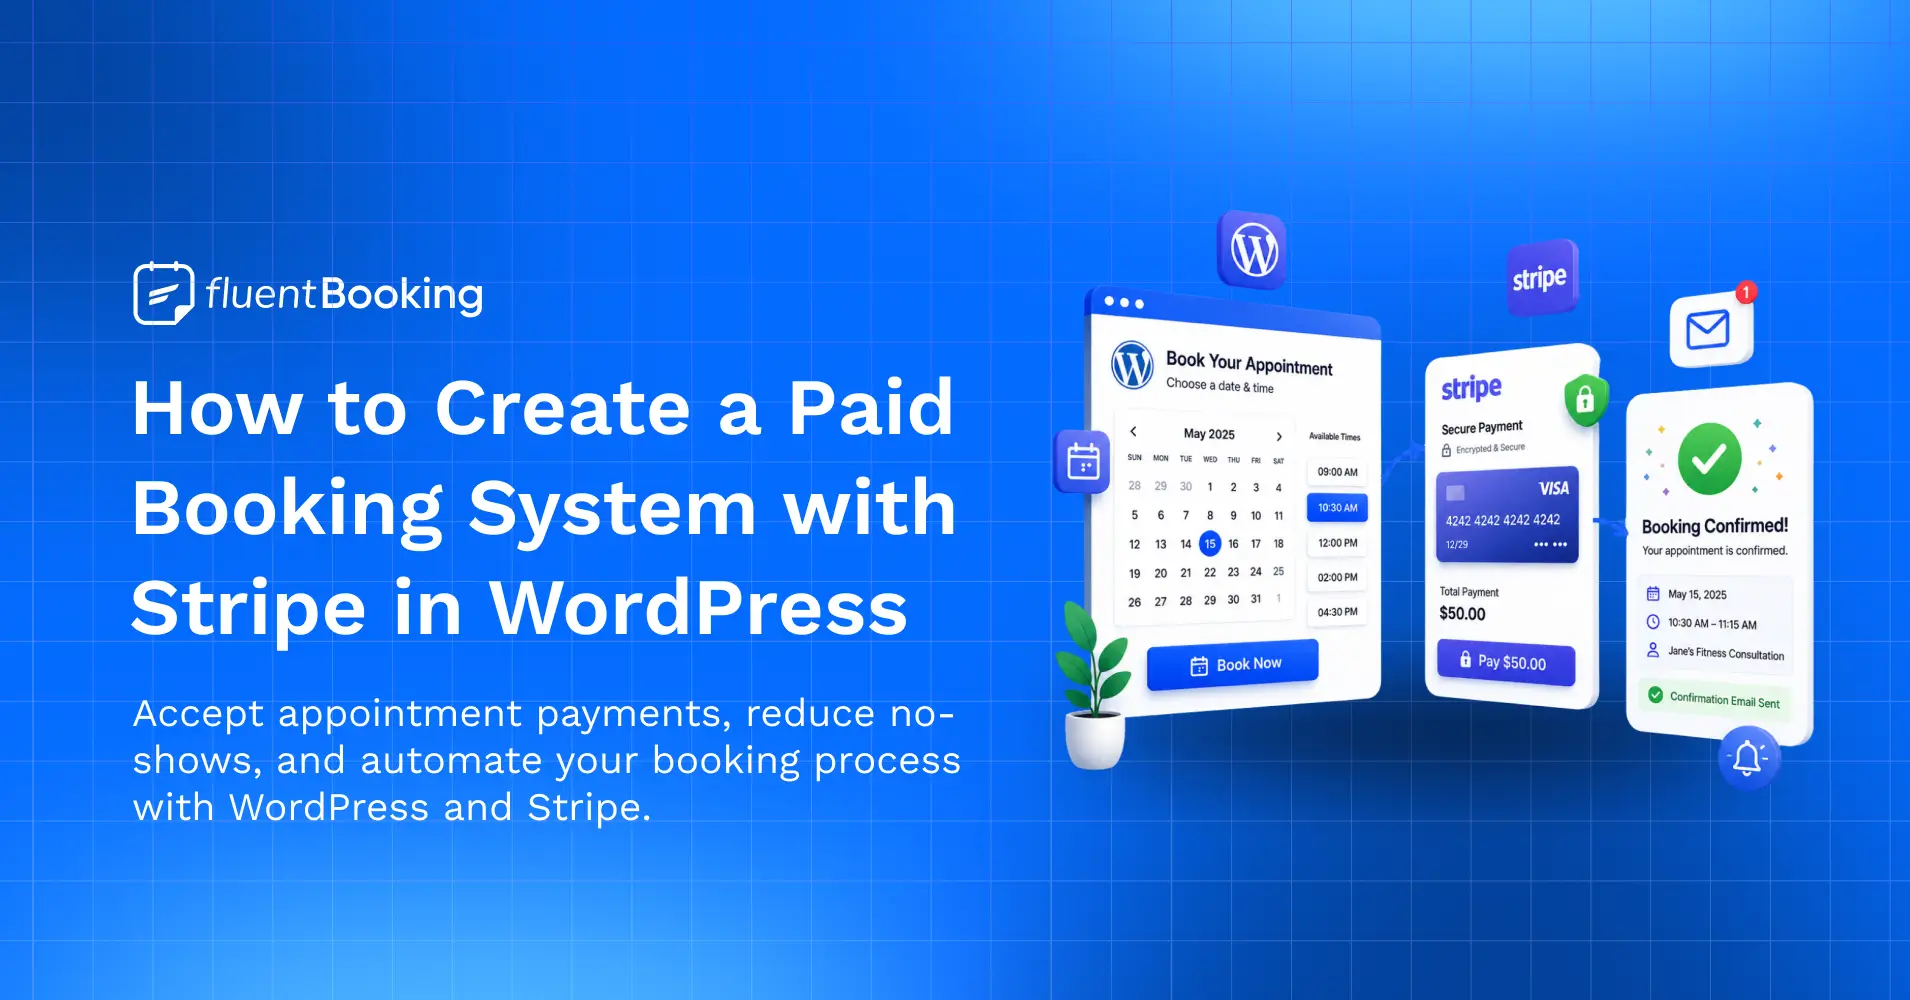
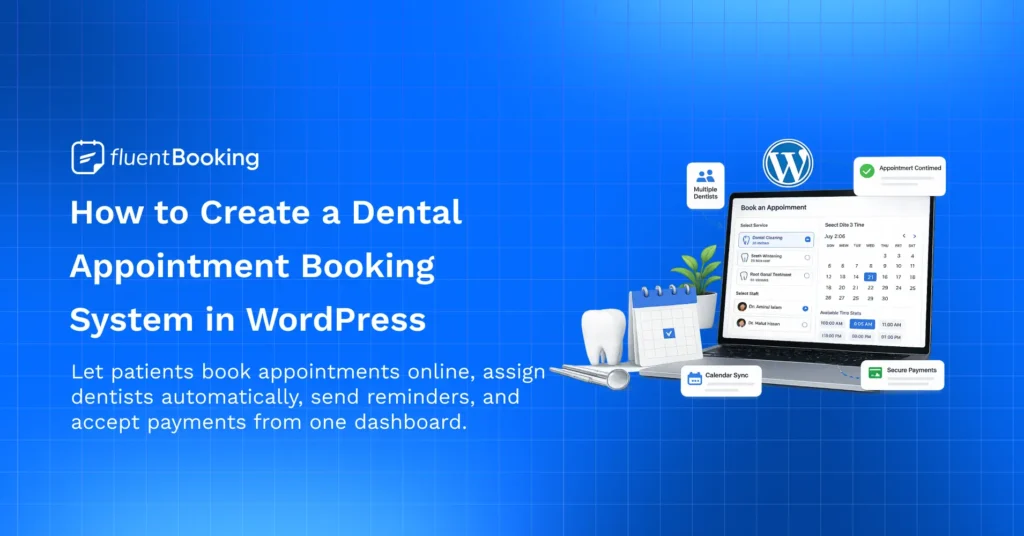
How to Create a Paid Booking System with Stripe in WordPress


Every missed appointment costs time and money. Whether you’re a consultant, coach, agency owner, or service provider, allowing people to book without paying often leads to cancellations, no-shows, and unnecessary follow-ups.
A paid booking system solves this problem by collecting payment when the appointment is booked. Clients secure their spot, payments are processed automatically, and your schedule stays filled with serious customers.
In this guide, we’ll show you how to create a paid booking system in WordPress and accept appointment payments through Stripe, so you can accept appointment payments without relying on complicated tools or custom development.
Why Accept Payments During Booking?
Collecting payments during the booking process does more than just help you get paid faster. It creates a smoother experience for both you and your clients while reducing the administrative work that comes with managing appointments.
- Reduce No-Shows and Last-Minute Cancellations: When clients pay upfront, they’re more likely to honor their appointments. A financial commitment encourages attendees to show up on time and reduces the chances of empty slots in your calendar.
- Improve Cash Flow: Instead of waiting days or weeks to send invoices and collect payments, you receive payment as soon as a booking is confirmed. This creates a more predictable revenue stream and helps maintain healthy cash flow.
- Automate Payment Collection: Manual invoicing, payment reminders, and follow-ups can consume valuable time. A paid booking system automatically collects payments during scheduling, allowing you to focus on delivering your services rather than chasing payments.
- Create a Better Client Experience: Clients appreciate convenience. Allowing them to select a time slot and complete payment in a single workflow makes the booking process faster, simpler, and more professional.
- Eliminate Administrative Work: Managing bookings, sending invoices, tracking payments, and confirming appointments manually can quickly become overwhelming. By combining scheduling and payment processing in one system, you can automate repetitive tasks and reduce administrative overhead.
What You’ll Need Before Getting Started
Before creating a paid booking system in WordPress, make sure you have the following:
- A WordPress Website: You’ll need a WordPress website where your booking system and payment processing will be managed.
- A Premium Booking Plugin: You’ll need a booking plugin that supports payment collection and integrates with Stripe. For this tutorial, we’ll use FluentBooking Pro, which lets you create booking pages, accept payments, and automate appointment scheduling.
- A Stripe Account: Stripe will securely process payments from your clients. If you don’t already have a Stripe account, you can create one for free and connect it to your booking system during the setup process.
How to Create a Paid Booking System with Stripe in WordPress
Now that you have everything ready, it’s time to set up your paid booking system. In this tutorial, we’ll use FluentBooking Pro and Stripe to allow clients to book appointments and pay online in a single, seamless process.
Let’s get started.
Step 1: Install FluentBooking Pro
The first step is to install and activate FluentBooking Pro on your WordPress website.
If you haven’t purchased FluentBooking Pro yet, choose a plan that fits your business needs and download the plugin files from your FluentBooking account.
After activation, follow the setup wizard to create your host profile and configure the basic booking settings.
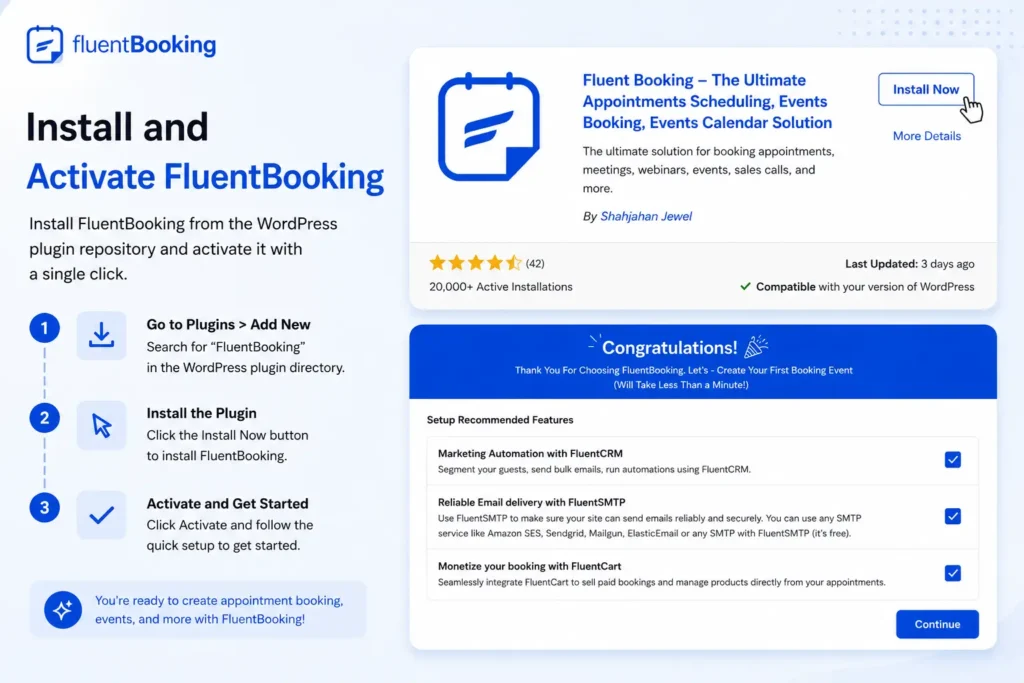
Once everything is set up, you’re ready to connect Stripe and start accepting payments for bookings.
Step 2: Enable the Payment Module
Before connecting Stripe, you’ll need to enable FluentBooking’s Payment Module. This unlocks the payment settings and allows you to accept booking payments through supported payment gateways.
To enable the Payment Module:
- Go to FluentBooking → Settings from your WordPress dashboard.
- Open the Payment tab from the left-hand menu.
- If the Payment Module is disabled, enable it.
- Save your changes.
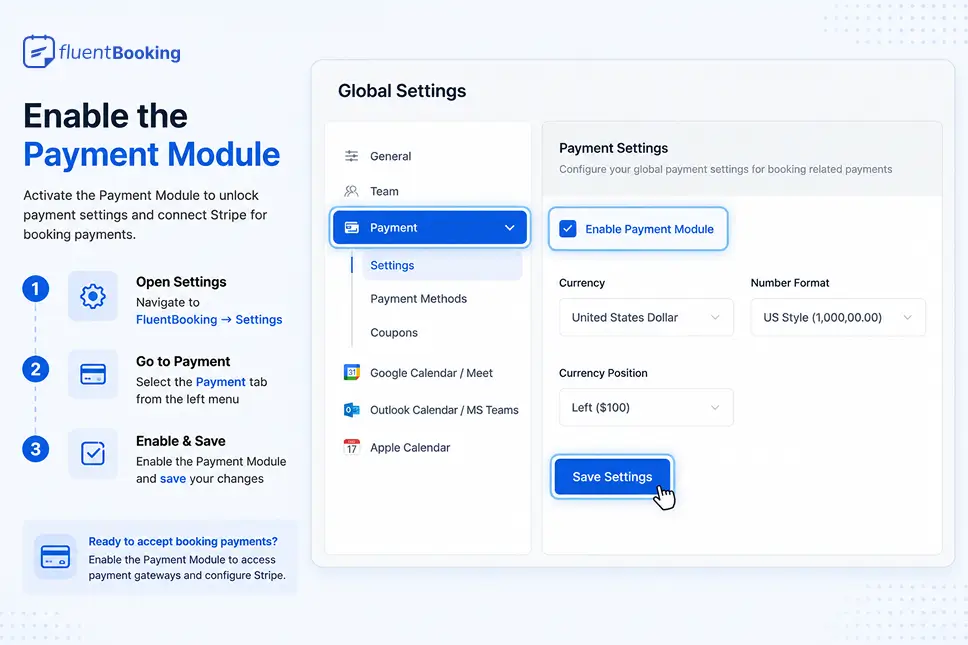
Once the Payment Module is active, you’ll be able to access the Payment Methods section and connect your Stripe account in the next step.
Step 3: Connect Stripe with FluentBooking
Now it’s time to connect your Stripe account and enable online payments for your bookings.
Navigate to: FluentBooking → Settings → Payment → Payment Methods → Stripe
On the Stripe settings page:
- Check the Enable Stripe payment for the booking payment option.
- Customize the Payment Label if you’d like to display a different payment method name on your booking page.
- Select your preferred payment mode:
- Test Mode to test the payment flow without charging real money.
- Live Mode to start accepting actual payments from clients.
- Click Connect with Stripe.
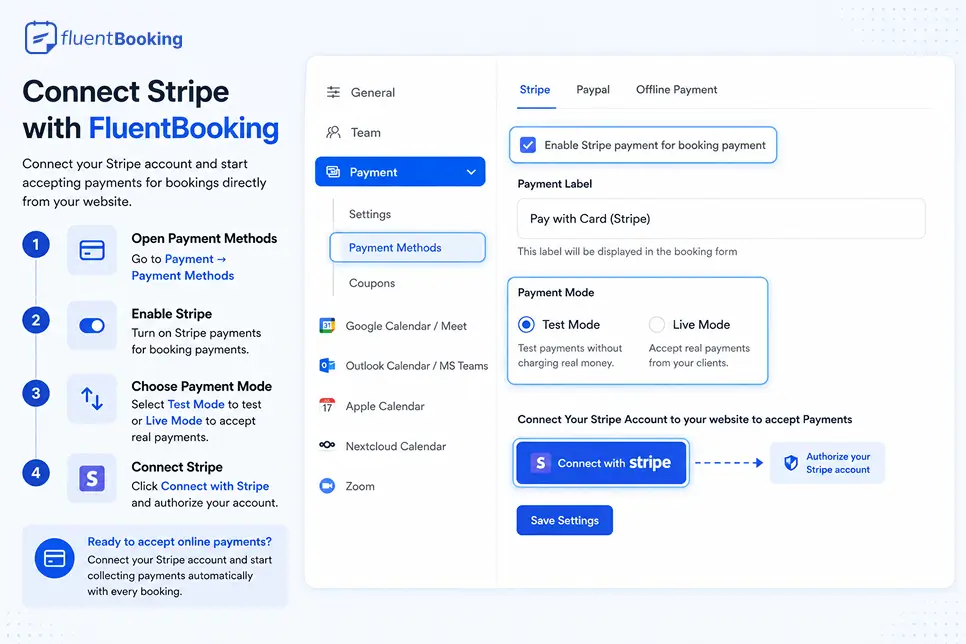
You’ll be redirected to Stripe, where you can log in to your existing account or create a new one. After authorizing the connection, Stripe will automatically connect with FluentBooking.
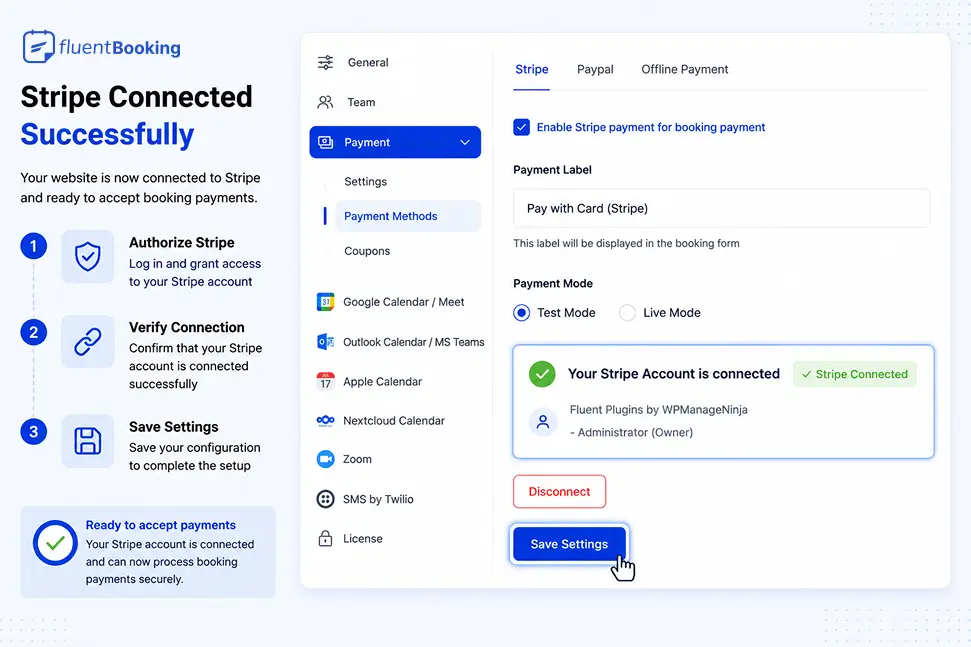
Finally, click Save Settings to complete the setup. Your booking system is now connected to Stripe and ready to accept payments.
Step 4: Choose Test Mode or Live Mode
Before accepting payments from clients, decide whether you want to test your setup or start processing real transactions.
In the Stripe settings, you’ll find two payment modes: Test Mode and Live Mode.
- Test Mode allows you to simulate transactions and verify that your booking and payment workflow is working correctly without charging real money.
- Live Mode enables actual payment processing, allowing clients to pay for appointments using their credit or debit cards.
If you’re setting up your paid booking system for the first time, it’s a good idea to start with Test Mode. Once you’ve successfully tested the booking flow, switch to Live Mode to begin accepting real payments.
After selecting your preferred mode, click Save Settings to apply the changes.
Step 5: Create a Paid Booking Event
Next, create an event that clients can book and pay for.
- Go to the FluentBooking Dashboard and click Create New Event.
- Add your event details, including the title, duration, and availability.
- Enable Payment Collection for the event.
- Set your booking price and save the event.
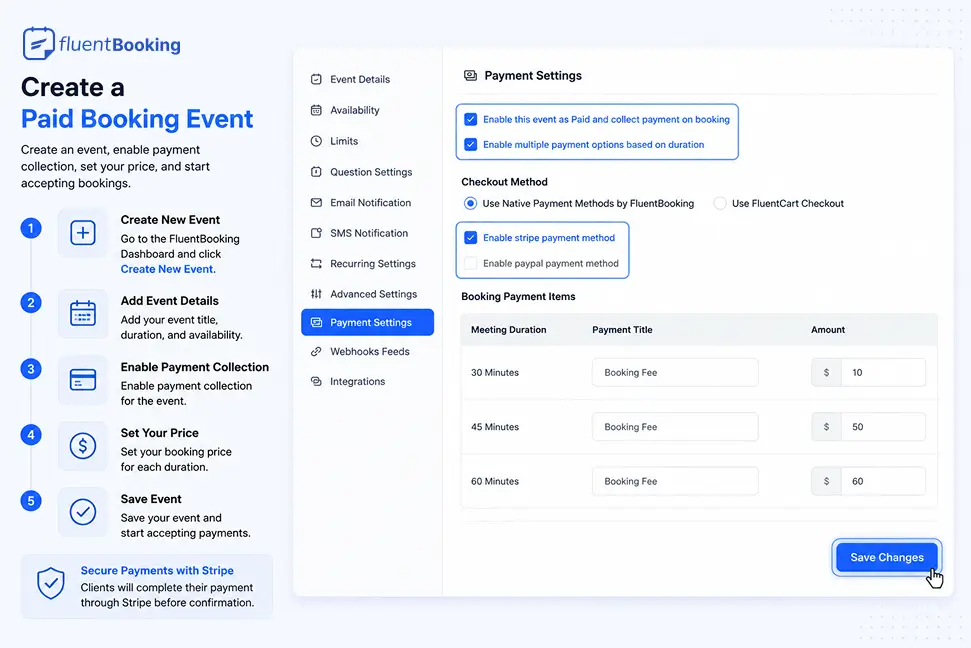
Once configured, clients will need to complete their payment through Stripe before their booking is confirmed.
Step 6: Publish Your Booking Page
Once your paid booking event is ready, it’s time to make it available to clients.
Simply add your booking event to a page on your WordPress website using FluentBooking’s shortcode or block. Then publish the page and share the booking link with your audience.
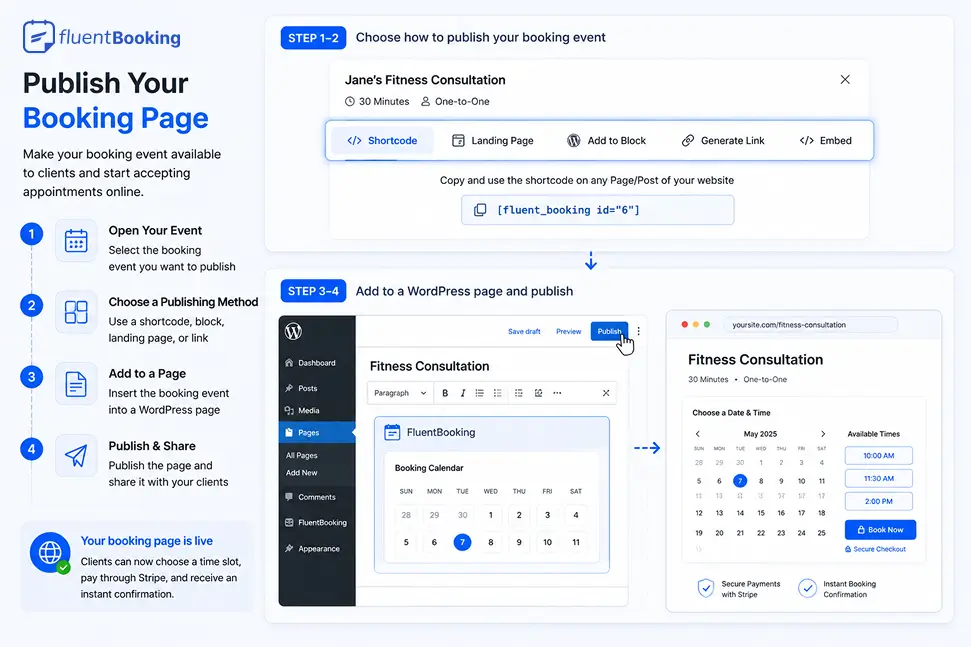
Now, clients can select an available time slot, complete their payment through Stripe, and receive an instant booking confirmation.
Step 7: Test the Complete Booking Experience
Before going live, run a test booking to make sure everything works as expected.
Book an appointment through your booking page, complete the payment process, and verify that the booking confirmation, payment status, and notifications are working correctly.
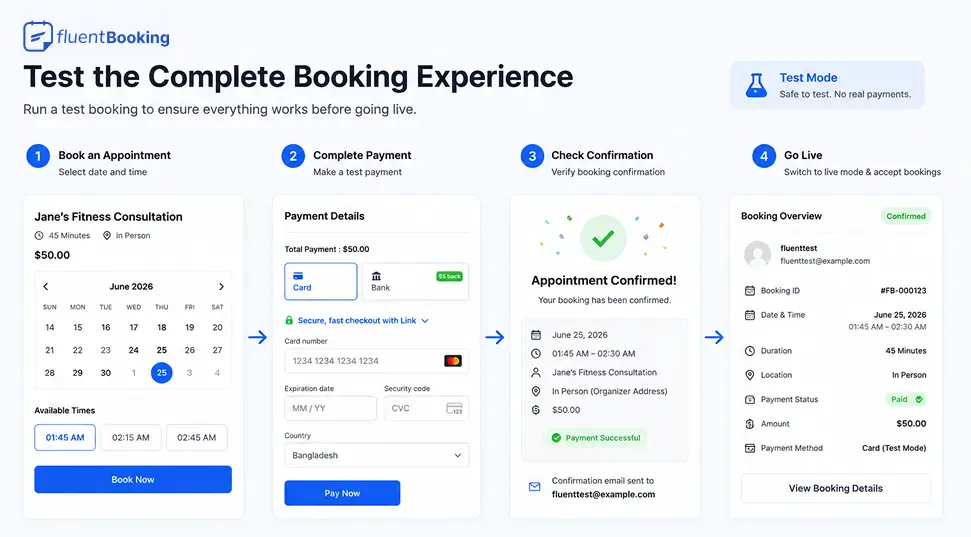
If you’re using Test Mode, you can safely test the entire workflow without processing real payments. Once you’re satisfied with the setup, switch to Live Mode and start accepting bookings from your clients.
Why Use FluentBooking for Paid Appointments?
If you’re looking for a simple way to accept appointment payments in WordPress, FluentBooking combines scheduling and payment collection in one platform. Here are a few reasons why it’s a great choice for paid bookings:
- Native Stripe Integration: Connect your Stripe account and start accepting payments without relying on third-party tools or complex configurations.
- Round-Robin Bookings: Automatically distribute appointments among team members to balance workloads and improve availability.
- Team Scheduling: Create booking calendars for multiple staff members and manage appointments from a centralized dashboard.
- Automated Confirmations: Send booking confirmations, reminders, and notifications automatically to keep everyone informed.
- Google Calendar Sync: Sync appointments with Google Calendar to avoid scheduling conflicts and stay organized.
- WordPress-Native Setup: Manage your bookings directly from your WordPress dashboard without switching between multiple platforms.
By combining scheduling, payments, and automation, FluentBooking helps you create a seamless booking experience for both you and your clients.
Turn Every Appointment Into Revenue
A paid booking system does more than collect payments. It helps reduce no-shows, improves cash flow, and creates a more professional booking experience for your clients.
By combining online scheduling with secure payment processing, you can let clients book appointments, pay upfront, and receive instant confirmations in a single seamless workflow. This not only saves time but also eliminates the hassle of manual invoicing and payment follow-ups.
Whether you’re running consultations, coaching sessions, classes, or professional services, setting up a paid booking system can help you streamline operations and focus more on delivering value to your clients.
Now that you know how to create a paid booking system with Stripe in WordPress, it’s time to put it into action and start accepting bookings with confidence.
Ratul Hasan Ripon
I enjoy making complex ideas simple and engaging through my writing and designs. With a strong knowledge on content writing and SEO, I create technical content that’s both easy to understand and interesting.
Table of Content
Subscribe To Get
WordPress Guides, Tips, and Tutorials


Leave a Reply