

How to Set Up Recurring Appointments in WordPress (Complete Guideline)


If you offer weekly coaching calls, monthly consulting sessions, therapy appointments, or regular online classes, you probably follow the same routine. A client books once, and then you create separate calendar events, send reminders, and confirm every session manually.
This process works, but it takes time that could be spent serving your clients.
The good news is that WordPress allows you to automate this process. With the right booking plugin, you can set up recurring appointments once and let the system handle the rest. Scheduling, reminders, calendar syncing, and even payments can run automatically.
In this guide, you will learn how to set up recurring appointments in WordPress using FluentBooking. The process is simple, requires no coding, and can help you move from manual scheduling to a fully automated system.
Why You Should Use Recurring Appointments
Recurring appointments simplify scheduling for both you and your clients. Here’s how:
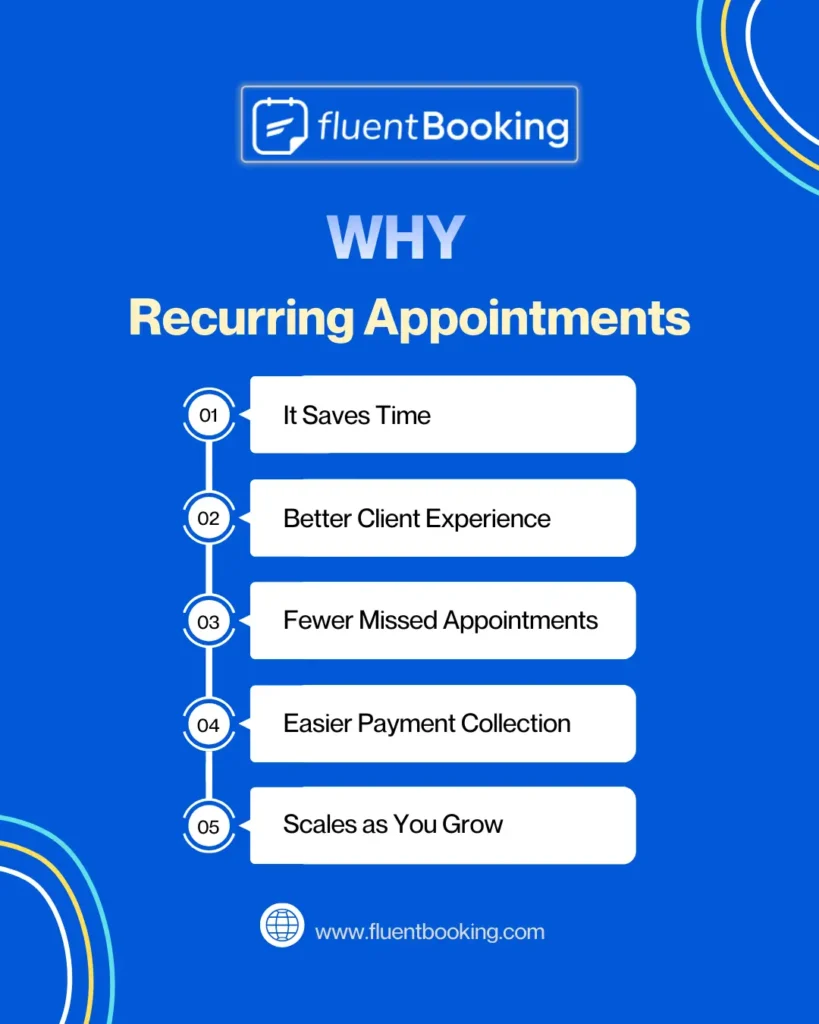
- It Saves Time: Creating bookings for every session takes time. With recurring appointments, you set the schedule once, and the system creates all future sessions automatically.
- Clients Get a Better Experience: Clients do not need to book every week. They choose a schedule once and follow it without repeating the booking process.
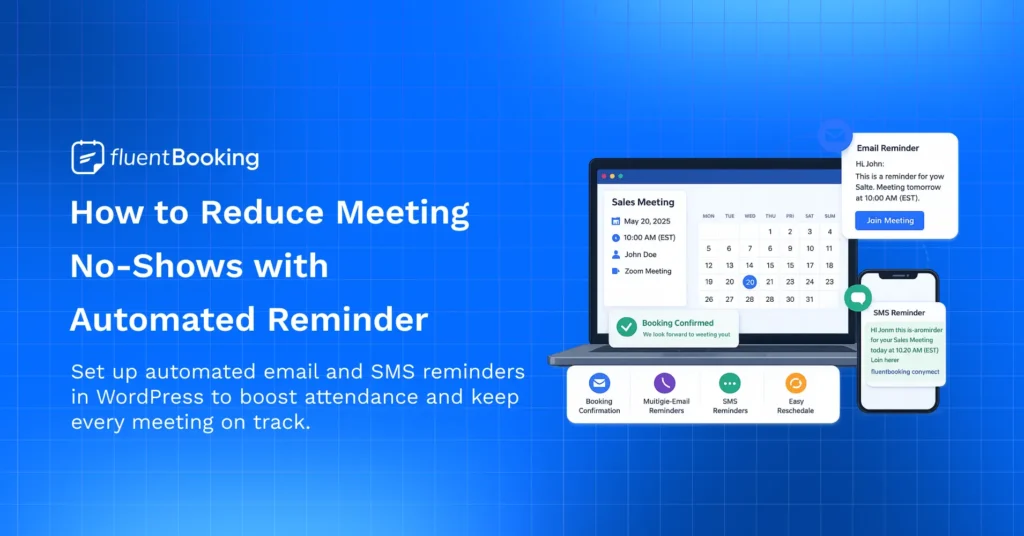
- Fewer Missed Appointments: Automated reminders keep clients informed about upcoming sessions, which reduces the chances of no-shows.
- Easier Payment Collection: You can collect payment in advance for multiple sessions or for a full package, which removes the need to send invoices after every meeting.
- It Scales as Your Business Grows: Managing ten or twenty repeat clients manually becomes difficult. Recurring appointments allow you to handle more clients without adding extra scheduling work.
What You Need Before Setting Up Recurring Appointments
Before starting the setup process, make sure you have the following. Please make sure you’ve followed the following steps carefully:
- A WordPress Website: You need a self-hosted WordPress site. This method works with WordPress.org installations, not the free version of WordPress.com.
- FluentBooking Installed: FluentBooking is a WordPress appointment booking plugin designed for professionals who need simple but powerful scheduling tools. It supports recurring appointments, automated reminders, calendar sync, team scheduling, and payment collection. You can install FluentBooking from the WordPress plugin directory or download it from the official FluentBooking website.
- FluentBooking Pro: Recurring appointment functionality is available in FluentBooking Pro. The Pro version also unlocks features like payment integration, virtual meetings, and advanced availability settings.
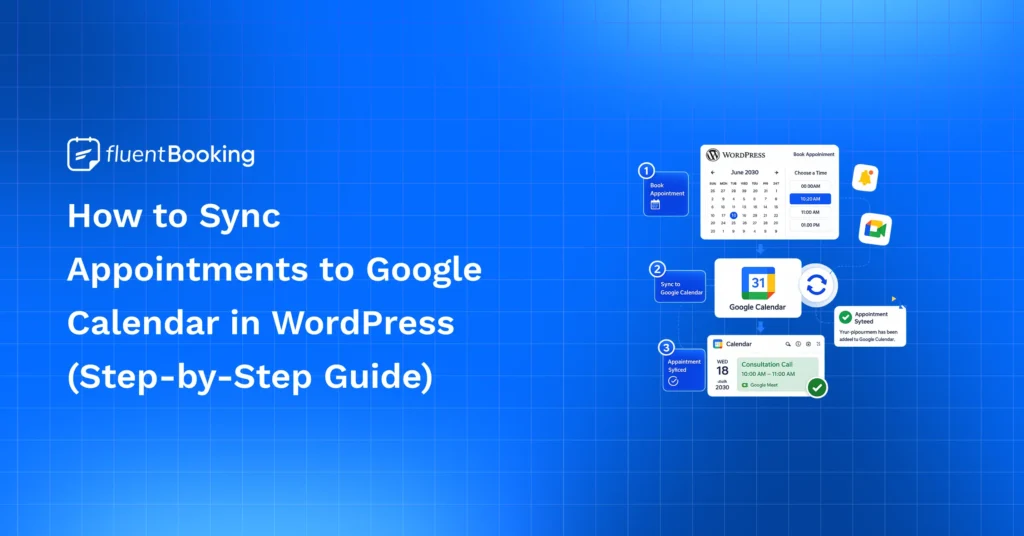
- A Connected Calendar: Connecting Google Calendar or Apple Calendar ensures that every appointment appears on your calendar and prevents double bookings.
- Your Recurring Schedule: Before creating your booking service, decide: 1. How often does the appointment repeat? 2. How many sessions does the series include? 3. What time slot do you want to reserve?
Step-by-Step Guide to Setting Up Recurring Appointments in WordPress Using FluentBooking
Once you have considered the previously advised checkpoints, it’s time to set up recurring events in your WordPress website using FluentBooking. Here’s a detailed guideline for you:
Install and Activate FluentBooking
First, you need to install FluentBooking on your WordPress website. Just follow these steps:
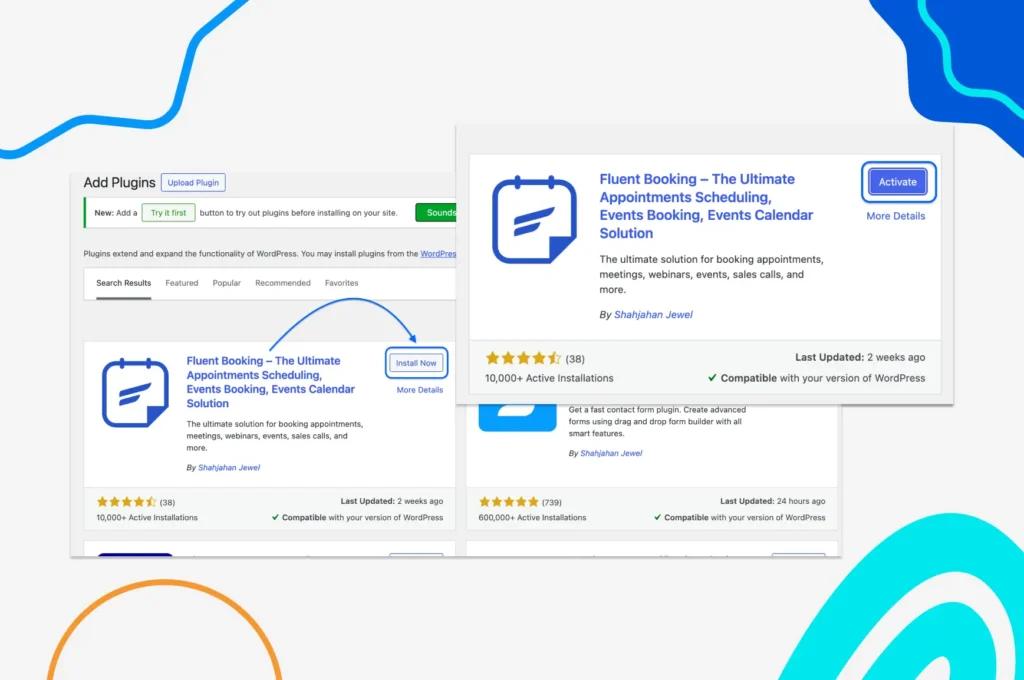
- Log in to your WordPress dashboard
- Go to Plugins and click Add Plugin
- Search for FluentBooking
- Click Install and then Activate
After activation, you will see FluentBooking in the dashboard menu.
Select Your Meeting Type and Host
Next, you need to select the meeting type of your recurring appointment. FluentBooking supports one-to-one and group meeting scheduling for recurring appointments.
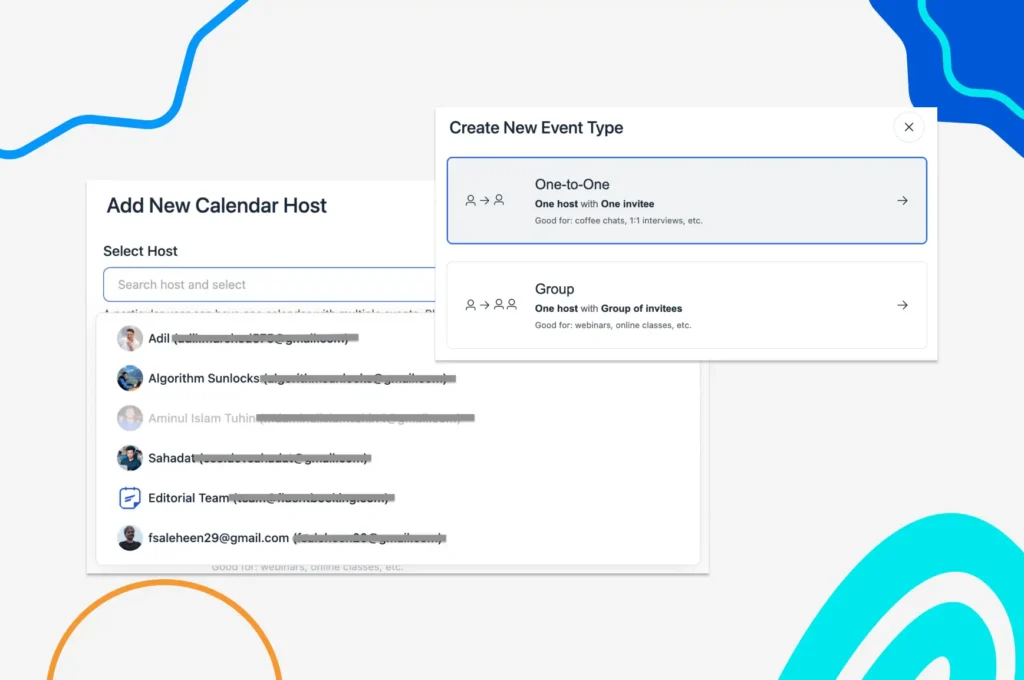
- Go to New > Add Host and select the host
- Next, select the meeting type between One-to-one and Group
Add Event Details
Now you need to add the event description of your event.
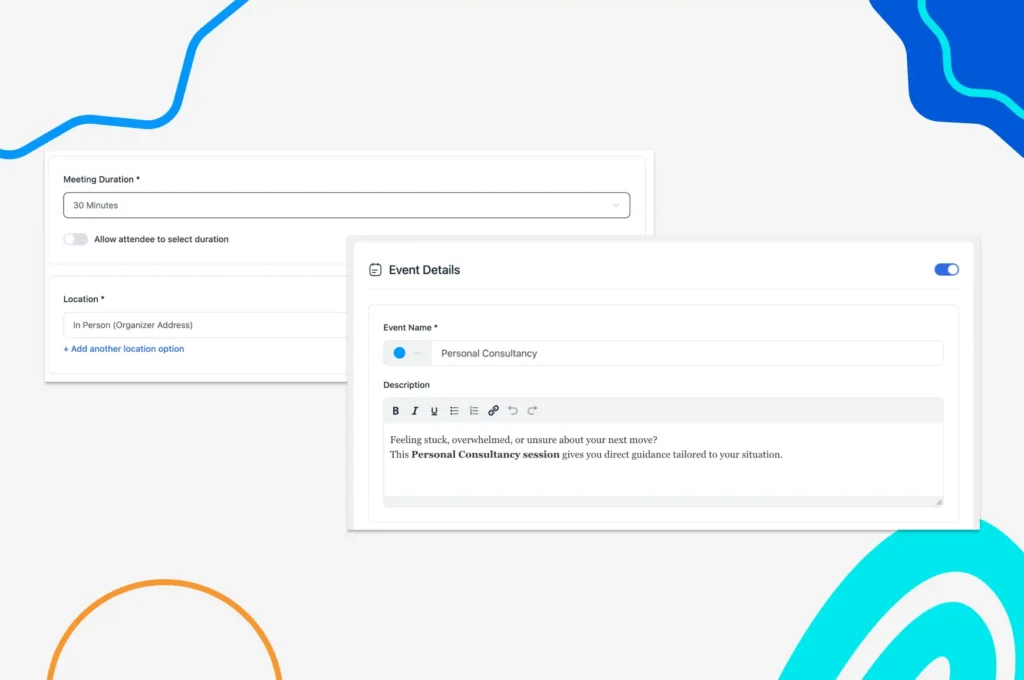
- Name your event and write a compelling description. You’ll find different formatting options for the description section
- Set your Meeting Duration
- Select meeting location from Conferenfing/In Person/Phone/Online/Other
- Set the timezone and click Continue
Configure Your Availability
Now you need to define when clients can book this service.
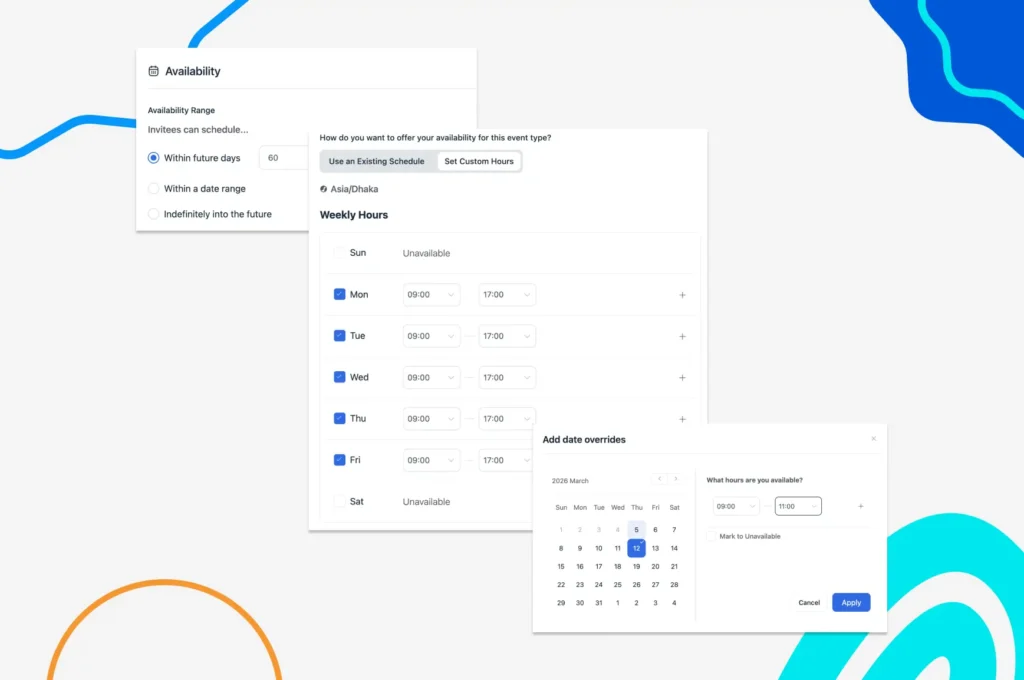
- Set your daily and weekly availability
- Choose your available time slots
- Set availability range for advanced use cases
- Add date overrides to set specific availability or unavailability for particular dates outside the regular schedule
Set Booking Limits
Booking limits help you to control your schedule and manage calendars effectively.

- Add buffer time between sessions if needed
- Limit Booking Frequency/Total Booking Duration for more control
- Lock timezone on booking page for in-person events (if needed)
Add Booking Questions
You can create custom booking questions to collect important attendee information.
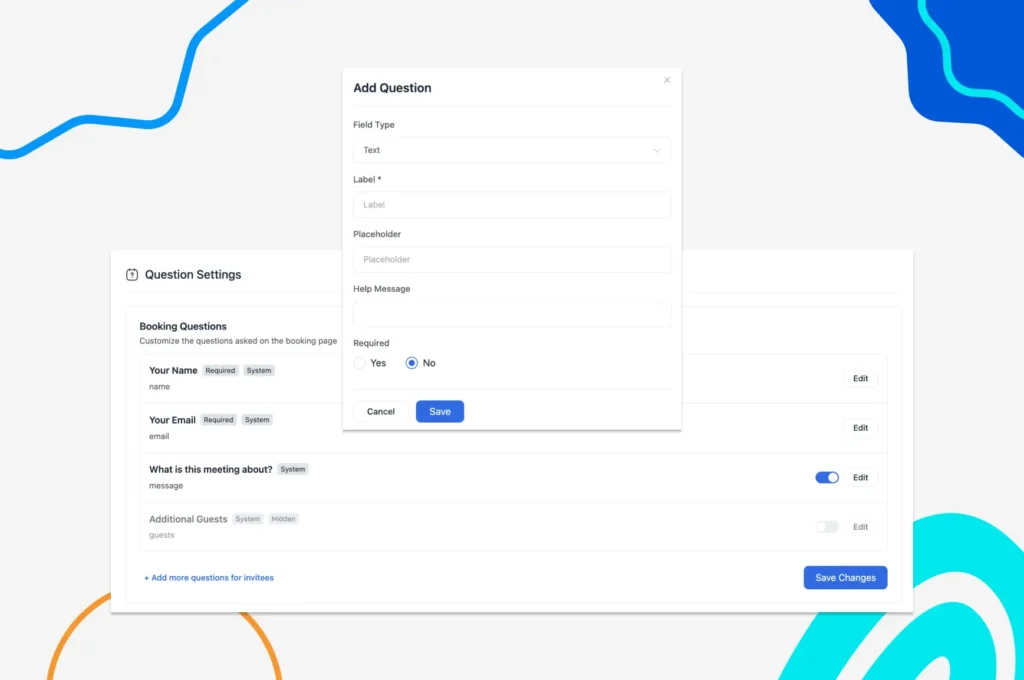
- Go to Question Settings > + Add more questions for invitees
- Configure your questions and then click Save
- Add multiple questions this way (if needed) and finally click Save Changes
Set Up Automated Notifications
Automated notifications keep both you and your clients informed. You can set both email and SMS notifications in FluentBooking.
Here’s how you can set email notifications in FluentBooking:
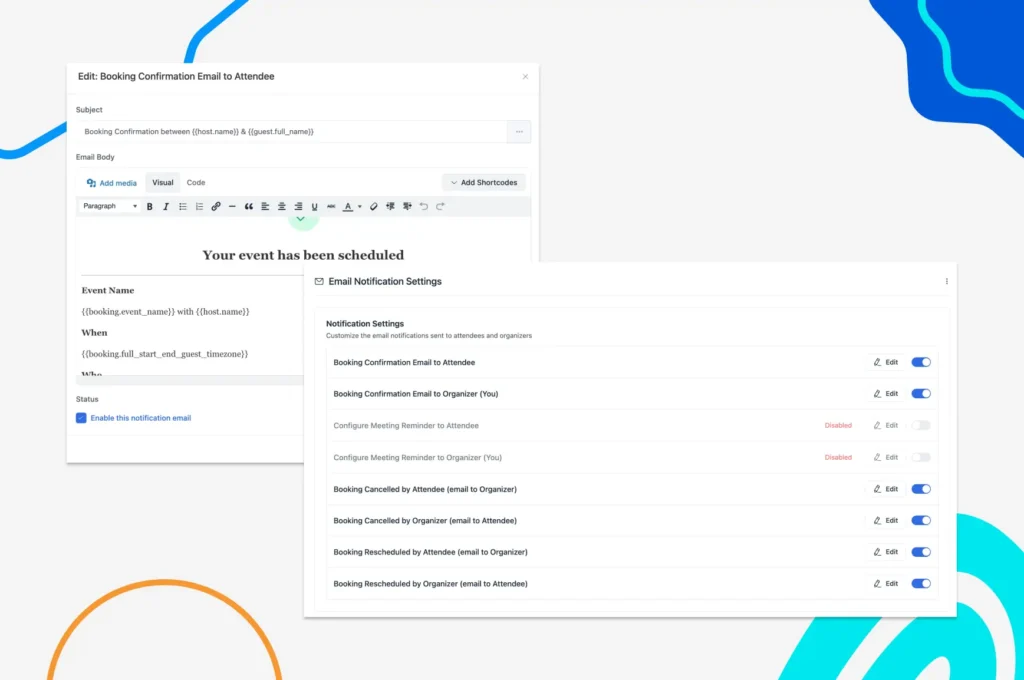
- Go to Email Notifications and enable/disable specific notifications
- Click Edit and customize your emails and Save Email (if required)
Now, follow the following steps for SMS/WhatsApp notifications:
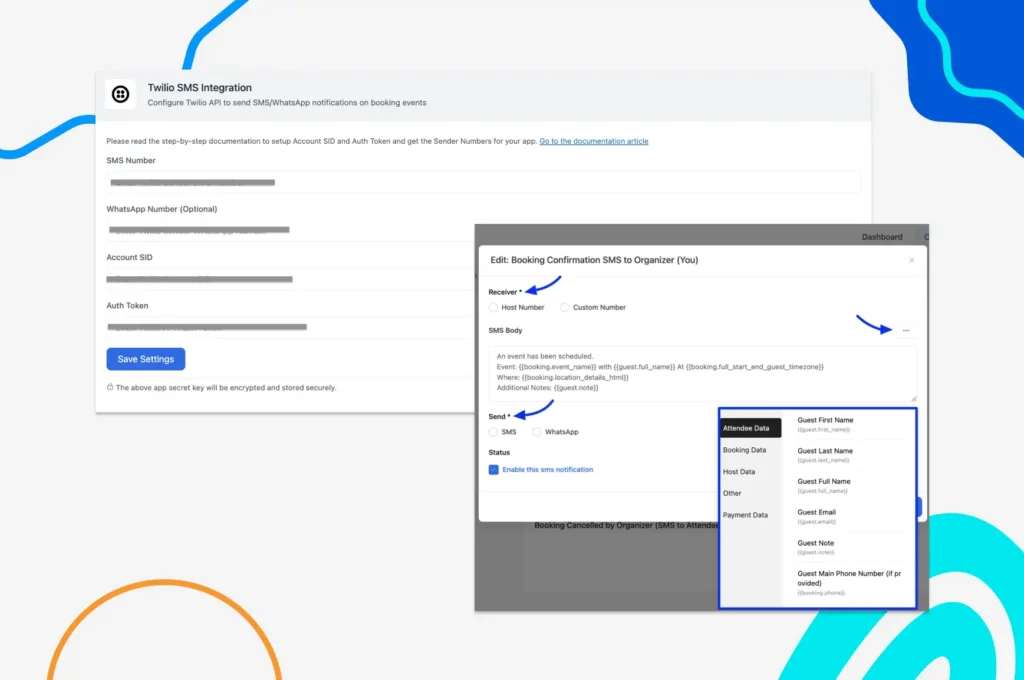
- Go to Settings > SMS by Twilio, then you need to configure your Twilio integration
- Insert your SMS Number, WhatsApp Number, Account SID, Auth Token, and click Save Settings
- Next, go to Calendars > Edit > SMS Notifications and configure your SMS
- Finally, click Save SMS, and your text/WhatsApp messaging is ready to roll
Enable Recurring Event
Here’s the most important part of configuring the recurring events in FluentBooking.
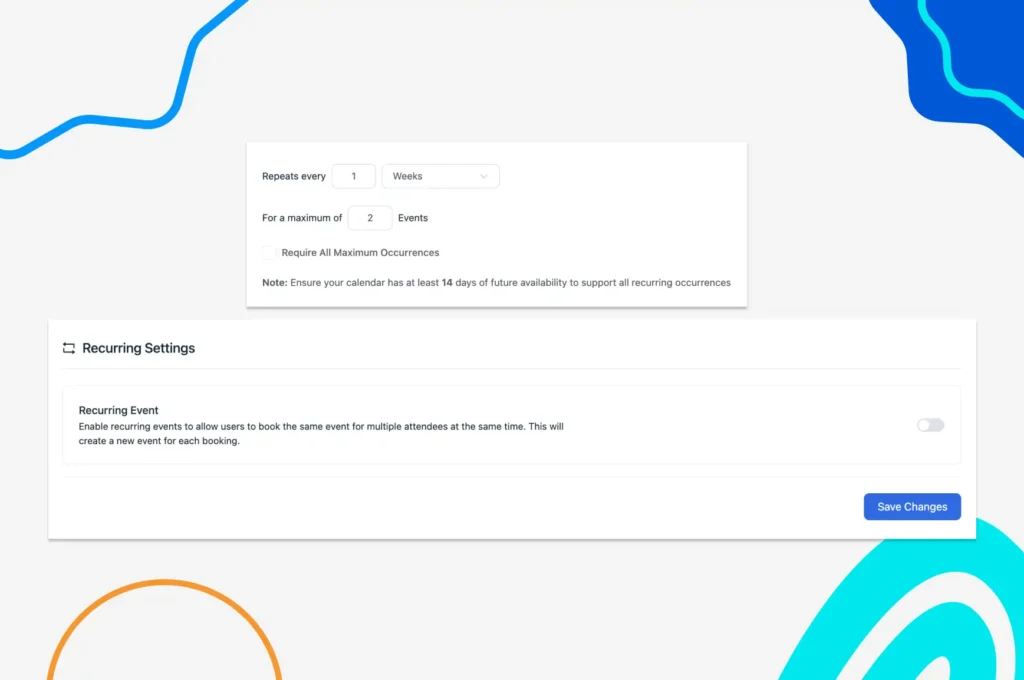
- Go to Recurring Settings and enable Recurring Event
- Next, set the repeat cycle and repeat time
- Check Requires All Maximum Occurrences if attendees need to book all slots in one go
Connect Your Calendar
Now you need to connect FluentBooking with your calendar apps to avoid scheduling conflicts.
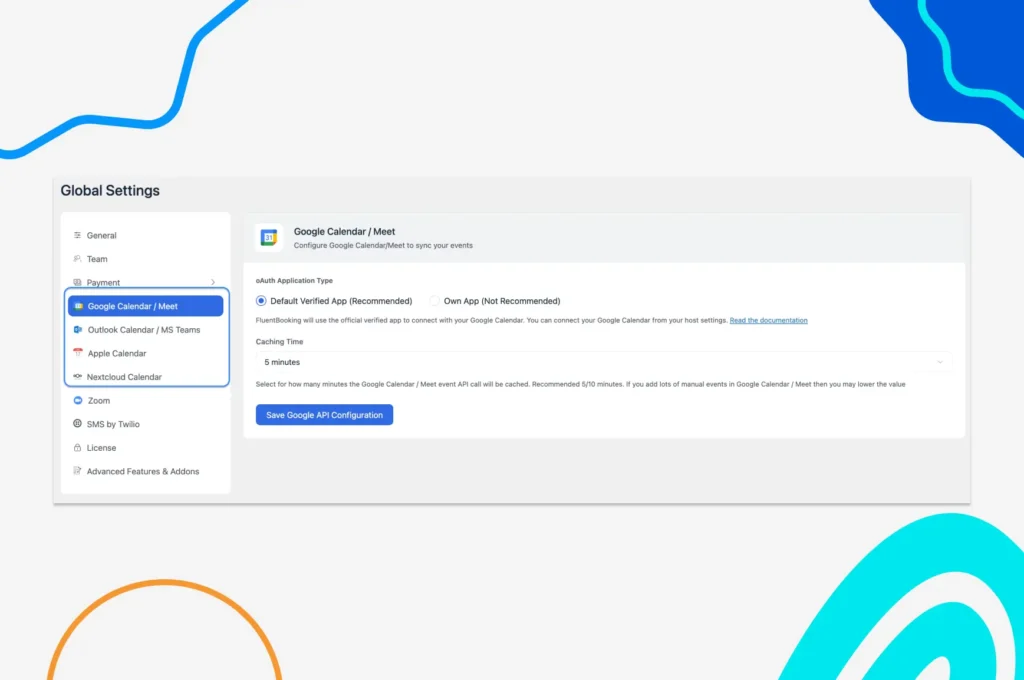
- Go to Settings, and you’ll discover many calendar options
- Connect with Google/Apple/Outlook/Nextcloud Calendar, and events will automatically sync
Enable Payments
If you charge per session or upfront, then you need to configure the payment module.

- Go to Settings > Payment, and you’ll find payment configuration options
- Check Enable Payment Module and set currency, number format, etc.
- From Payment Methods, select between Stripe/PayPal/Offline Payment
Go Live with Your Calendar
Now it’s time to publish your booking page and accept recurring appointments.
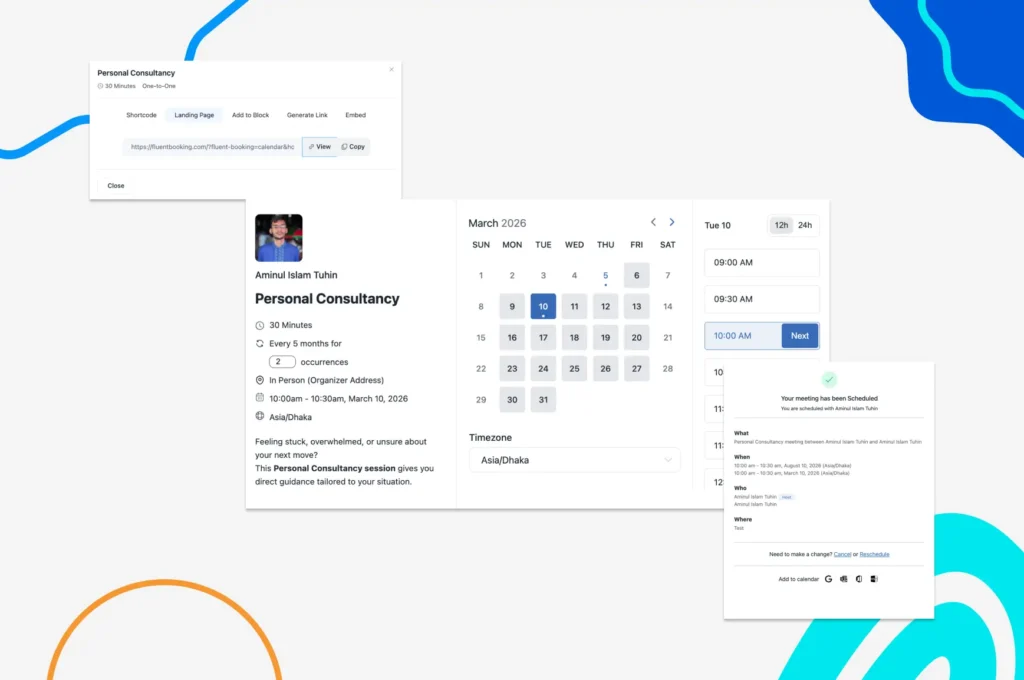
- Select between Shortcode, Landing Page, Add to Block, Generate Link, and Embed to go live with your calendar
- Clients can easily select their preferred time and schedule recurring appointments with you
Ready to Stop Scheduling Appointments Manually?
If you are still creating appointments one by one, you are spending time that could go toward serving your clients.
FluentBooking makes it easy to set up recurring appointments in WordPress, automate reminders, sync calendars, and collect payments directly from your website.
You do not need extra tools or complex setups. Install FluentBooking, configure your service, and start offering a simple booking experience for both you and your clients.
Start using FluentBooking today and set up your first recurring appointment in minutes.
Frequently Asked Questions
Aminul Islam Tuhin
Hi! Nice to meet you. I’m a guy who loves to explore, learn, and share knowledge. I spend most of my time catching up with marketing tips & tricks. When I’m not busy with any of these, you’ll find me with a book, exploring the city, or playing my favorite games.
Table of Content
Subscribe To Get
WordPress Guides, Tips, and Tutorials

Leave a Reply