


How to Add Appointment Booking to a WordPress Form


Last Updated:
Most WordPress websites already have a form that leads to an appointment. It might be a contact form, a consultation request, or a project inquiry.
Someone fills it out, and then the back-and-forth begins. You email them to suggest available times. They reply a day or two later, and by then, the slot you offered might already be taken.
The problem is that the form ends without a clear next step. Visitors have shared what they need, but they still have to wait for someone to get back to them.
What if they could book an appointment right after submitting the form?
That’s exactly what you’ll learn to set up in this guide. You’ll turn a regular WordPress form into an appointment scheduling form by adding a calendar at the end. Visitors can answer your questions, choose an available time, and book an appointment in a single submission.
Appointment Request Form vs. Appointment Scheduling Form
An appointment request form collects information and asks visitors for their preferred date or time. Someone on your team then reviews the request and confirms the appointment manually.
That process works when you receive only a handful of requests. But as your business grows, managing dozens of requests through email becomes time-consuming. Visitors also have to wait to find out whether their preferred time is available.
An appointment scheduling form removes that extra step.
Instead of requesting a preferred time, visitors see available slots directly from your FluentBooking calendar. They choose a suitable time, submit the form, and their appointment is booked.
You keep all the questions you’re already asking, but visitors no longer need to wait for a manual confirmation.
What You Need Before You Start
In this guide, we’ll use Fluent Forms to collect visitor information and FluentBooking to manage appointment scheduling. Both plugins offer free versions, and you can connect them without any additional cost.
If you’re still deciding which questions to include in your form, start by planning your client intake form. Once your questions are ready, follow the steps below to connect your form to a booking calendar.
Before getting started, make sure both plugins are installed and activated:
- FluentBooking: You’ll need at least one calendar with an event type configured. The Fluent Forms integration is available in the free version.
- Fluent Forms: The free version includes everything covered in this tutorial. However, file uploads and multi-step layouts require Fluent Forms Pro.
If you don’t have a calendar yet, go to FluentBooking → Calendars, click New, then Add Host. Choose the host, set Select Your Timezone, set the Weekly Hours, and click Continue. Then create the event type visitors will book: give it an Event Name, a Meeting Duration, and a Location, and click Save Changes.
Turn Your Form Into an Appointment Scheduling Experience[Step-by-Step]
With Fluent Forms and FluentBooking connected, you can collect visitor information and let them book an appointment through a single form. Setting it up takes just a few steps. Let’s walk through the process, from creating your form to configuring the booking calendar and testing the final experience.
Step 1: Create Your Form and Add Name and Email Fields
In Fluent Forms, create a new blank form or open an existing contact or inquiry form that you want to turn into an appointment scheduling form.
Start by adding two essential fields:
- Name
These fields identify the person making the booking. FluentBooking uses them to create the appointment and send booking-related notifications.
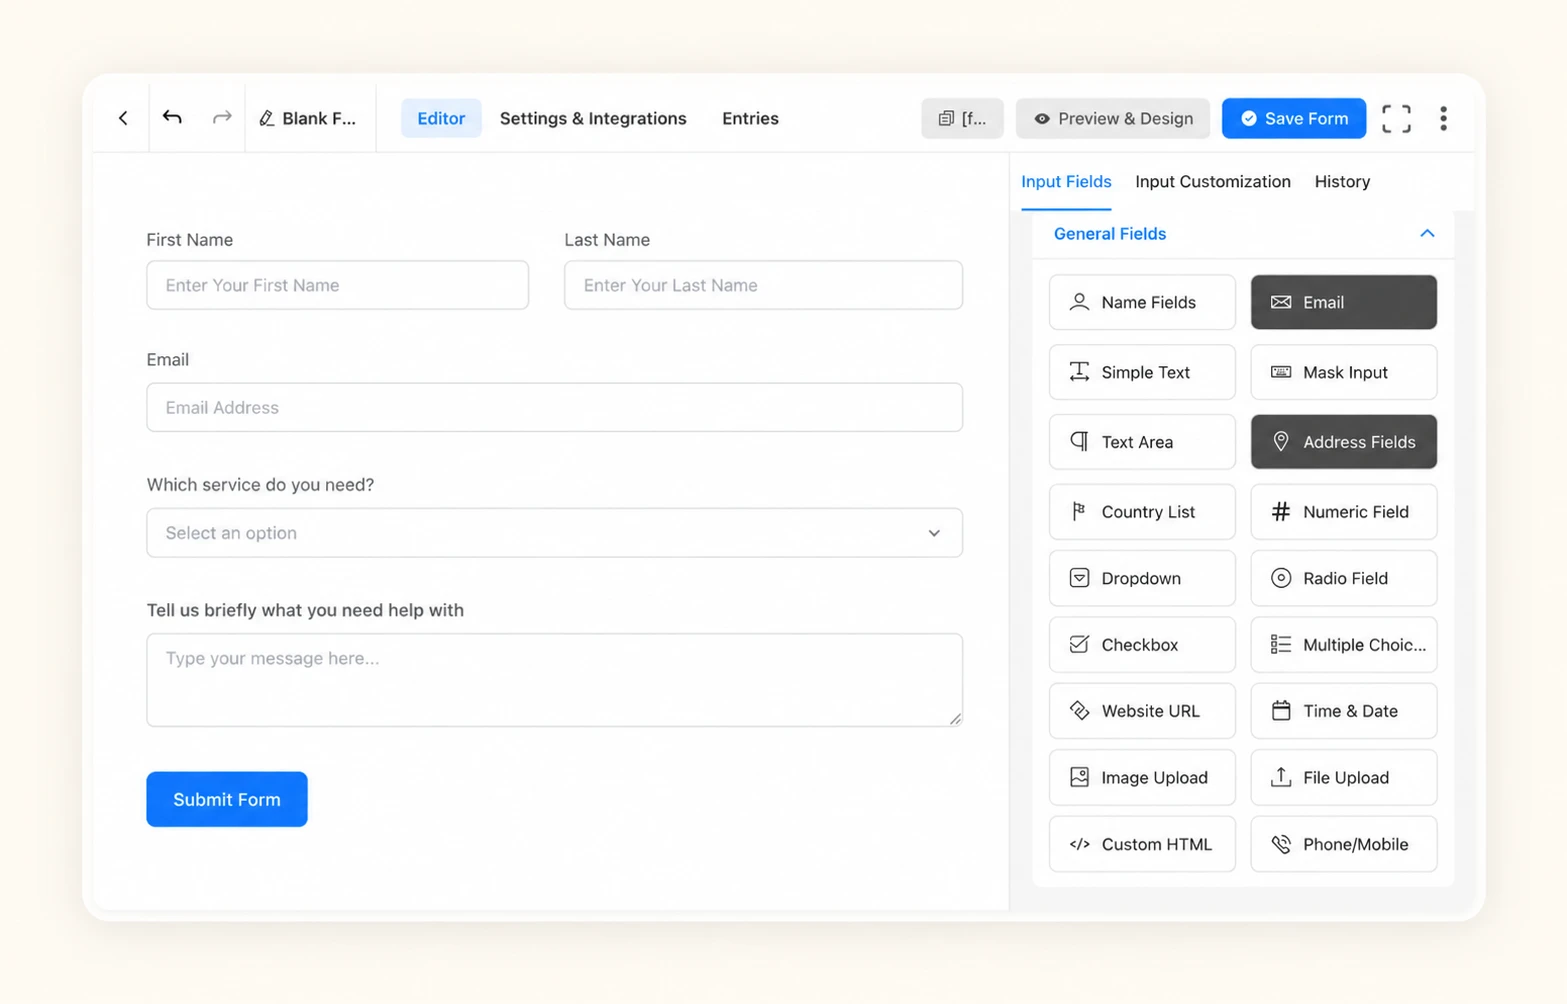
Next, add the intake questions you need before the meeting. For example, you might ask which service they need, what they need help with, or whether they have any specific requirements.
Keep your questions relevant. The goal is to collect enough information to prepare for the appointment without making the form unnecessarily long.
If you plan to use conditional logic later, dropdown and radio button fields are particularly useful. Their predefined answers make it easier to create rules based on visitors’ selections.
Step 2: Add the FluentBooking Field
Once your intake questions are ready, it’s time to add the booking calendar.
In the Fluent Forms editor, open the Advanced Input section in the field panel and look for the FluentBooking Field.
You can also click the plus icon and search for “FluentBooking” to find the field quickly. Drag the field into your form or click it to add it.
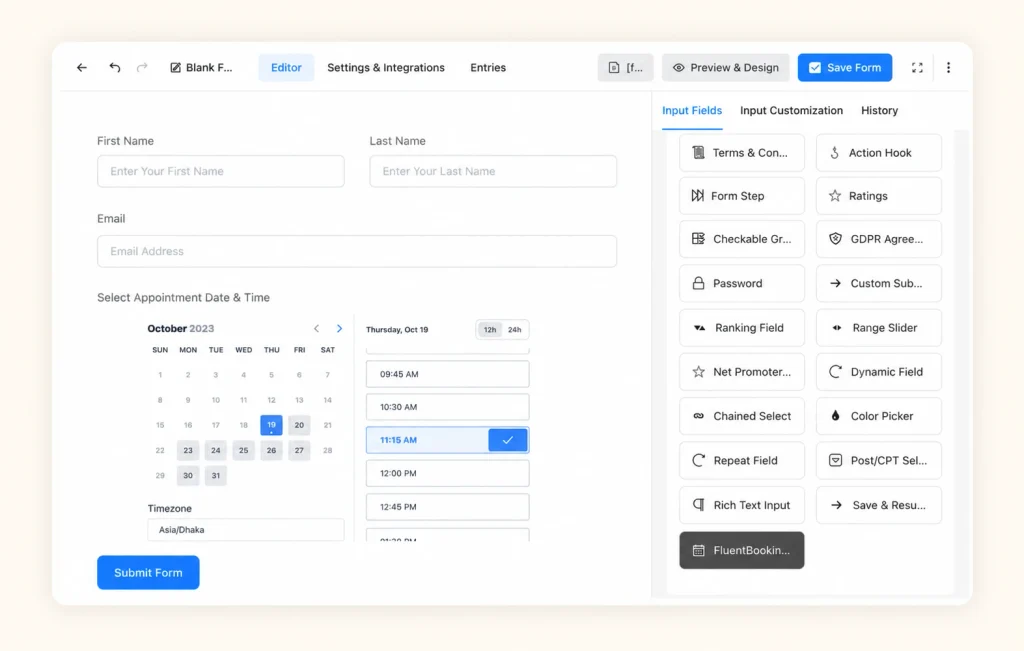
Place the FluentBooking Field at the end of your form, after all your intake questions.
This order creates a more natural experience. Visitors first tell you who they are and what they need. Once they’ve provided that information, they can choose an available appointment time.
It also gives you more control over the booking experience. In the next step, you’ll see how to display the calendar only when a visitor’s answers meet your requirements.
Step 3: Connect the Field to Your Calendar
Now that you’ve added the FluentBooking Field, you need to configure it.
Hover over the field and click the pencil icon to open Input Customization.
Here are the settings you’ll need to configure.
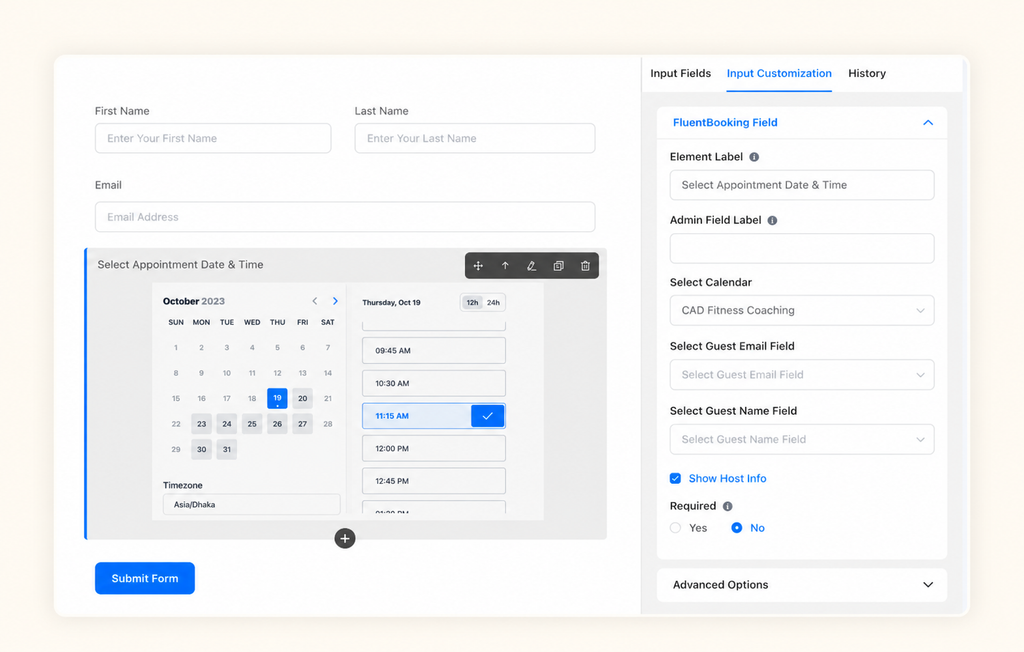
Element Label and Admin Field Label
The Element Label is what visitors see above the booking calendar.
Use a clear, action-oriented label that tells them what to do. For example, “Pick a time for your consultation” is more helpful than a generic label like “Booking.”
The Admin Field Label is used internally to identify the field in your form entries. Choose something descriptive, such as “Consultation booking,” so you can easily recognize it later.
Select Calendar
Choose the FluentBooking calendar you want to connect to this form.
Make sure you’ve already created the calendar and its event type in FluentBooking. Otherwise, you won’t have a calendar ready to select.
Select Guest Email Field and Select Guest Name Field
Next, map the guest information to the corresponding fields in your form.
- Select Guest Email Field: Choose the Email field you added in Step 1.
- Select Guest Name Field: Choose the Name field you added in Step 1.
This mapping tells FluentBooking who is making the appointment and where to send the booking confirmation.
Show Host Info
Enable this option if you want visitors to see information about the person they’ll be meeting.
For individual service providers, this helps build trust. For businesses with multiple hosts, it lets visitors know who will handle their appointment.
Required
Enable Required if every form submission should include an appointment booking.
However, if you’re planning to display the calendar only to certain visitors using conditional logic, leave this option disabled.
Once you’ve configured these settings, your form and calendar are connected.
Combine form submissions, appointment scheduling, and automated notifications to make managing client appointments easier.
Step 4 (Optional): Show the Calendar Only to the Right Visitors
Here’s where your appointment scheduling form becomes more flexible.
You don’t necessarily need to show the booking calendar to everyone who submits your form. Sometimes, you want to review a visitor’s answers before allowing them to schedule an appointment.
For example, an accounting firm might want to show its calendar only to people who need business tax services. An agency might want to qualify leads based on their project budget.
You can handle these situations using Conditional Logic.
Open the FluentBooking Field’s Advanced Options and configure Conditional Logic. This feature is available in the free version of Fluent Forms.
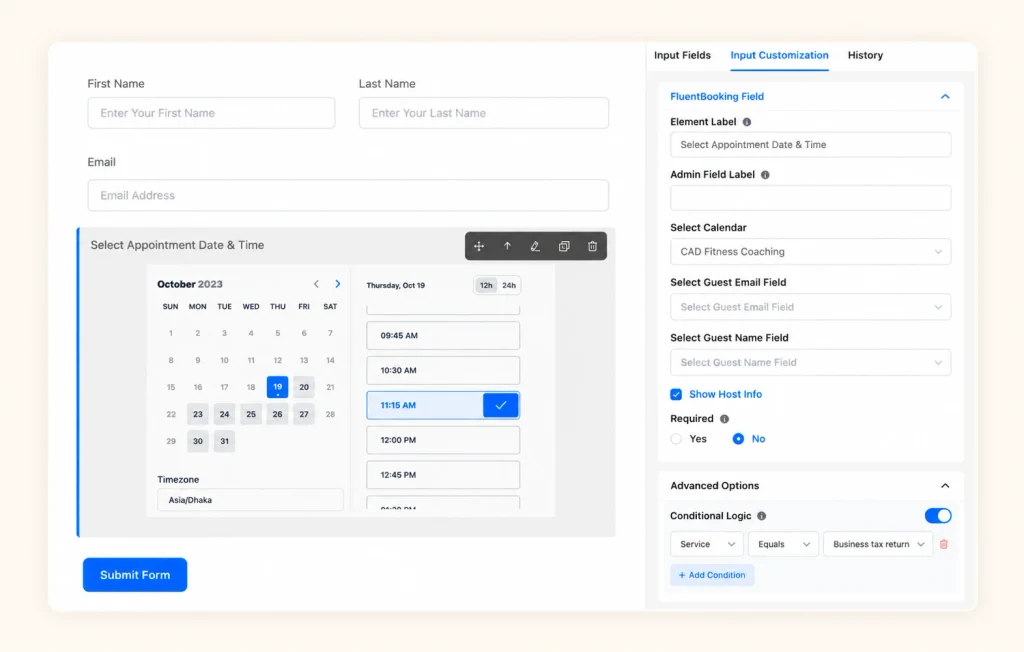
Create a rule based on one of your intake questions. Here are a few examples:
| Business | Conditional rule | What it helps prevent |
| Accounting firm | Show the calendar when Service is “Business tax return” | Personal-return clients booking time with the business tax specialist |
| Agency | Show the calendar when Budget is not “Under $1,000” | Discovery calls for projects outside your budget requirements |
| Clinic or wellness practice | Show the calendar when New or returning is “New client” | Returning clients booking a lengthy new-client assessment |
With these rules in place, the calendar appears only when a visitor’s answers meet your conditions.
Visitors who don’t meet the requirements can still submit the form. Their responses are saved as regular form entries, allowing you to review their requests and decide what to do next.
You might recommend another service, refer them to someone else, or simply follow up by email.
Either way, every visitor gets a next step, even if that next step isn’t an appointment.
Step 5: Publish Your Form and Test a Real Booking
Your appointment scheduling form is almost ready.
Now, add it to a WordPress page using the Fluent Forms block or paste the form’s shortcode from your Fluent Forms list.
Publish the page and open it in a private browser window to test the complete booking experience.
Fill in the intake questions, select an available time, and submit the form just as a visitor would.
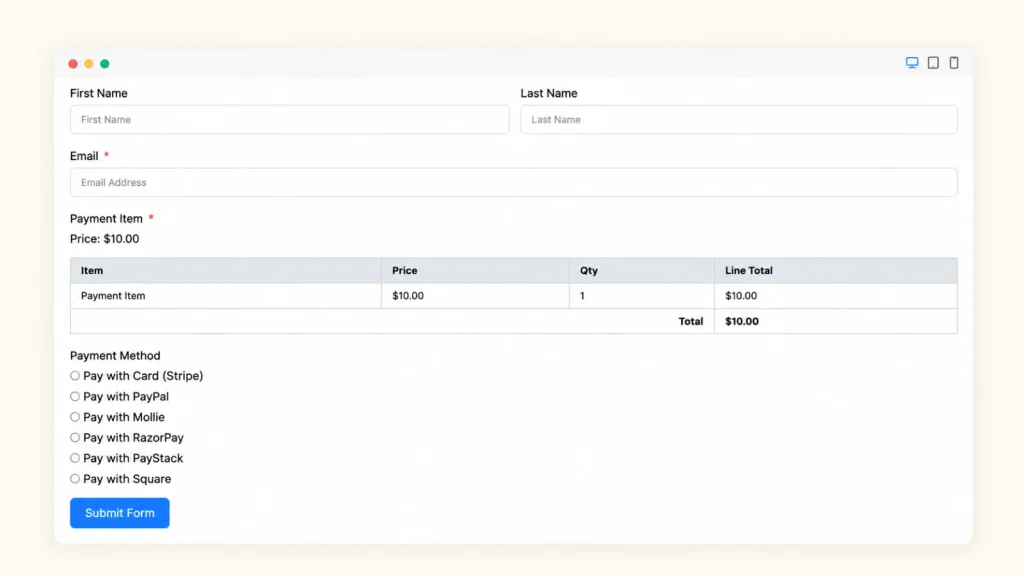
After submitting the form, check that the booking information is saved in both plugins.
- In FluentBooking: Find the test booking and click View Details. You should see the answers submitted through Fluent Forms in the booking details. This gives you the information you need before the meeting.
- In Fluent Forms: Open your form’s Entries section. You’ll find the same submission saved alongside your other form entries.
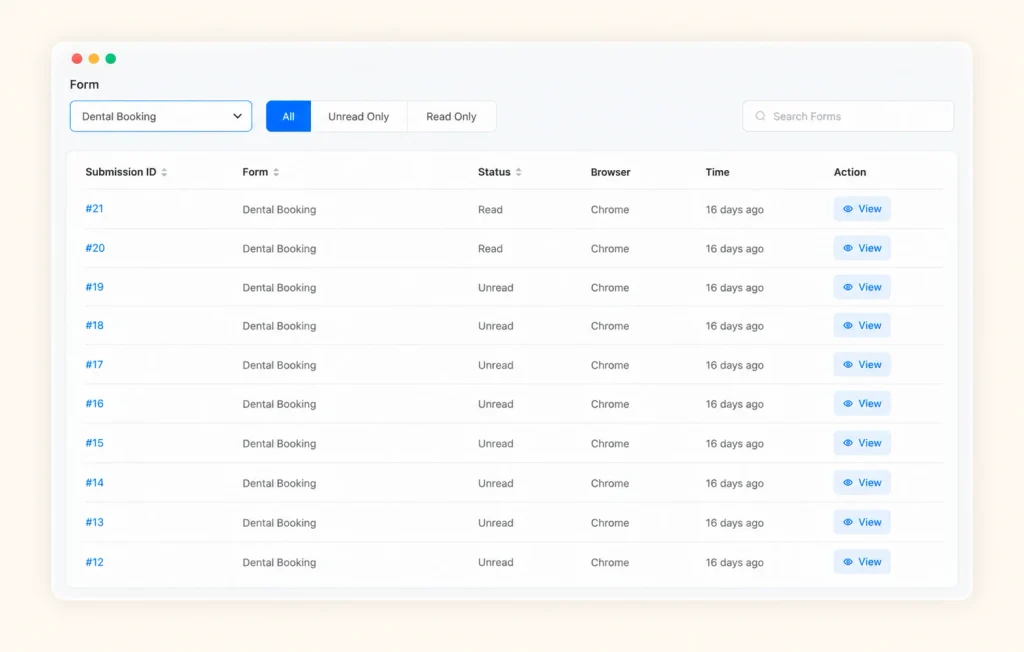
If you enabled conditional logic in Step 4, run another test using answers that don’t match your conditions. Check that the form still accepts the submission but keeps the booking calendar hidden.
Once both tests work as expected, your appointment scheduling form is ready to use.
What Happens After Someone Books?
Submitting the form isn’t the end of the process. It starts a series of steps: sending a confirmation, reminding guests before the meeting, and following up afterward.
Since bookings made through Fluent Forms are regular FluentBooking bookings, they follow the same workflows as appointments made through a booking page.
You can manage confirmation and reminder emails from the event type’s Email Notification settings. To customize them, open your event type, go to Email Notification, and click Edit on the email you want to update. Adjust the Subject, Email Body, and reminder Timing, then click Save Email.
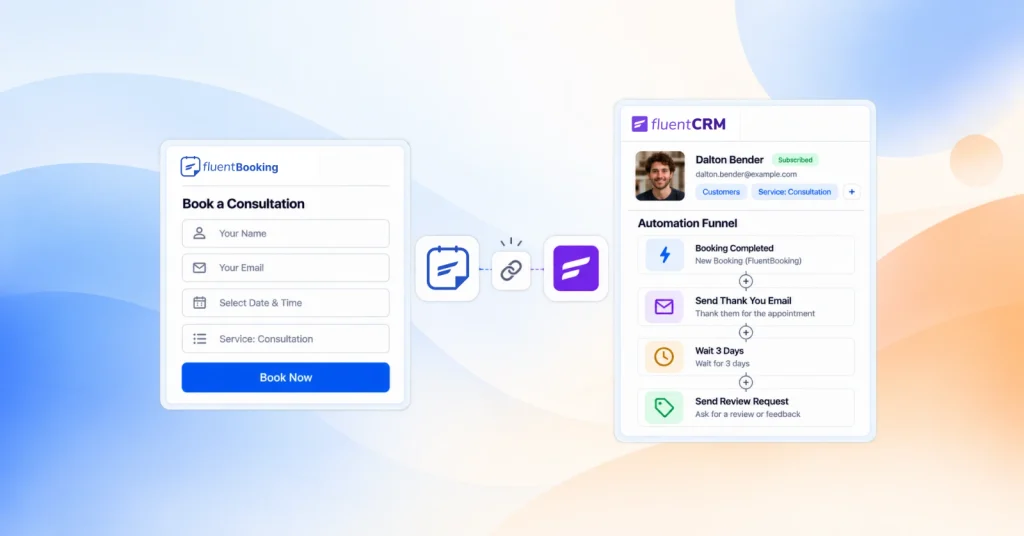
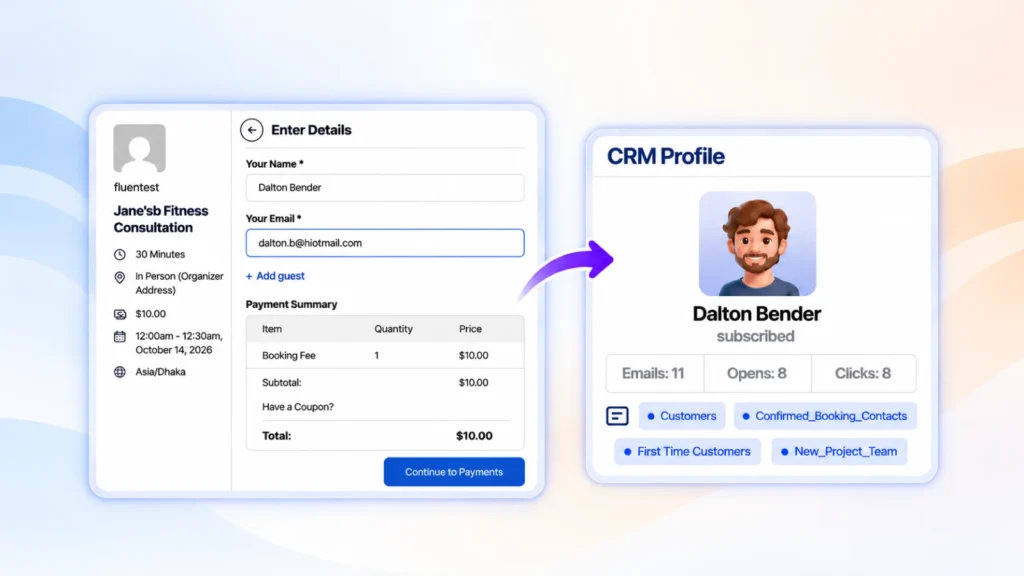
You can also prepare for meetings using the information visitors submit through the form, which is saved in the booking details. And after the meeting, if you use FluentCRM, you can automatically tag new clients as they book and use those tags to trigger follow-up campaigns.
Turn Your Existing Form Into a Booking Experience
You don’t need to replace your existing contact or inquiry form to start accepting appointments online. With Fluent Forms and FluentBooking, you can collect the information you need, let visitors choose an available time, and create appointments in a single submission.
From booking confirmations and reminders to meeting preparation and client follow-ups, you can manage more of the appointment journey without adding extra manual steps.
No tricks, just smoother scheduling! Get up to 30% OFF FluentBooking Pro and make every booking a little less spooky.
Ratul Hasan Ripon
I enjoy making complex ideas simple and engaging through my writing and designs. With a strong knowledge on content writing and SEO, I create technical content that’s both easy to understand and interesting.
Table of Content
Subscribe To Get
WordPress Guides, Tips, and Tutorials




Add your first comment to this post