

How to Set Up Patient Scheduling on Your Medical Practice WordPress Site


Managing patient appointments over the phone can quickly become time-consuming for a medical practice. Staff members have to answer calls, check a doctor’s availability, find an appropriate time slot, confirm the appointment, and often send reminders later.
A patient scheduling system can automate much of this process.
If your medical practice website runs on WordPress, you can add an online appointment booking system that lets patients choose an available time, provide the required information, and receive appointment confirmations automatically.
In this guide, we’ll show you how to set up patient scheduling on a WordPress medical practice website using FluentBooking.
Why Add Online Patient Scheduling to Your WordPress Site?
Patients increasingly expect to be able to schedule appointments online without calling the practice during office hours.
An online scheduling system can help your practice:
- Accept appointment requests 24/7
- Reduce phone calls and manual scheduling
- Show real-time availability
- Prevent double bookings
- Manage appointments for multiple doctors or staff
- Send automatic confirmations and reminders
- Offer both in-person and virtual appointments
- Sync appointments with connected calendars
FluentBooking supports one-on-one, group, and team scheduling, along with availability management, calendar synchronization, booking reminders, and custom attendee information.
What You Need Before Getting Started
Before setting up patient scheduling, make sure you have:
- A WordPress medical practice website
- An appointment booking plugin installed and activated
- Your doctors’ or providers’ working hours
- A list of appointment types you want to offer
- A connected calendar for each provider, where appropriate
- Your preferred notification and reminder settings
- A dedicated appointment booking page
If you need advanced scheduling features, check which features are included in your FluentBooking plan before configuring your site.
Important: A scheduling plugin should not automatically be assumed to make a website HIPAA-compliant or compliant with other healthcare privacy regulations. Before collecting protected health information through an online form, review your applicable legal, privacy, security, and data-processing requirements and use appropriate compliant services and configurations.
How to Set Up Patient Scheduling on Your WordPress Site [Step-by-Step]
Adding an online scheduling system to your medical practice website can make it easier for patients to book appointments without calling your office. It also helps your team manage provider availability, appointment times, and booking notifications from one place.
Step 1: Choose and Install a WordPress Scheduling Plugin
There are several WordPress scheduling plugins available, and the setup process can vary depending on the solution you choose. For this guide, we’ll use FluentBooking as an example to show how you can add patient scheduling to your medical practice website.
First, install FluentBooking on your WordPress site.
From your WordPress dashboard:
- Go to Plugins > Add New Plugin.
- Search for FluentBooking.
- Click Install Now.
- Click Activate.
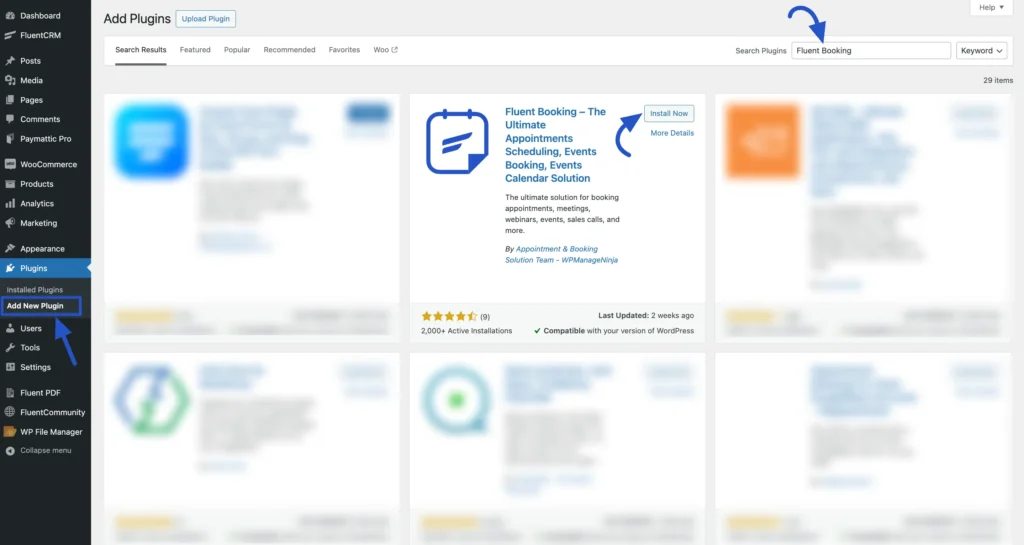
Once activated, FluentBooking will appear in your WordPress dashboard, where you can start creating appointment schedules and managing your bookings.
If you’re using the Pro version, install and activate the Pro plugin, then enter your license key in the FluentBooking settings.
Step 2: Create a Calendar for Your Medical Practice
Next, create a booking calendar for the provider or service you want patients to schedule.
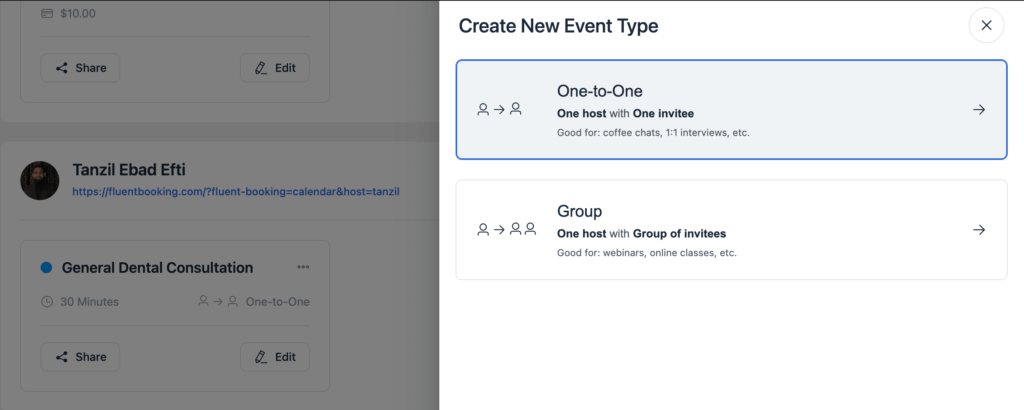
For example, you could create separate calendars for:
- General consultations
- Dental appointments
- Follow-up visits
- Specialist consultations
- Telehealth appointments
- Physical therapy sessions
For a practice with multiple providers, you can create calendars for individual doctors or use team scheduling features to distribute appointments among available team members. FluentBooking supports multiple hosts and round-robin scheduling.
Keeping appointment types organized makes it easier for patients to choose the right service.
Step 3: Create Your Appointment Type
Now create the appointment patients will book.
Choose the appropriate meeting type and enter the basic appointment details.
For example:
- Appointment Name: General Consultation
- Duration: 30 minutes
- Location: In-person at the clinic
- Description: Meet with a healthcare provider for a general consultation.
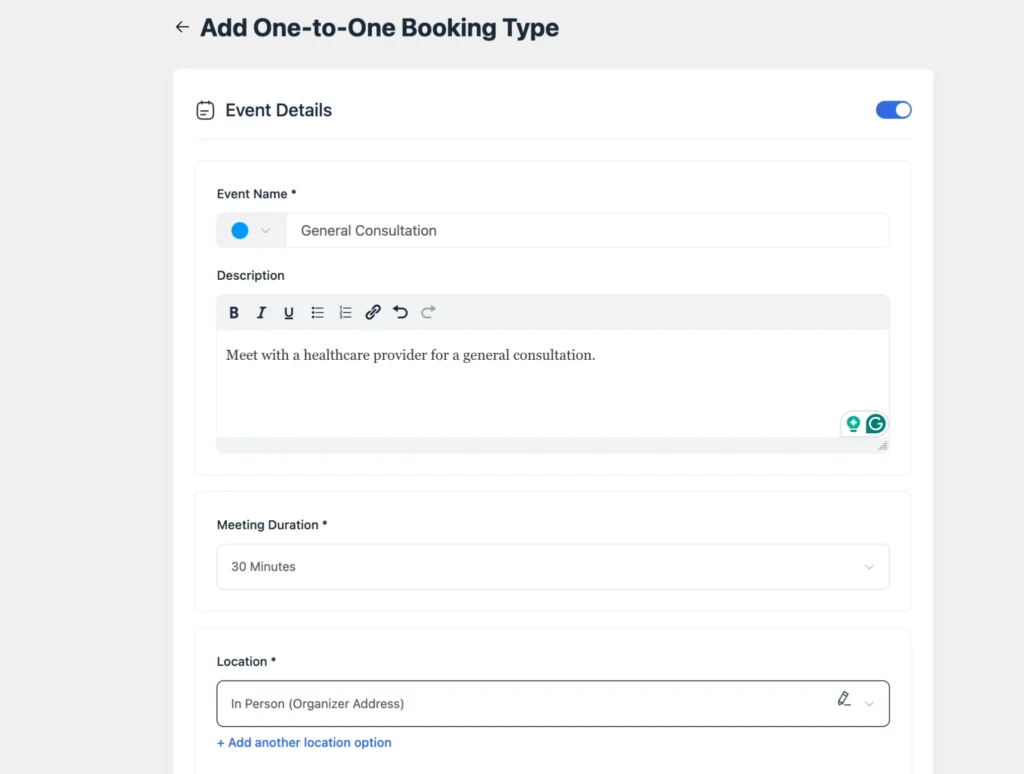
You can create different booking events for different services if they require different durations, providers, or availability.
For example, a general consultation might be 30 minutes, while a specialist consultation could require 45 or 60 minutes.
Step 4: Set the Doctor’s Availability
The next step is to tell FluentBooking when the provider is available.
Open the appointment’s Availability settings and configure the appropriate working hours.
For example:
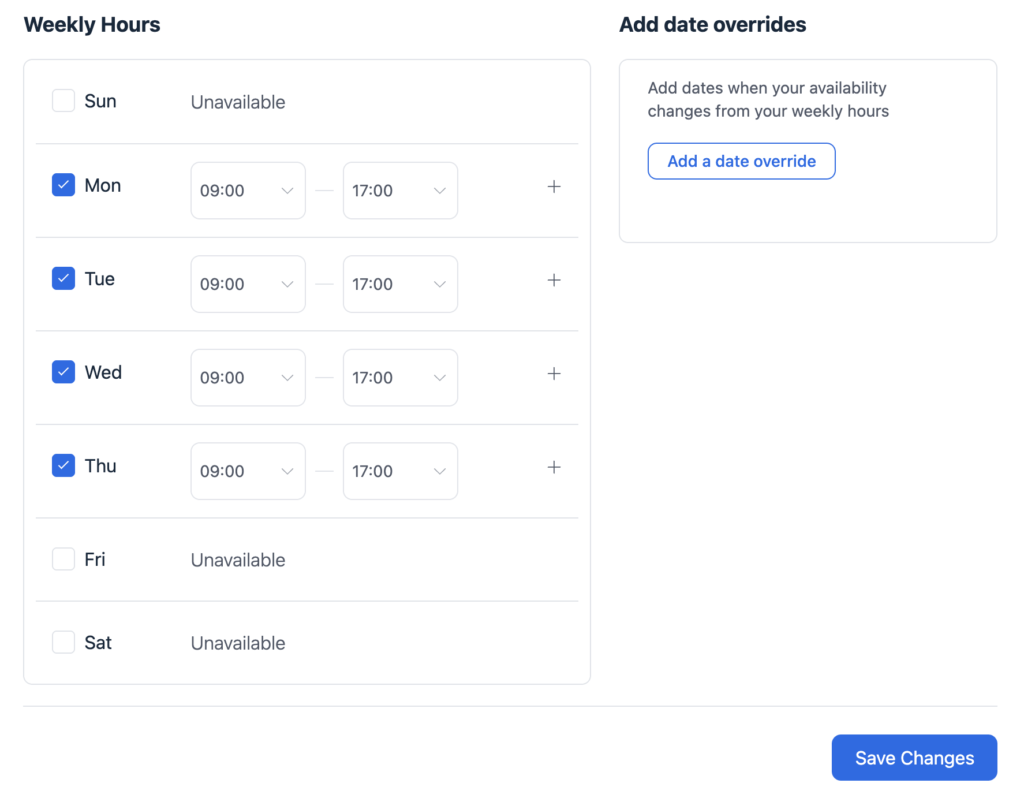
You can also create reusable availability schedules and add date overrides for holidays, leave days, or other exceptions.
This is particularly useful for medical practices because provider schedules can change from week to week.
Step 5: Add Buffer Time Between Appointments
Medical appointments don’t always end exactly on schedule. A doctor may need a few minutes to finish notes, prepare for the next patient, or reset the consultation room.
Adding buffer time between appointments can help prevent back-to-back bookings.
For example, if a consultation lasts 30 minutes, you could add a 10-minute buffer before the next appointment.
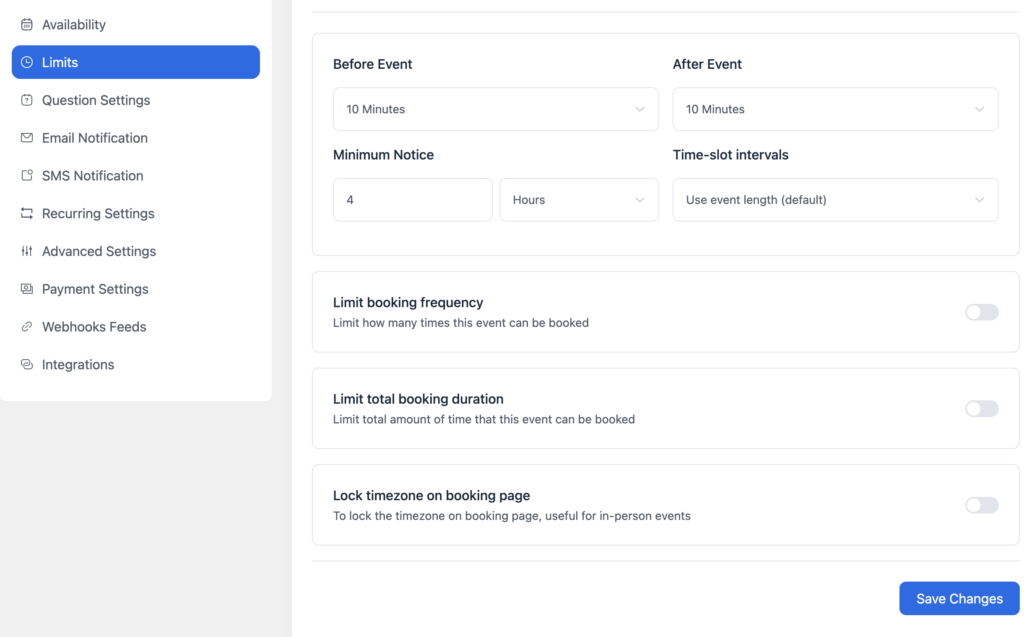
This gives your staff and providers some breathing room while reducing the risk of an overloaded schedule. FluentBooking includes buffer-time and booking-limit controls for managing appointment capacity.
Step 6: Connect Your Calendar
Connecting your existing calendar is an important step if doctors already manage their schedules through a calendar application.
FluentBooking can synchronize appointments with supported calendar services like Google Calendar, Apple Calendar, and more, helping keep availability up to date and reducing the possibility of scheduling conflicts.
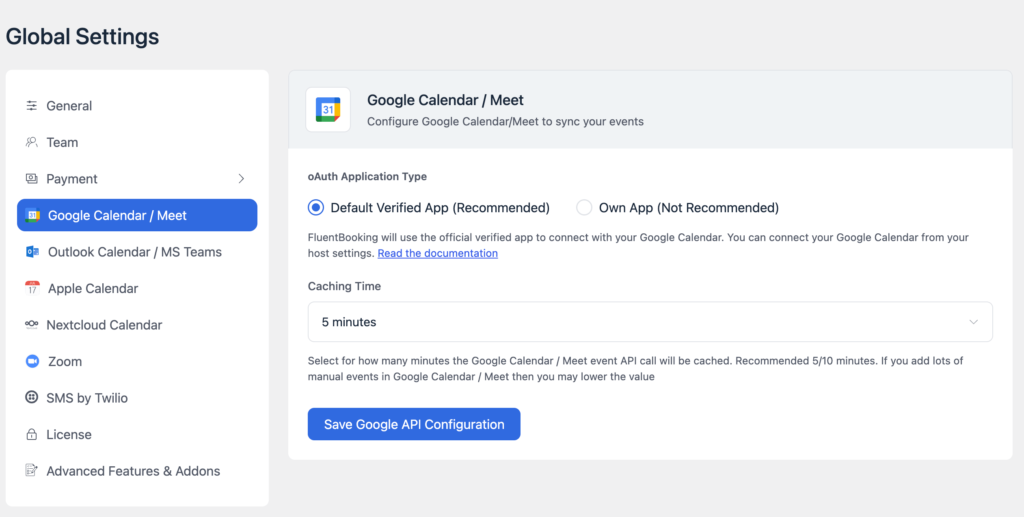
For example, if a doctor already has a personal or professional event on their connected calendar, that time can be taken into account when displaying available appointment slots.
Before going live, test the synchronization carefully to make sure your availability behaves as expected.
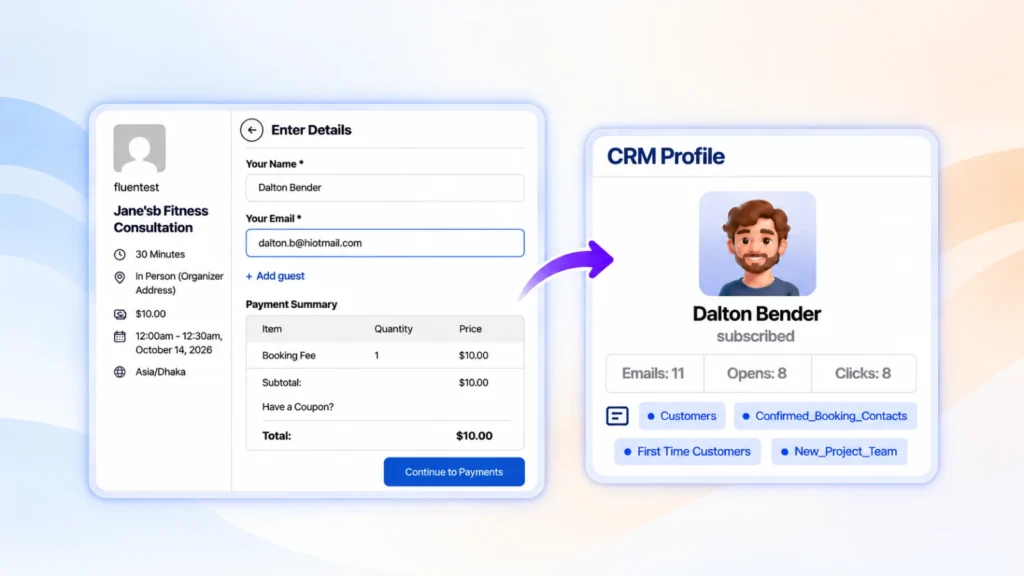
Step 7: Collect the Information You Actually Need
Your booking form should collect enough information to help the practice manage the appointment, but avoid asking for unnecessary sensitive information.
Depending on your practice and compliance requirements, you might collect basic information such as:
- Patient name
- Email address
- Phone number
- Appointment type
- Preferred provider
- New or returning patient status
You can also use custom booking questions or form integrations to collect additional information when appropriate. FluentBooking supports attendee questions and integrations that can extend the information collected during booking.
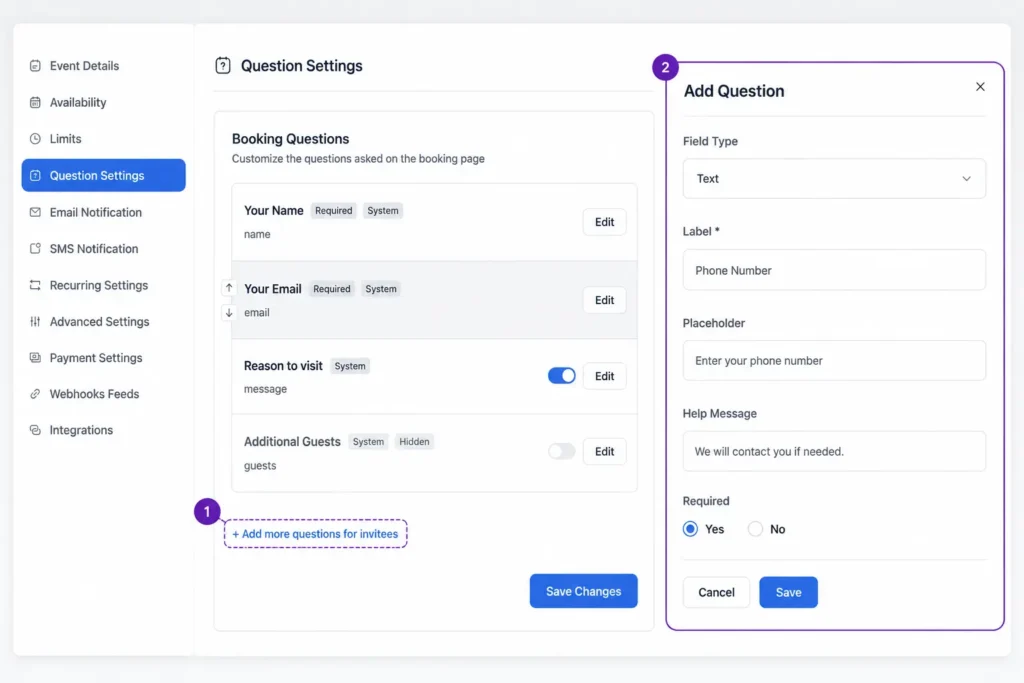
For sensitive medical information, make sure the form, storage, transmission, and third-party services you use are appropriate for your applicable privacy and regulatory requirements.
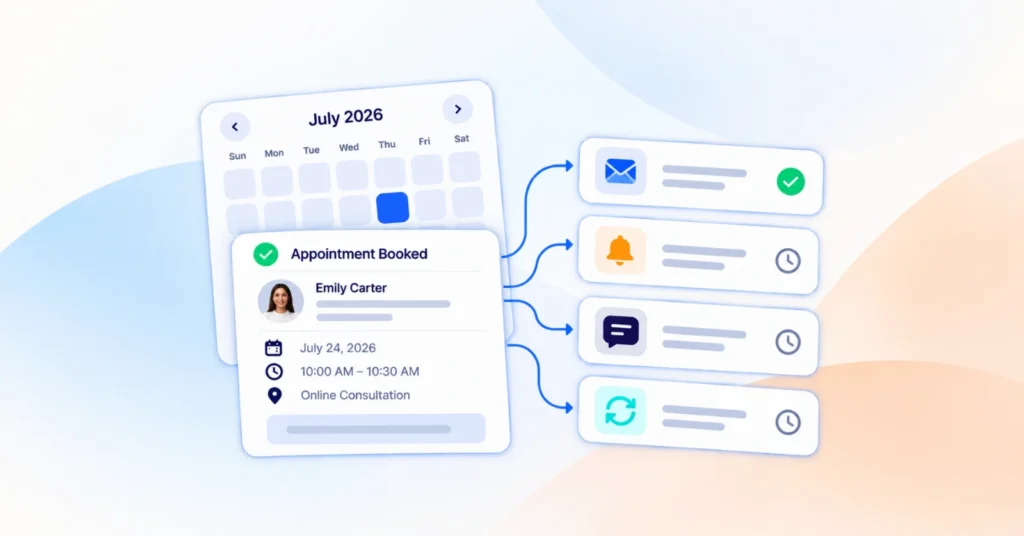
Step 8: Configure Confirmation and Reminder Emails
Once a patient books an appointment, they should receive confirmation immediately.
You can configure automated notifications so patients and staff receive important appointment information without requiring someone to send each message manually.
Useful notifications include:
- Booking confirmation
- Appointment reminder
- Cancellation notification
- Rescheduling notification
- Follow-up message
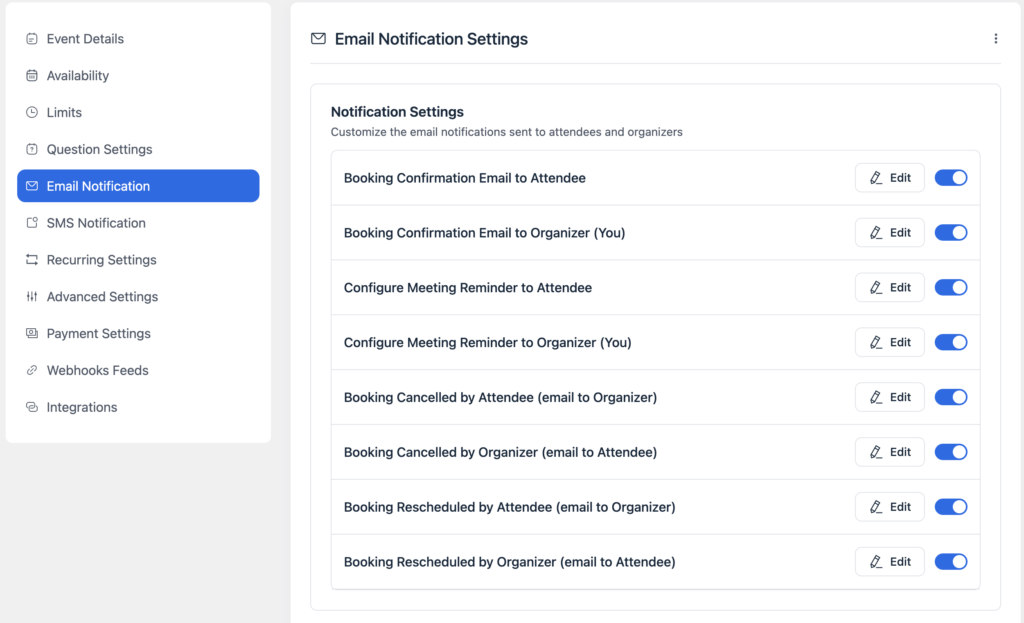
FluentBooking supports customizable email notifications and multiple reminder emails, helping practices reduce manual follow-up and missed appointments.
For example, you could send one reminder 24 hours before the appointment and another a few hours before the scheduled time.
Step 9: Create a Patient-Friendly Booking Page
Now it’s time to put your scheduling system on your website.
Create a dedicated page such as:
Book an Appointment
Then add a short introduction explaining what patients can do on the page.
For example:
Choose your appointment type, select an available time, and provide your contact information to schedule your visit.
FluentBooking allows you to add booking forms to WordPress pages using a shortcode, WordPress block, landing page, or generated booking link.
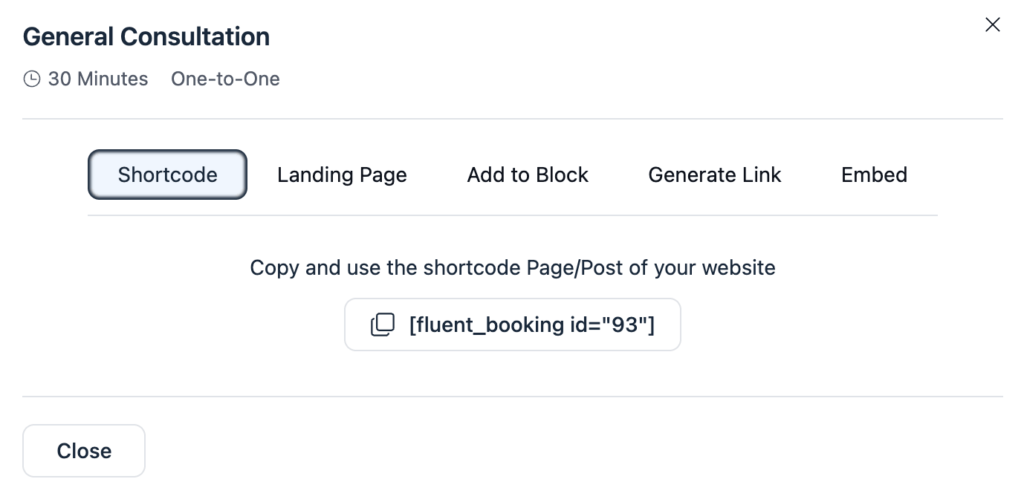
You could also add a Book an Appointment button to your website’s:
- Header
- Homepage
- Doctor profile pages
- Contact page
- Services pages
- Mobile navigation
The goal is to make the booking option easy to find.
Step 10: Test the Booking Process
Before sending patients to your new scheduling page, complete a test booking yourself.
Check the entire process from the patient’s perspective.
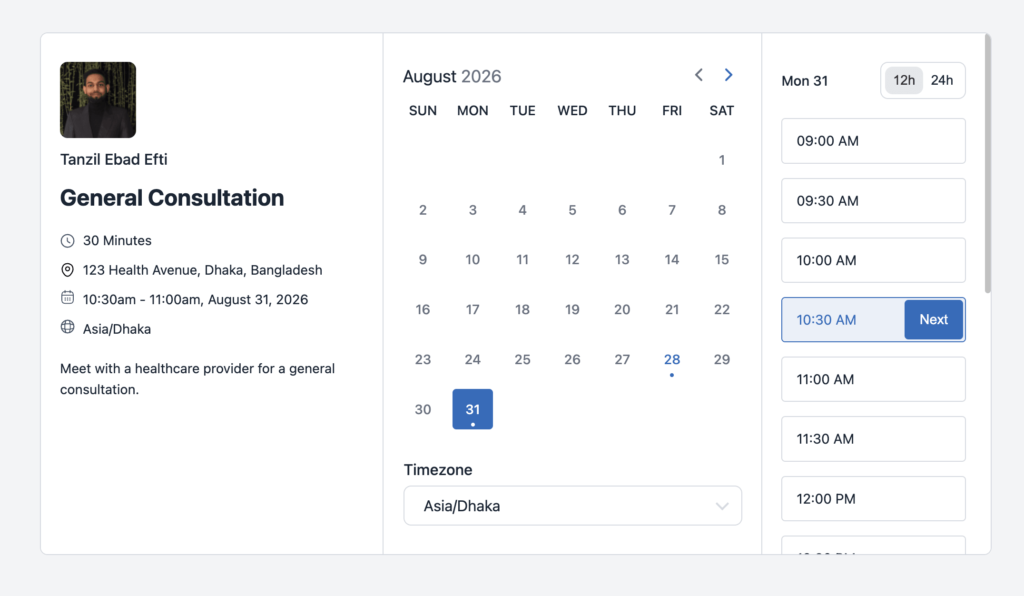
Make sure:
- Available times are correct
- Unavailable times cannot be booked
- The correct appointment duration appears
- Confirmation emails arrive
- Calendar events are created correctly
- Time zones are displayed correctly
- Cancellation and rescheduling work as expected
- The booking page works well on mobile devices
Testing is especially important for a medical practice because scheduling mistakes can affect both patients and staff.
Step 11: Publish Your Online Scheduling System
Once everything is working correctly, publish the booking page and start directing patients to it.
You can add a prominent Book an Appointment button across your website and include the booking link in email communications, social media profiles, or patient resources where appropriate.
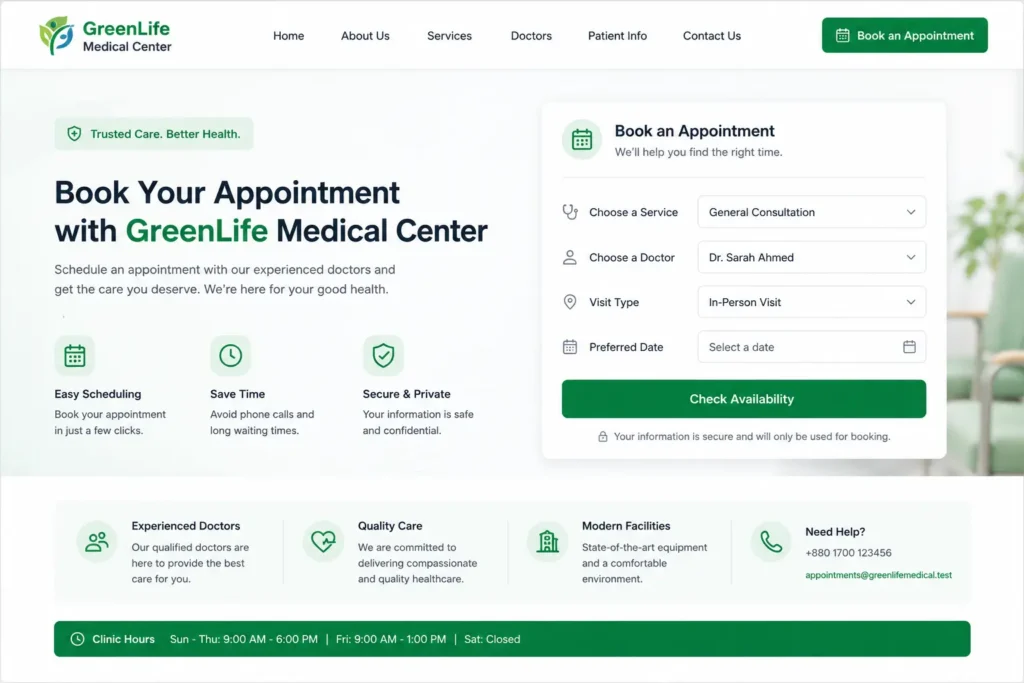
For practices with multiple providers, you can also create separate booking experiences based on the doctor, service, or appointment type.
Best Practices for Medical Practice Scheduling
Setting up online booking is only the first step. A few additional practices can make the experience easier for both patients and staff.
Keep Appointment Types Simple
Don’t overwhelm patients with dozens of similar options.
Use clear names such as:
- General Consultation
- Follow-Up Visit
- Specialist Consultation
- Virtual Consultation
Show Realistic Availability
Only make time slots available when the provider can actually see patients.
Include lunch breaks, administrative time, holidays, and other regular interruptions in the schedule.
Use Buffer Times
Leave enough time between appointments for providers to finish one visit before starting the next.
Make Booking Mobile-Friendly
Many patients will access your website from a smartphone. Test the complete booking process on mobile before publishing it.
Keep Notifications Clear
Confirmation and reminder emails should clearly show the appointment date, time, provider, location, and any relevant instructions.
Protect Patient Information
Only collect information you actually need, and make sure your WordPress site, hosting environment, forms, integrations, and data storage follow the privacy and security requirements that apply to your practice.
Make Every Appointment Easier to Book
Online patient scheduling can make a medical practice website much more useful for both patients and staff.
Instead of relying entirely on phone calls and manual calendar management, you can give patients a convenient way to find an available appointment and book it directly from your WordPress website.
With FluentBooking, you can create appointment types, configure provider availability, connect calendars, collect booking information, send automated notifications, and publish booking forms directly on your WordPress site.
The result is a simpler scheduling experience for patients and less administrative work for your practice team.
Ratul Hasan Ripon
I enjoy making complex ideas simple and engaging through my writing and designs. With a strong knowledge on content writing and SEO, I create technical content that’s both easy to understand and interesting.
Table of Content
Subscribe To Get
WordPress Guides, Tips, and Tutorials


Add your first comment to this post