

How to Migrate From Calendly to a WordPress Booking Plugin


Calendly makes scheduling easy, but at some point, you may want more control over your booking system. Maybe you’re tired of sending customers to a separate scheduling page, want to keep your booking experience within your WordPress website, or simply want your scheduling tool to work more closely with the rest of your WordPress stack.
Moving from Calendly to a WordPress booking plugin can solve these problems, but the migration involves more than switching one booking link for another. You’ll need to recreate your event types, availability, booking forms, calendar connections, notifications, and other integrations. You also need to make sure your existing bookings aren’t affected during the transition.
In this guide, we’ll show you how to migrate from Calendly to a WordPress booking plugin step by step. We’ll use an appointment booking plugin for the WordPress-specific examples and show you what to check before, during, and after the migration so you can switch without disrupting your booking workflow.
What Actually Changes When You Move Off Calendly
Moving from Calendly to a WordPress booking plugin isn’t just a matter of changing where your booking link points. You’re moving your entire scheduling workflow from a hosted platform to your own WordPress website.
With Calendly, your booking page, availability settings, and scheduling workflow are managed through Calendly. With a WordPress booking plugin, these are managed from your WordPress dashboard and can become part of your existing website.
That also means there isn’t usually a one-click Calendly-to-WordPress migration. You’ll need to recreate your event types, availability, calendar connections, booking forms, notifications, and integrations in your new system.
The amount of work depends on your setup. A solo user with a few simple events can usually migrate quickly, while a team using round-robin scheduling, multiple calendars, payments, and CRM integrations will need more time to test everything properly.
The key is to know what you currently have before you start rebuilding it.
Before You Start: Inventory Your Calendly Setup
Before you start rebuilding your booking system in WordPress, take some time to review your current Calendly setup. Knowing exactly what you’re using will make the migration smoother and help you avoid missing important settings.
Create a list of your:
- Event types: Meeting names, durations, prices, and booking questions
- Availability: Working hours, buffer times, minimum notice, and booking limits
- Calendar connections: Google Calendar, Outlook, or other calendars
- Meeting integrations: Zoom, Google Meet, or other video tools
- Payment settings: Any payments or deposits collected during booking
- Notifications: Confirmation, reminder, cancellation, and rescheduling emails
- Team settings: Hosts, individual availability, and round-robin scheduling
- Booking links and embeds: Every Calendly URL or widget currently used on your website and marketing channels
- Upcoming bookings: Appointments scheduled after your planned migration date
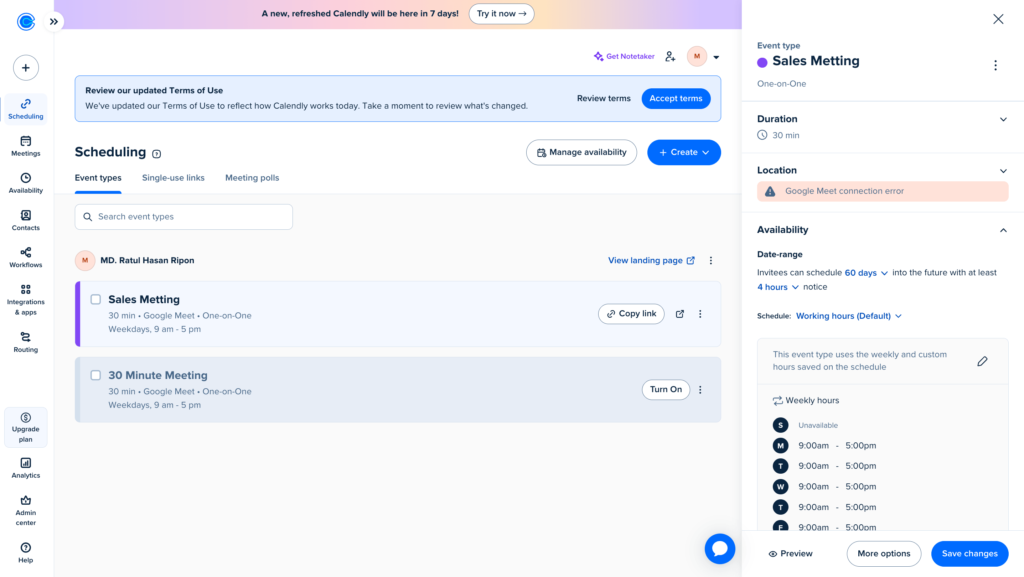
This list will become your migration checklist. Once you know what needs to be moved, you can recreate each part of your booking workflow in your WordPress plugin without overlooking anything important.
How to Migrate From Calendly to a WordPress Booking Plugin
Once you’ve decided to move away from Calendly, the next step is rebuilding your scheduling workflow in WordPress. The process is straightforward when you know what needs to be moved and tested.
Follow these steps to recreate your booking setup and make the switch without disrupting your existing appointments.
Choose the Right WordPress Booking Plugin
Once you’ve documented your Calendly setup, the next step is choosing a WordPress booking plugin that can handle the same workflow.
Don’t choose a plugin based only on whether it lets people book appointments. Look at the features you actually use in Calendly and make sure your new plugin can support them.
For this guide, we’ll use FluentBooking as the example. It brings appointment scheduling directly into WordPress and supports features such as calendar synchronization, team scheduling, payments, notifications, and integrations.
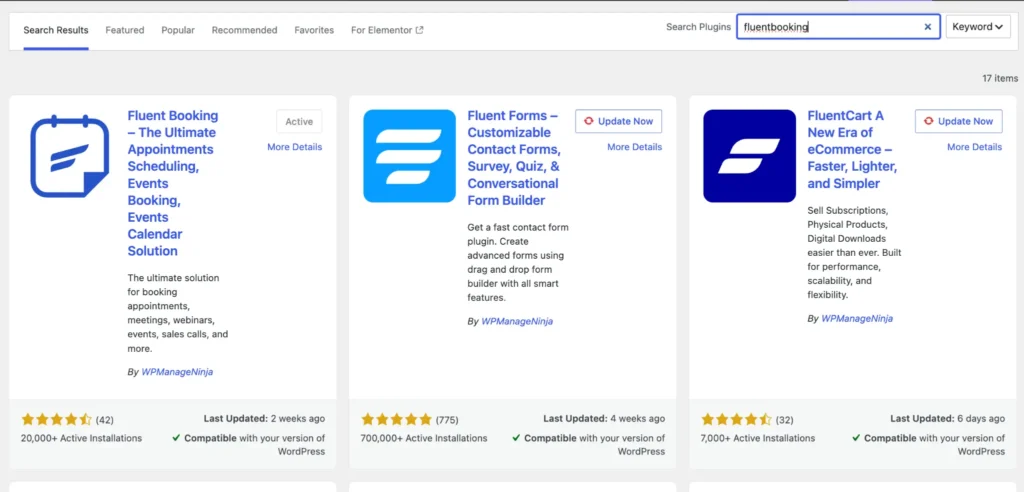
Once you’ve chosen your plugin, you can start rebuilding your Calendly setup inside WordPress.
If you’re still deciding whether to move away from Calendly or comparing different scheduling tools, our guide to the best free Calendly alternatives can help you compare your options before choosing a WordPress booking plugin.
Install and Set Up Your WordPress Booking Plugin
Now that you’ve chosen your booking plugin, it’s time to install it on your WordPress website and set up the basic scheduling structure.
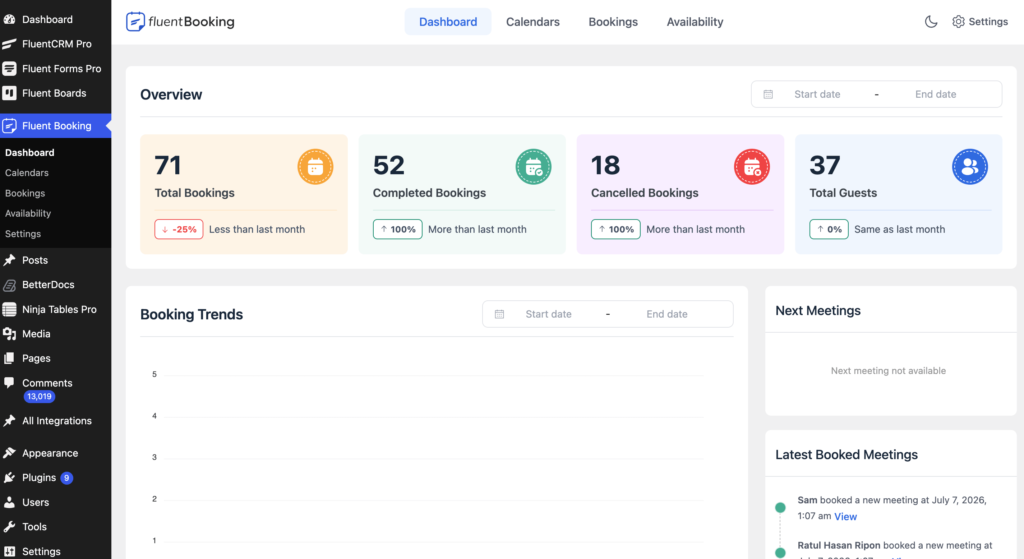
Install and activate FluentBooking from your WordPress dashboard. Once it’s ready, open the FluentBooking dashboard and create your host profile. If you’re managing bookings for a team, you can add the other team members later when you configure team scheduling.
Before creating your first booking event, check your basic settings, including:
- Your business or host name
- Time zone
- Default availability
- Calendar connection
- Booking page settings
You don’t need to recreate every Calendly setting at once. Start with the basic structure, then move through your existing Calendly setup one section at a time.
Once your WordPress booking plugin is installed and your basic settings are ready, you can start recreating your Calendly event types.
Recreate Your Calendly Event Types
Now it’s time to recreate the events you’ve documented from Calendly.
For each Calendly event, create a corresponding booking event in your WordPress booking plugin. Keep the setup as close to your existing workflow as possible during the initial migration.
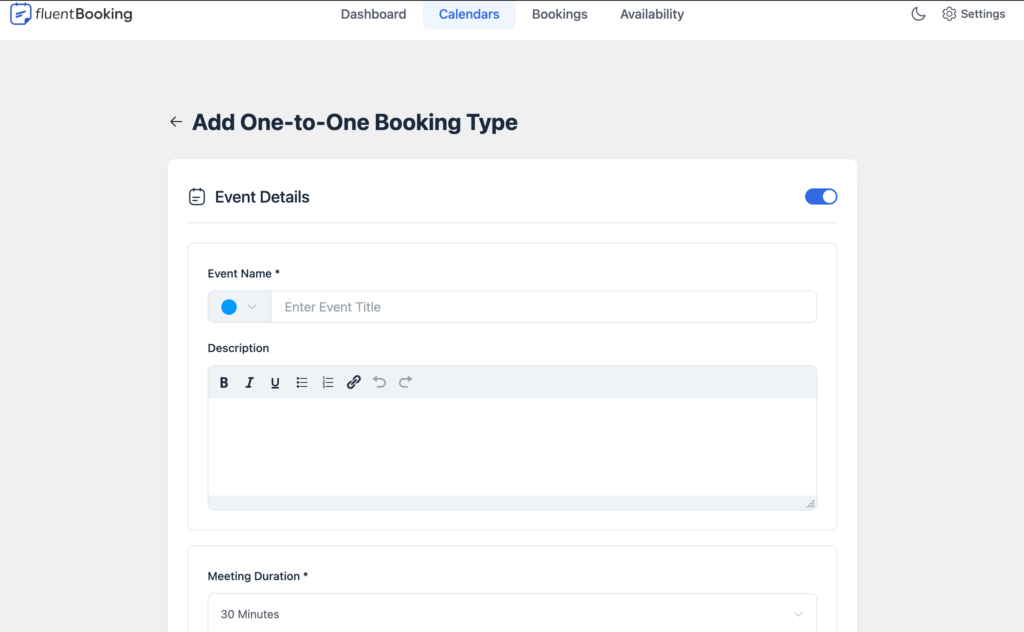
For example, if you currently offer:
- 15-Minute Intro Call
- 30-Minute Discovery Call
- 60-Minute Consultation
Create a separate booking event for each one rather than combining them into a single event.
For each event, review settings such as:
- Event name and description
- Meeting duration
- Location or meeting platform
- Buffer time
- Availability
- Booking questions
- Minimum scheduling notice
- Maximum booking window
- Confirmation and notification settings
- Payment requirements, if applicable
With FluentBooking, you can configure these settings when creating a new booking event and adjust them later as your workflow evolves.
This is also a good opportunity to clean up your booking setup. If you have old event types that you no longer use, there’s no reason to recreate them just because they exist in your Calendly account.
Once your event types are recreated, the next step is to make sure customers can book them only when you’re actually available.
Rebuild Your Availability Settings
After recreating your event types, set up your availability so the new booking system offers the same time slots as Calendly.
Review the availability settings you documented earlier and recreate them in your WordPress booking plugin. Pay attention to:
- Working days and hours
- Buffer time between meetings
- Minimum scheduling notice
- How far ahead customers can book
- Unavailable dates and holidays
- Event-specific availability
- Time zone settings
For example, if your Calendly setup allows customers to book from 10 AM to 5 PM, Monday through Friday, with at least 12 hours’ notice, recreate those rules in your new system.
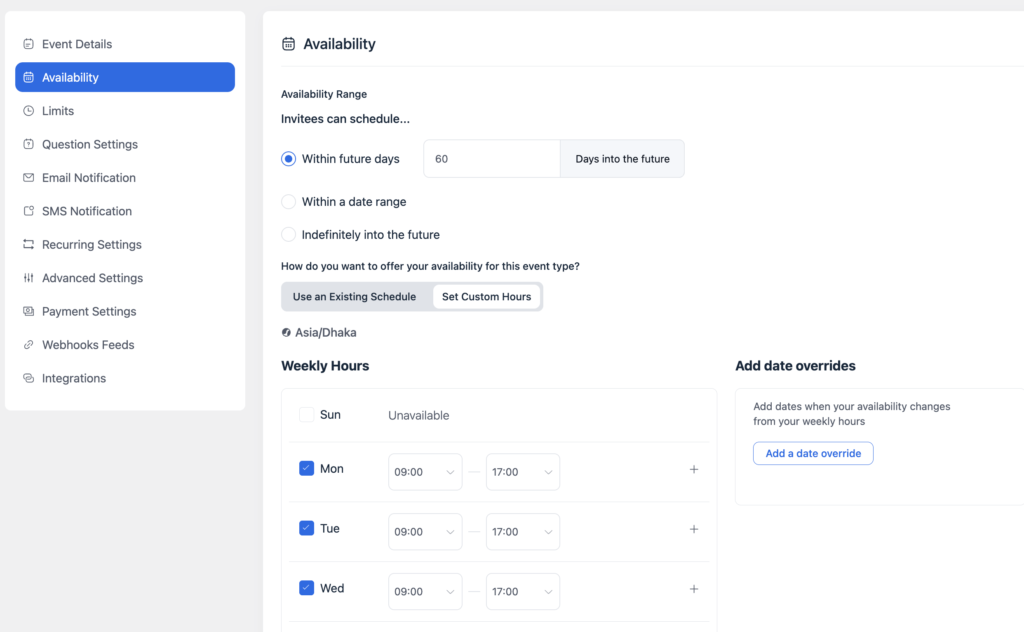
With FluentBooking, you can configure weekly availability as well as date-specific overrides, giving you control over when each event can be booked.
Once you’ve configured the schedule, compare the available slots with your Calendly setup. It’s worth checking this before moving on because incorrect availability can lead to double bookings or customers seeing times you don’t actually want to offer.
After your availability is ready, the next step is connecting your calendar and other integrations.
Reconnect Your Calendar and Other Integrations
Your calendar connection is one of the most important parts of the migration. It helps your new booking system recognize when you’re already busy and prevents customers from booking unavailable time slots.
Connect the same calendar you used with Calendly, such as Google Calendar or Outlook. Then check that existing events are being recognized correctly by your WordPress booking plugin.
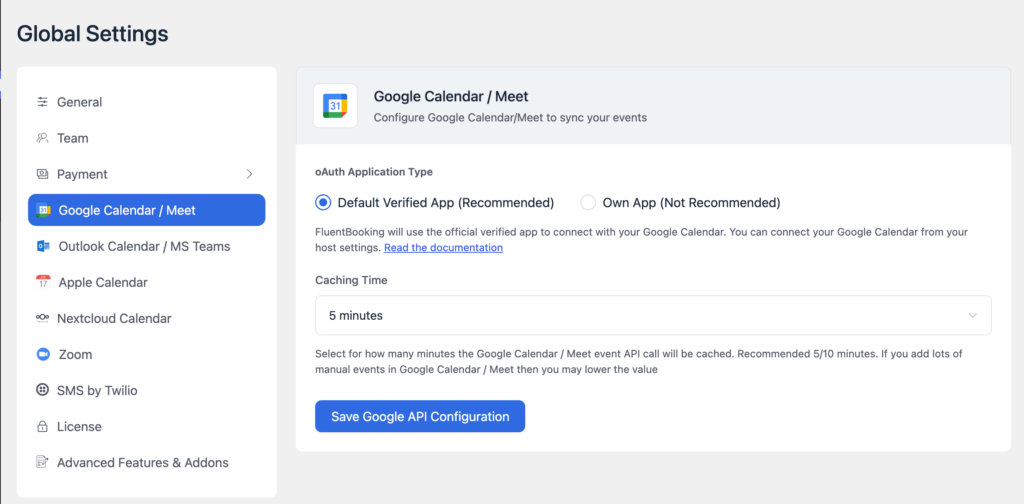
Next, reconnect the other tools that are part of your scheduling workflow. Depending on your setup, this might include:
- Zoom or Google Meet for online meetings
- Stripe or another payment gateway for paid appointments
- CRM integrations for managing new leads and customers
- Email or automation tools for follow-ups
- Team calendars for multiple hosts
If you’re using FluentBooking, you can connect supported calendar, meeting, payment, and CRM integrations from its settings and configure them for individual booking events.
Don’t just connect everything and assume it’s working. Create a test booking and check whether the calendar event, meeting link, payment, and connected automation are triggered correctly.
Once your integrations are working, you can move on to recreating your booking form and customer notifications.
Recreate Your Booking Form and Notifications
Your booking form is another important part of the migration. If you collect information from customers before a meeting, make sure those fields are available in your new booking system.
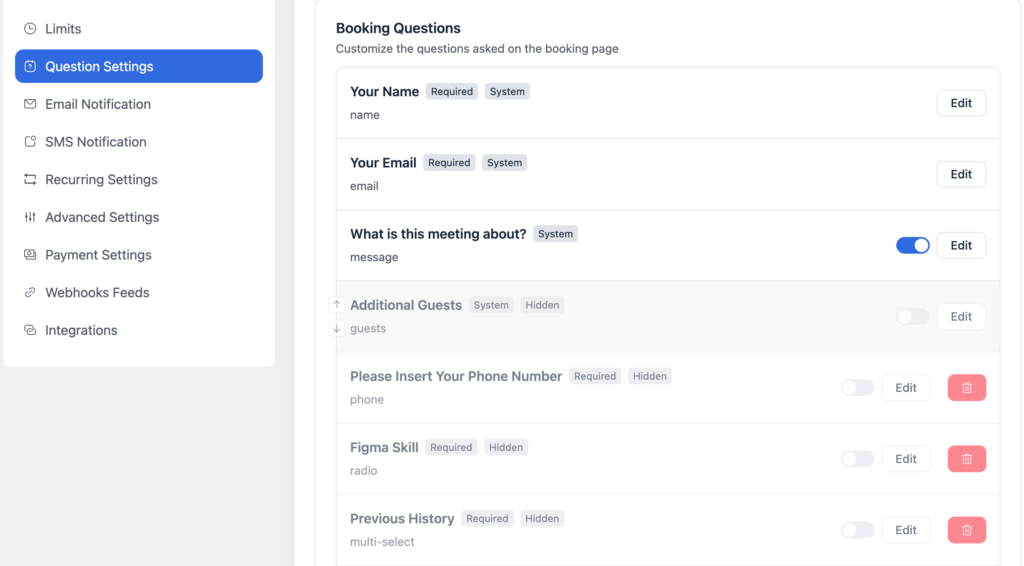
Review the questions you currently use in Calendly and recreate the ones you still need. These might include:
- Name and email address
- Company name
- Website URL
- Phone number
- Reason for booking
- Service or meeting type
- Additional notes or requirements
You don’t have to copy every question. If some fields are no longer useful, this is a good opportunity to simplify the form and make booking easier for your customers.
Next, recreate your booking notifications. Depending on your workflow, you may need:
- Booking confirmation emails
- Host notifications
- Reminder emails
- Cancellation notifications
- Rescheduling notifications
- Follow-up emails
With FluentBooking, you can customize your booking form fields and configure notifications for different booking events.
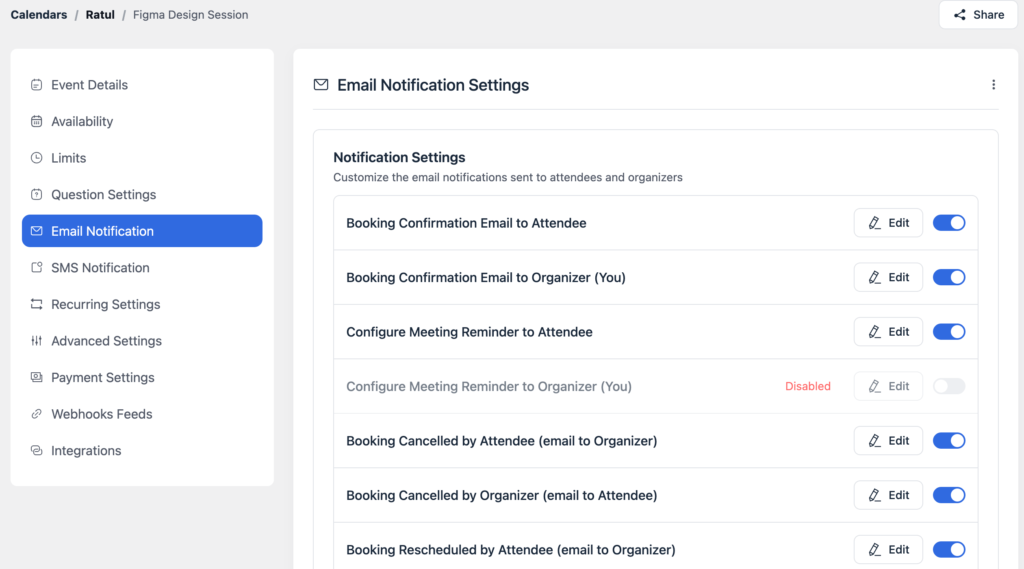
Once you’ve finished, make a test booking and check both the form and emails from a customer’s perspective. Make sure the right information appears in the confirmation and that the customer receives all the important meeting details.
Recreate Team Scheduling and Round-Robin Bookings
If you use Calendly for team scheduling, recreate your team members, availability, and booking rules in your WordPress booking plugin.
If you use round-robin scheduling, test it carefully to make sure bookings are distributed as expected. Different platforms may handle routing differently.
With FluentBooking, you can create team events and use round-robin scheduling to distribute bookings among multiple hosts while considering their calendar availability.
Before going live, test a few bookings and make sure:
- The right hosts are included
- Individual availability is respected
- Calendar conflicts are blocked
- Bookings are assigned correctly
- The correct notifications are sent
Once everything works as expected, you can move on to replacing your Calendly links and embeds.
Replace Your Calendly Links and Embeds
Once your new booking system is ready, it’s time to replace the Calendly links and embeds across your website and other channels.
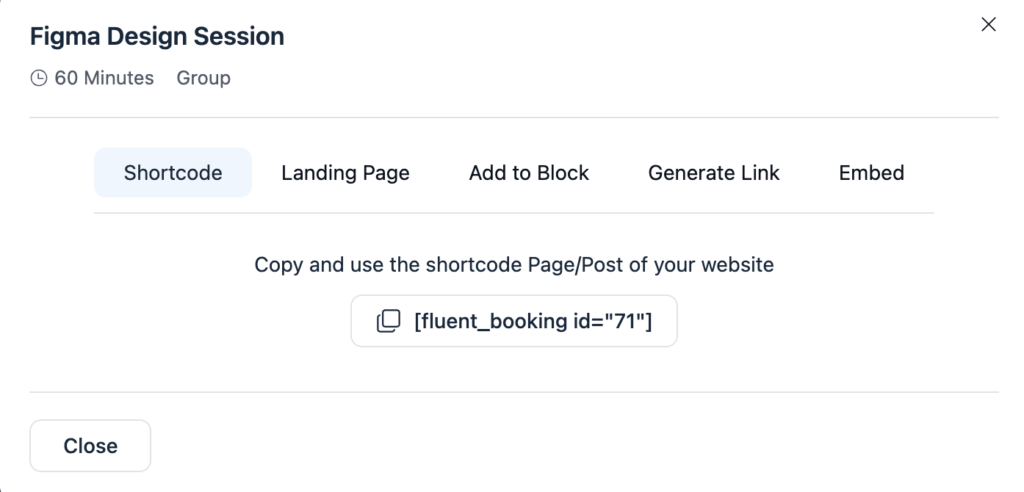
Start by checking your:
- Website pages and buttons
- Contact and booking pages
- Blog posts and landing pages
- Email signatures
- Social media profiles
- Marketing emails
- Ad campaigns
Remove any Calendly embeds from your WordPress pages and add your new booking form instead. With FluentBooking, you can publish booking events directly on your WordPress site using booking pages, shortcodes, or WordPress blocks.
Also search your website for calendly.com to find links or embeds you may have forgotten.
If you control a page that currently redirects visitors to Calendly, update it to point to your new WordPress booking page. This helps ensure new customers use your new system instead of accidentally creating bookings through Calendly.
Handle Your Existing Calendly Bookings
Before you shut down Calendly, review all upcoming appointments. Your new WordPress booking plugin won’t automatically recreate bookings that customers have already made through Calendly.
Make a list of upcoming meetings and check the:
- Customer name and contact details
- Date and time
- Calendar event
- Meeting link
- Assigned host
If the existing meeting can continue as planned, leave it on the calendar. If the meeting link or other details will change after the migration, notify the customer in advance so they know what to expect.
You should also keep your exported Calendly data for future reference. Once all upcoming appointments are accounted for, you can move to the final testing stage.
Test Your New Booking System
Before sending customers to your new WordPress booking page, test the complete booking process yourself. Don’t rely only on the settings in your WordPress dashboard. Go through the booking flow as a customer would.
Check that:
- Available time slots are correct
- Calendar conflicts are blocked
- The booking form works properly
- Confirmation emails are delivered
- Calendar events are created
- Meeting links work
- Reminders are triggered
- Cancellation and rescheduling work
- Payments are processed correctly, if applicable
It’s also worth testing the booking page on mobile devices since many customers may book from their phones.
If you’re using team scheduling, complete a few test bookings to make sure bookings are assigned to the correct hosts.
Fix any issues you find before replacing your remaining Calendly links. A few test bookings now can save you from dealing with failed bookings after the migration goes live.
Run Both Systems During the Transition
You don’t have to switch from Calendly to your WordPress booking plugin overnight. Keeping both systems available for a short period can give you time to catch problems before fully committing to the new setup.
Once your WordPress booking system has been tested, stop promoting your Calendly links and direct new customers to your WordPress booking page.
During this transition, monitor:
- New bookings
- Calendar synchronization
- Confirmation and reminder emails
- Meeting links
- Team assignments
- Payment and CRM integrations
Keep Calendly active until you’re confident that everything is working properly and all upcoming appointments have been accounted for.
Once the new system is stable, remove the remaining Calendly links and cancel or downgrade your Calendly subscription.
Complete the Final Cutover
Once you’ve tested your new WordPress booking system and confirmed that everything works correctly, it’s time to complete the migration.
Before making the final switch, do one last check:
- All Calendly links and embeds have been replaced
- Upcoming Calendly bookings are accounted for
- Calendar synchronization is working
- Meeting and payment integrations work correctly
- Confirmation and reminder emails are being delivered
- Team scheduling works as expected
After that, make your WordPress booking page the primary way customers schedule appointments. Keep Calendly active for a short period if you still have upcoming appointments or want an extra safety net.
Once you’re confident that the new system is handling bookings correctly, you can cancel or downgrade your Calendly subscription.
Calendly to WordPress Migration Checklist
- Export important Calendly data
- Inventory event types and availability
- Choose a WordPress booking plugin
- Recreate event types
- Rebuild availability
- Connect calendars and integrations
- Recreate booking forms and notifications
- Set up team scheduling
- Replace Calendly links and embeds
- Account for upcoming bookings
- Test the complete booking flow
- Run both systems during the transition
- Complete the final cutover
What to Verify Before You Cancel Calendly
Before you cancel Calendly completely, take a final look at the parts of your booking workflow that could cause problems if they aren’t configured correctly.
- Calendar Sync: Check that your connected calendars are synced correctly, existing events block unavailable slots, and new bookings appear on the calendar.
- Team and Round-Robin Scheduling: Test several bookings to make sure appointments are assigned to the right hosts and each team member’s availability is respected.
- Payments and Automations: Test payments, CRM updates, email sequences, and other automations to make sure they trigger correctly after a booking.
- Existing Bookings: Make sure every upcoming Calendly appointment is accounted for and customers have the correct date, time, host, and meeting details.
- Booking Forms: Submit the booking form as a customer and check that all required fields, custom questions, and confirmation messages work correctly.
- Notifications and Reminders: Test confirmation, reminder, cancellation, and rescheduling emails to make sure they are delivered with the correct appointment details.
Once you’ve checked these areas and your new booking system has handled real or test bookings successfully, you’re in a much safer position to cancel your Calendly subscription.
Final Thoughts
Migrating from Calendly to a WordPress booking plugin doesn’t have to be complicated. The key is to treat it as a complete workflow migration rather than simply replacing your Calendly link.
Start by exporting the data you need and documenting your existing event types, availability, integrations, forms, and team settings. Then recreate your setup in WordPress, replace your Calendly links, and test the entire booking experience before making the final switch.
If you’re using WordPress and want your booking system to live alongside the rest of your website, FluentBooking can help you manage appointments directly from your WordPress dashboard.
Take your time with the transition, keep Calendly active while you test, and only cancel it once you’re confident your new booking system is working smoothly.
Ratul Hasan Ripon
I enjoy making complex ideas simple and engaging through my writing and designs. With a strong knowledge on content writing and SEO, I create technical content that’s both easy to understand and interesting.
Table of Content
Subscribe To Get
WordPress Guides, Tips, and Tutorials
Add your first comment to this post