
You can let your users choose offline payment in FluentBooking. With this option enabled, users can select offline payment directly from the booking calendar. In this guide, we’ll walk you through the steps to enable offline payments for your bookings.
The Offline Payment feature is only available in FluentBooking Pro. You’ll need the FluentBooking Pro plugin to access this feature.
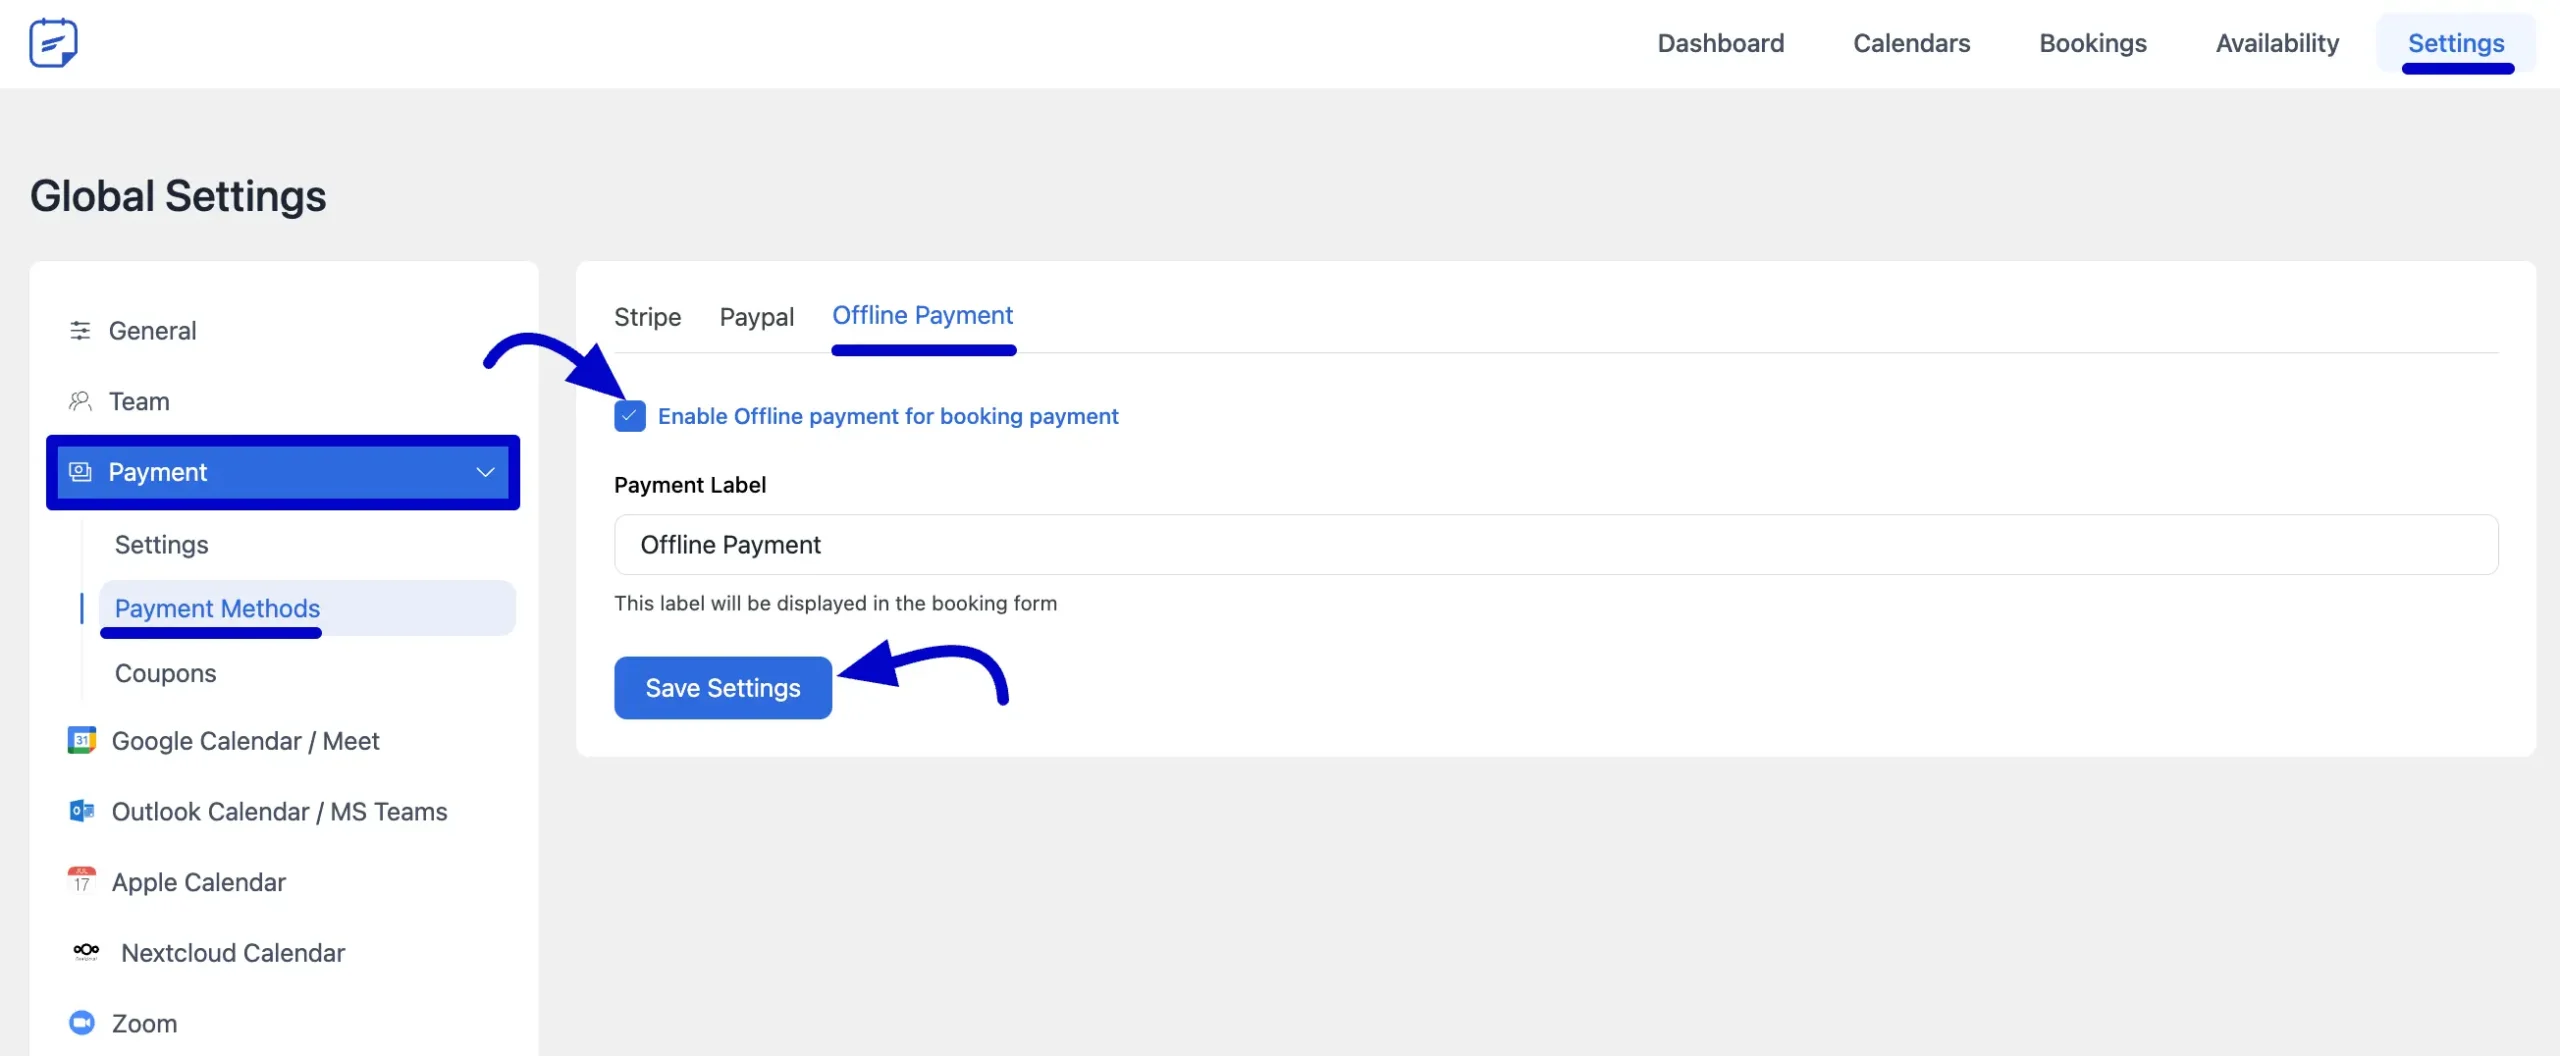
Enable Offline Payment #
Before proceeding, make sure the main Global Payment Module is enabled from Payment Setting.
Go to the WordPress admin dashboard, navigate to FluentBooking > Settings, and select Offline Payment. Now, check on the Enable Offline Payment for Booking Payment to enable the Offline Payment options.
Payment Label: You can customize the text your clients will see on the booking form. The default is (Offline Payment). Now, click the Save Settings button to apply your changes.
Configure Offline Payment for Booking Forms #
Once you’ve enabled Offline Payment from the Settings, you’ll need to turn it on for individual events.
From your FluentBooking dashboard, navigate to the Calendars tab. Find the booking event you want to configure and click on it to open the settings.
To do that, go to the Edit page of an existing event or create a new one. From the left sidebar, click on Payment Settings.
Now, check the option Enable this event as Paid and Collect Payment on Booking to activate payments for the event.
Next, check the Enable Offline Payment Method option. You can also enable other payment methods to let users choose from multiple options.
In the Booking Payment Items section, define the item label and price. For example, you can enter “Booking Fee” as the name and set your desired price. You can click Add more items to add multiple line items if needed.
Finally, click the Save Settings button to apply your changes.

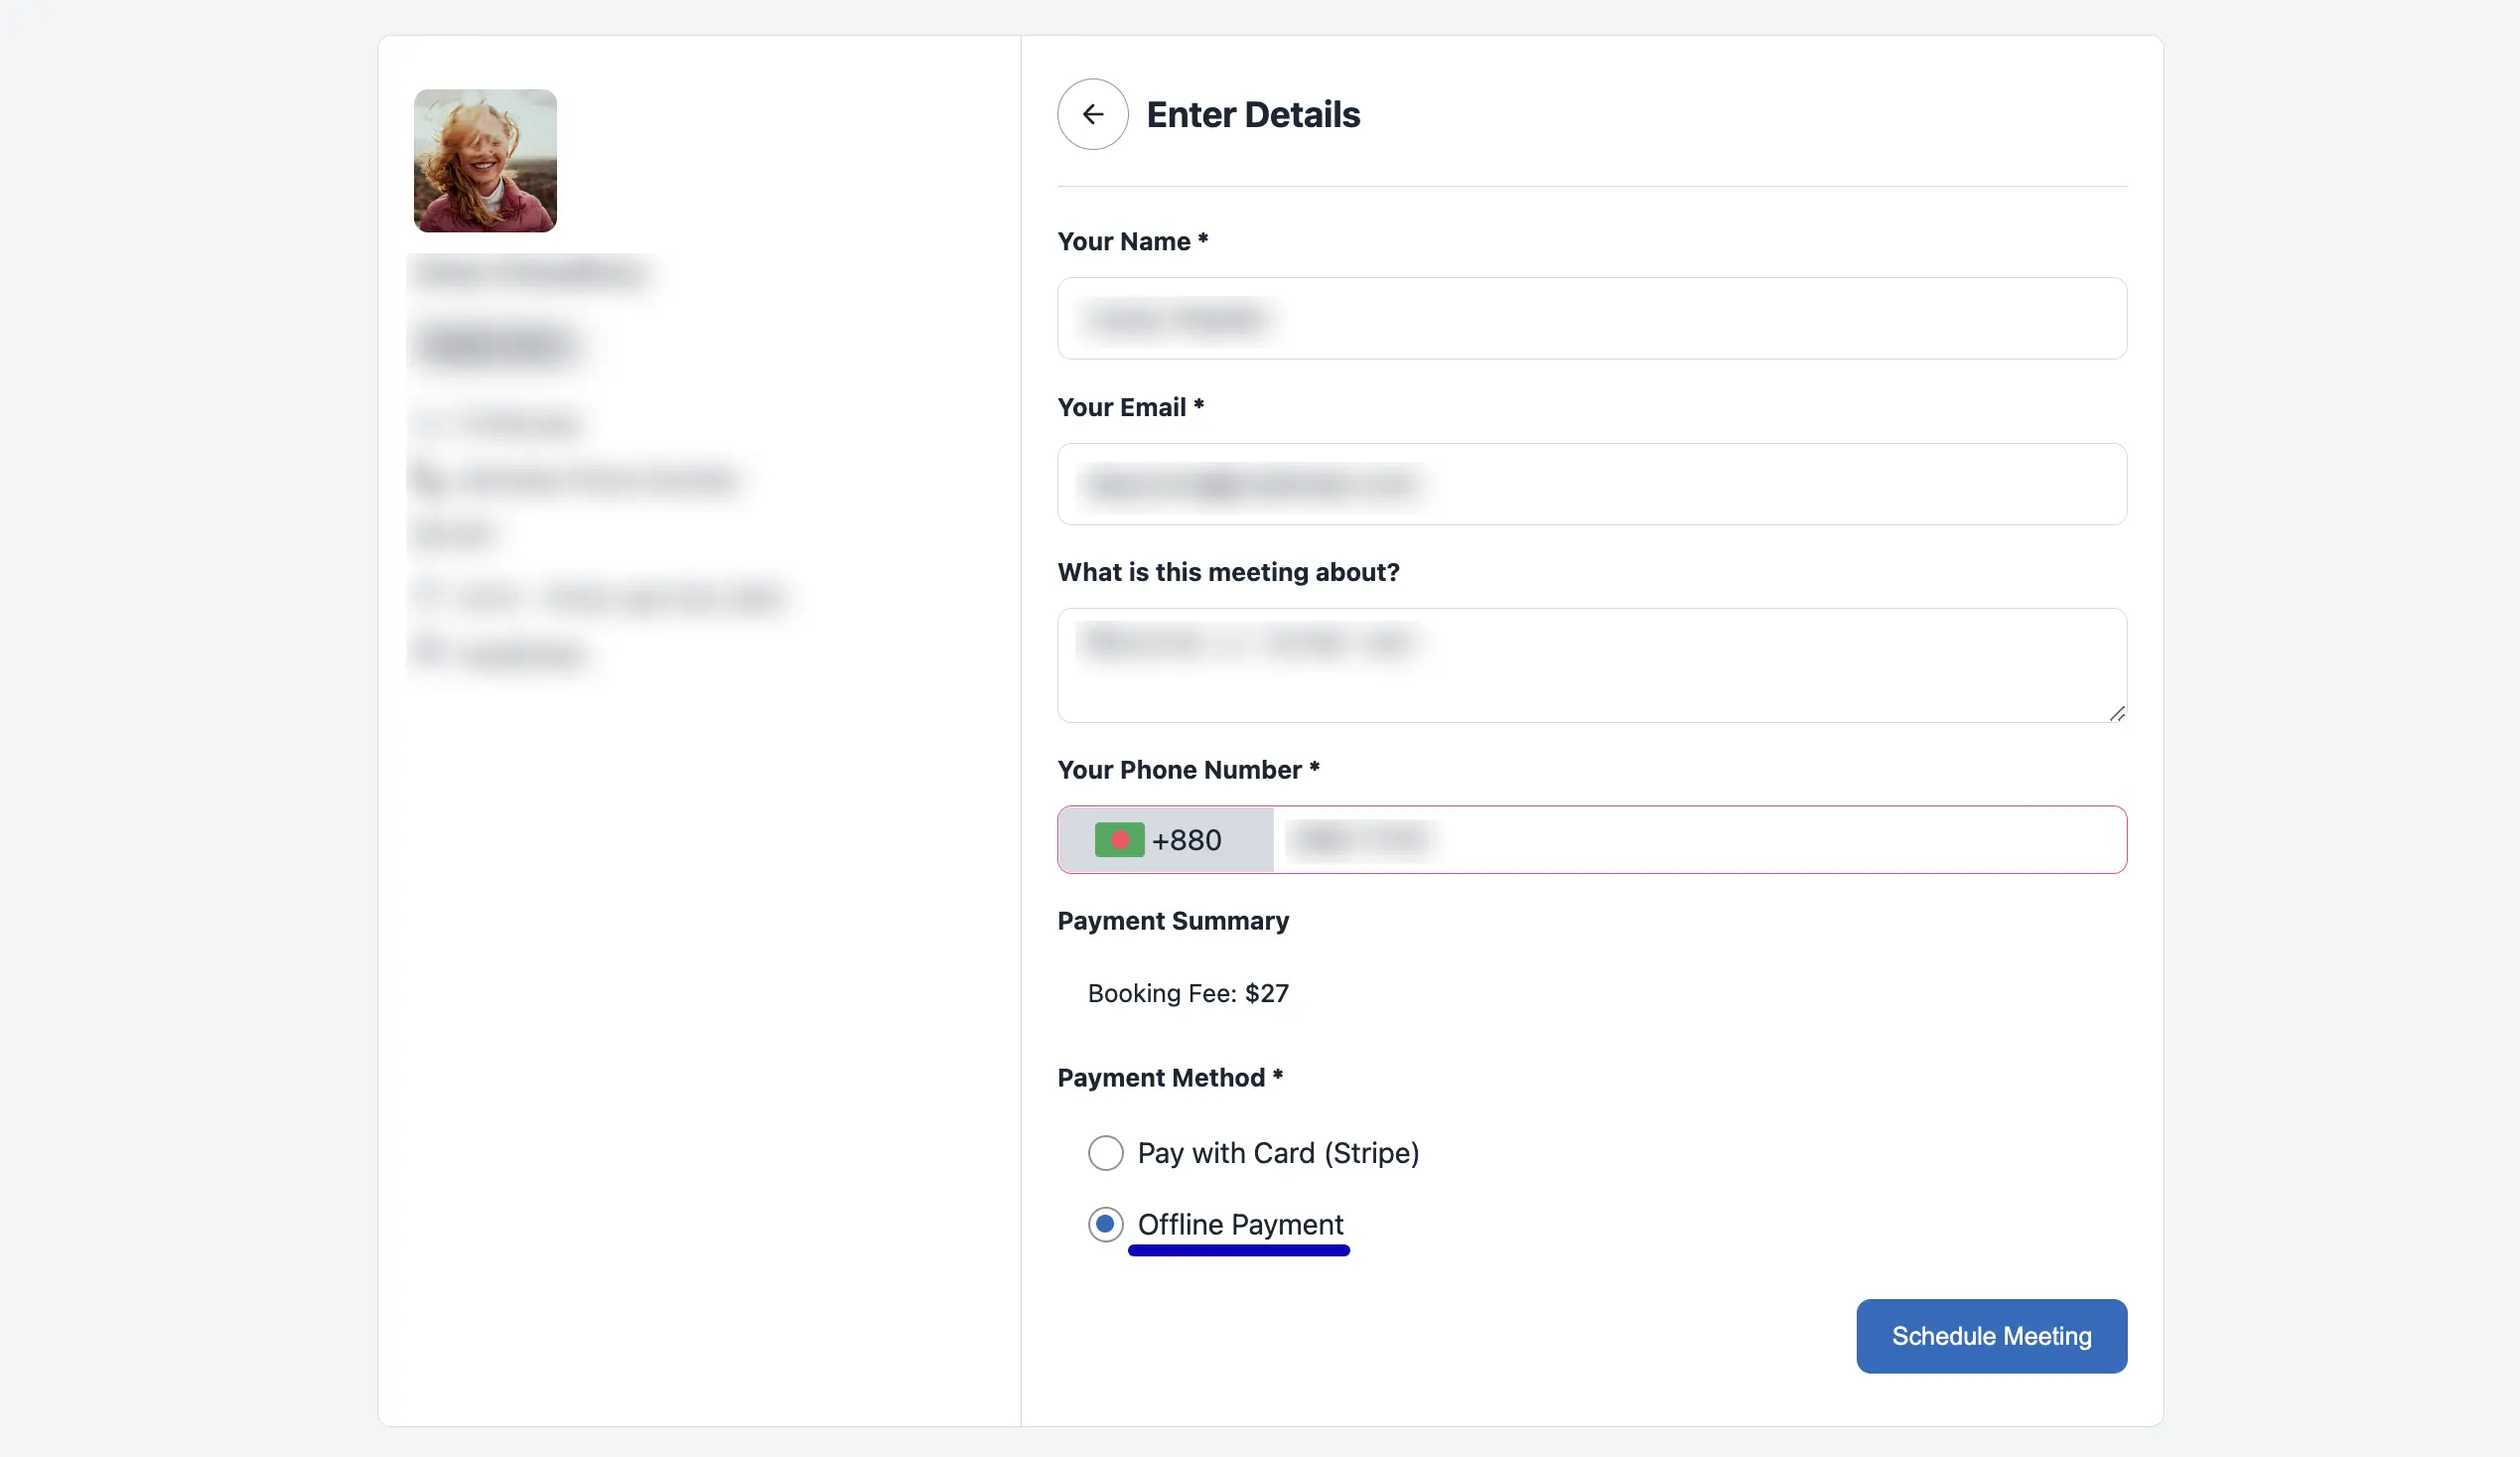
Preview #
In the Booking Calendar, users will see the Offline Payment option displayed as shown in the screenshot below.
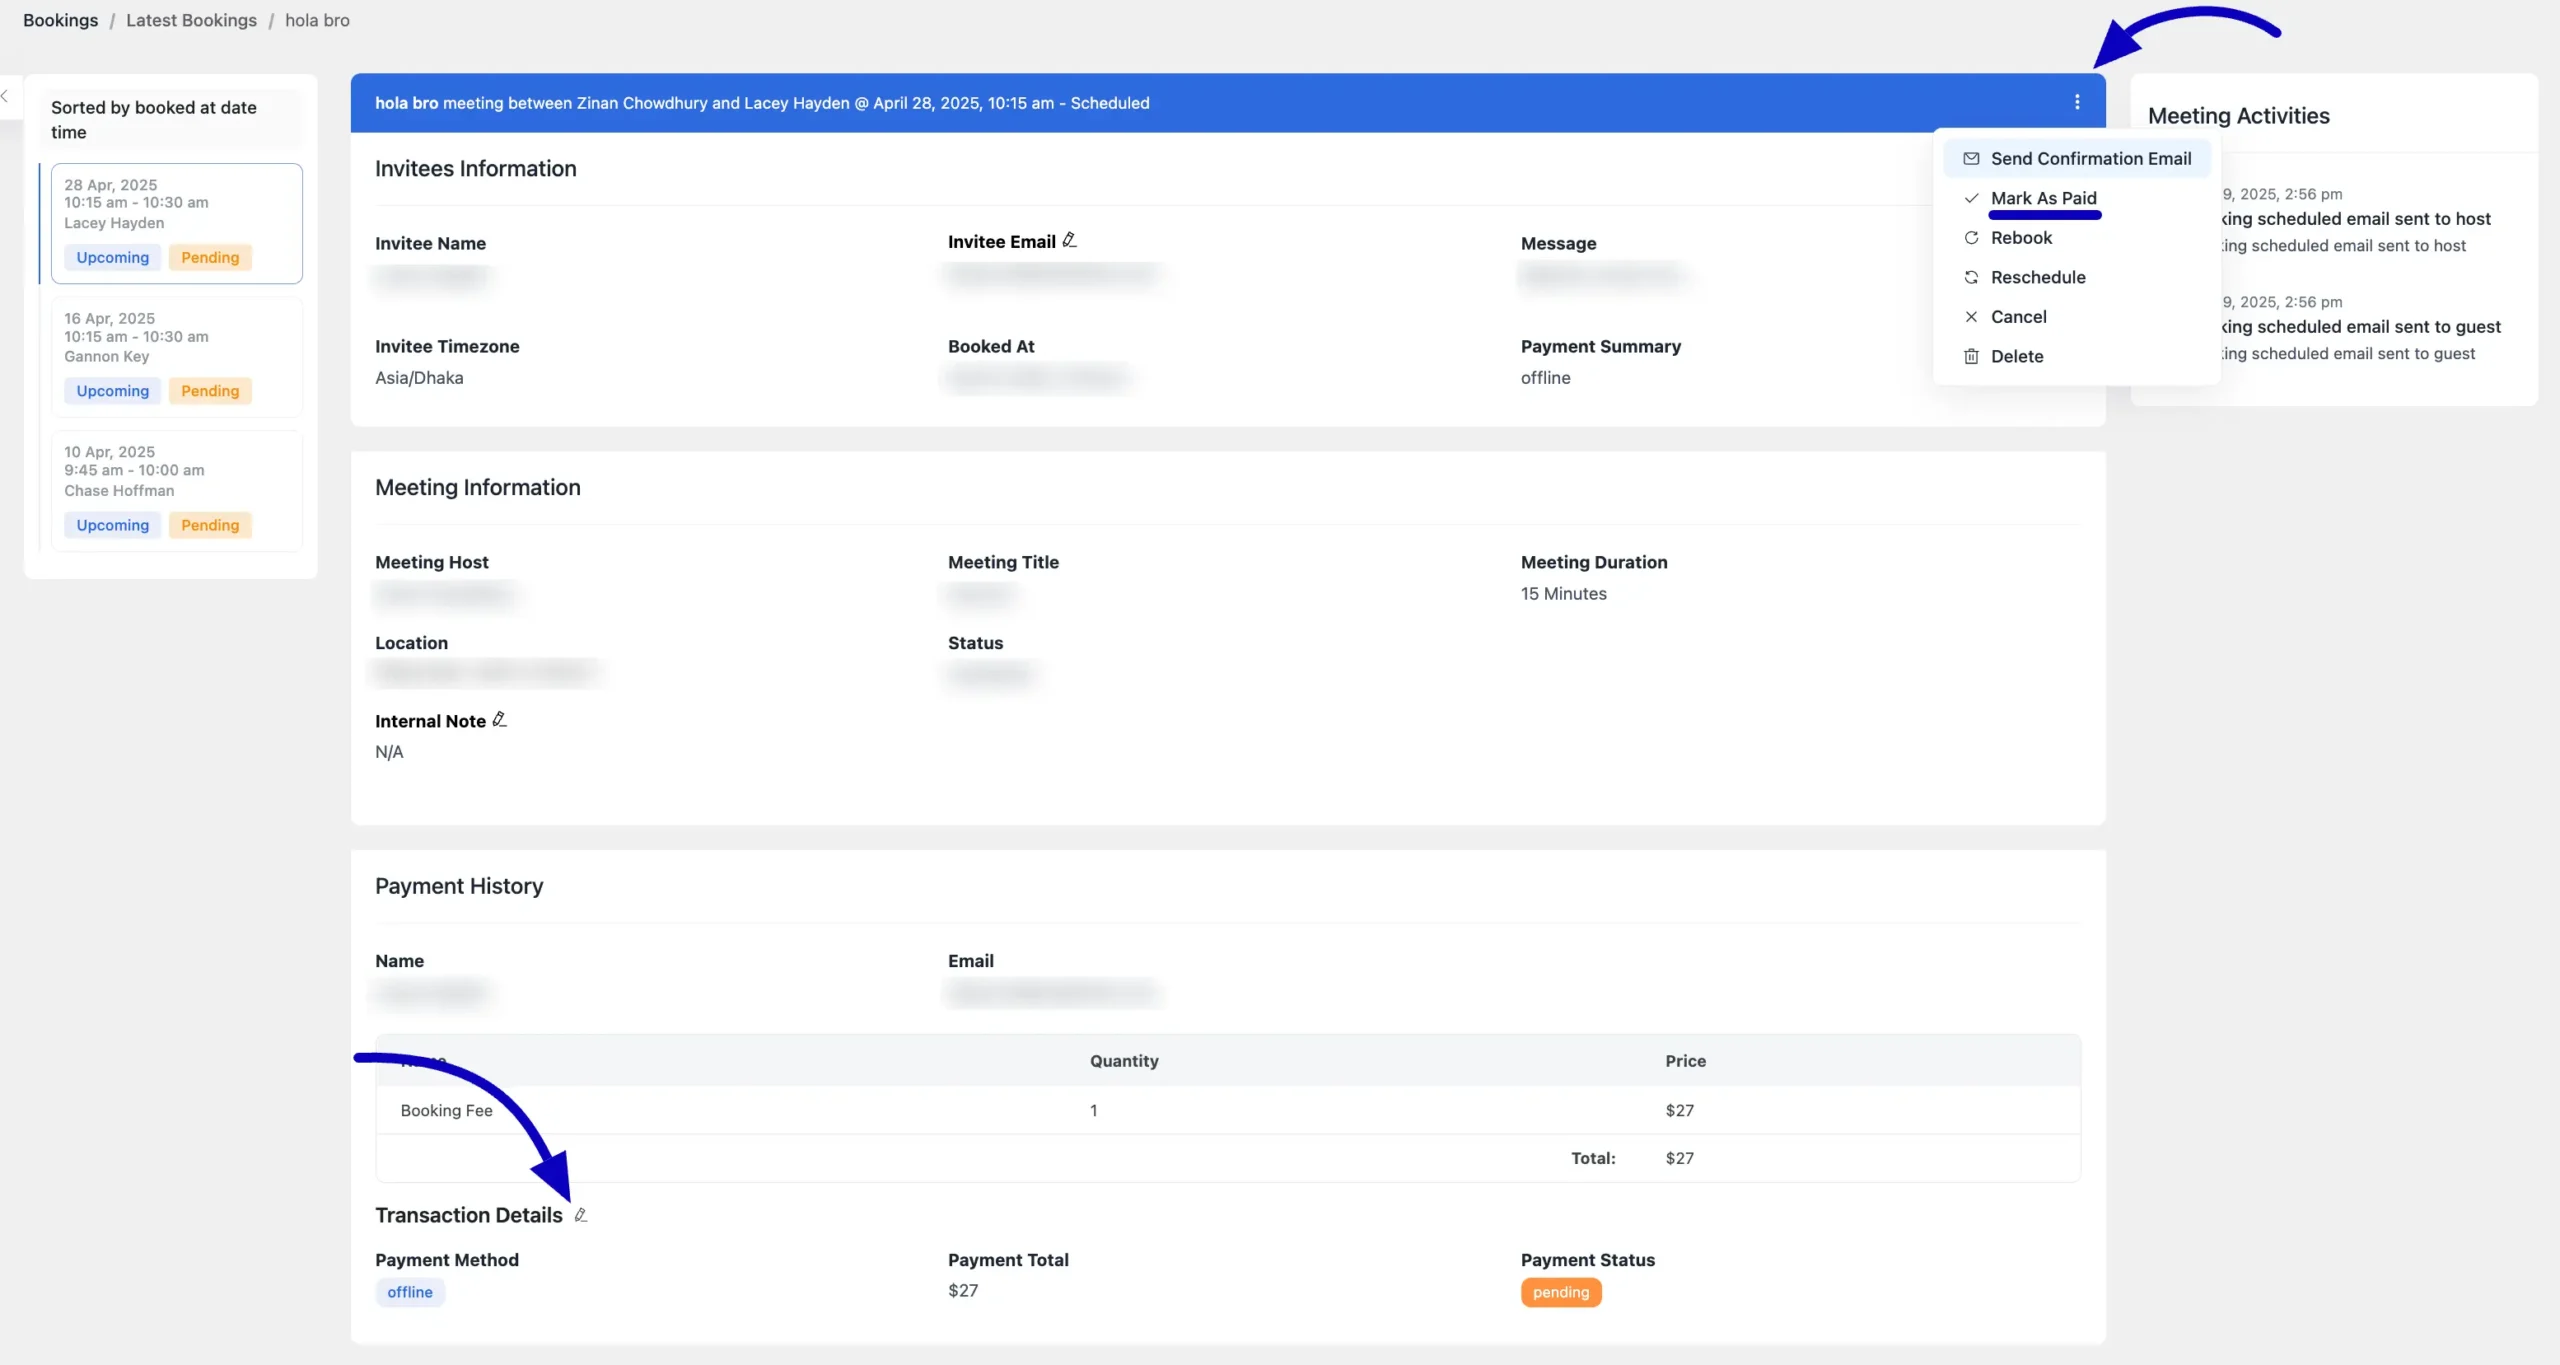
Booking Details Page #
On the Booking Details page, you’ll find the transaction details. To mark a payment as completed, click the three-dot icon and select Mark as Paid.
Alternatively, you can update the payment status from the Billing Details section. Just click the Edit icon next to the Transaction Details and adjust the status as needed.
That’s how you can easily enable and manage offline payments for your booking events. If you have any further questions, feel free to reach out to our support team—we’re here to help!


