

Zoom integration simplifies the process of scheduling and handling online meetings, offering audio, chat, and video call options.
To integrate Zoom with FluentBoooking you need to follow some straightforward steps described in this guideline.
Setting Up Zoom Integration #
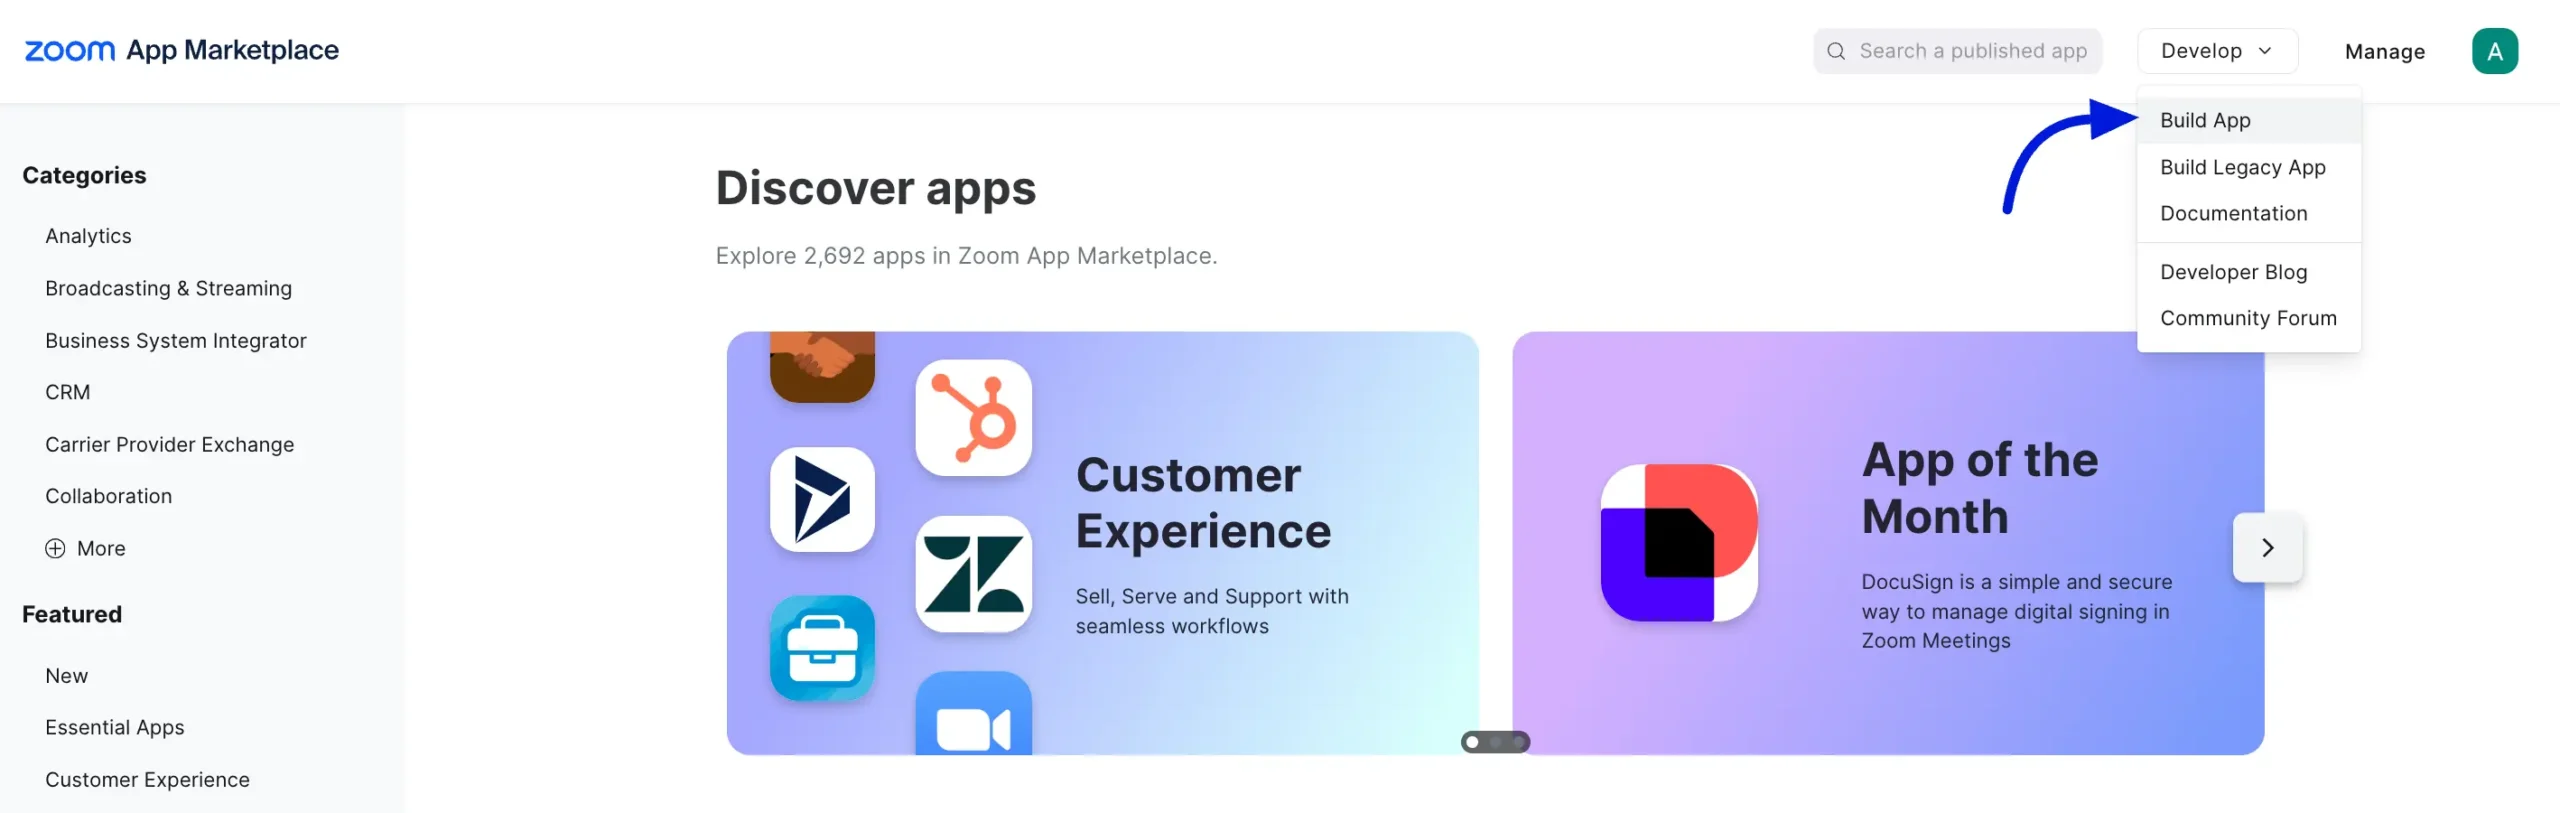
To connect your FluentBooking with Zoom you need some credentials. First, go to your Zoom Marketplace and log in or create a new account.
Create Zoom App #
You have to create a Zoom App in order to get the credentials for the integration. On the top right side, you will find the Develop button hover over the button and you will find the Build App option click on it.
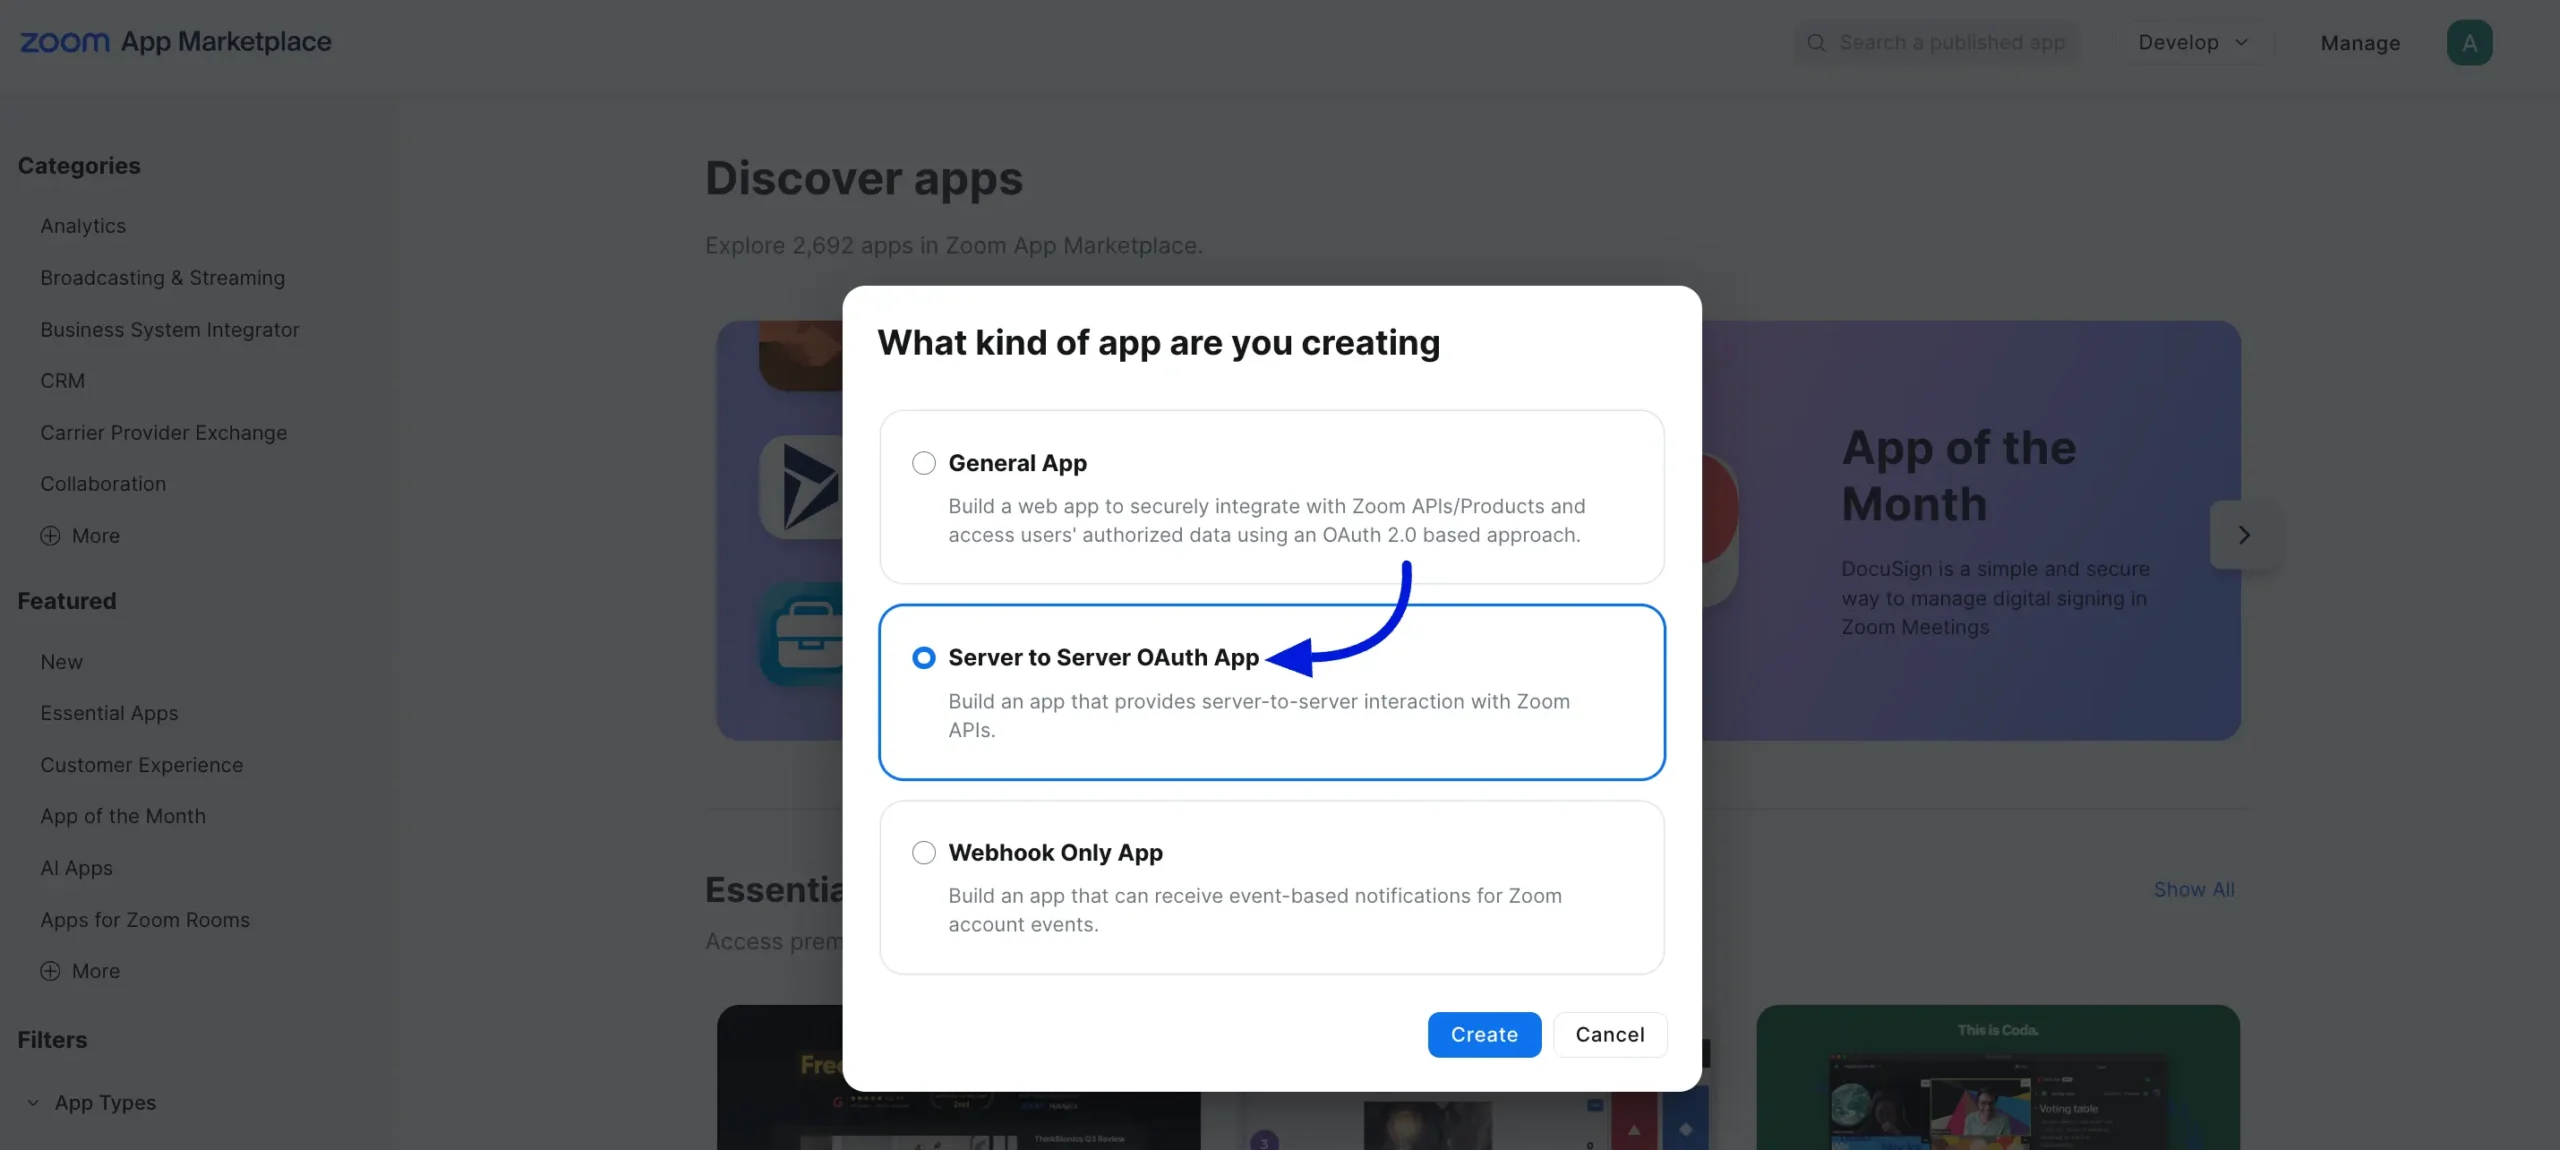
Here you need to select the app type Server-to-Sever OAuth App then click on the Create button.
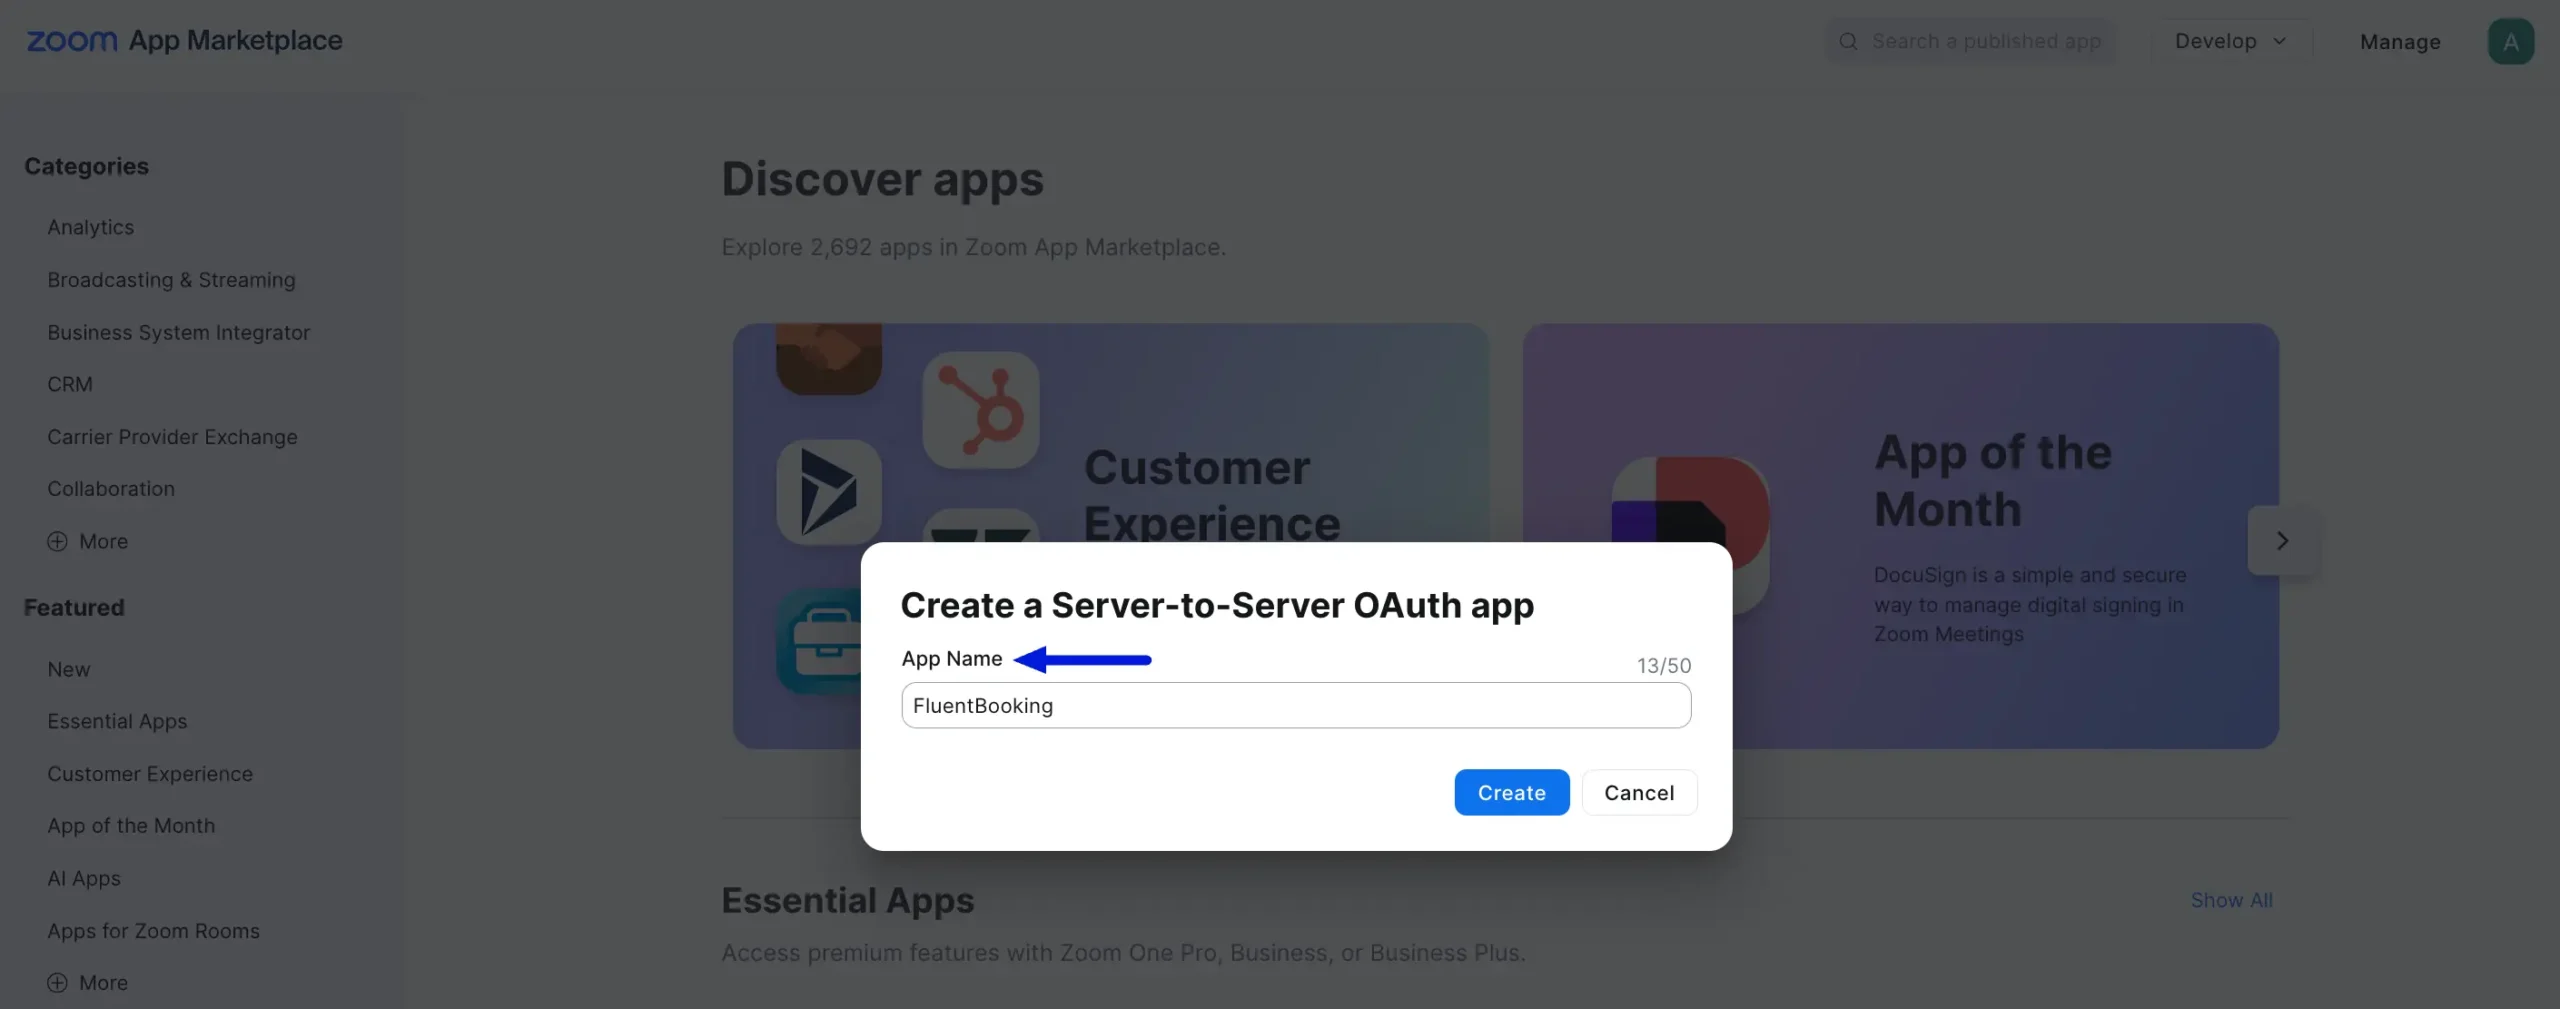
Now give a name to your App then click on the Create button.
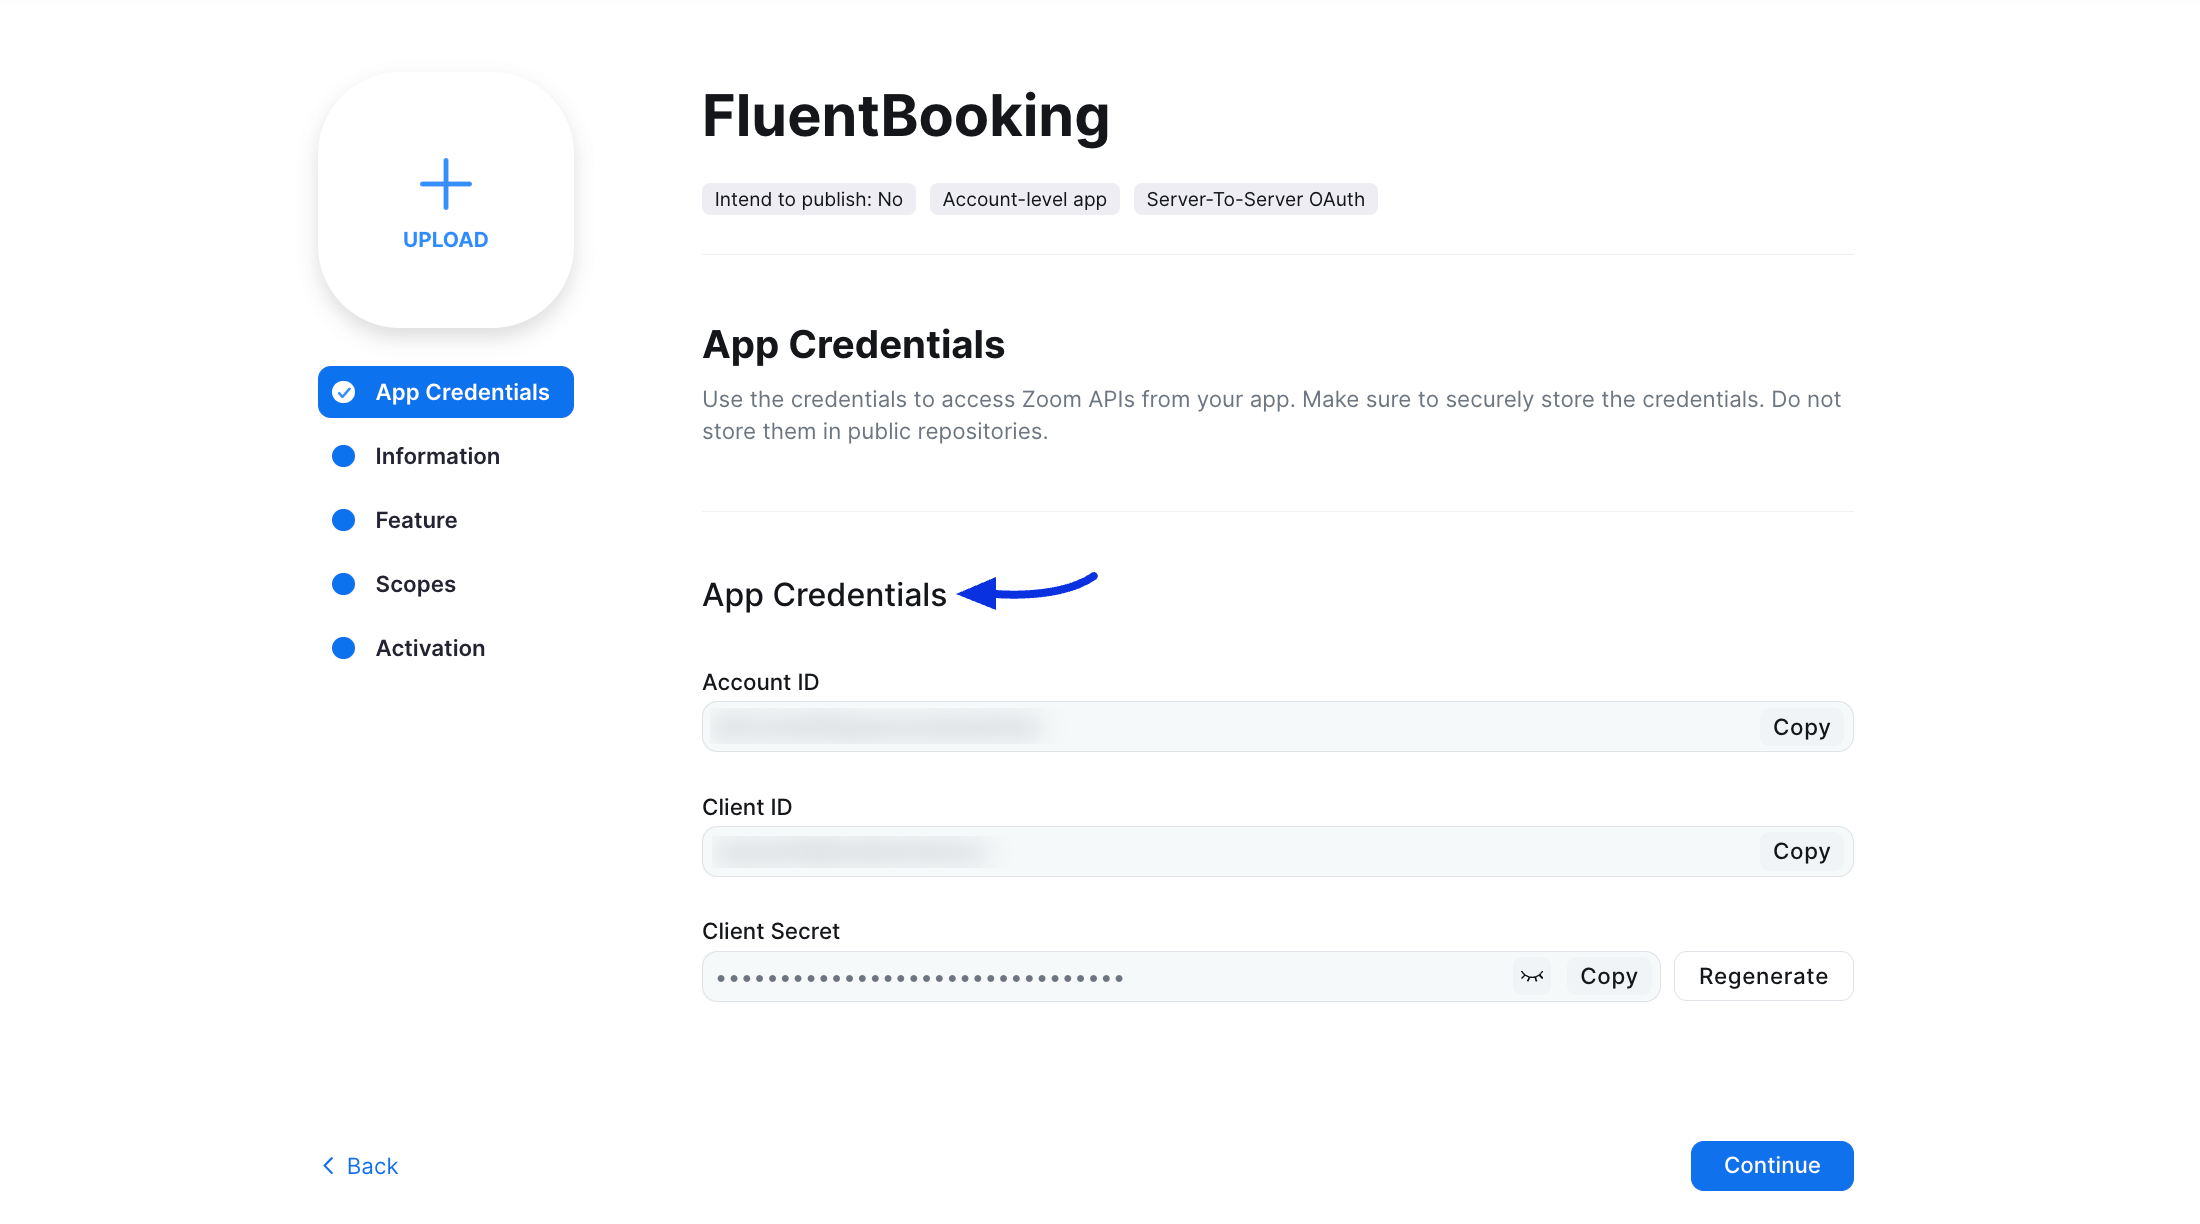
App Credentials #
Now you will be taken to the App Credential page where you will get the App credentials. At this time you can copy the credentials to FluentBooking but that doesn’t complete the process, so keep the copied credential in the clipboard for later use.
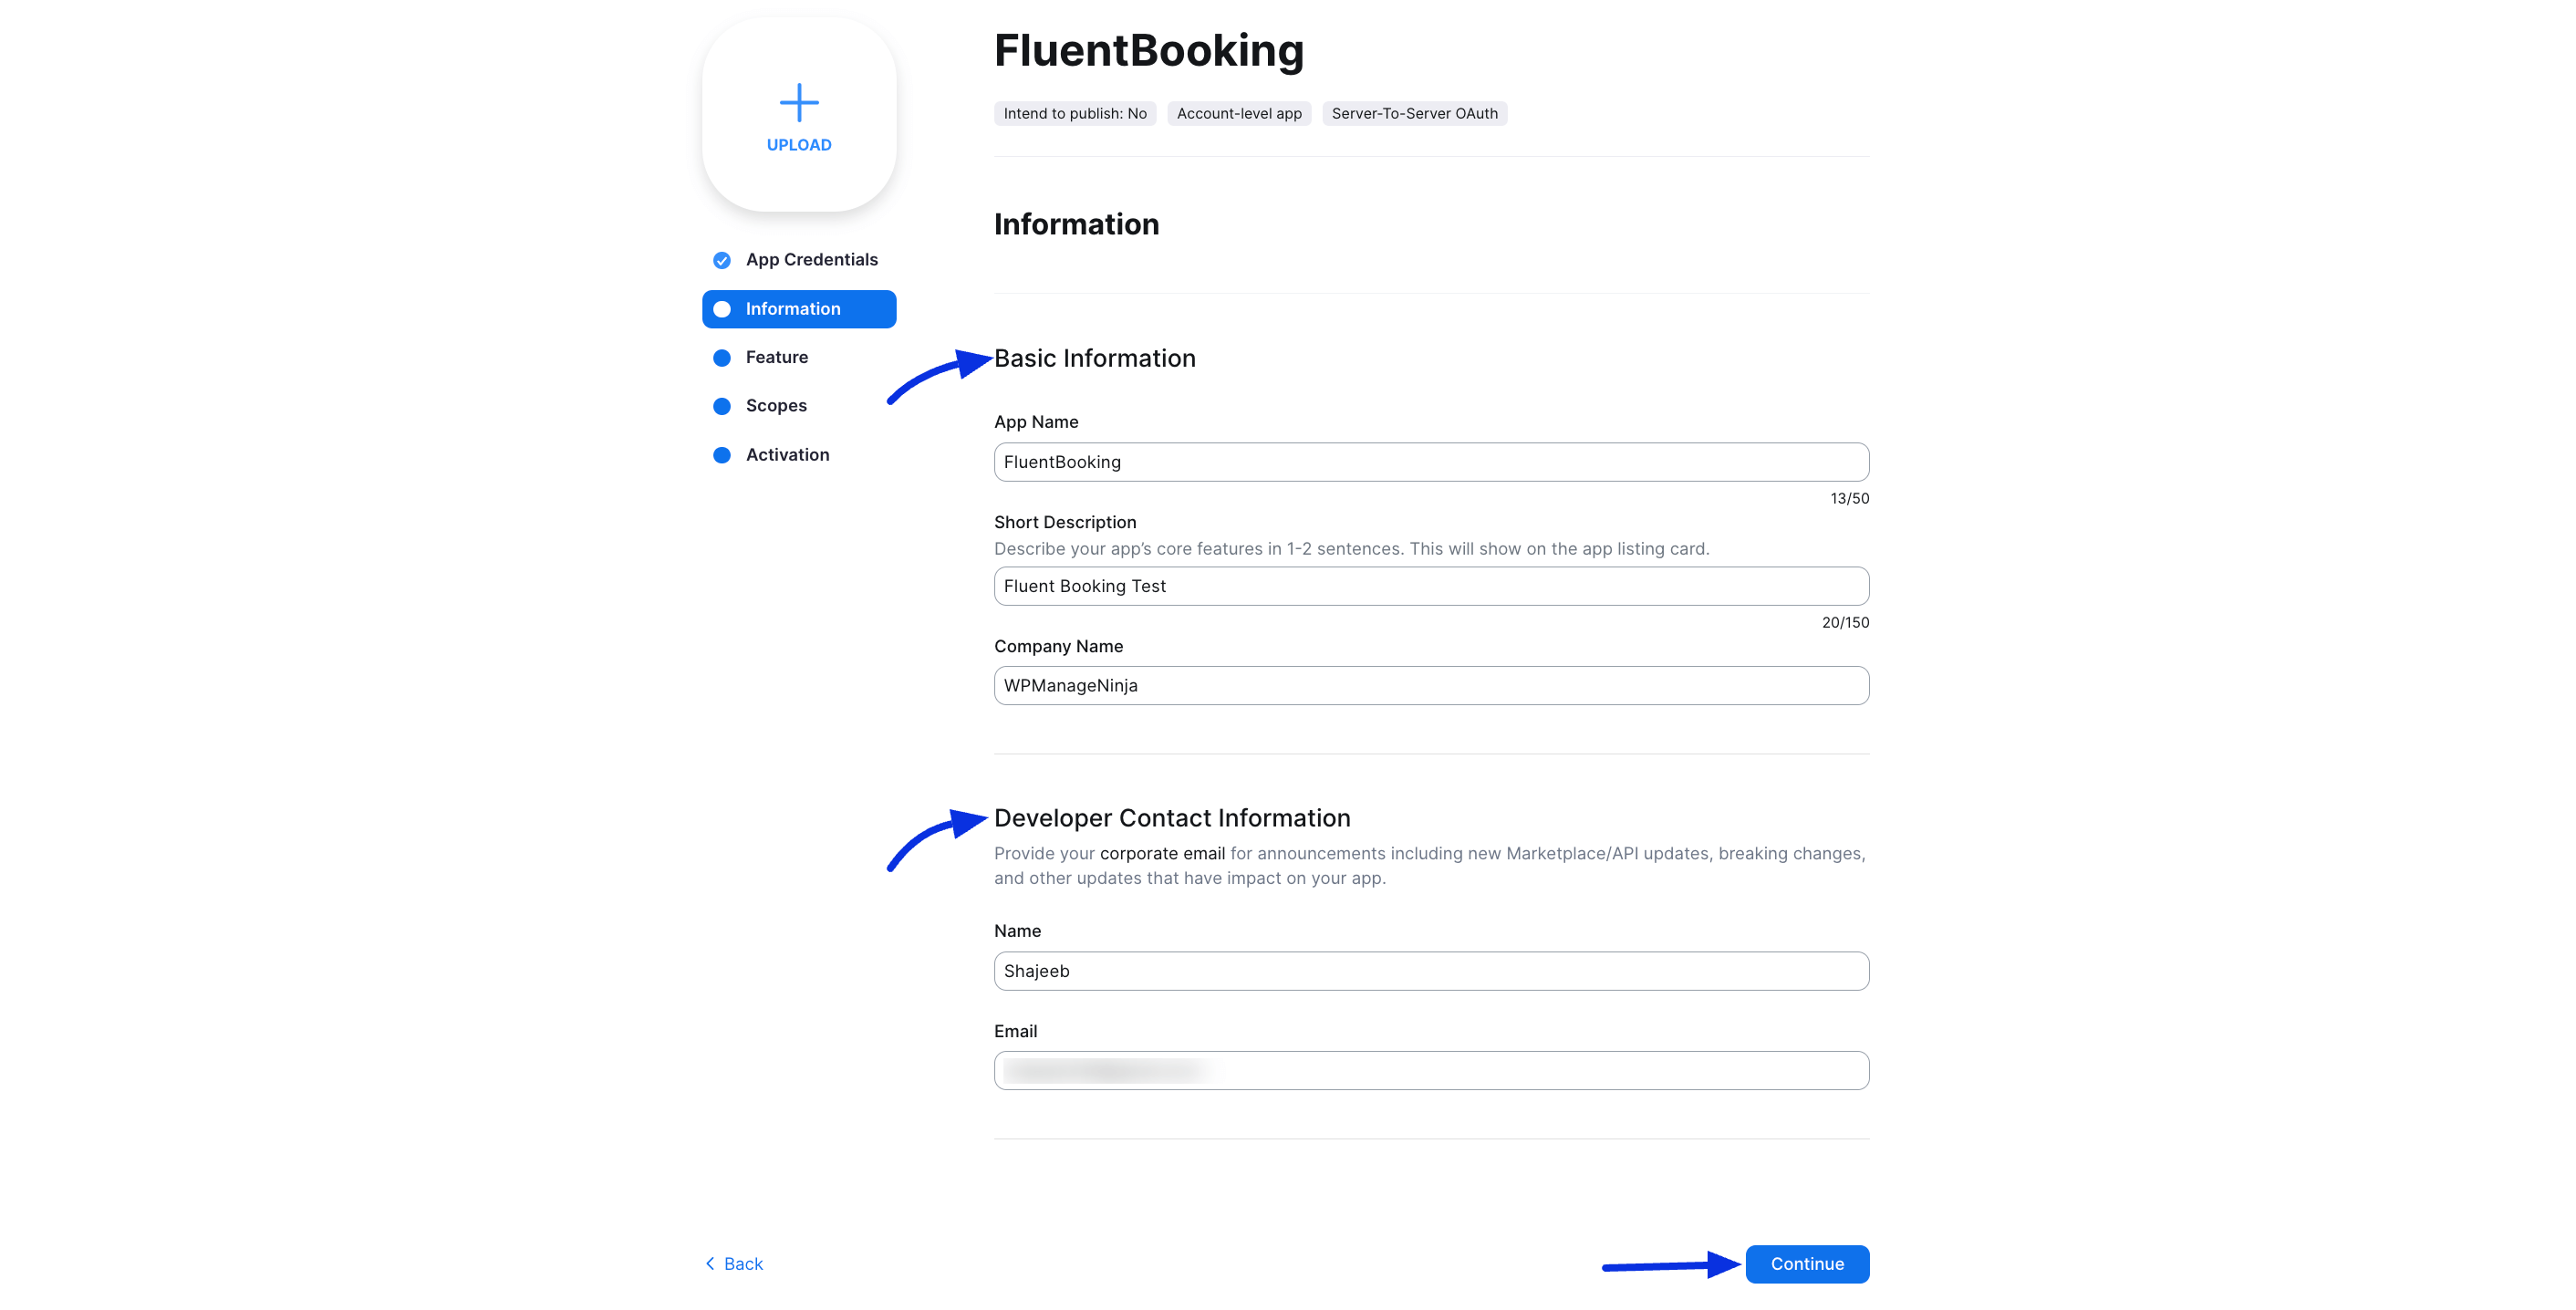
Information #
On the Information page, there are some mandatory fields those are Basic Information Fields App Name, Short Description, Company Name, and Developer Contact Information ( Name, Email ). You have to give this information and then click on the continue button.
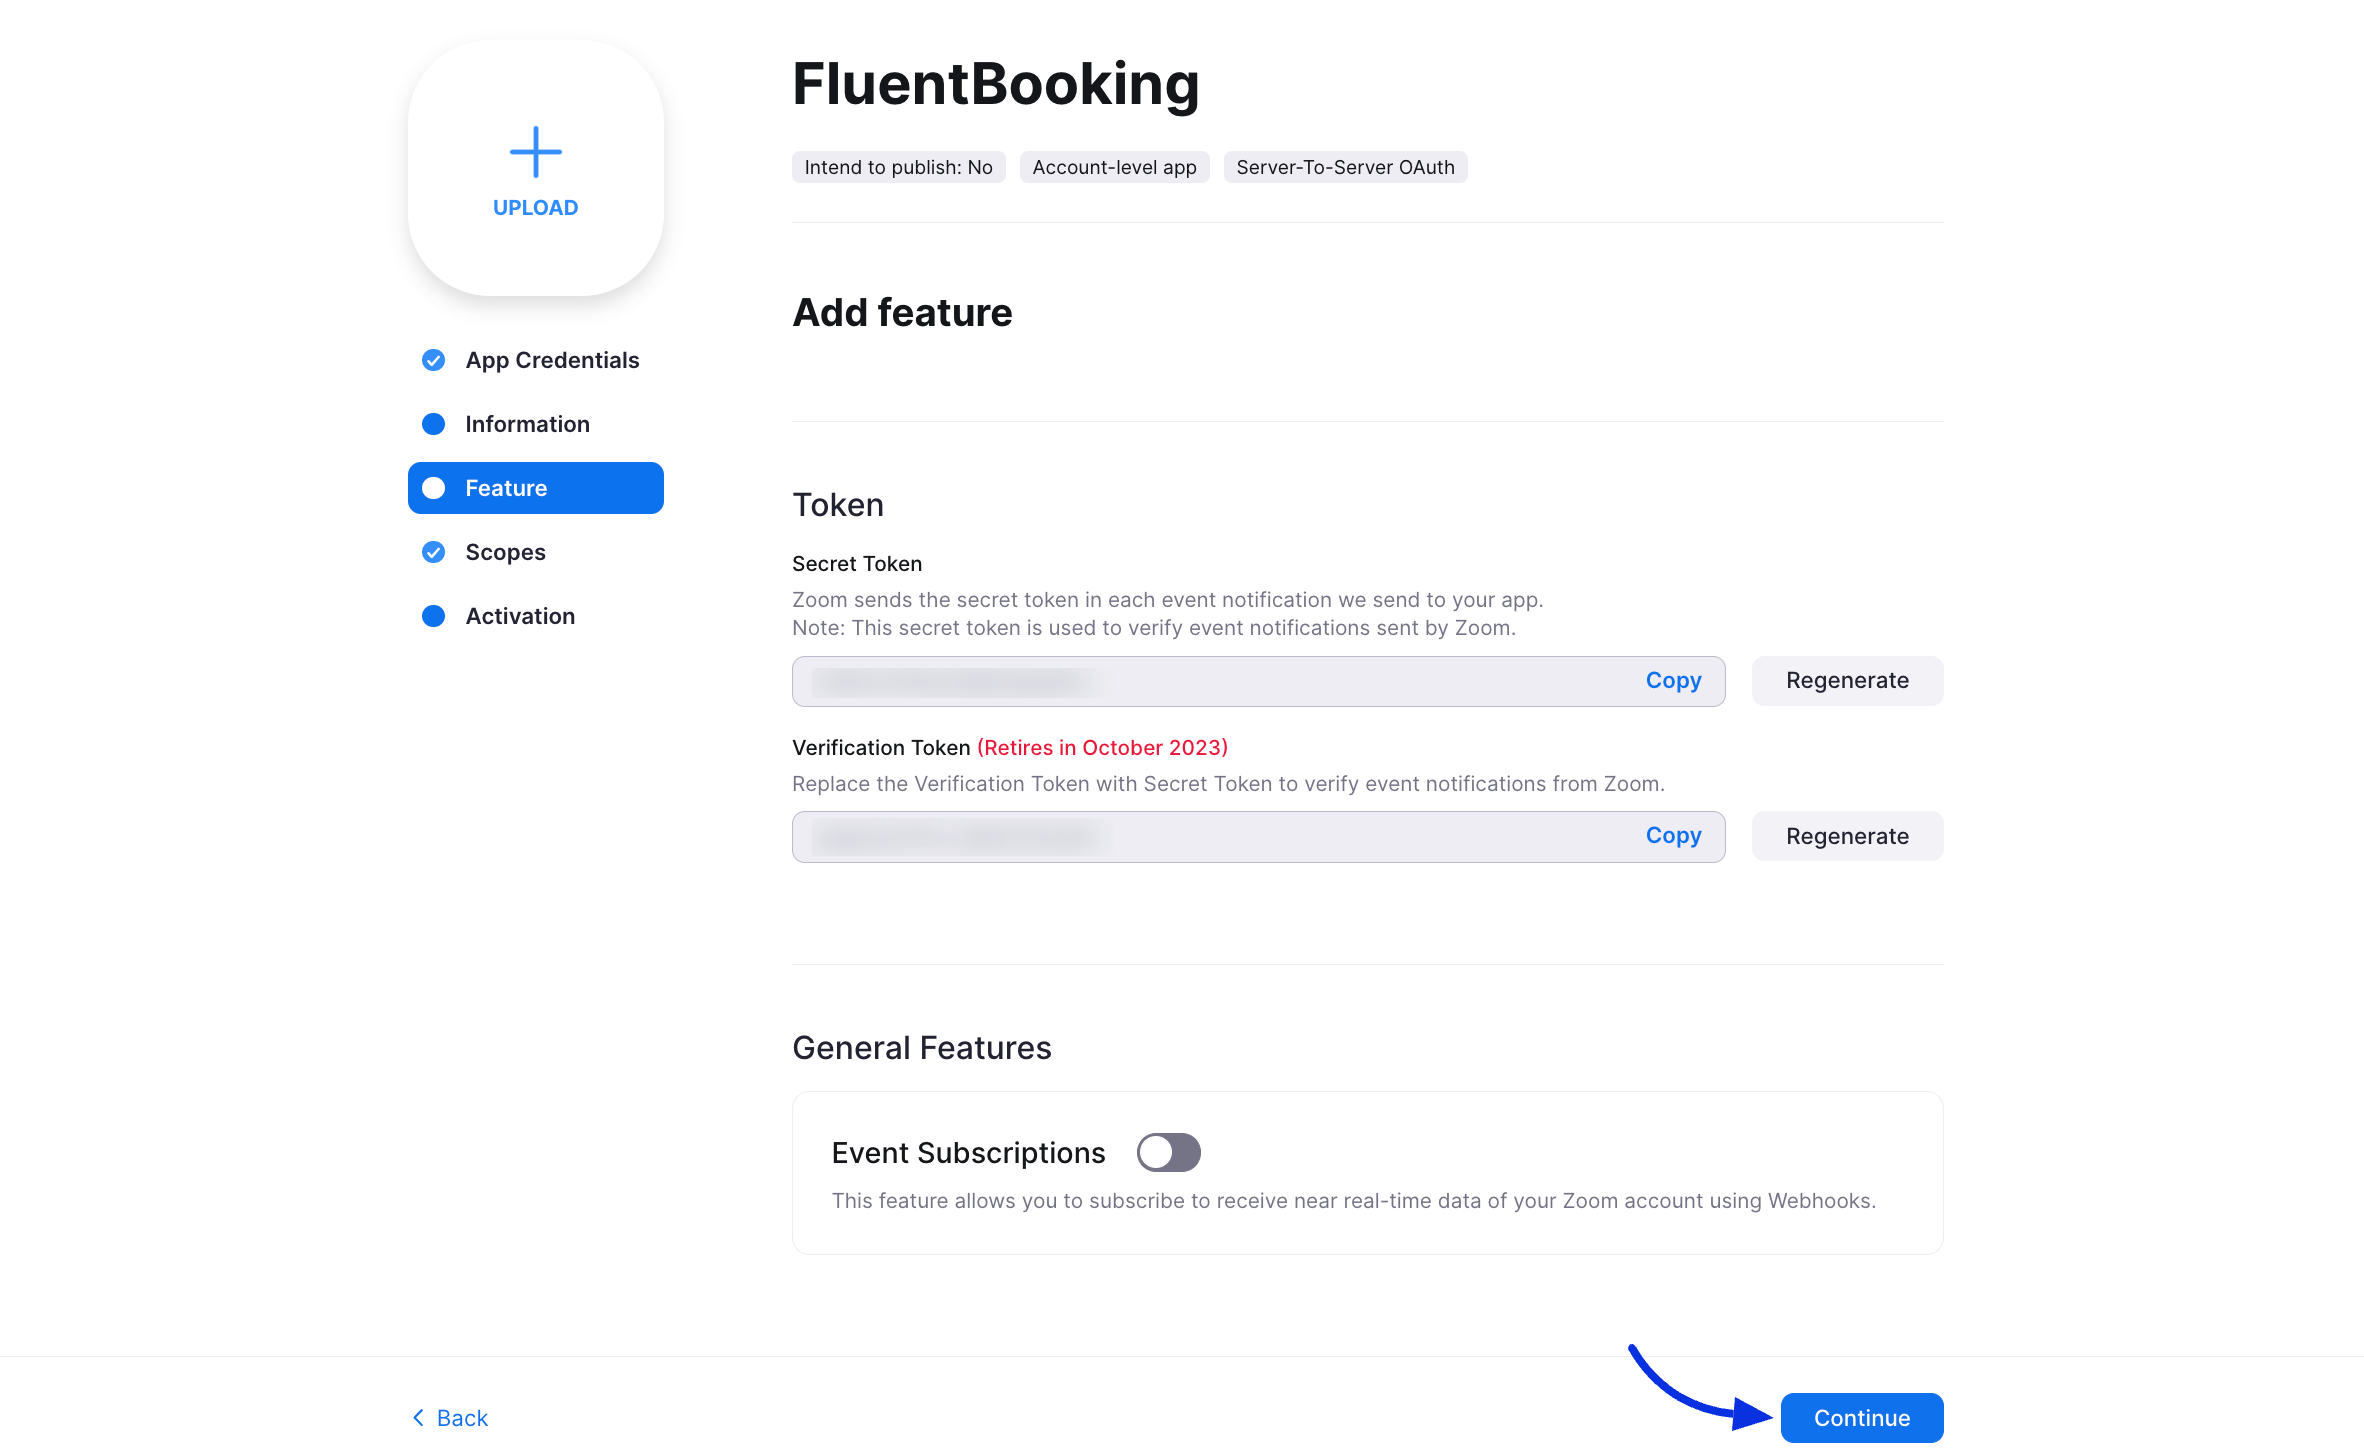
Feature #
In the feature section, you don’t need to change anything so you can simply skip the feature section.
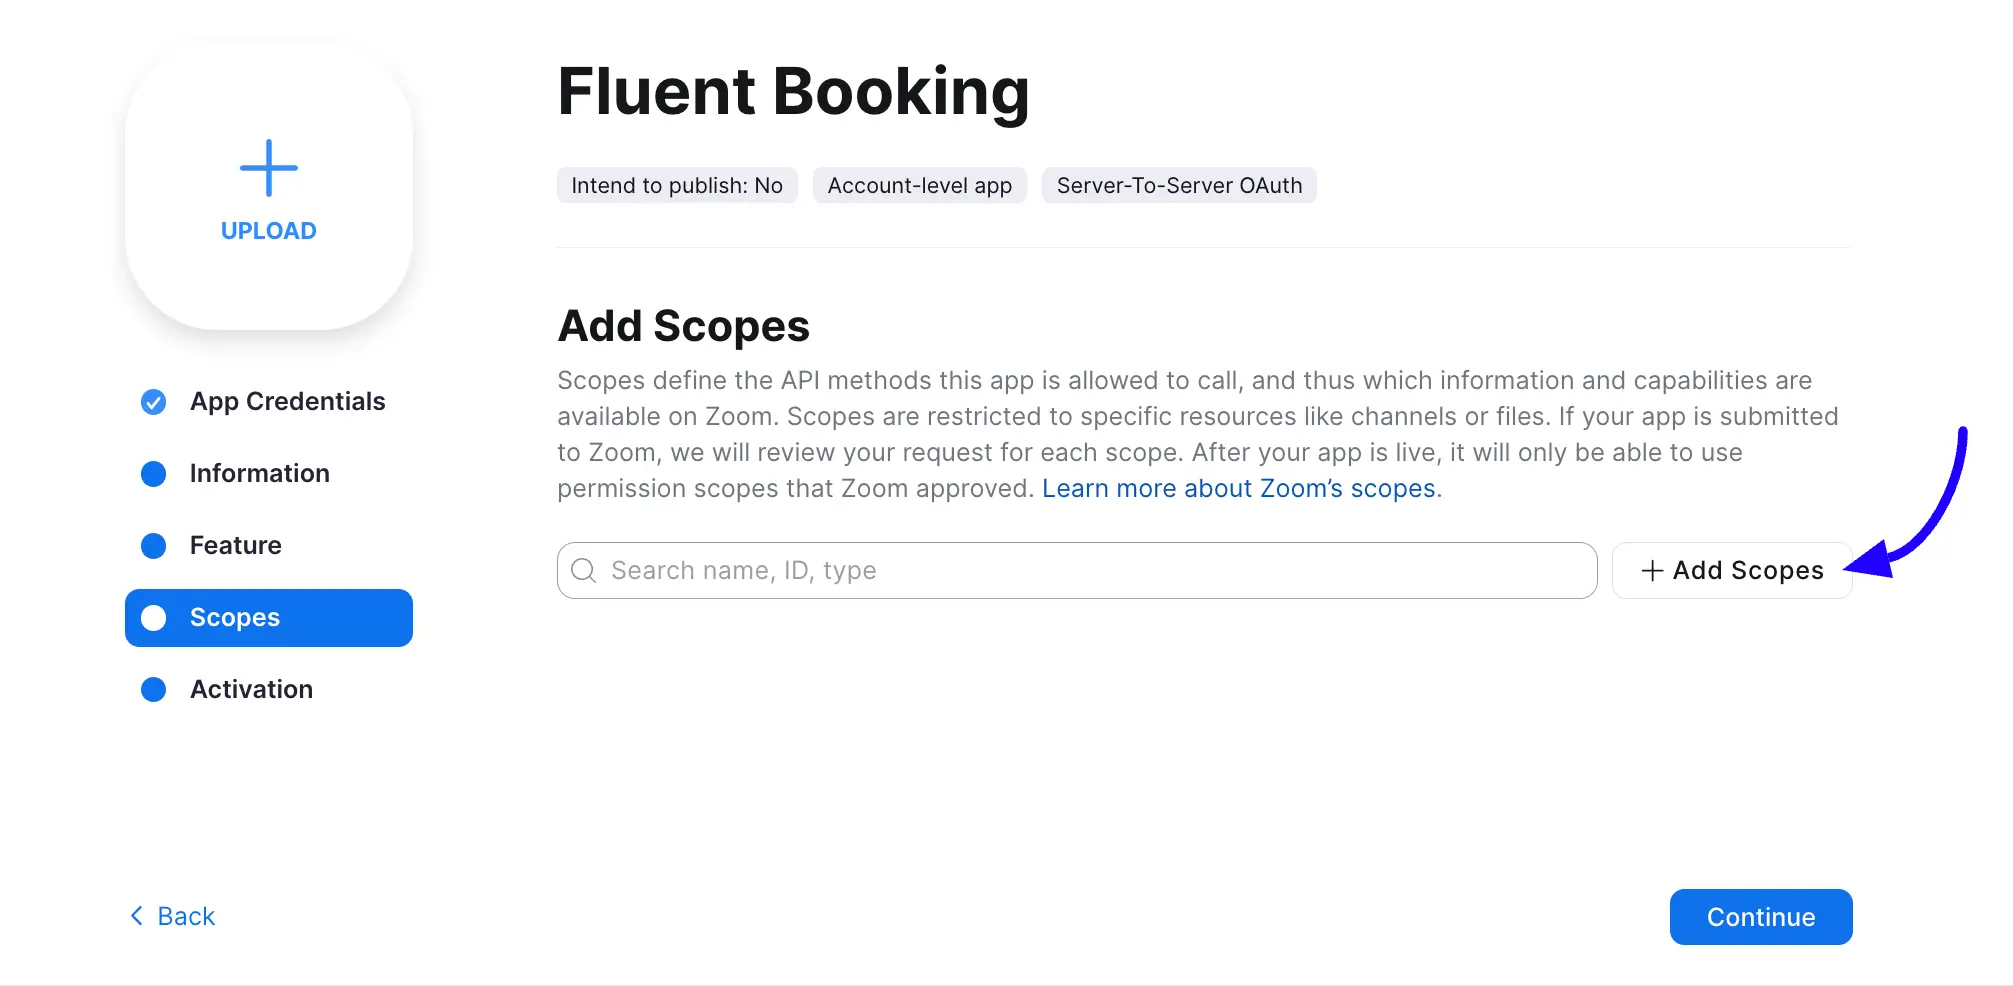
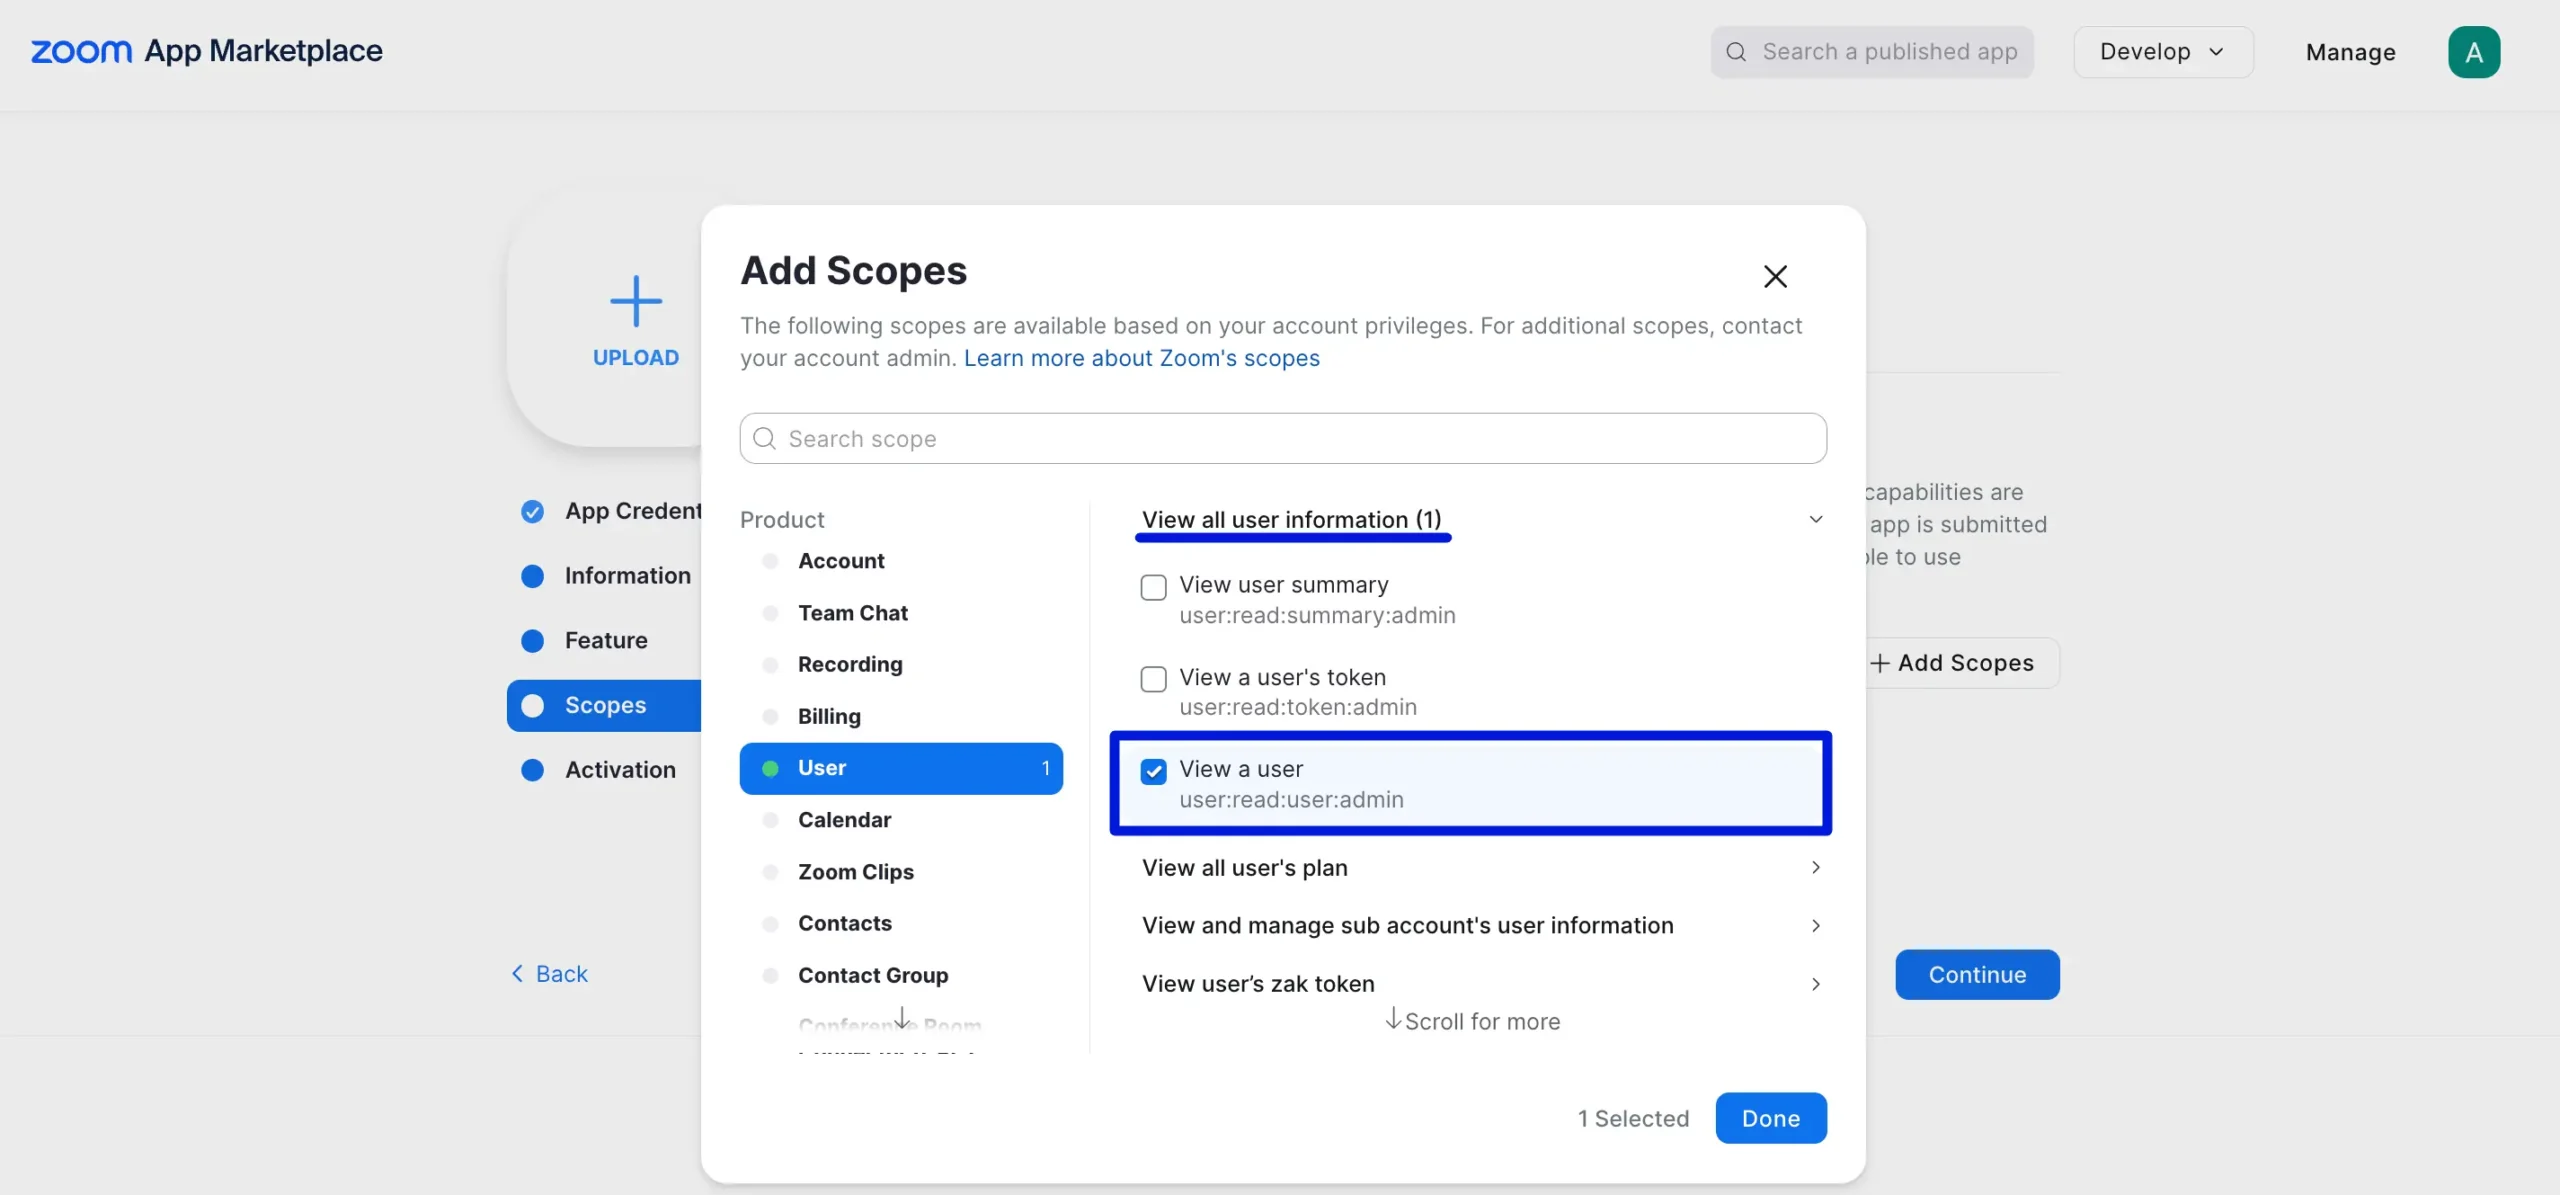
Scopes #
Here you have to add four scopes. Click on the Add Scopes button and a pop-up will come up.
Select the following scopes from the Meeting and User Scopes then click on the Done button and continue:
From Meeting go to View and manage all user meetings and select these three scopes:
- Delete a Meeting (meeting:delete:meeting:admin)
- Update a Meeting (meeting:update:meeting:admin)
- Create a meeting for a user (meeting:write:meeting:admin)
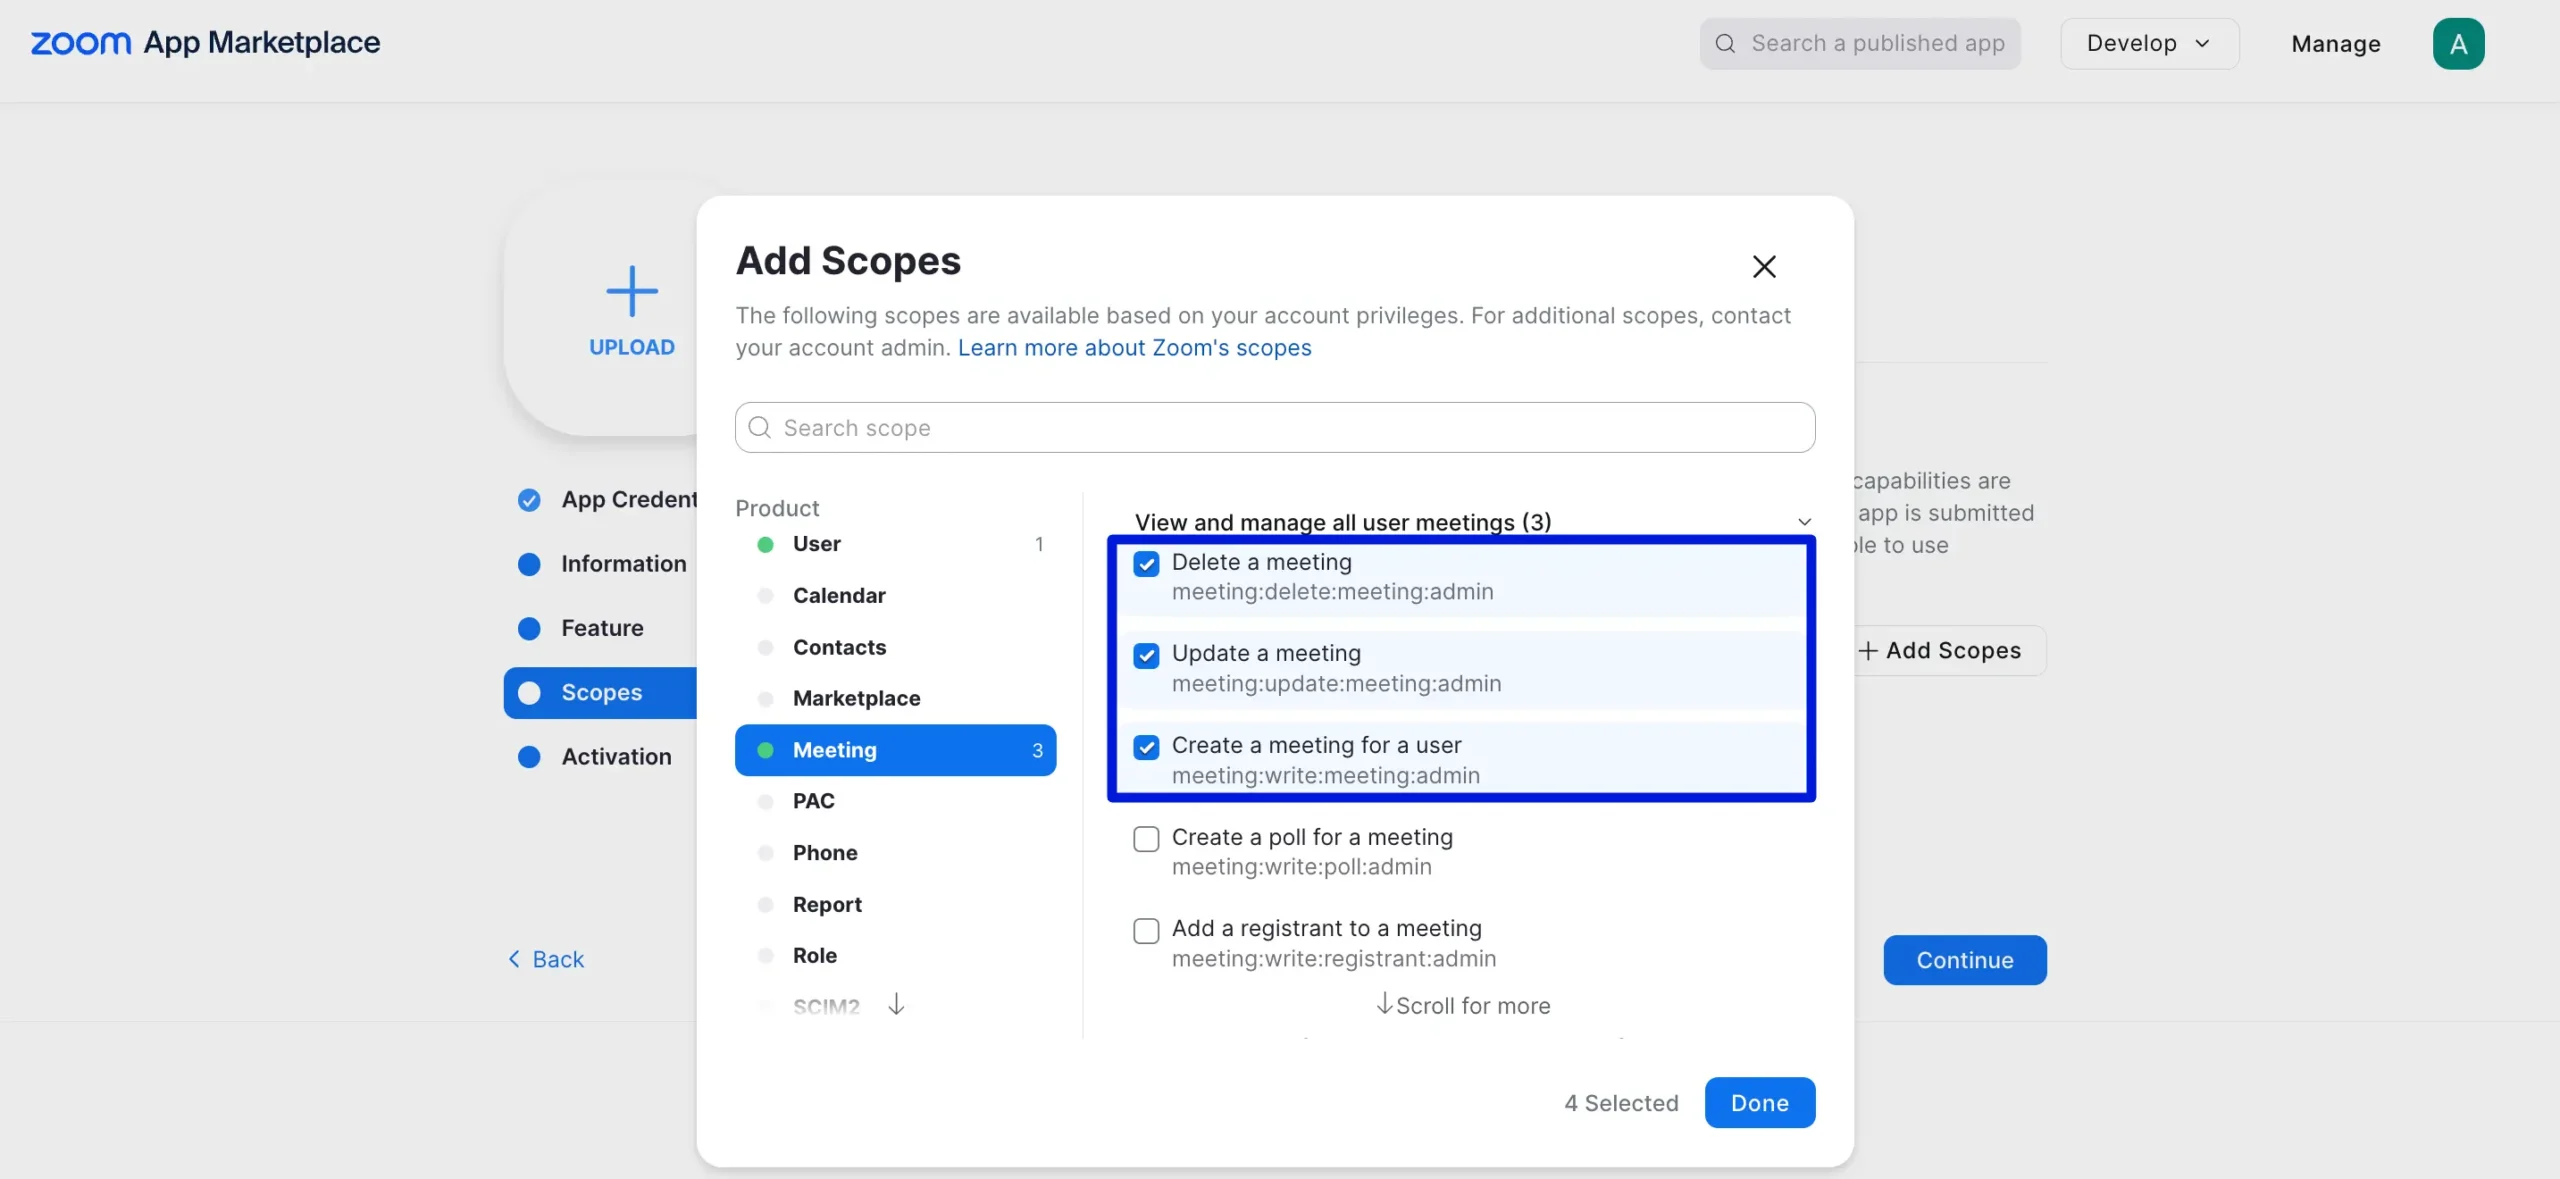
From User go to View all User information then select ‘View a user (user:read:user:admin)’.
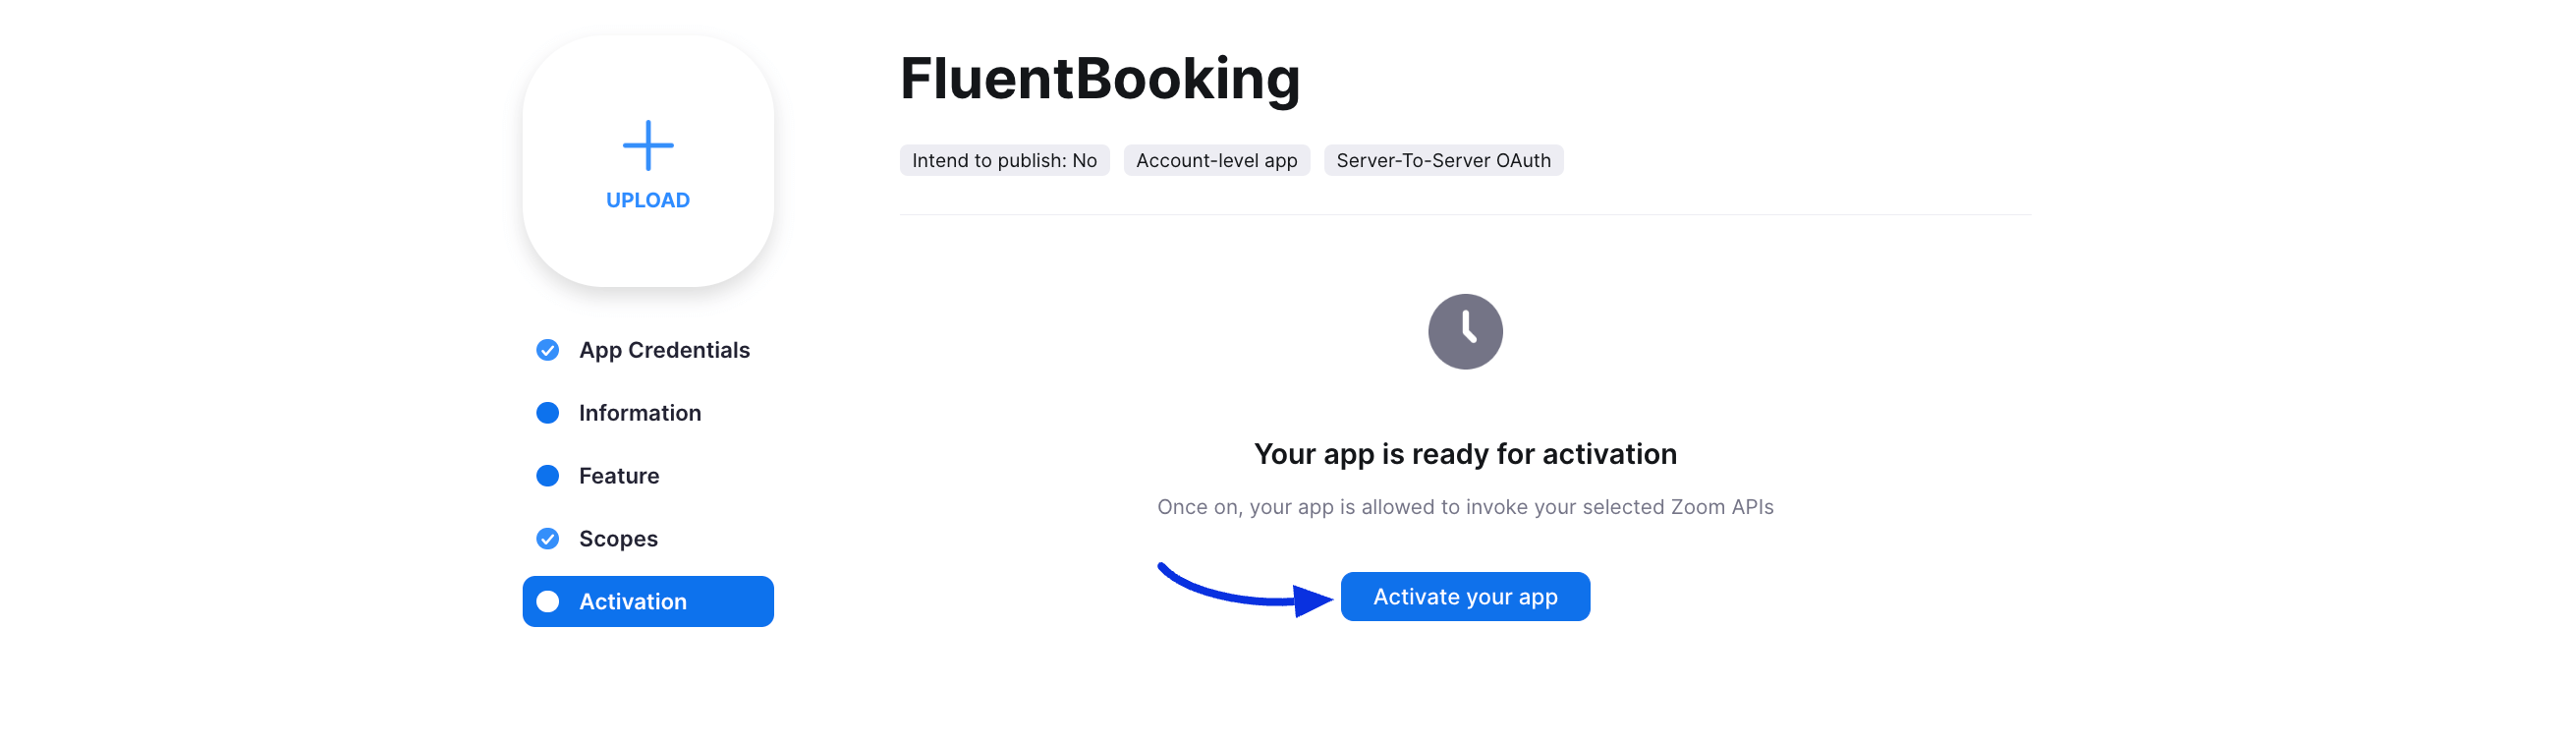
Activation #
Once you have completed the above steps the Activation step will come. Simply click on the Activate your app button. This completes the process of creating a Zoom app.
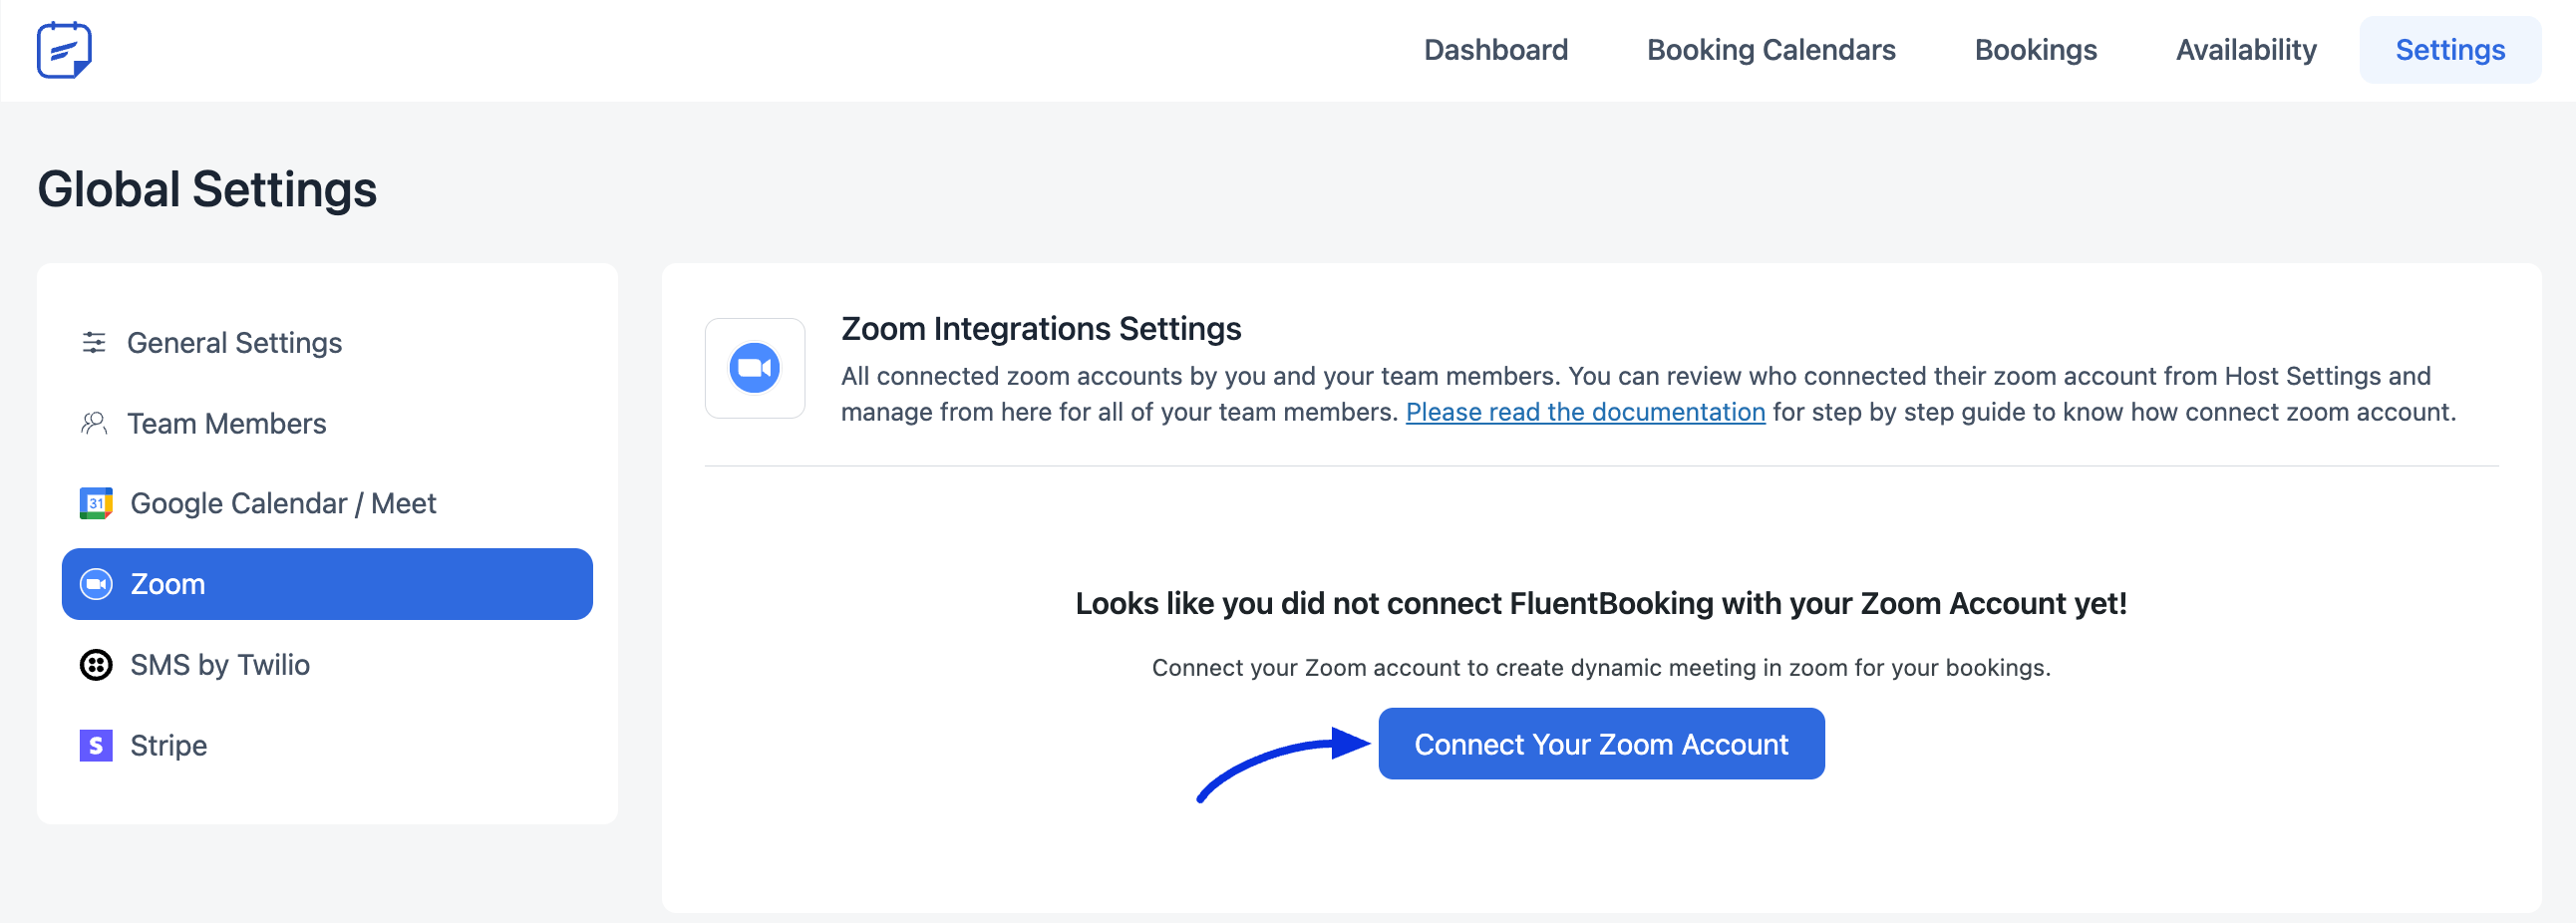
Configuring Zoom With FluentBooking #
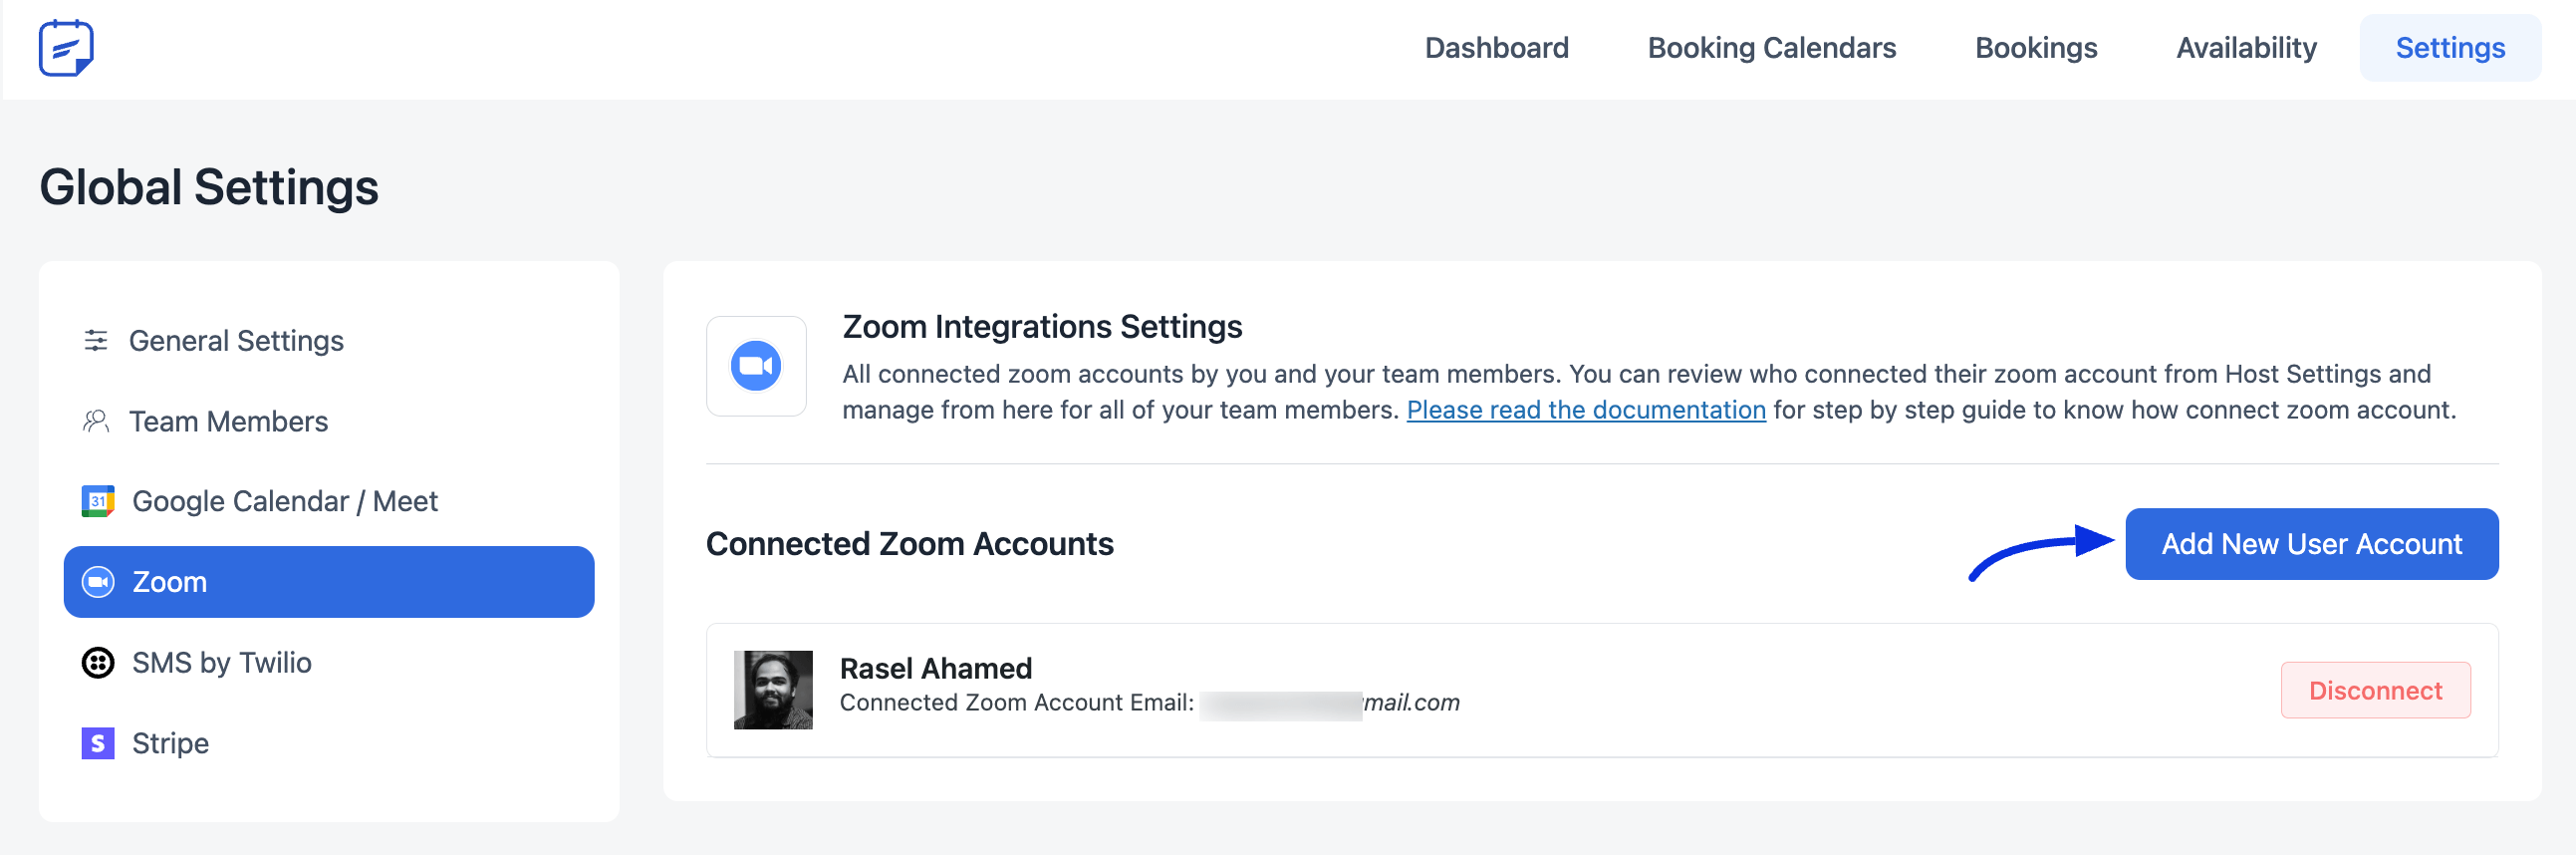
After creating the Zoom app properly now you can connect your Zoom with FluentBooking. Go to FluentBooking Dashboard and navigate to Settings > Zoom and you will see the button Connect Your Zoom Account click on the button.
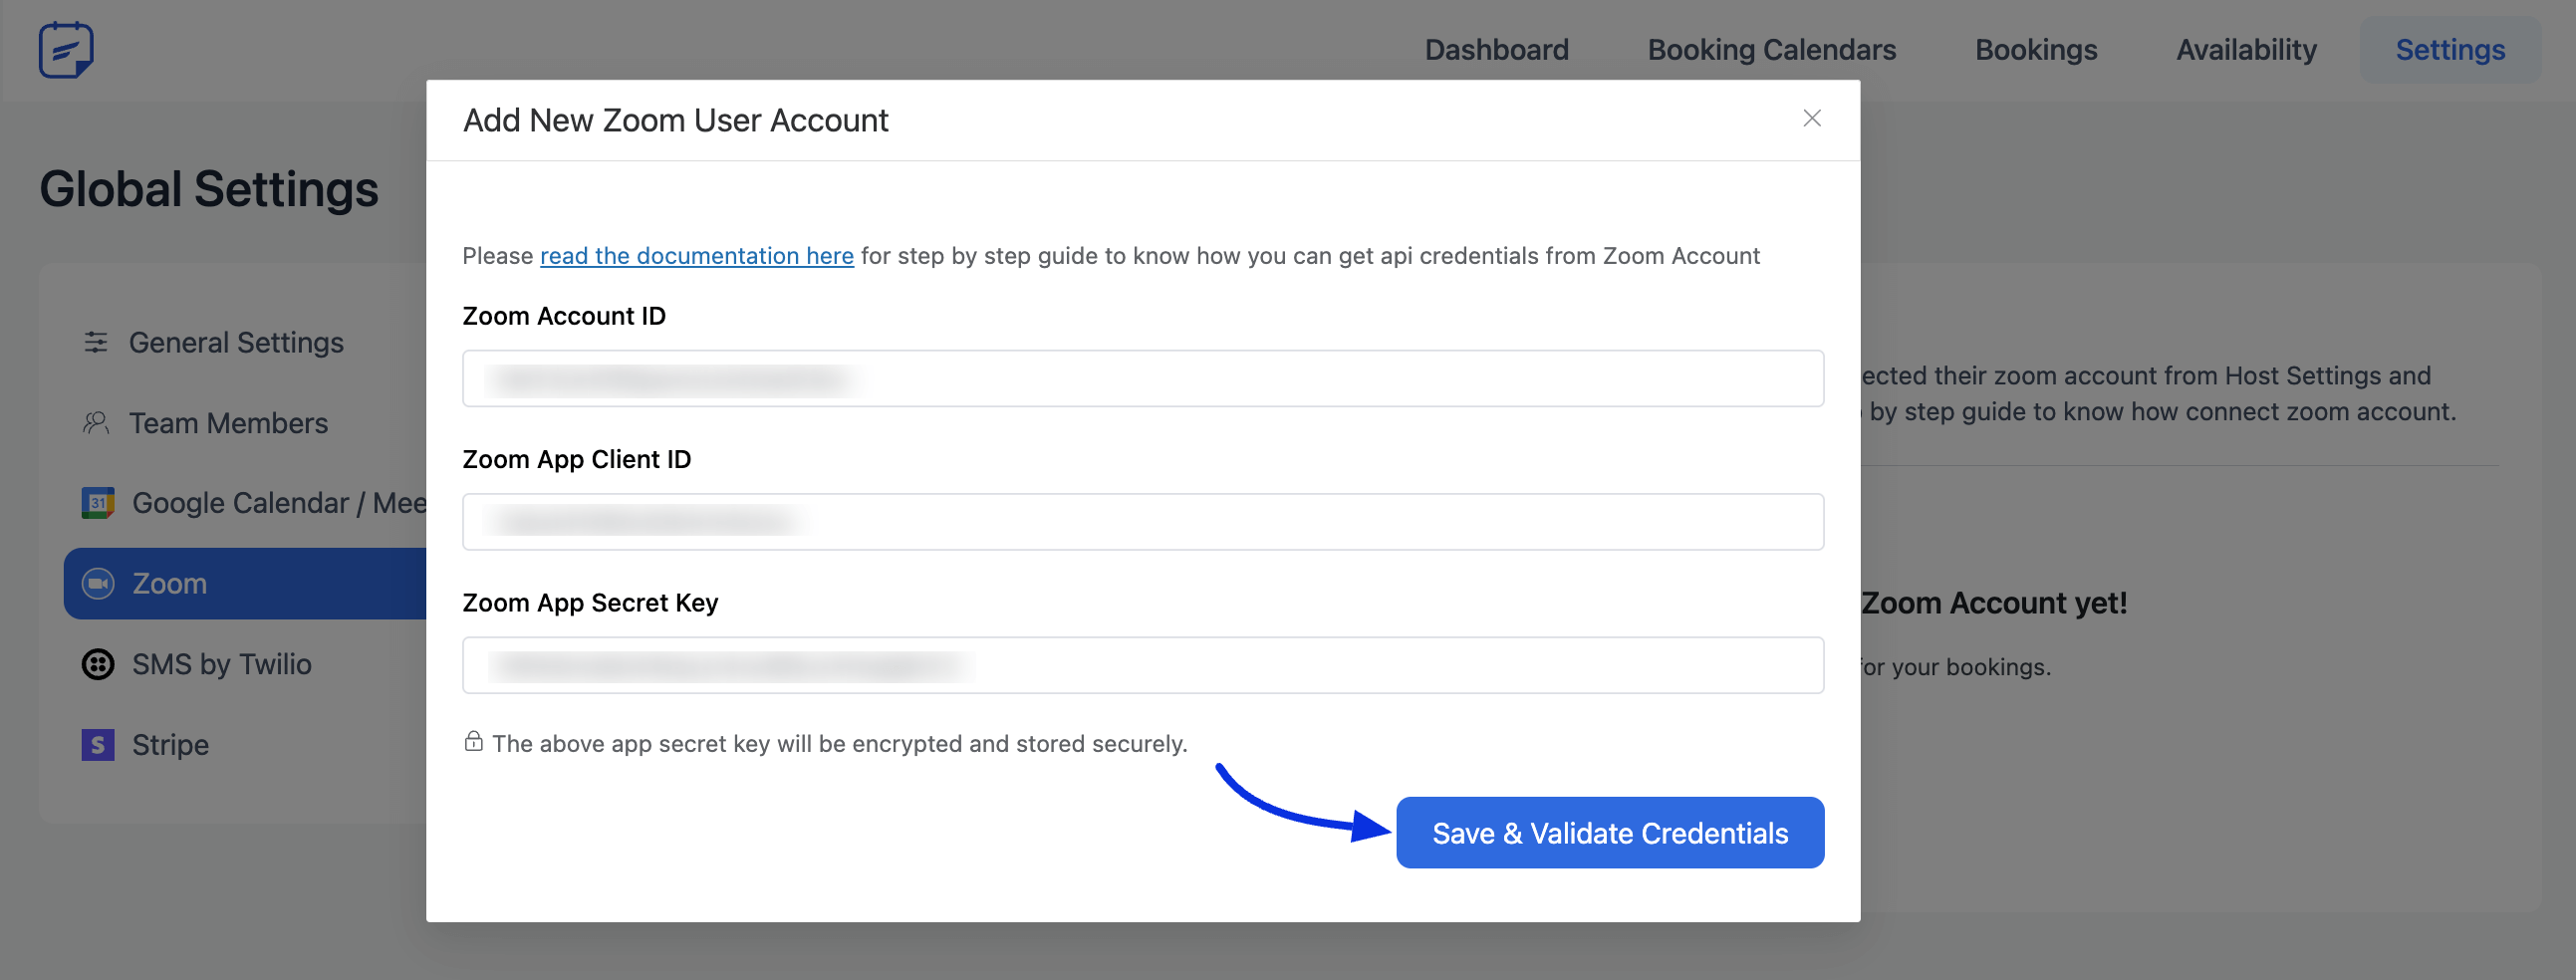
Now a popup will appear paste your copied Zoom App credentials here and click on Save & Validate Credentials.
FluentBooking and Zoom are successfully connected, you can see the connected host here. If you want to connect another user account of FluentBooking with Zoom click the Add New User Account button.
To connect another user account of FluentBooking with Zoom you need to create another app from another Zoom account and then repeat the same process to connect with Zoom.
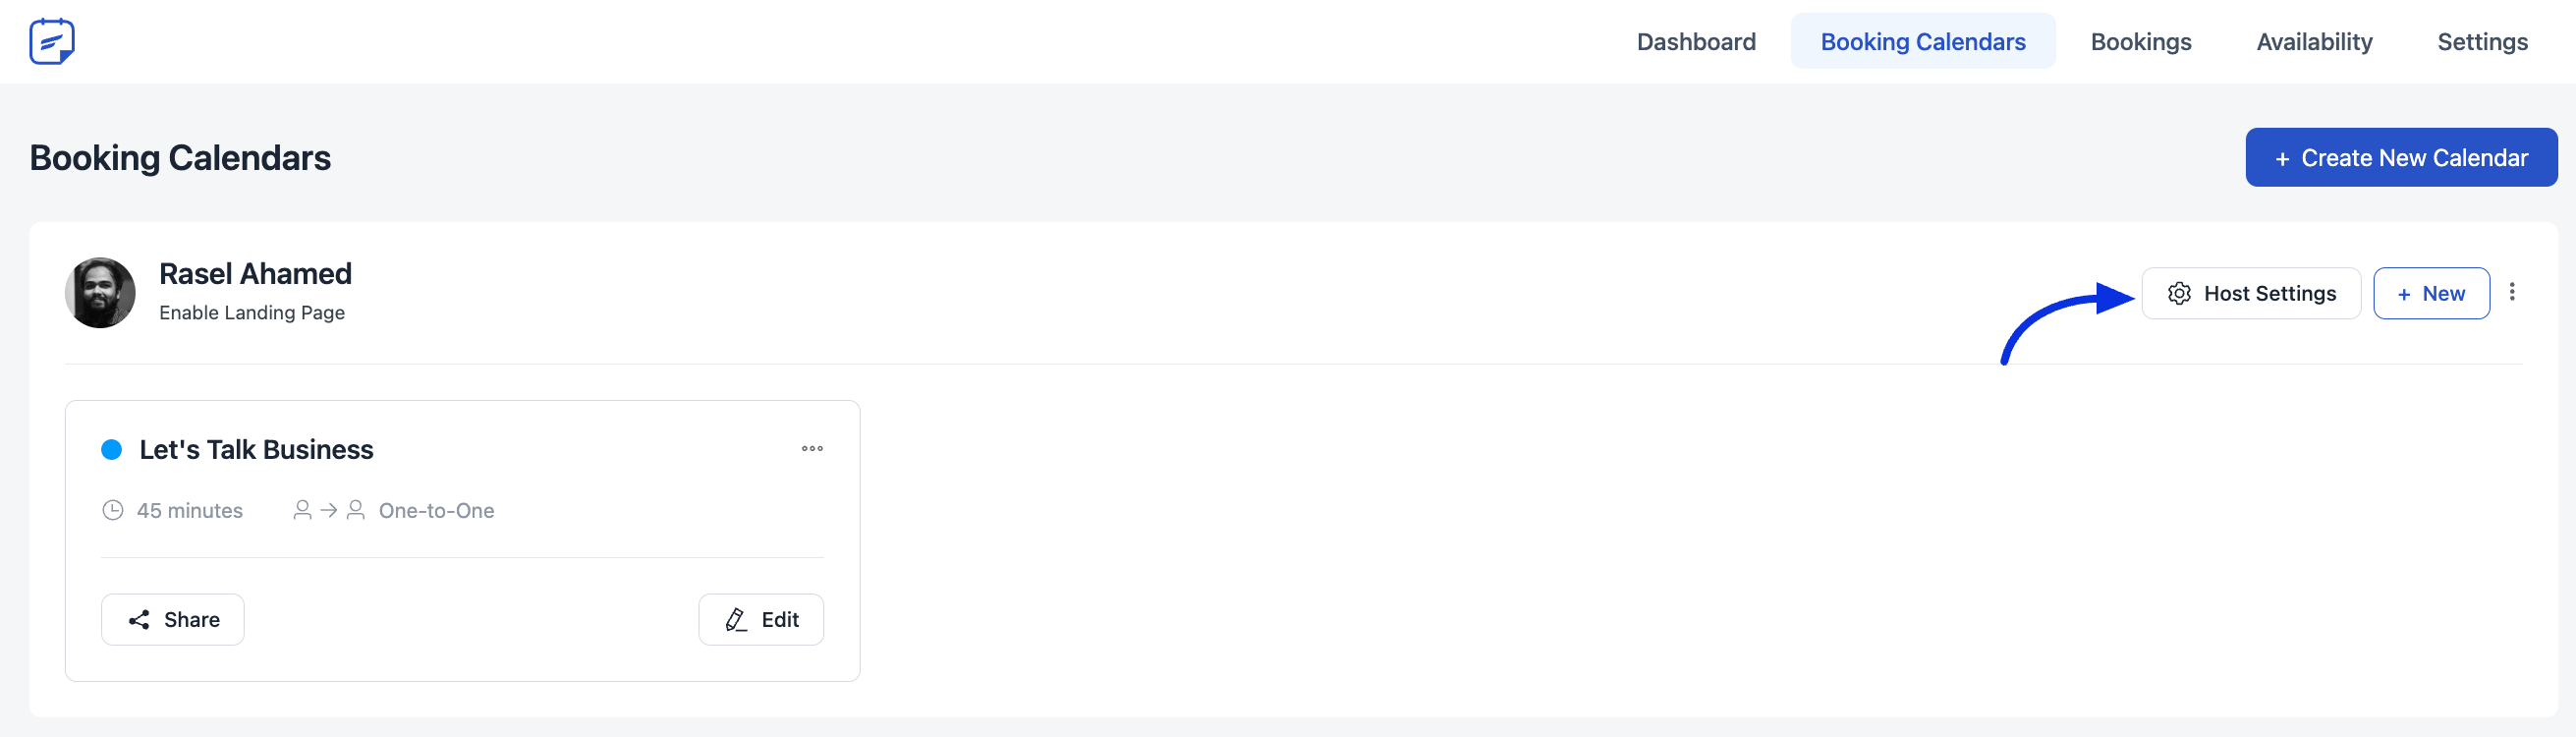
Zoom Integration From Host Setting #
You can also set up Zoom from your host settings. Go to Booking Calendars of FluentBooking and click the Host Settings button on the host/calendar’s profile.
Now go to the Zoom Integration and press the Connect with Zoom Account button.
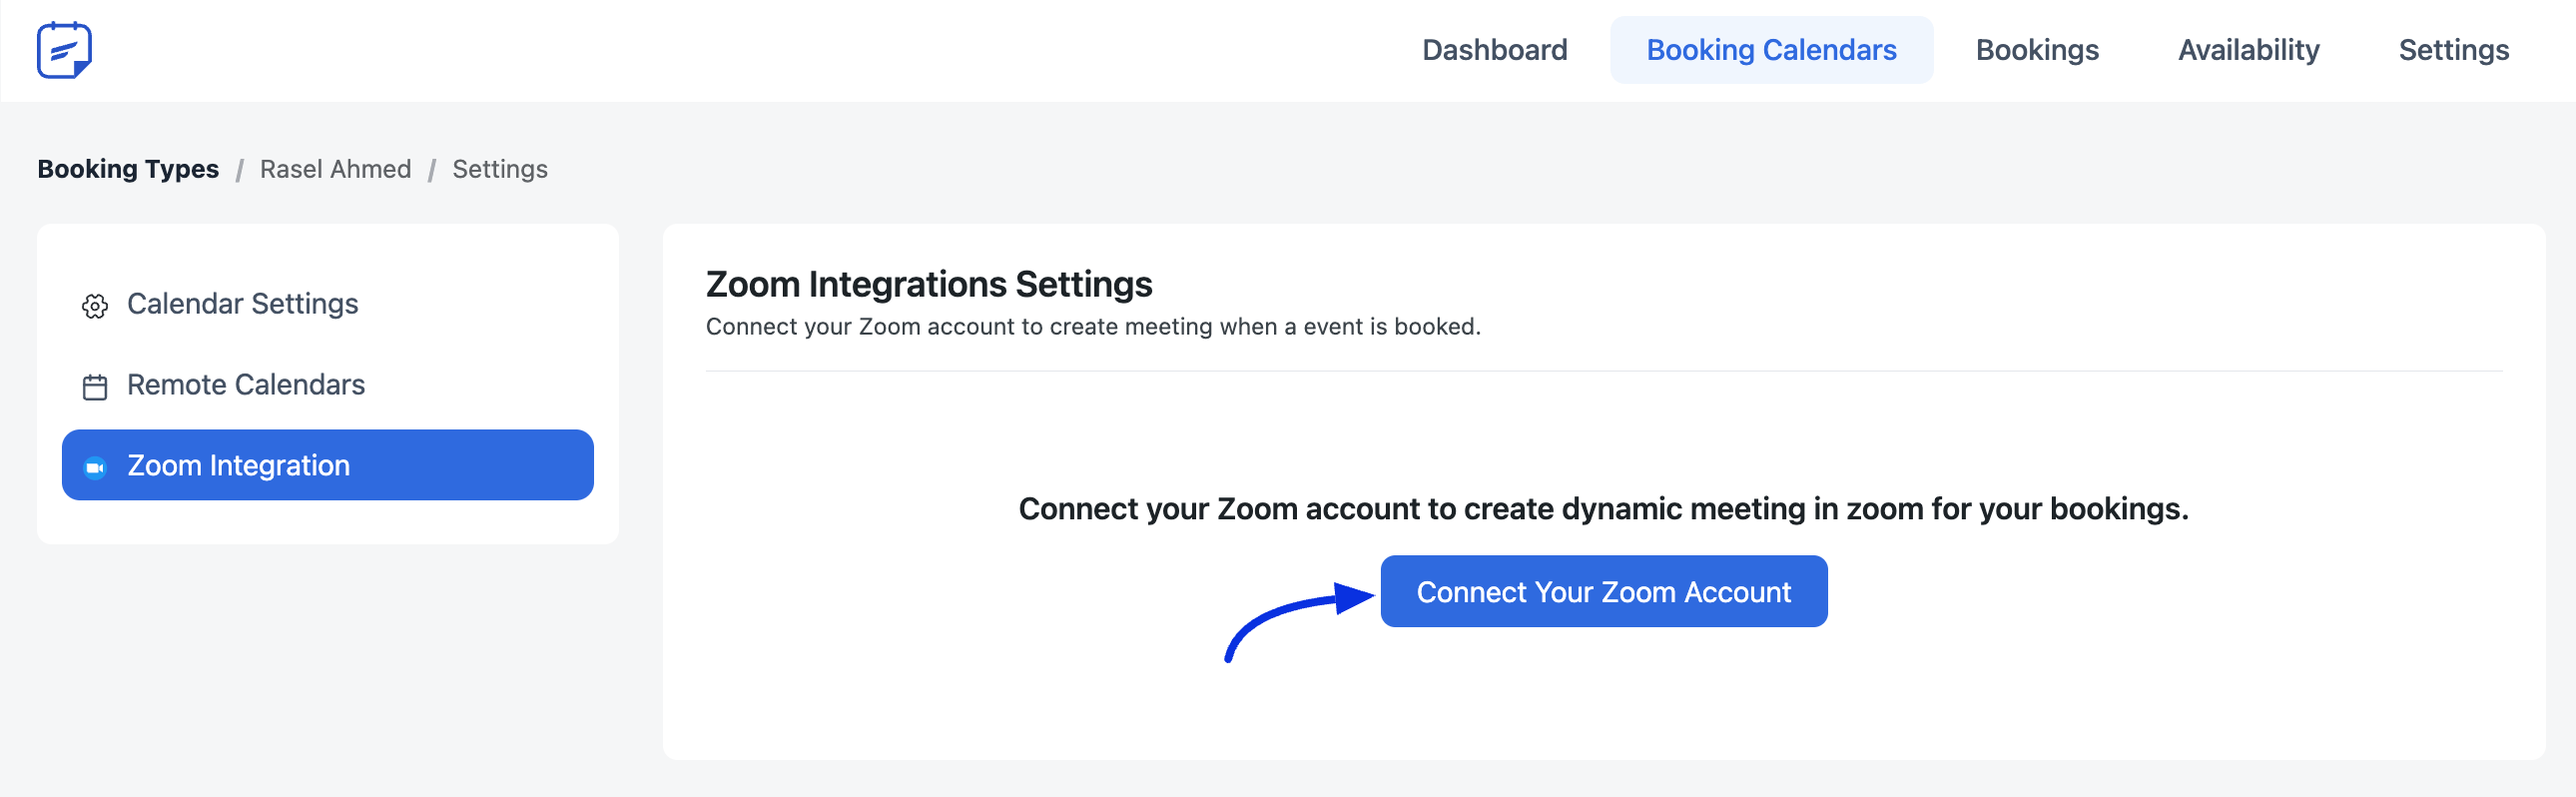
Now a popup will appear in the same way for your Zoom App credentials here paste your copied credentials here and click on Save & Validate Credentials.

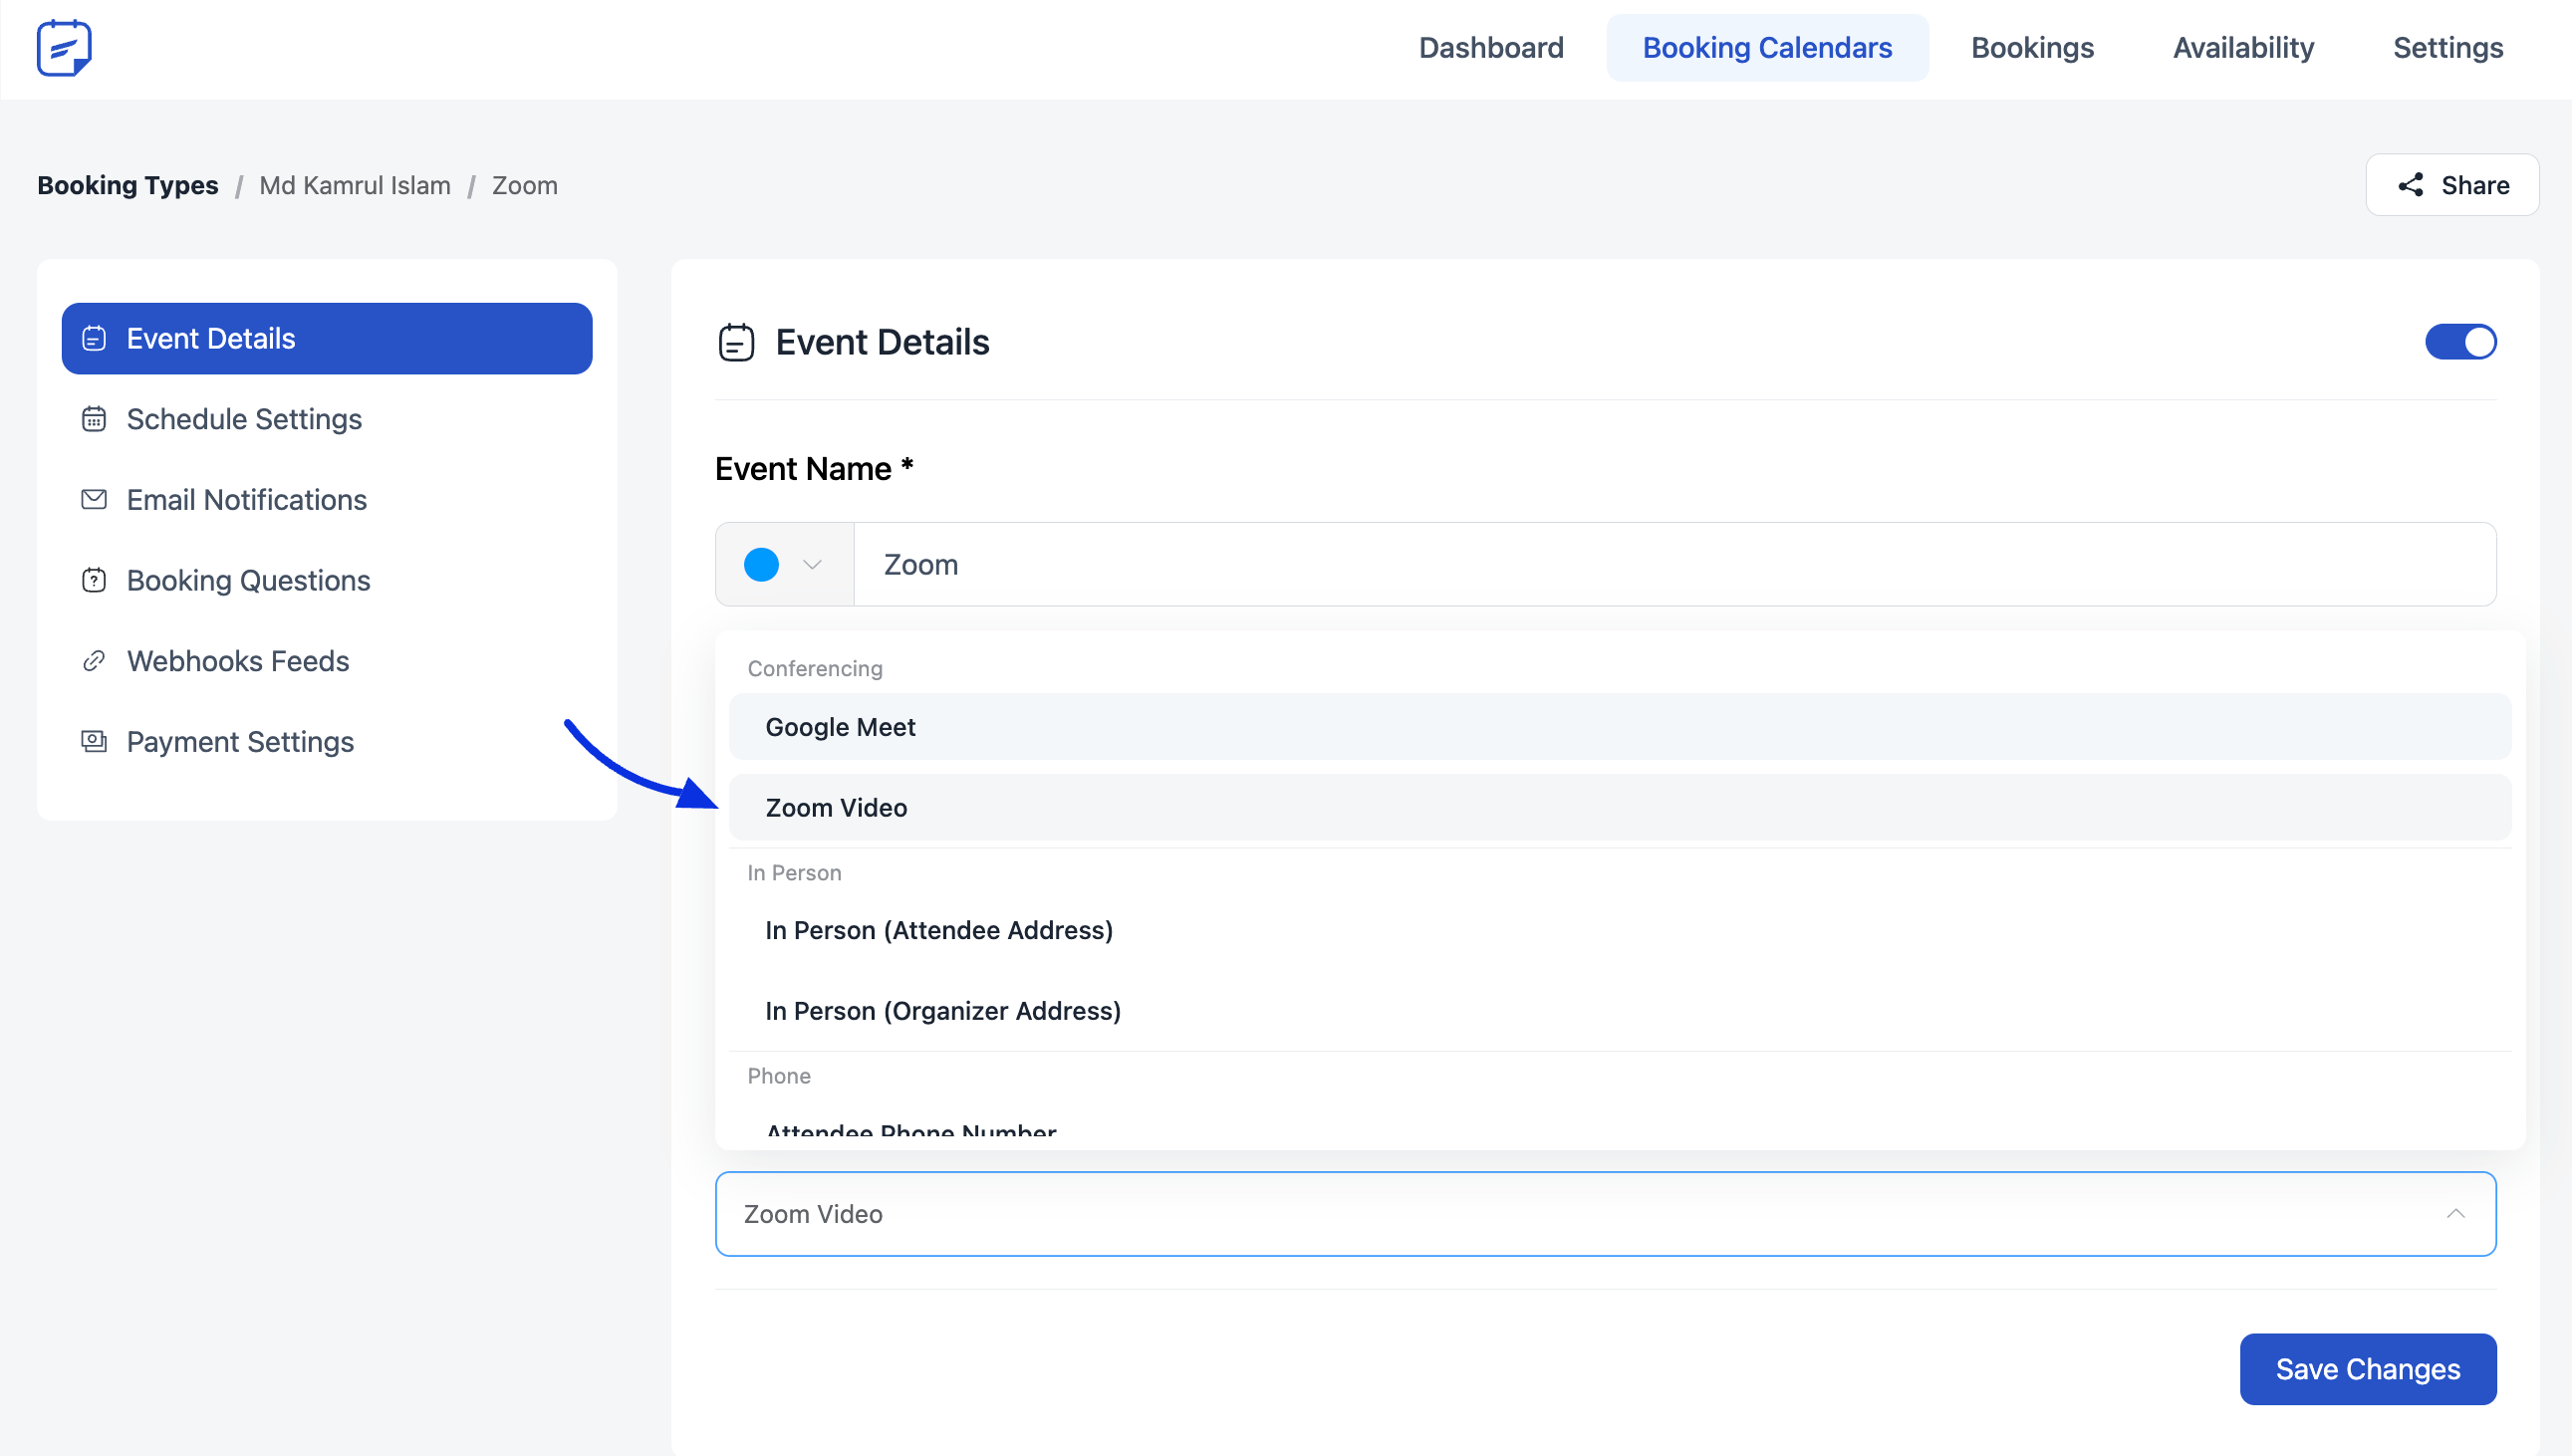
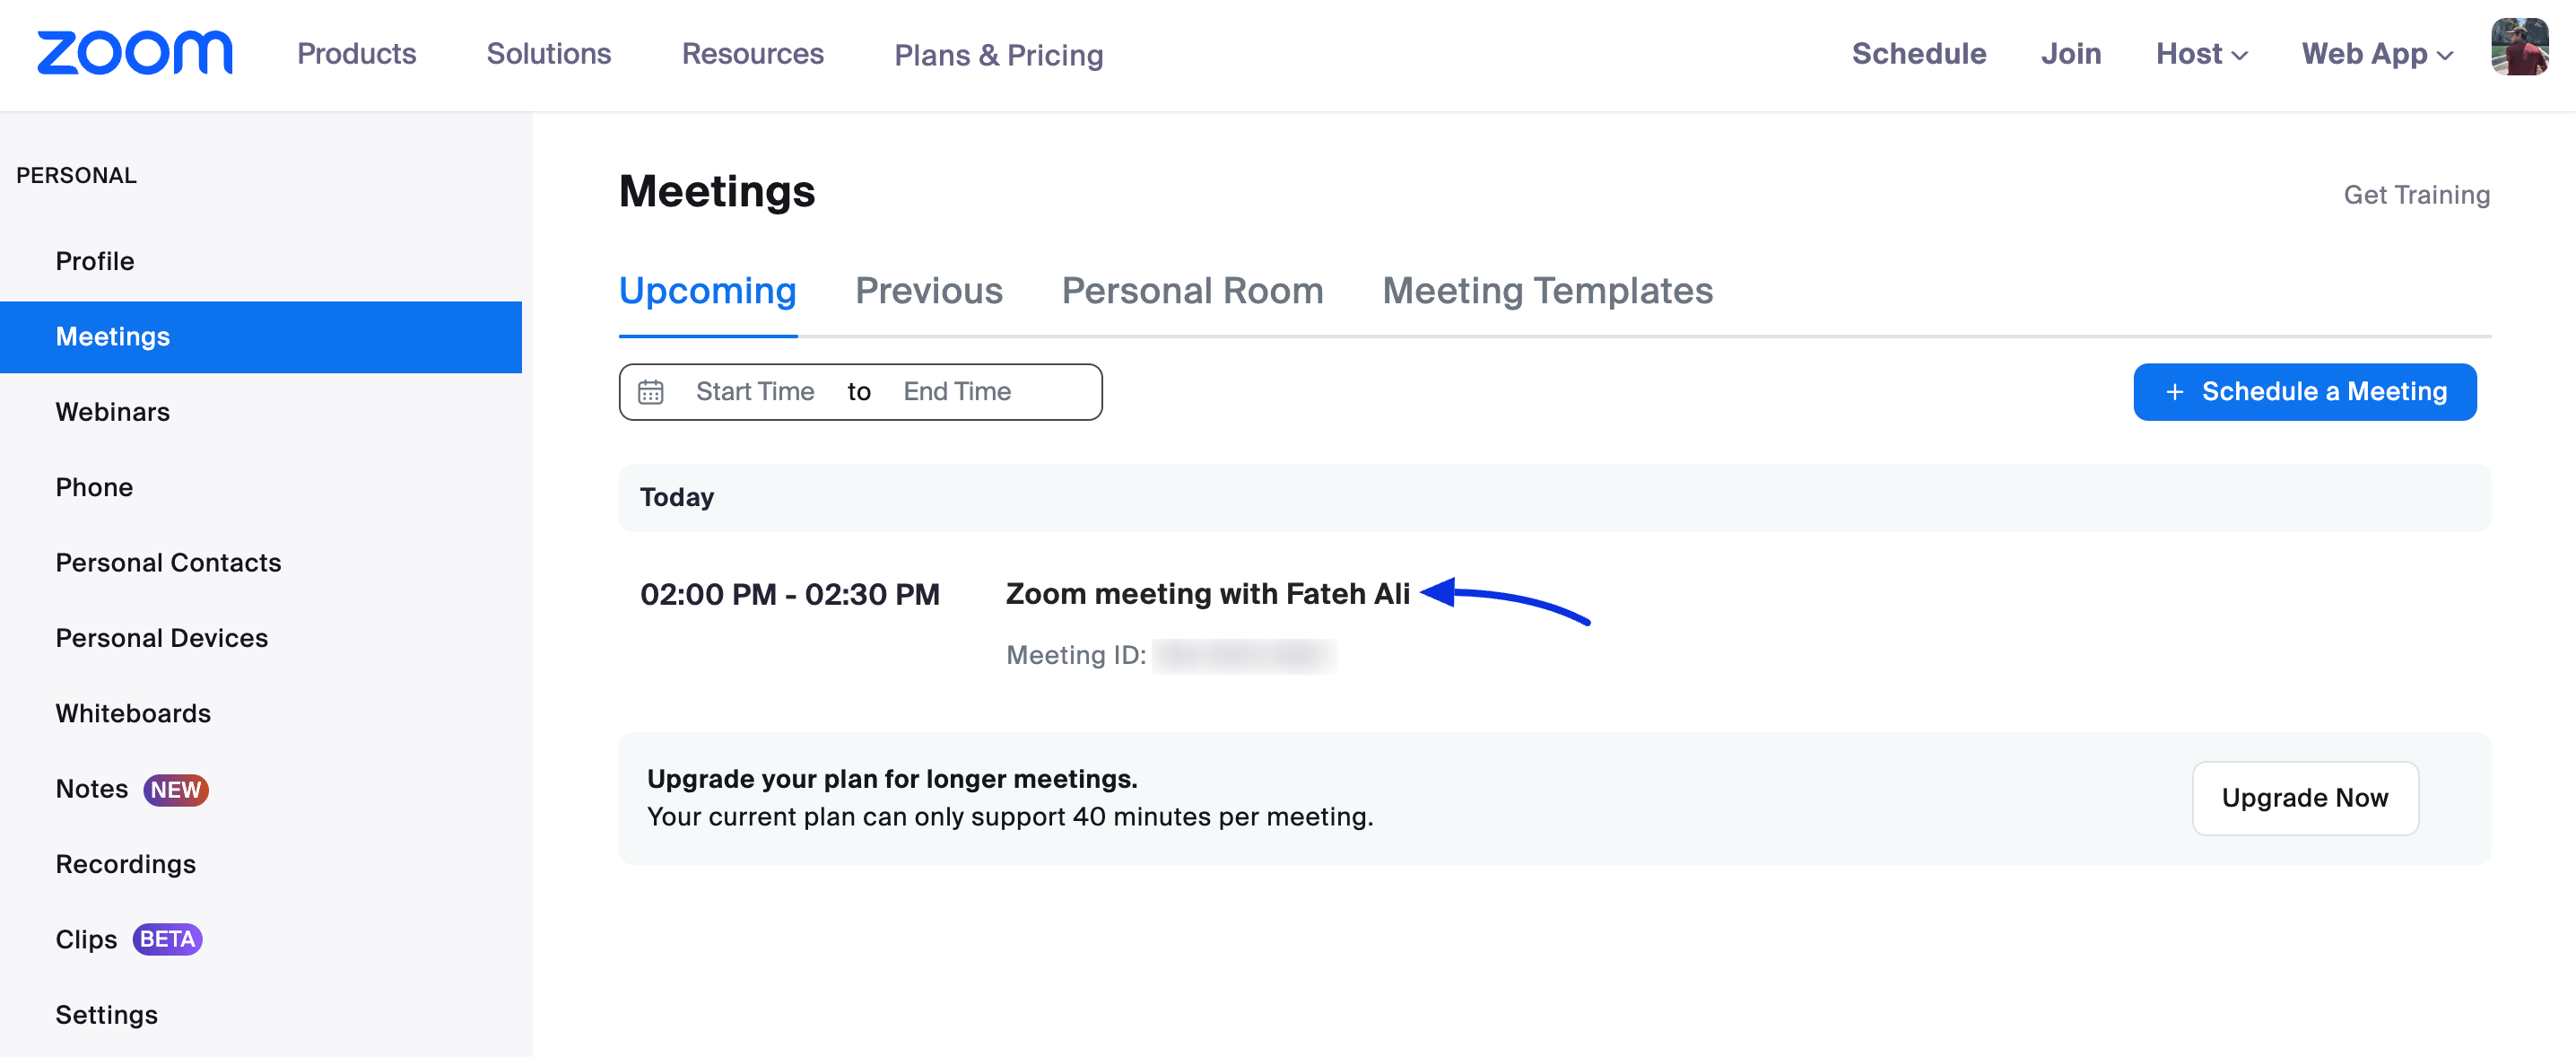
Add Zoom to the Event #
Now at the Event Location, you will find the Zoom video for your meeting.
The host of the Fluentbooking and the attendees will receive the Zoom video link with the notification mail. Also, you will see your meetings in your Zoom account just like the screenshot below:
If you have any further queries about this integration feel free to reach our support team.


now it works with wordfence – I had to reconnect to the zoom app.
Hey Matt,
Glad to know that!
please explain how to configure wordfence. Because once wordfence is activated even in learning mode, no zoom event is created anymore. This question also was unanswered in the facebook group for months.
“root”:{9 items
“endpoint”:string”https://api.zoom.us//v2/users/me”
“method”:string”GET”
“response”:string”{“code”:4711,”message”:”Invalid access token, does not contain scopes:[user:read:user:admin, user:read:user].”}”
“response_headers”:string”{}”
“date_time”:string”2024-10-08T08:31:17.497+00:00″
“request_body”:string”N/A”
“request_headers”:string”{x-zm-haid=639, x-zm-real-ip=64.227.153.149, x-forwarded-for=64.227.153.149, 172.70.35.85, 170.114.10.89, 170.114.10.85, 170.114.10.35, 198.19.1.39, x-zm-cluster-id=us06, x-zm-aid=O–gYL-BS9OsveGPX1oL0A, user-agent=WordPress/6.6.2; https://crm.internetcoachingempire.com}”
“request_params”:string”{}”
“http_status”:string”400″
}
Whenever I connect zoom I am getting this error
Hey Anas,
Please submit a ticket here
The host name on my Zoom account changed automatically to one of my clients even though I reset the Zoom connection again. I don’t know what to do. It’s bizarre.
Hey Julia ,
Please submit a support ticket here
On the Zoom Scope settings, I suggest adding one item to the documentation. For the “View and manage all user meetings” section, the documentation above says to “select ‘Create a meeting for a user (meeting:write:meeting:admin)’.” I did that, and FluentBooking wasn’t able to move a Zoom meeting when I or or the client rescheduled the call.
I went back and added “Update a meeting (meeting:update:meeting:admin)”, and FluentBooking was able to move the Zoom meeting. Perhaps that should be added above.
Hi Wes,
We have noted this. Thanks!
Thanks, Aminul. I also went back and added the delete permission to the Zoom application to let FluentBooking delete a cancelled meeting.
Hi Wes,
Thanks for letting us know. We’ll update this soon!
I did all of the above and have one problem:
The zoom meeting link doesn’t show up in the email notifications.
How do we fix this?
Hi Jason,
Please submit a support ticket. Our support team will help you in resolving this issue.
Hi there,
Does it require any custom coding or does the plugin have a built-in way to add the Zoom meeting link to the email notifications in case when the payment process is successfully completed?