

How to Send a Calendar Invite with FluentBooking: 2 Easy Methods


When someone books an appointment through your website, you want them to remember it and show up on time. One simple way to help is by giving them an easy option to add the appointment to their personal calendar.
With FluentBooking, you can handle calendar invites in two ways. You can send an ICS calendar file with the booking confirmation email, allowing attendees to add the event to their preferred calendar app. Or, you can connect a supported calendar service with FluentBooking to sync your bookings and manage your availability more efficiently.
In this guide, we’ll walk you through both methods, explain how they work, and help you choose the right option for your booking workflow.
What You Need Before Sending Calendar Invites
Before setting up calendar invites with FluentBooking, make sure your booking system has the basic pieces in place. You don’t need a complicated setup, but these requirements will help everything work smoothly.
- FluentBooking installed on your WordPress site: Install and activate FluentBooking before creating your booking workflow.
- A booking event created: Set up the appointment type, duration, availability, and other event details that your attendees will book.
- A supported calendar connected: If you want to sync bookings with your own calendar, connect a supported service such as Google Calendar.
- Email notifications enabled: Your confirmation email needs to be configured so attendees receive their booking details after completing an appointment.
- Correct attendee information collected: Make sure your booking form collects the attendee’s name and email address correctly. The email address is particularly important because it’s where the booking confirmation and calendar information are sent.
Once these are ready, you can set up your preferred calendar workflow and test it with a sample booking before making your booking page live.
How to Send a Calendar Invite in Two Easy Methods (Step-by-Step)
FluentBooking gives you more than one way to make appointments easier to manage on a calendar. The right method depends on whether you want to help attendees save the appointment to their personal calendar, keep your own calendar synchronized, or do both.
Here are the two methods you can use:
Method 1: Send an ICS Calendar File with the Confirmation Email
The easiest way to let attendees save their appointments to their personal calendars is to include an ICS file in the booking confirmation email. FluentBooking can automatically attach this calendar file to the confirmation email, so both you and the attendee can download the event details and add them to a preferred calendar application.
Here’s how to enable it.
Step 1: Open FluentBooking Settings
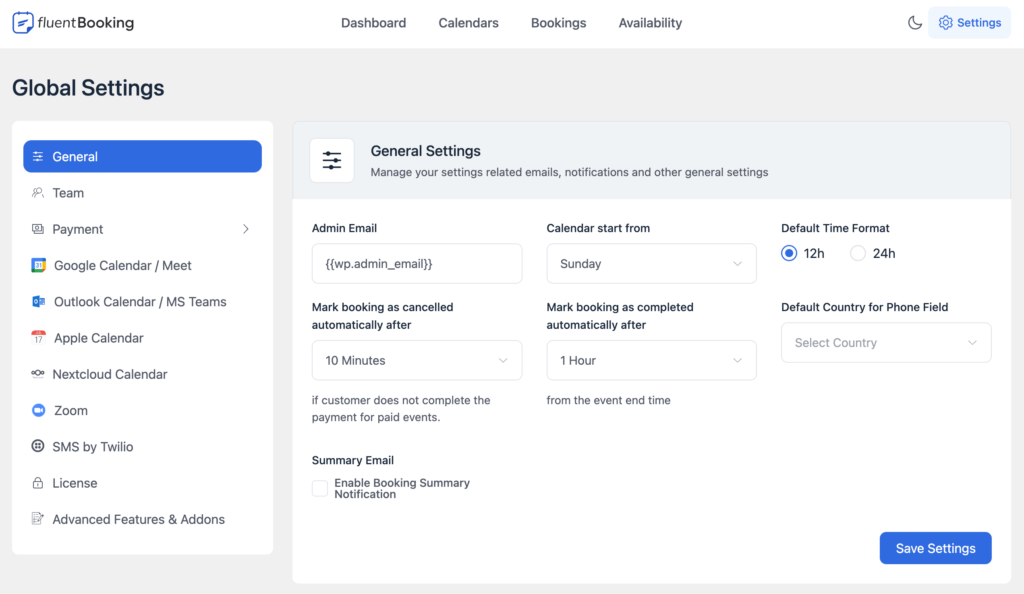
From your WordPress dashboard, go to FluentBooking → Settings.
Then open the General settings section. You’ll find the email configuration options under Email Settings.
Step 2: Enable the ICS File Attachment
Under Email Settings, look for the option Include ICS File Attachment in Booking Confirmation Email.
Turn this option on.
This setting tells FluentBooking to automatically attach an .ics calendar file whenever it sends a booking confirmation email.
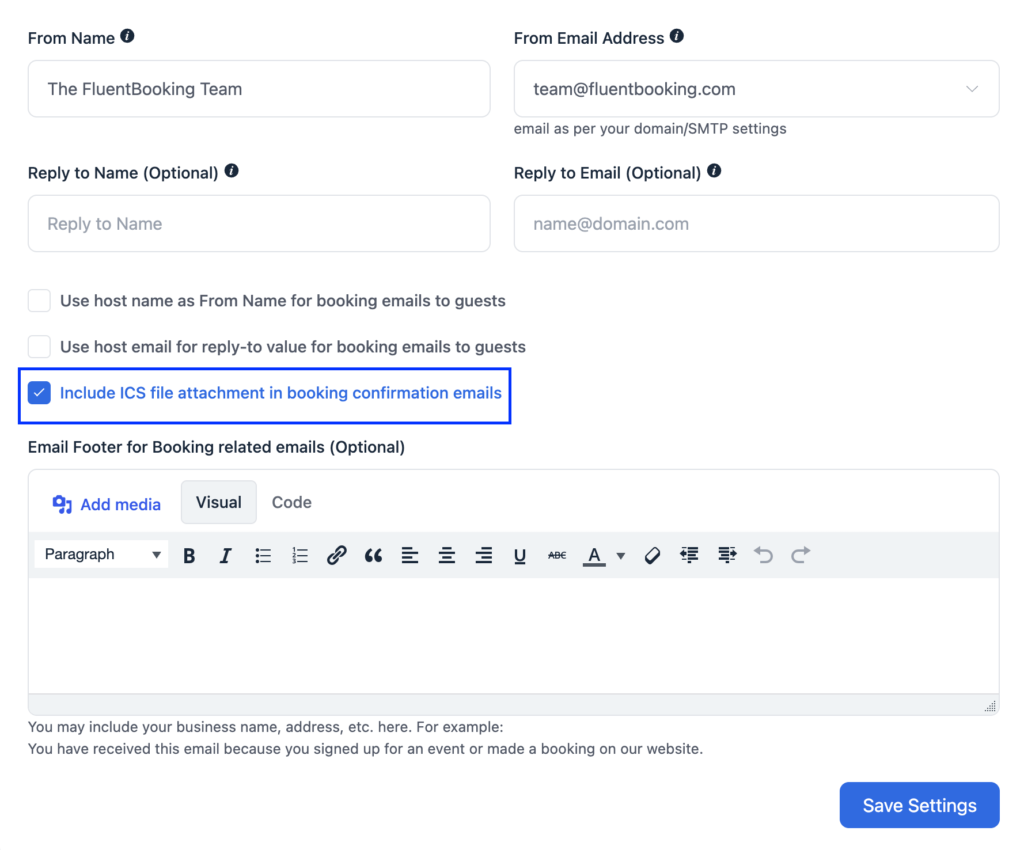
After enabling the ICS option, save your settings.
That’s all you need to do. You don’t have to manually create an ICS file for each appointment. FluentBooking generates the calendar file based on the booking details.
Step 3: Create a Test Booking
Next, open your booking page and make a test appointment using a different email address.
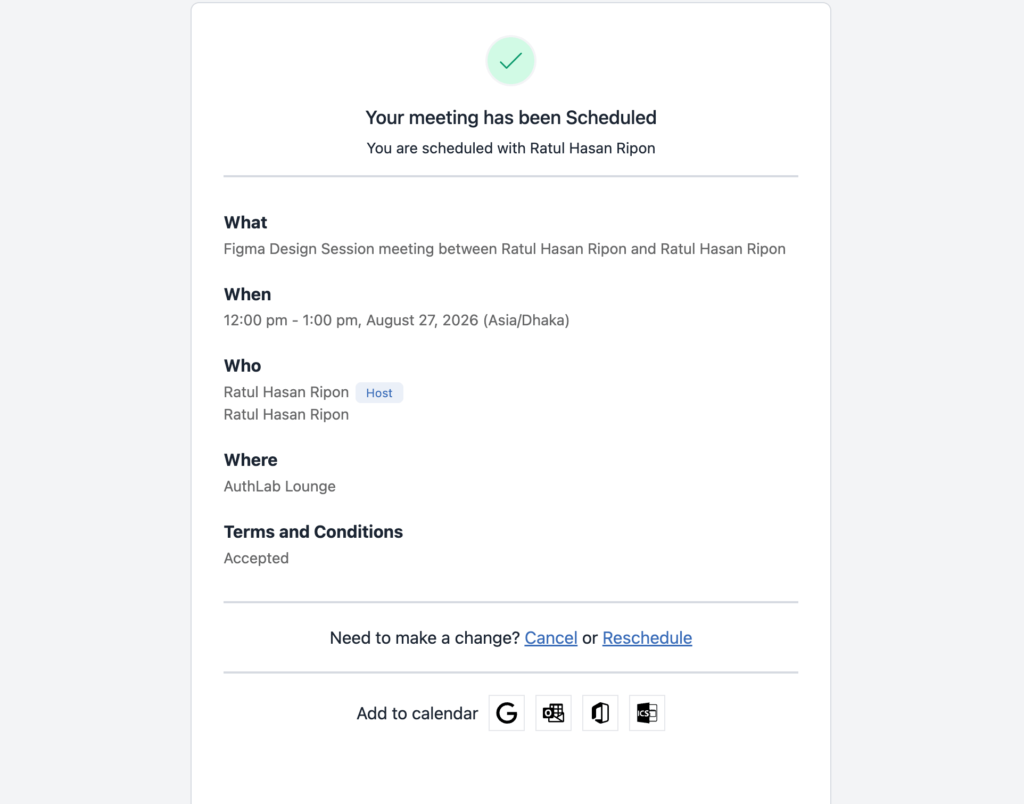
Once the booking is confirmed, FluentBooking will send the booking confirmation email with the ICS file attached.
Step 5: Check the Confirmation Email
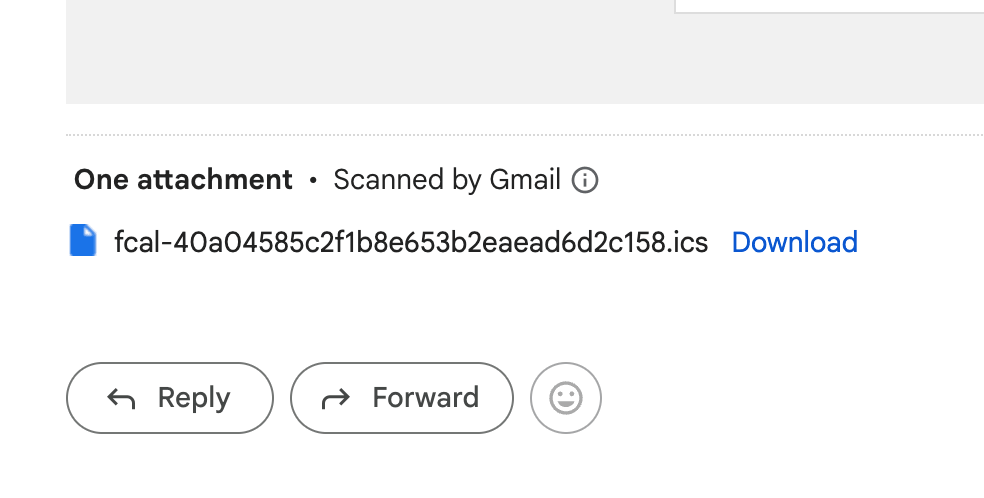
Open the confirmation email and look for the attached .ics file.
The file contains the appointment information and can be opened or imported into compatible calendar applications such as Google Calendar, Outlook, and Apple Calendar. FluentBooking’s documentation specifically highlights the ICS attachment as a way for recipients to add events to their preferred calendar software.
Step 6: Add the Appointment to Your Calendar
The attendee can download or open the ICS file and add the appointment to their preferred calendar application.
For example, if they use Google Calendar, they can import the ICS file and add the appointment to their calendar. The same file can be used with other compatible calendar applications.
This gives attendees a simple way to save their appointment without requiring them to use the same calendar service as the organizer.
Bonus Tip: Not sure how to add the ICS file to Google Calendar? For a detailed walkthrough, check out our guide: How to Import ICS to Google Calendar step-by-Step Guide.
Method 2: Connect Your Calendar with FluentBooking
FluentBooking supports integrations with calendars such as Google Calendar, Outlook Calendar, Apple Calendar, and Nextcloud Calendar. Its Google Calendar integration also supports two-way synchronization, so existing calendar events can be considered when checking availability, while new FluentBooking appointments can be added to your calendar.
For this example, we’ll use Google Calendar.
Step 1: Open the Calendar Integration Settings
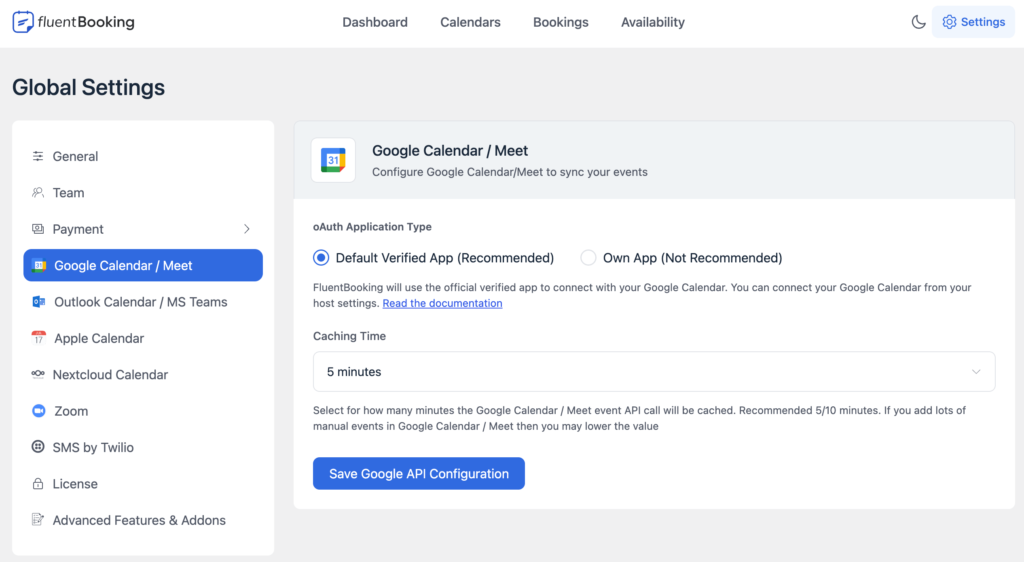
From your WordPress dashboard, go to FluentBooking → Settings and open the Google Calendar/Meet integration.
FluentBooking provides a one-click Google Calendar integration, so you don’t need to create your own Google Cloud app for the standard setup.
Step 2: Connect Your Google Account
Select the Default Verified App option and connect the Google account you want to use for your bookings.
You’ll be redirected to Google, where you need to sign in and grant FluentBooking the required permissions.
Once authorization is complete, your Google account will be connected to FluentBooking.

Step 3: Connect the Calendar to Your Host
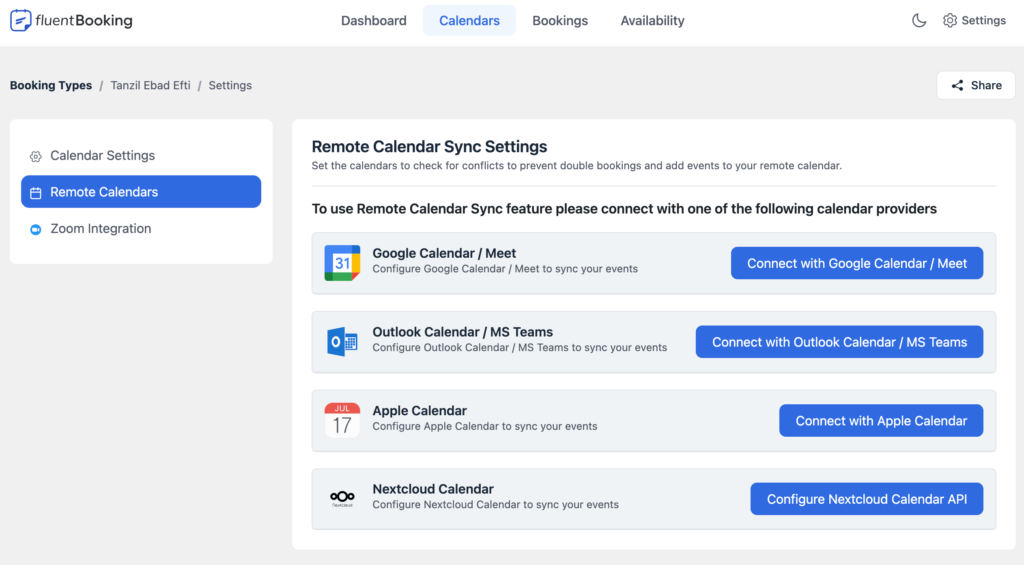
Next, go to Calendars in FluentBooking and select the host whose appointments you want to sync.
Open the host’s settings and find Remote Calendar. From there, choose Connect with Google Calendar/Meet and select the Google account you just connected.
Step 4: Check the Booking Confirmation Email
FluentBooking also lets you configure the booking confirmation email sent to the attendee. Go to Calendars → select your event → Email Notification and make sure the Booking Confirmation Email to Attendee is enabled and configured correctly.
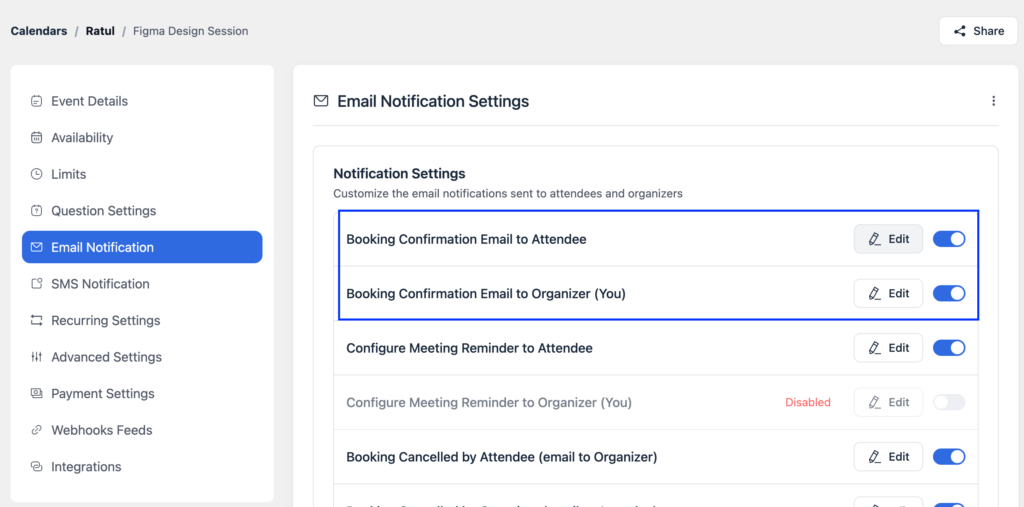
If you’ve enabled the ICS attachment in the global email settings, the calendar file can also be included in this confirmation email. This means you can use the calendar integration for your own schedule while giving the attendee an ICS file to add the appointment to their personal calendar.
Step 5: Save and Test the Integration
Once everything is configured, create a test booking through your FluentBooking booking page.
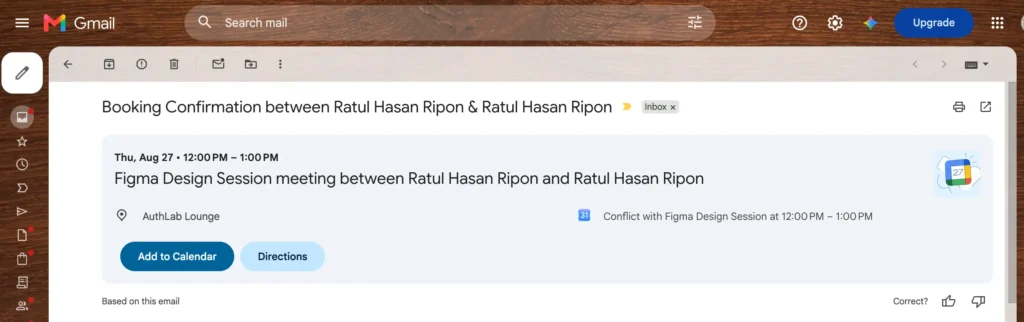
Then open your Google Calendar and check whether the appointment has been added correctly. FluentBooking’s integration is designed to keep your booking schedule and connected calendar synchronized, helping you avoid scheduling conflicts.
Check that:
- The appointment appears on the correct calendar.
- The date and time are correct.
- The attendee information is included.
- The meeting location or conferencing details are correct.
- The booked time is no longer available for another appointment.
How This Method Works
Once the integration is configured, the workflow becomes simple:
Customer books an appointment → FluentBooking confirms the booking → Appointment is synced with your connected calendar → Your calendar and availability stay updated
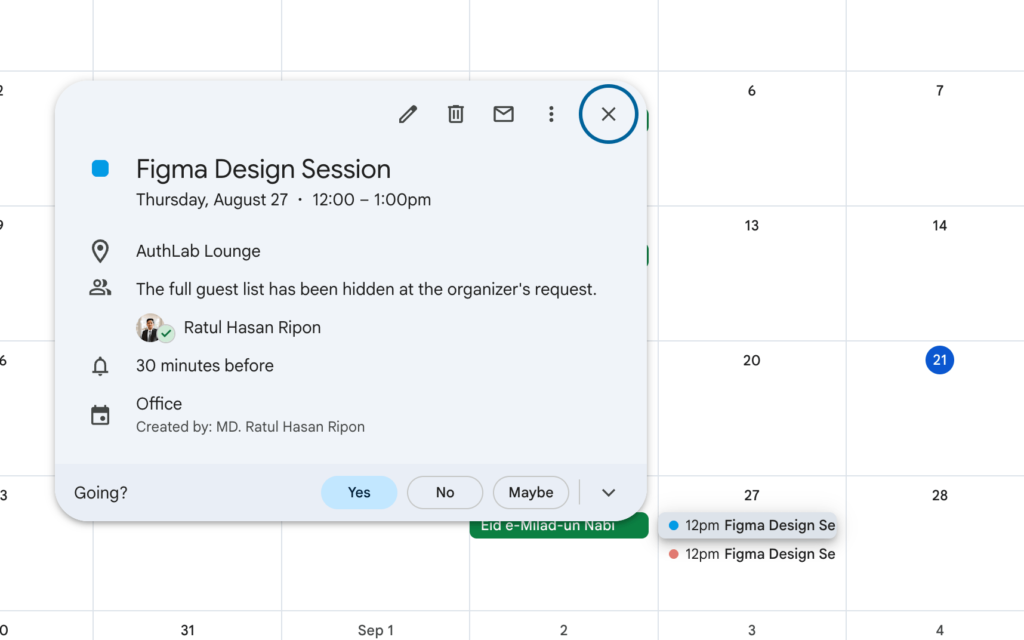
This method is particularly useful when you manage your daily schedule from Google Calendar or another supported calendar service. You can use it alongside the ICS attachment method to manage your own schedule while also giving attendees an easy way to save the appointment to their personal calendars.
ICS File vs. Calendar Integration: Which Method Should You Use?
Both methods can make appointment management easier, but they solve slightly different problems. The right option depends on whether your priority is helping attendees save their appointments or keeping your own calendar and availability in sync.
| Feature | ICS File Attachment | Calendar Integration |
| Main purpose | Helps attendees save the appointment | Keeps your calendar synchronized |
| How it works | Attaches an .ics file to the confirmation email | Connects FluentBooking with a supported calendar |
| Attendee’s calendar | Attendee can add the event to their preferred calendar | Primarily manages the organizer’s connected calendar |
| Calendar platform | Works with compatible calendar apps | Depends on the supported integration |
| Availability management | Doesn’t manage your availability | Can help with availability and conflict checking |
| Best for | Sending appointment details to attendees | Managing your own schedule |
Best Practices for Sending Calendar Invites
Keep these tips in mind to make your calendar invite workflow simple and reliable:
- Use the correct time zone: Make sure your booking event uses the correct time zone so the appointment doesn’t appear at the wrong time on the attendee’s calendar.
- Include complete appointment details: Add the appointment title, date, time, duration, location, and meeting link when applicable.
- Collect the attendee’s correct email address: Make the email field required on your booking form so the confirmation email and ICS file reach the right person.
- Test the booking workflow: Make a test booking before publishing your booking page. Check the confirmation email, ICS attachment, appointment details, and calendar event.
- Use both methods when appropriate: Connect your calendar to manage your own schedule and enable the ICS attachment so attendees can easily save the appointment to their preferred calendar.
From Booking to Calendar, Automatically
Sending calendar information after a booking makes it easier for attendees to save appointments and stay on schedule. It can also help reduce missed meetings by keeping important booking details in their calendar.
With FluentBooking, you can include an ICS file with the confirmation email so attendees can add the appointment to their preferred calendar app. You can also connect a supported calendar service to sync bookings, manage availability, and keep your own schedule organized.
You can use either method on its own or combine both. Once everything is set up, FluentBooking takes care of the calendar details automatically, so you don’t have to manually create and send calendar information after every booking.
Ratul Hasan Ripon
I enjoy making complex ideas simple and engaging through my writing and designs. With a strong knowledge on content writing and SEO, I create technical content that’s both easy to understand and interesting.
Table of Content
Subscribe To Get
WordPress Guides, Tips, and Tutorials
Add your first comment to this post