This feature allows you to assign multiple hosts to a single meeting with one client or attendee. Unlike a traditional one-on-one meeting, this collaborative setup is ideal for scenarios such as sales calls, interviews, or support sessions.
In this article, we’ll guide you through the step-by-step process of creating a Collective Booking effortlessly.
Create Collective Booking #
To create a Collective Booking, navigate to your Fluent Booking dashboard and click on Calendar in the navigation bar.
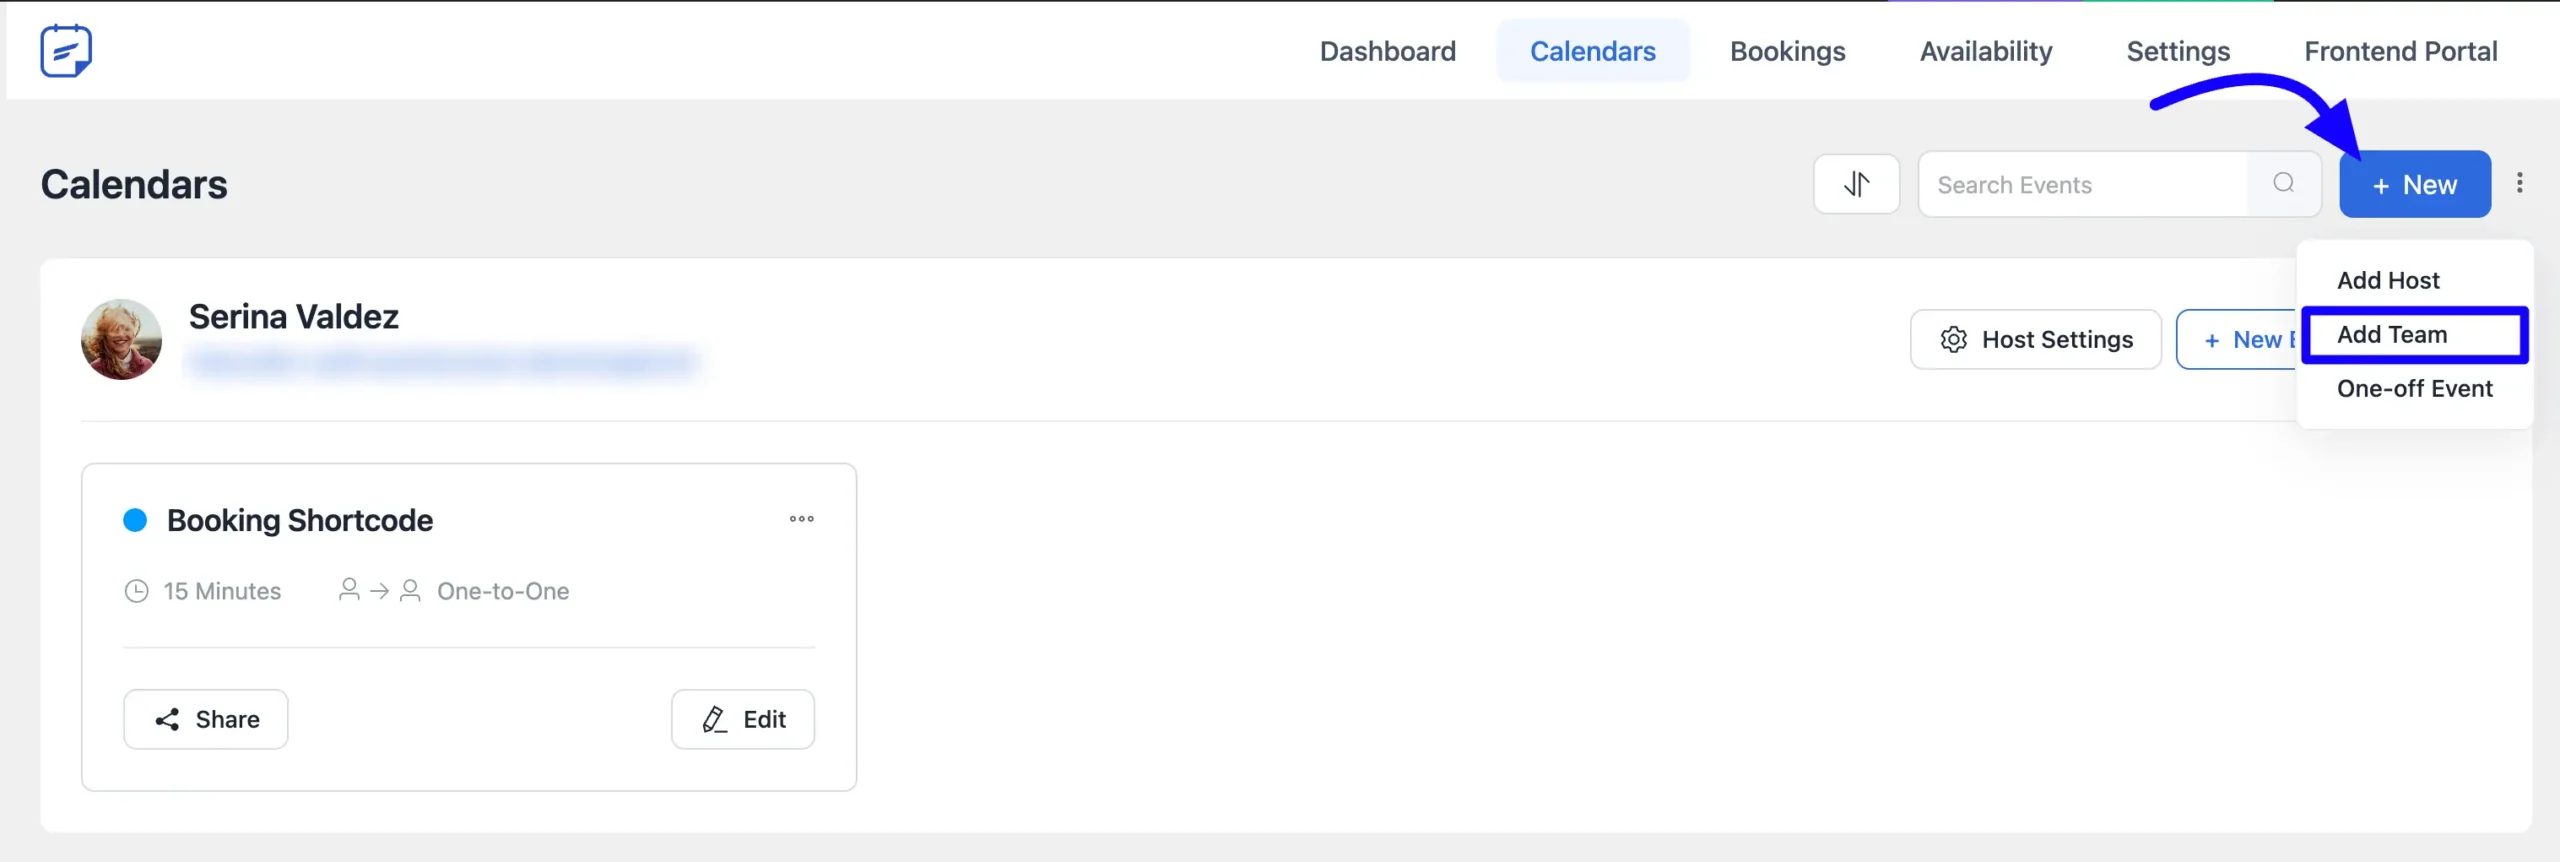
Next, click the New button and select Add Team. Please note that the Collective Booking feature is available exclusively within Team Events.
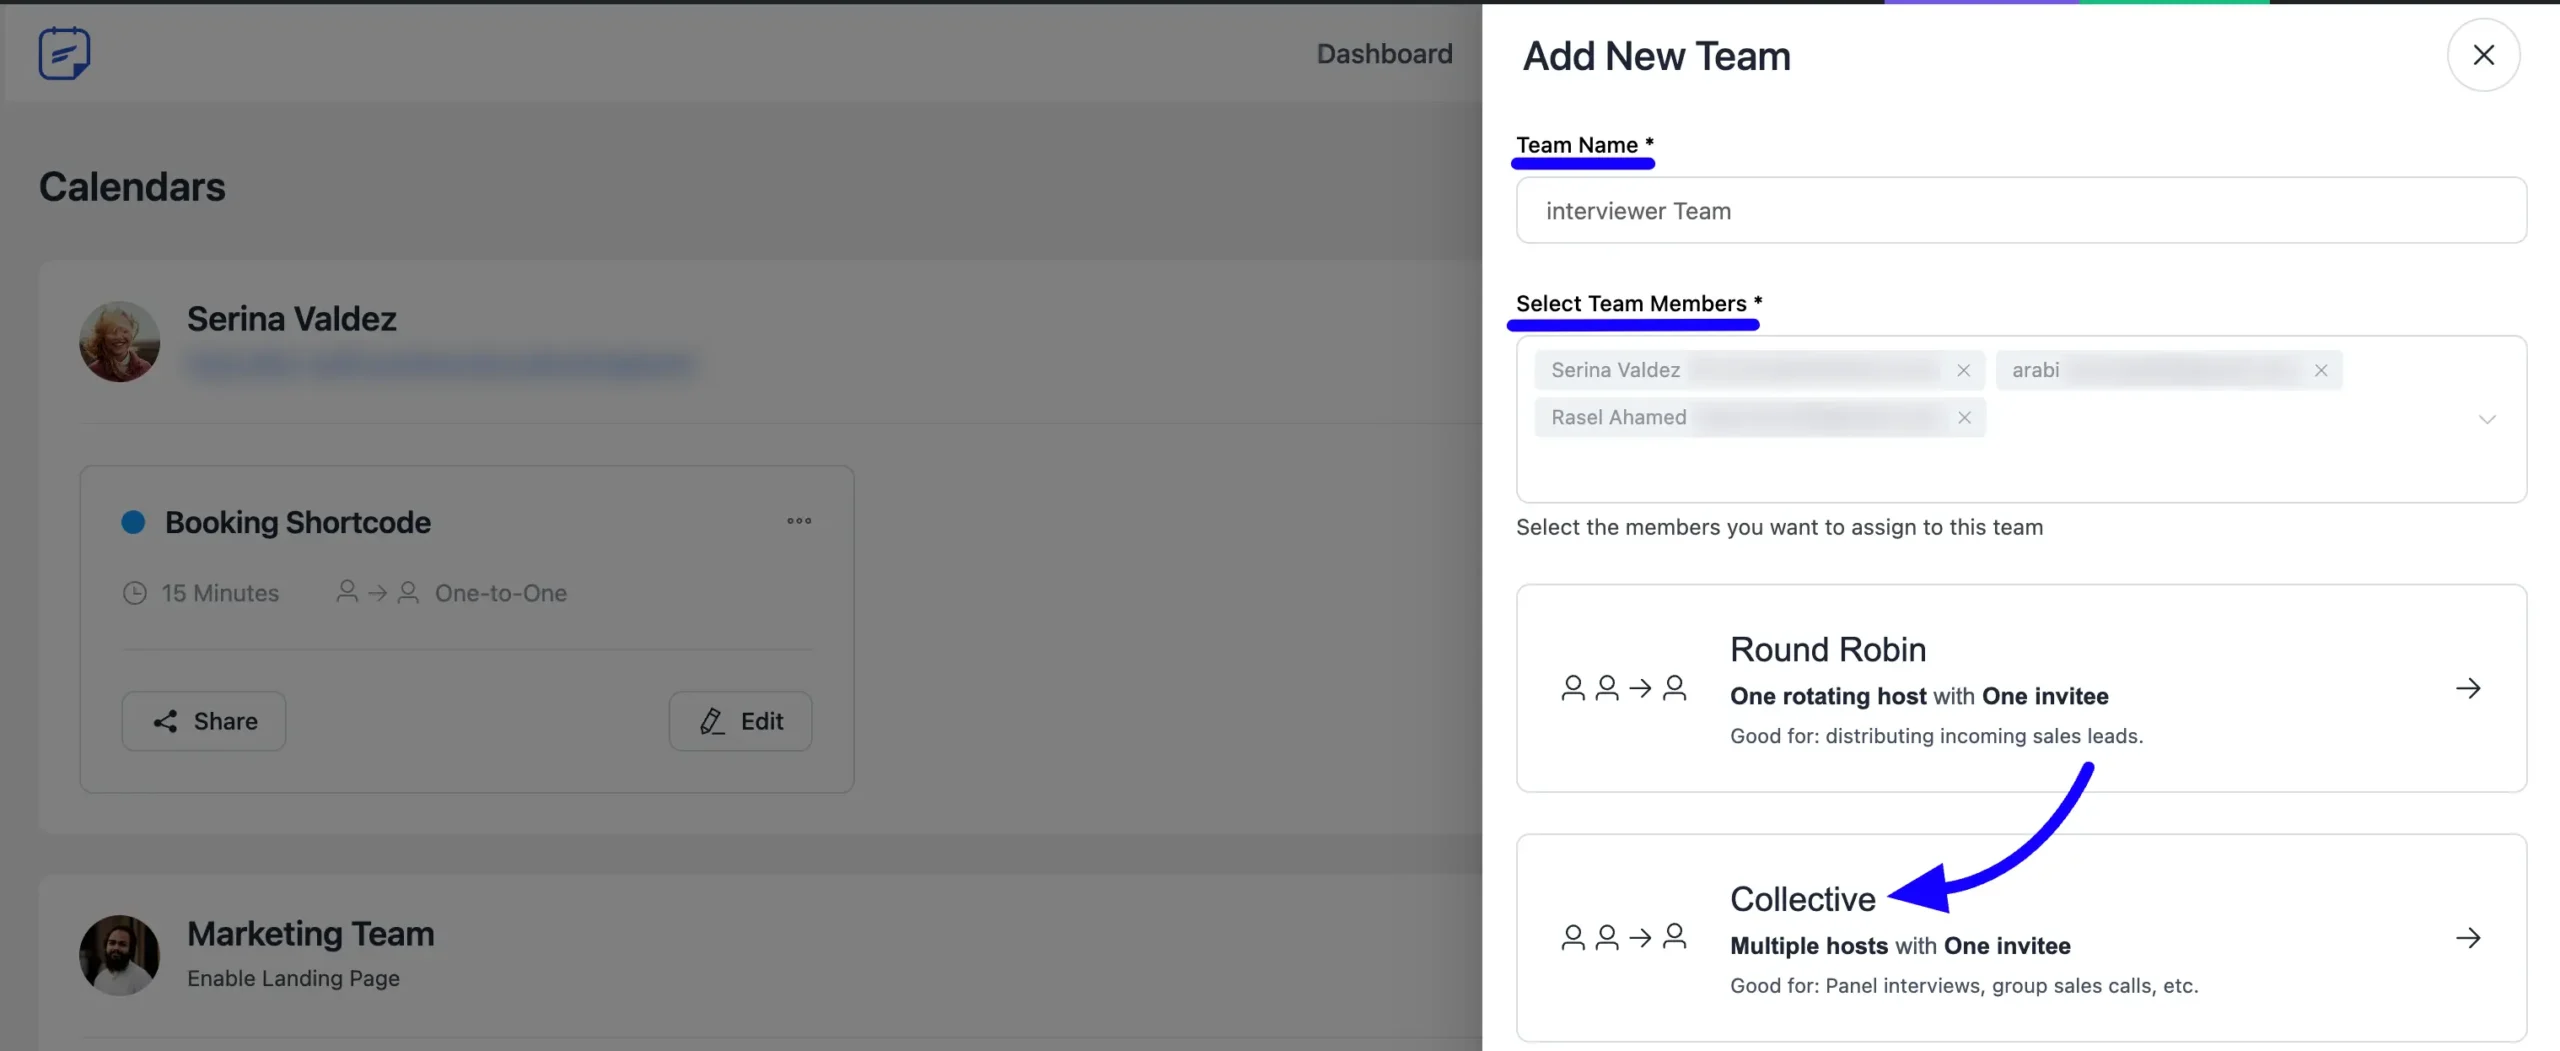
Assign a name to your team, then use the Select Team Member dropdown to choose the team members. Below this, you’ll find the Collective option—select it to enable the Collective Booking feature.
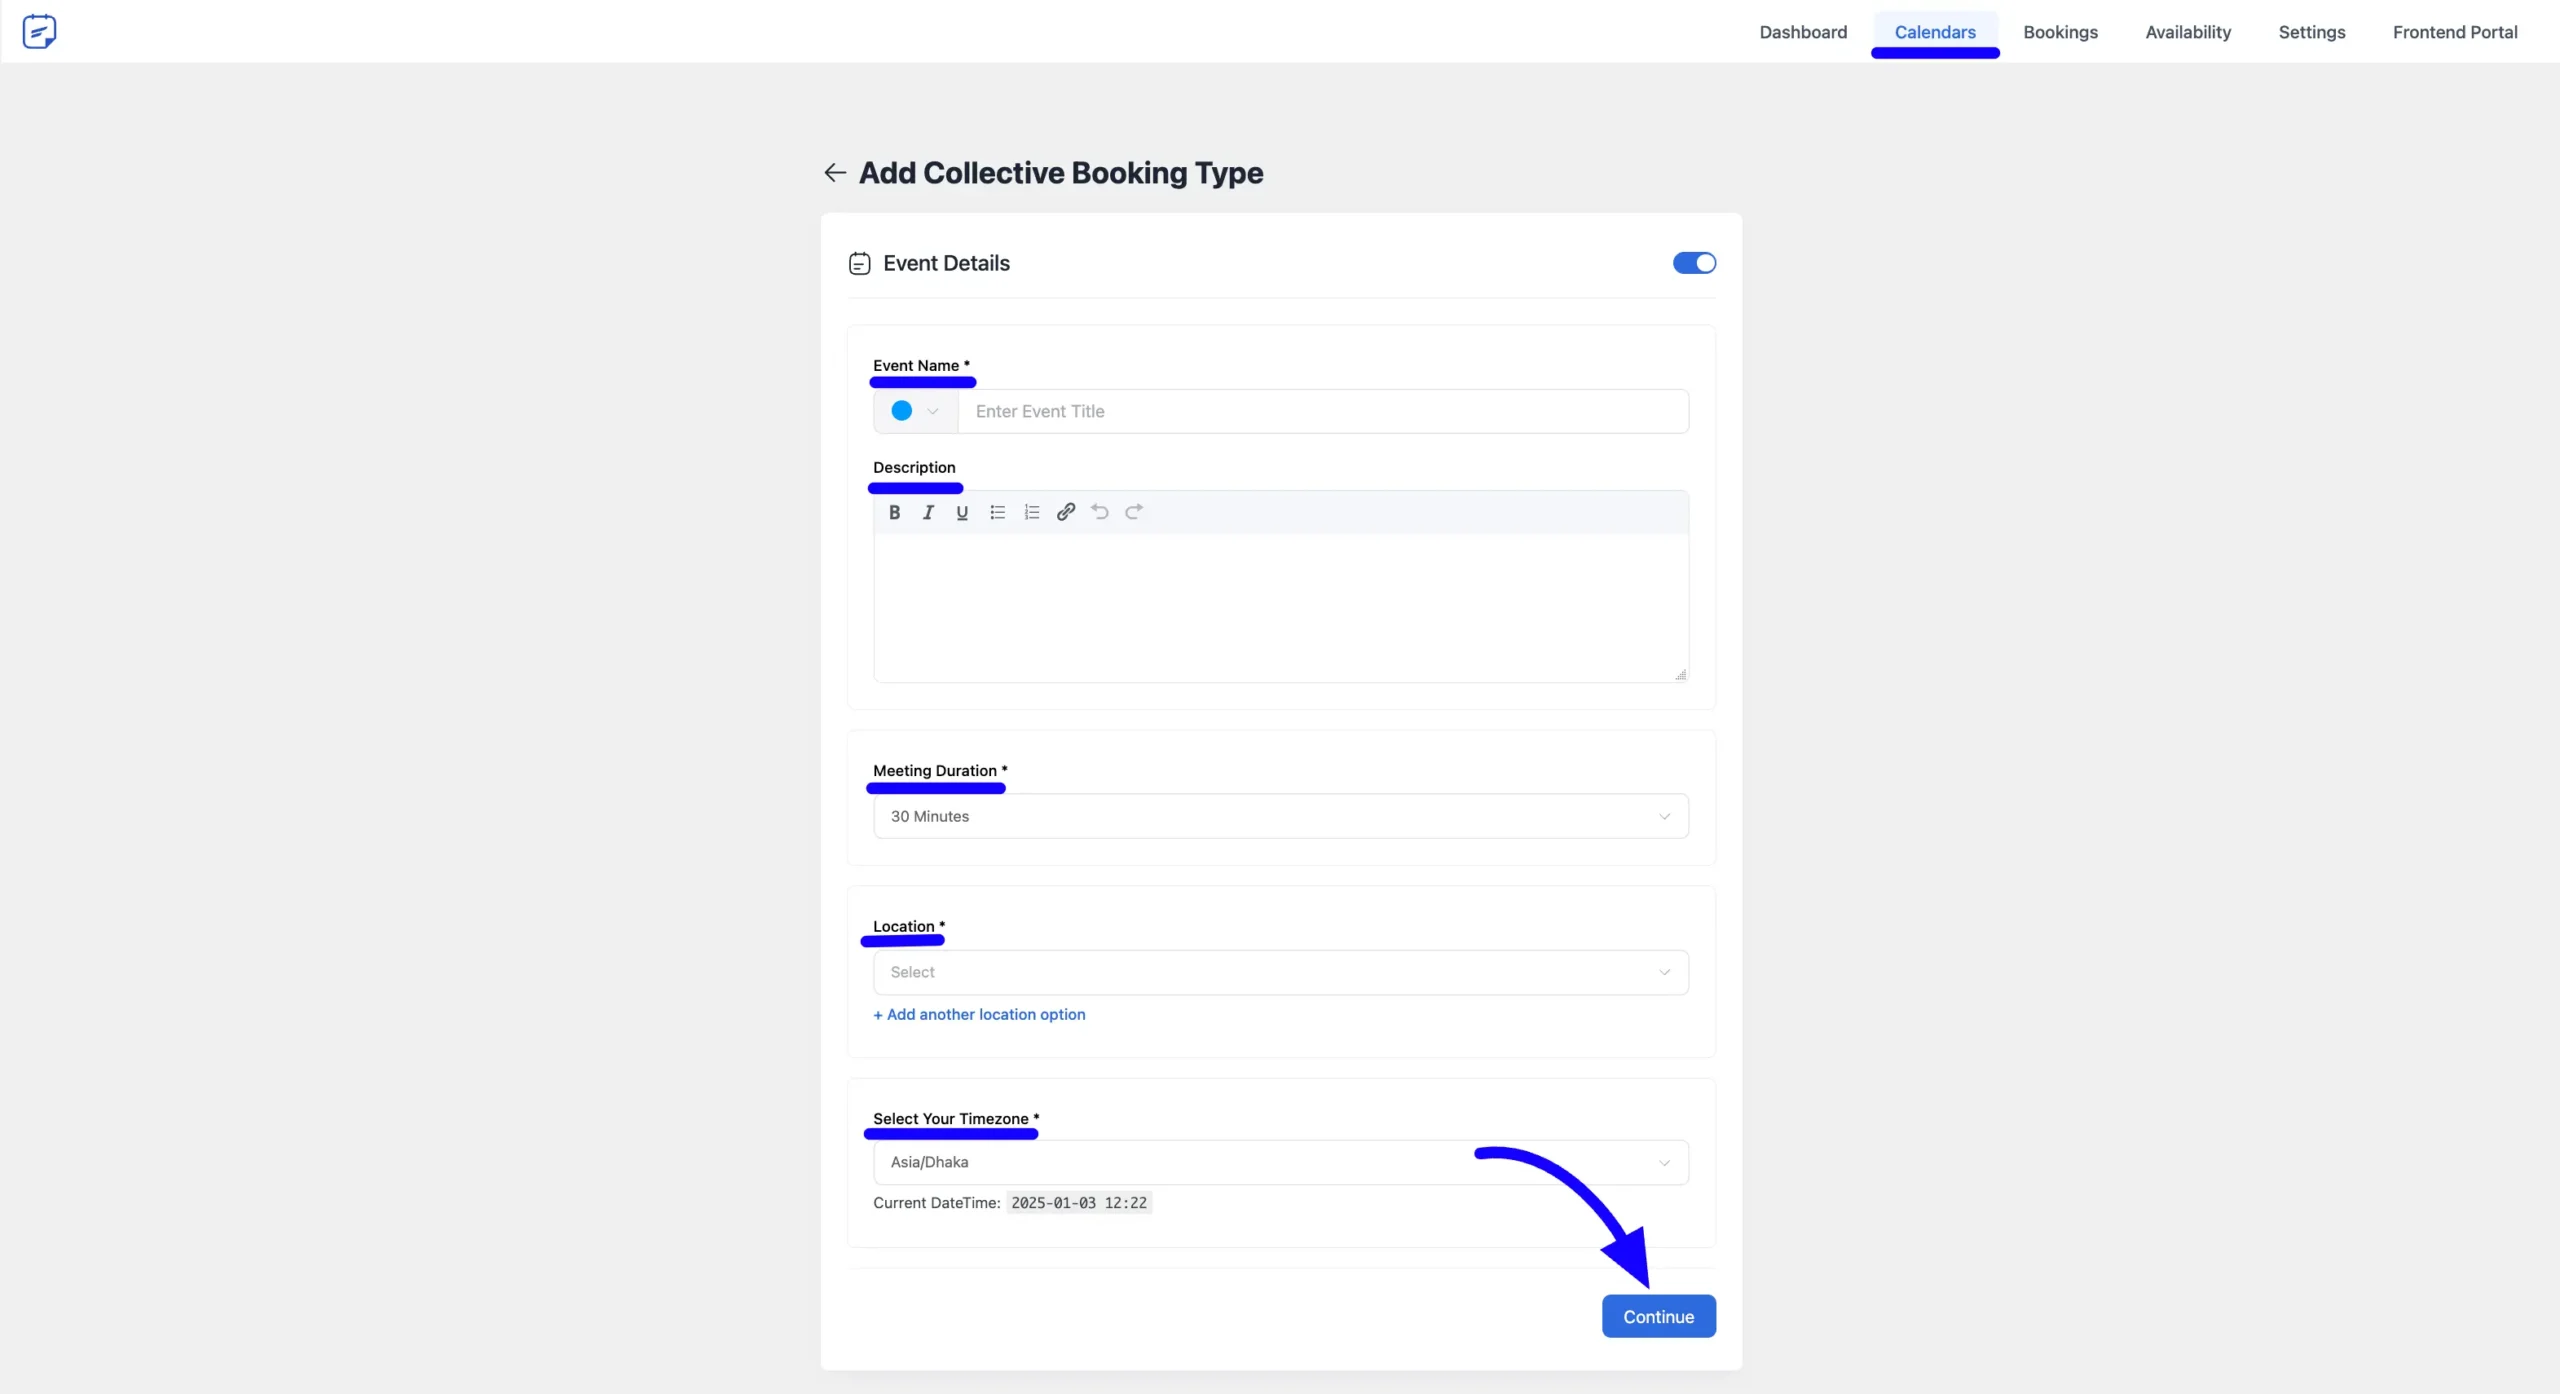
Next, you’ll be directed to the Collective Booking Details page. Here, provide a name and description for your booking.
Use the Meeting Duration dropdown field to select the desired duration for the meeting.
Below that, you’ll find options for Meeting Location and Timezone. Customize these settings as needed, then click the Continue button to proceed.
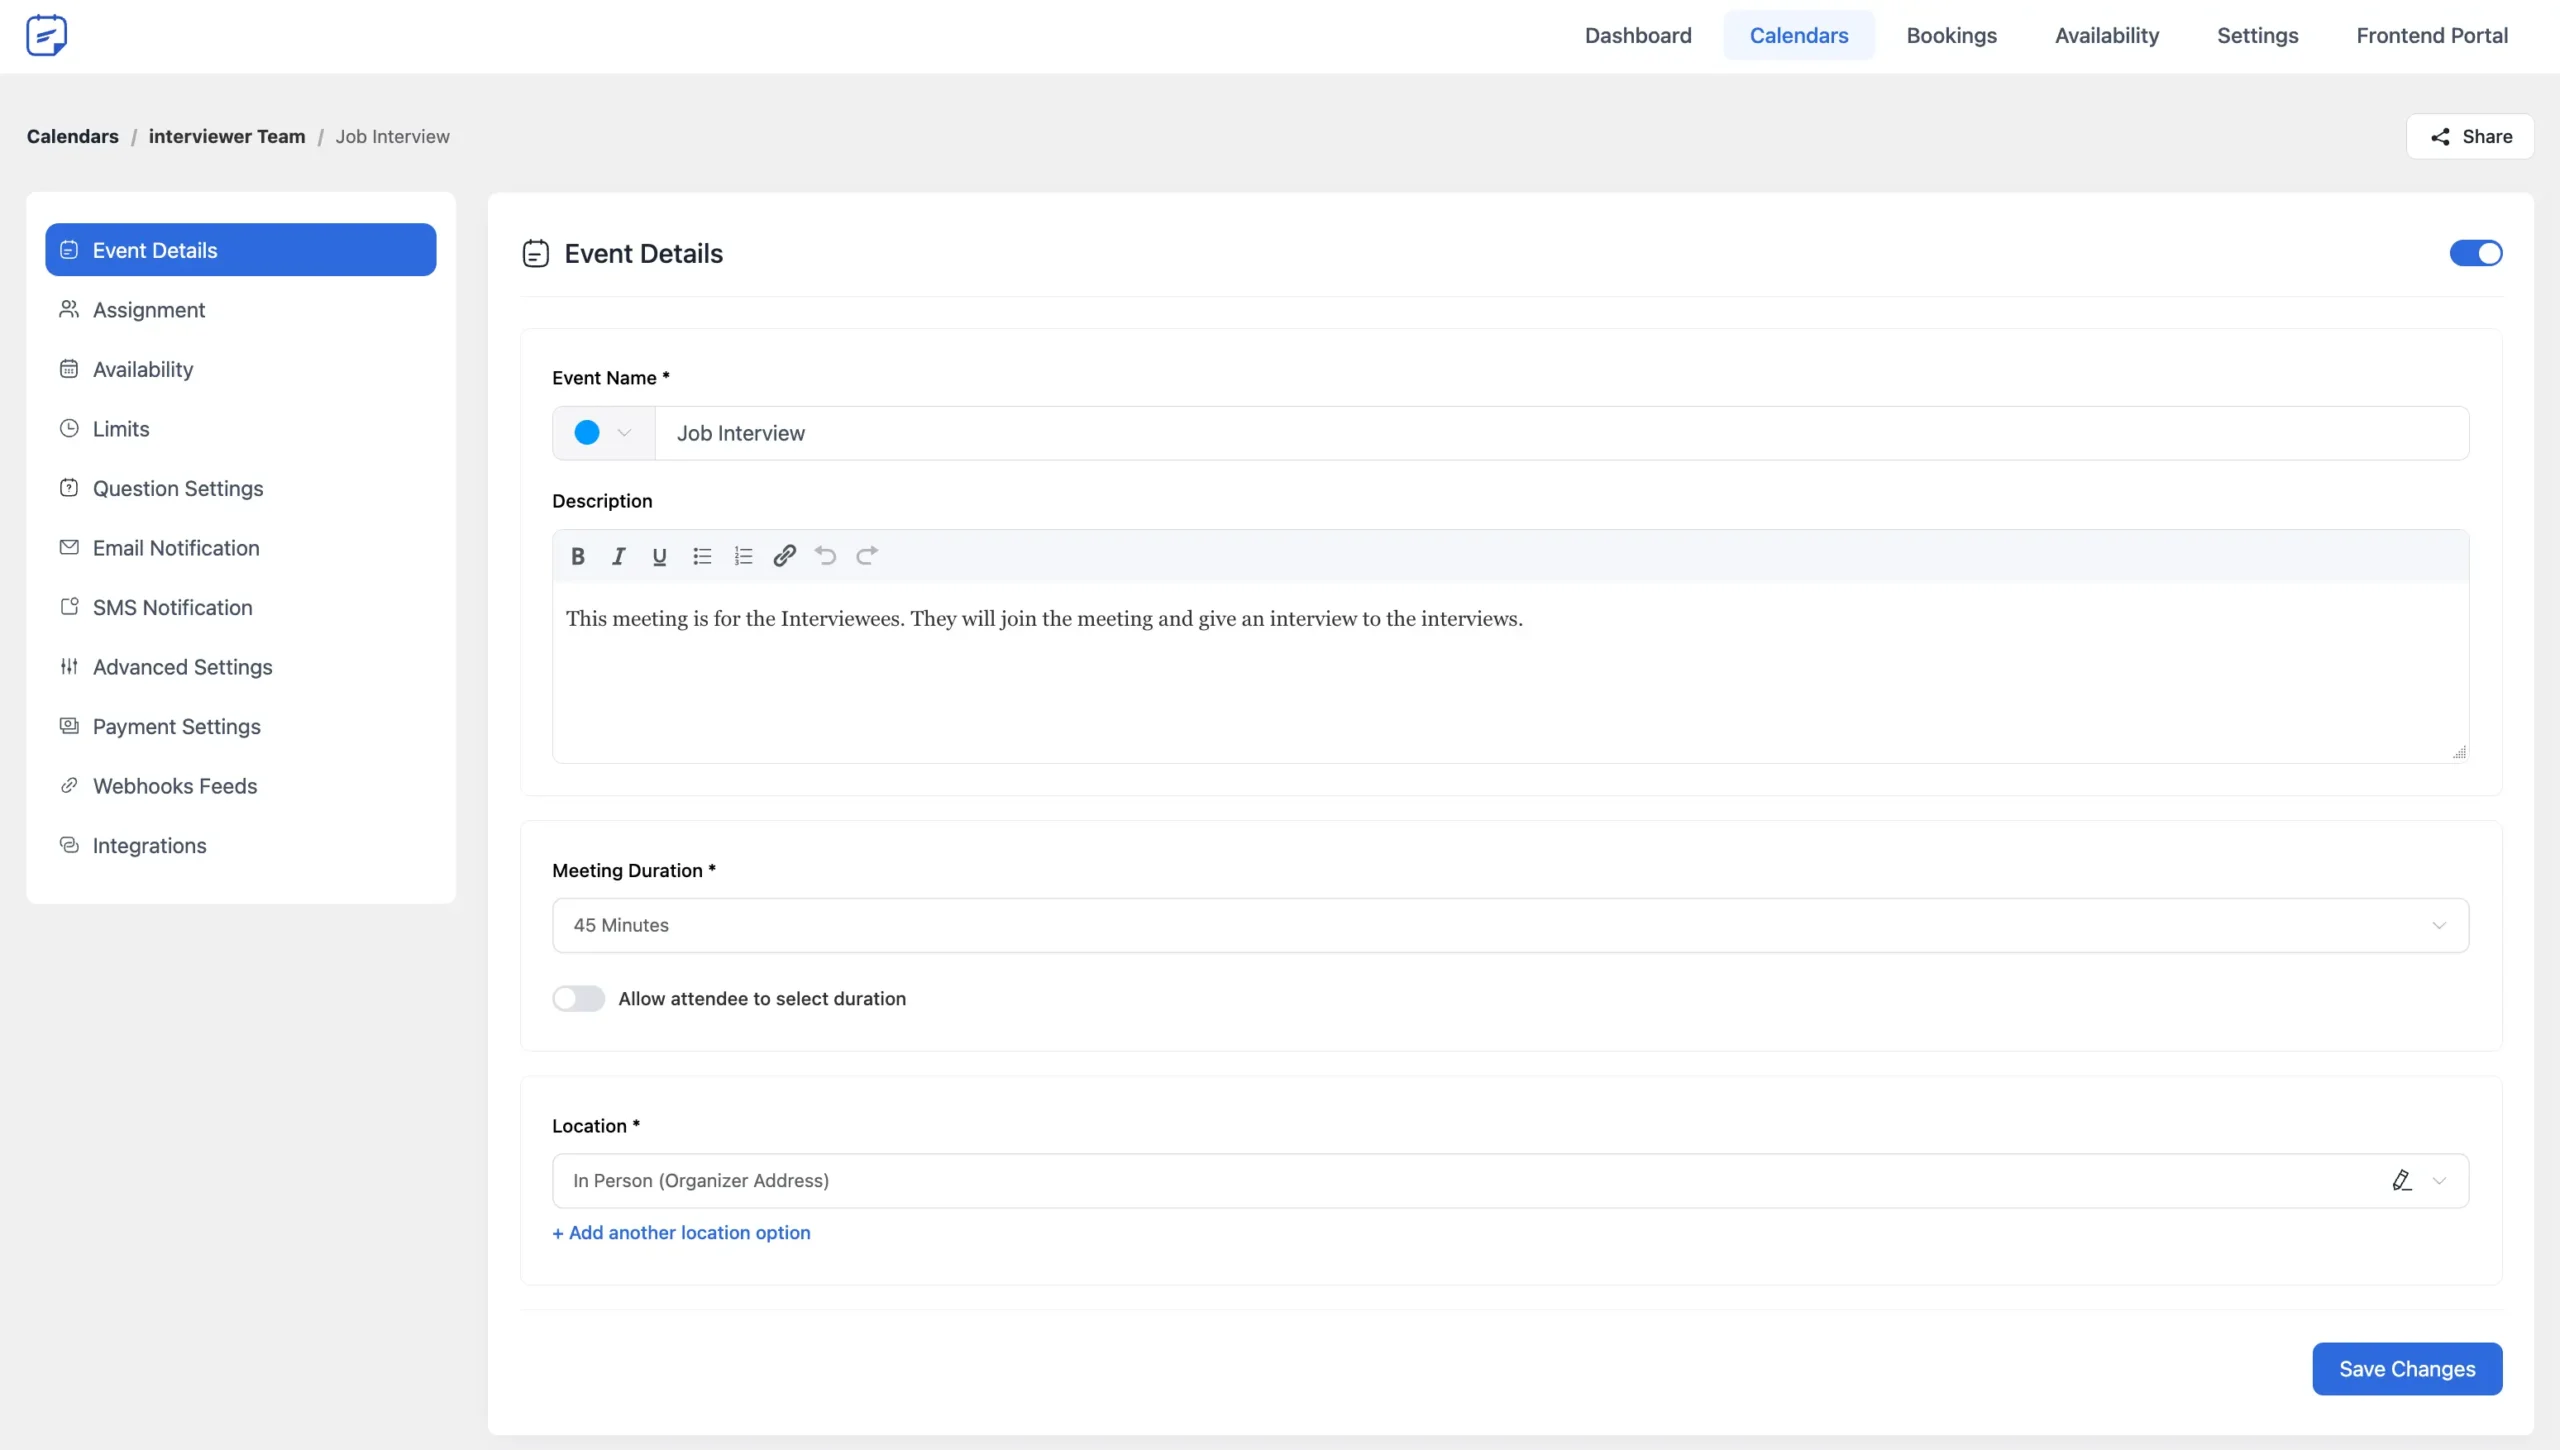
You will now be redirected to the Booking Event Editor page, where you can select and customize all the options to make your booking more effective and tailored to your needs.
Availability Settings #
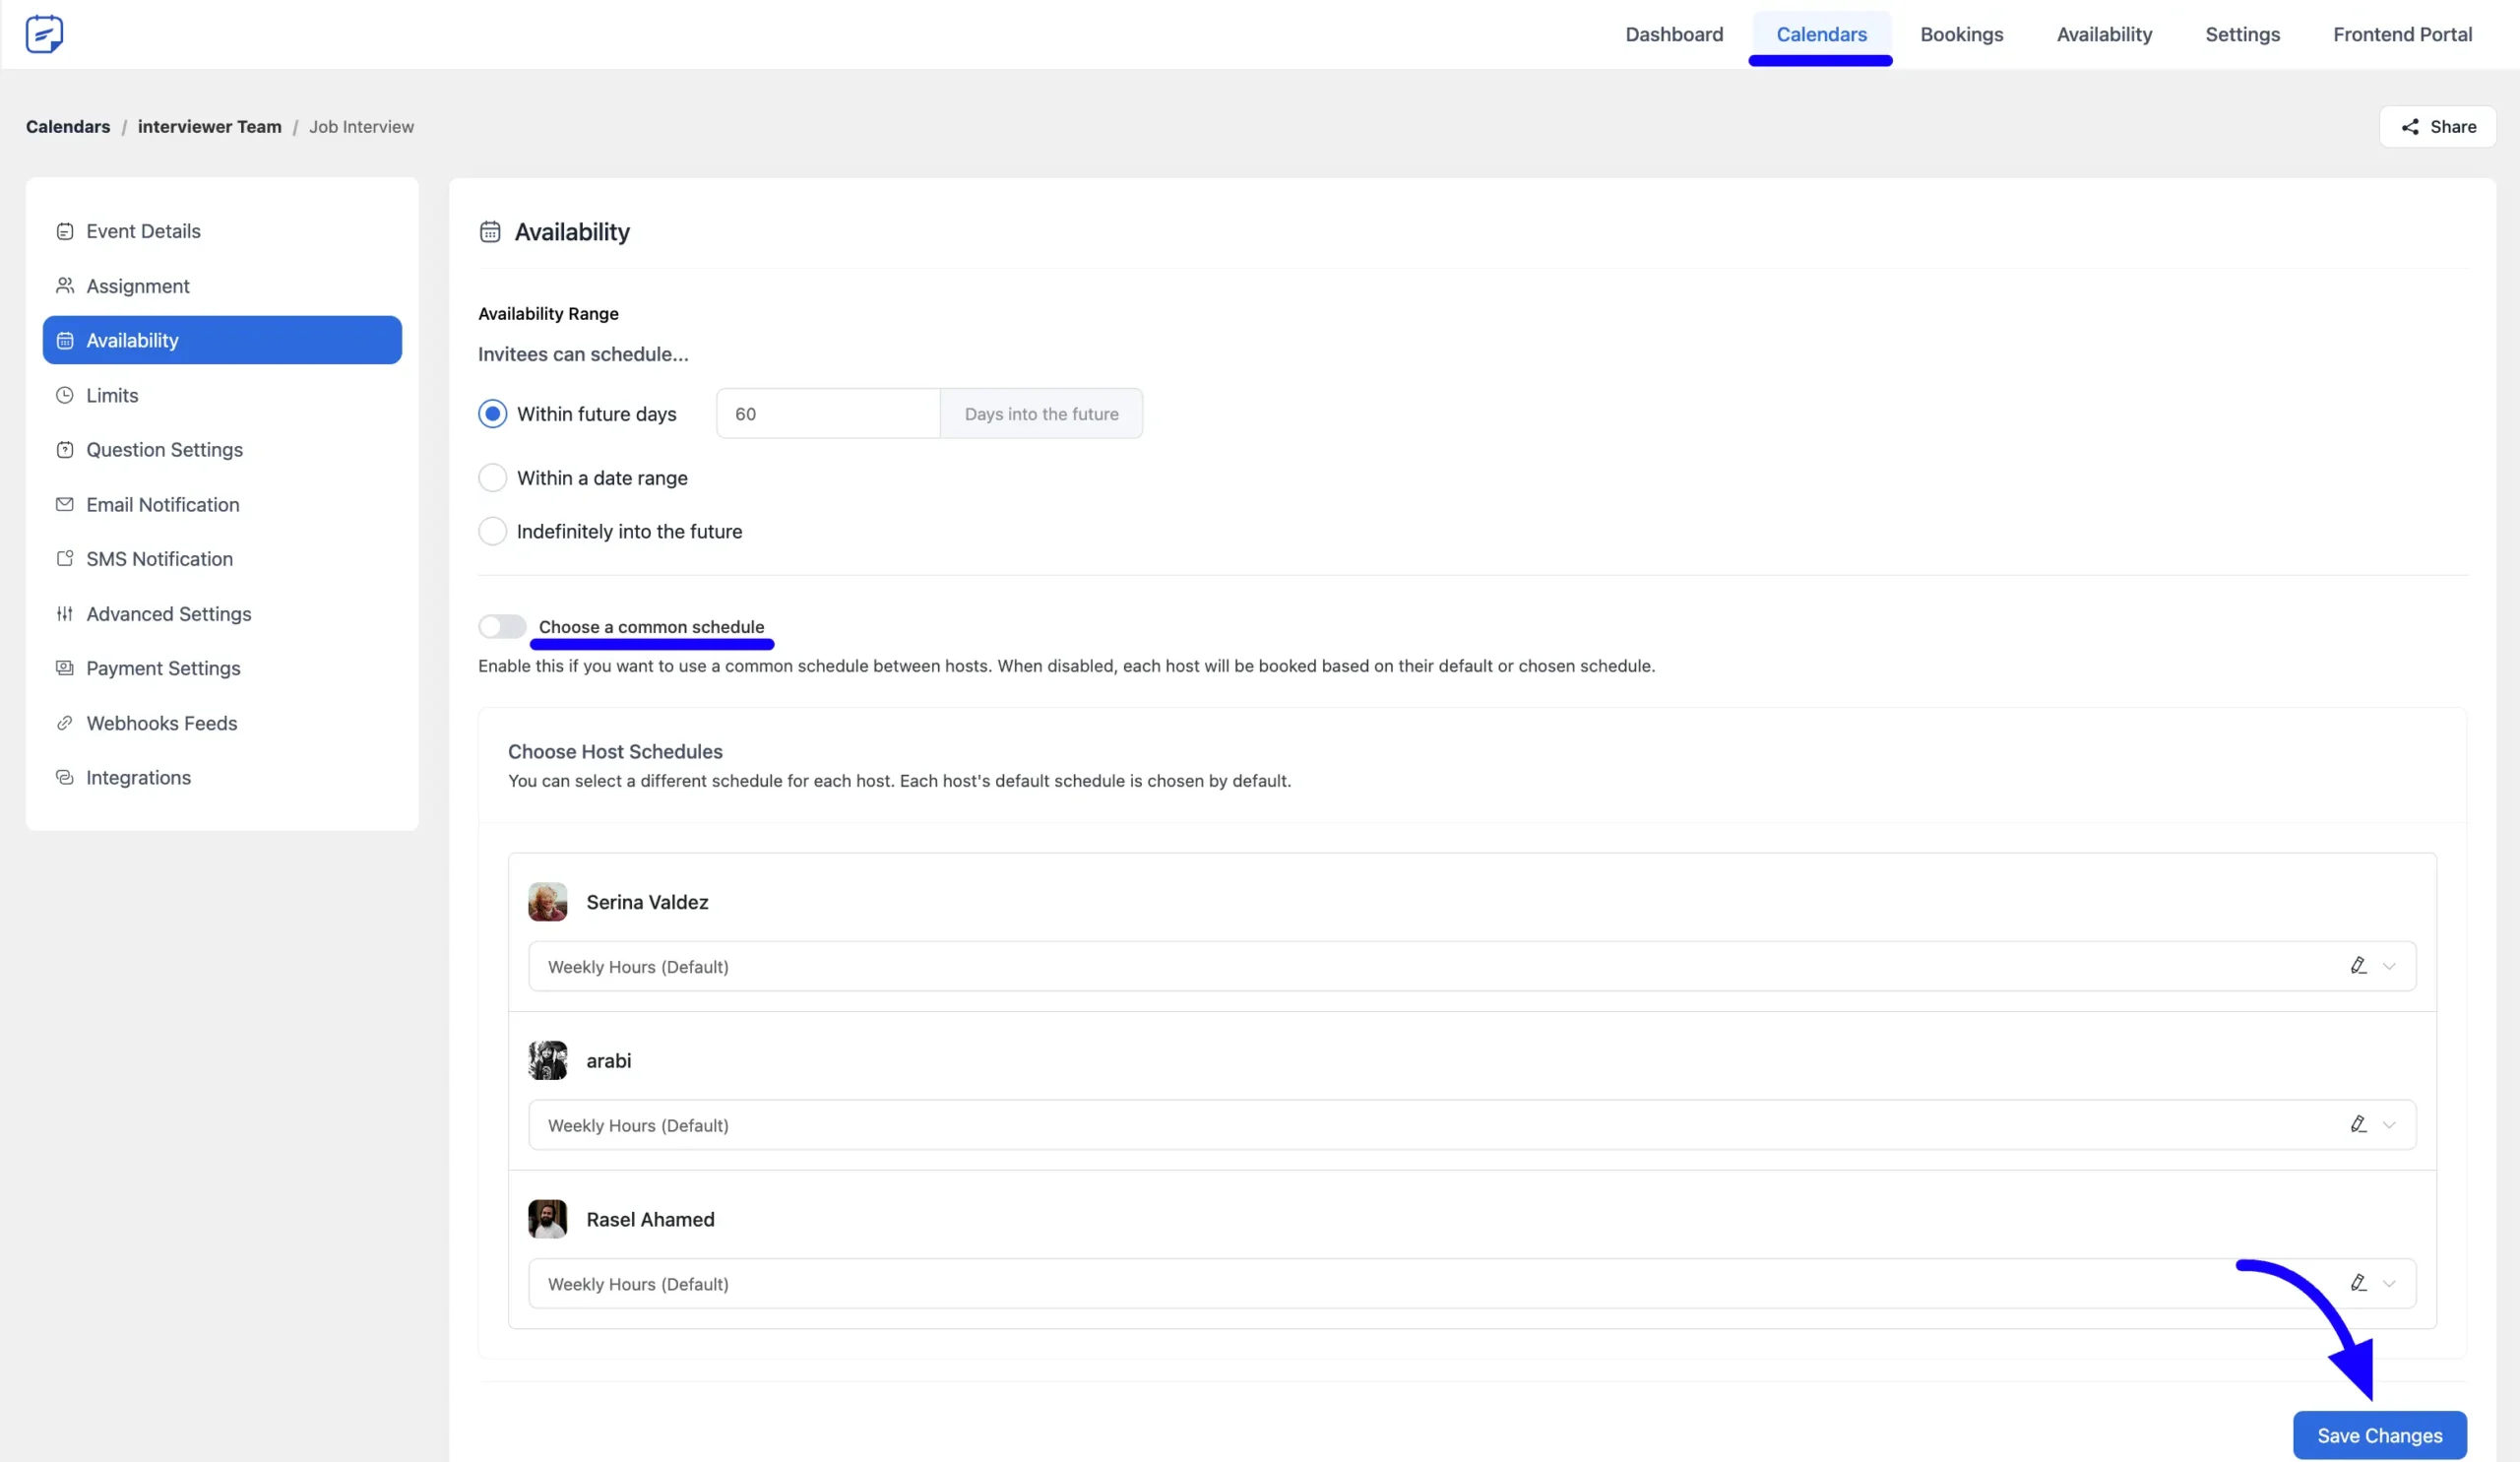
From the Availability section of the Collective Booking, you can set availability either for each team calendar individually or as a common schedule.
Availability Range #
Here, you can define the availability range for the booking calendars.
Choose a Common Schedule #
Enable this option to use a common schedule shared among all hosts. If disabled, each host will follow their individual default or selected schedule for bookings. To activate this Time Schedule option, simply check the checkbox to enable the Common Schedule for the Collective Booking.
Choose Host Schedule #
If you prefer to use each host’s individual availability, select the Host Schedule option. You can pick the pre-configured availability times for each host from the dropdown menu, which displays all available booking schedules.
Finally, click the Save Settings button to apply the changes to your Collective Booking.
And that’s how you can create a collective booking! If you have any further questions, concerns, or suggestions about this documentation, please don’t hesitate to reach out to us. We’re here to help!


