
The Global Settings in FluentBooking help you manage the core setup of your booking system. Here, you’ll find essential options like admin email preferences, email templates, and theme customization. You can also define default behaviors for new bookings.
In this guide, we’ll walk you through how to configure your Global Settings and explore the different options available under the General tab.
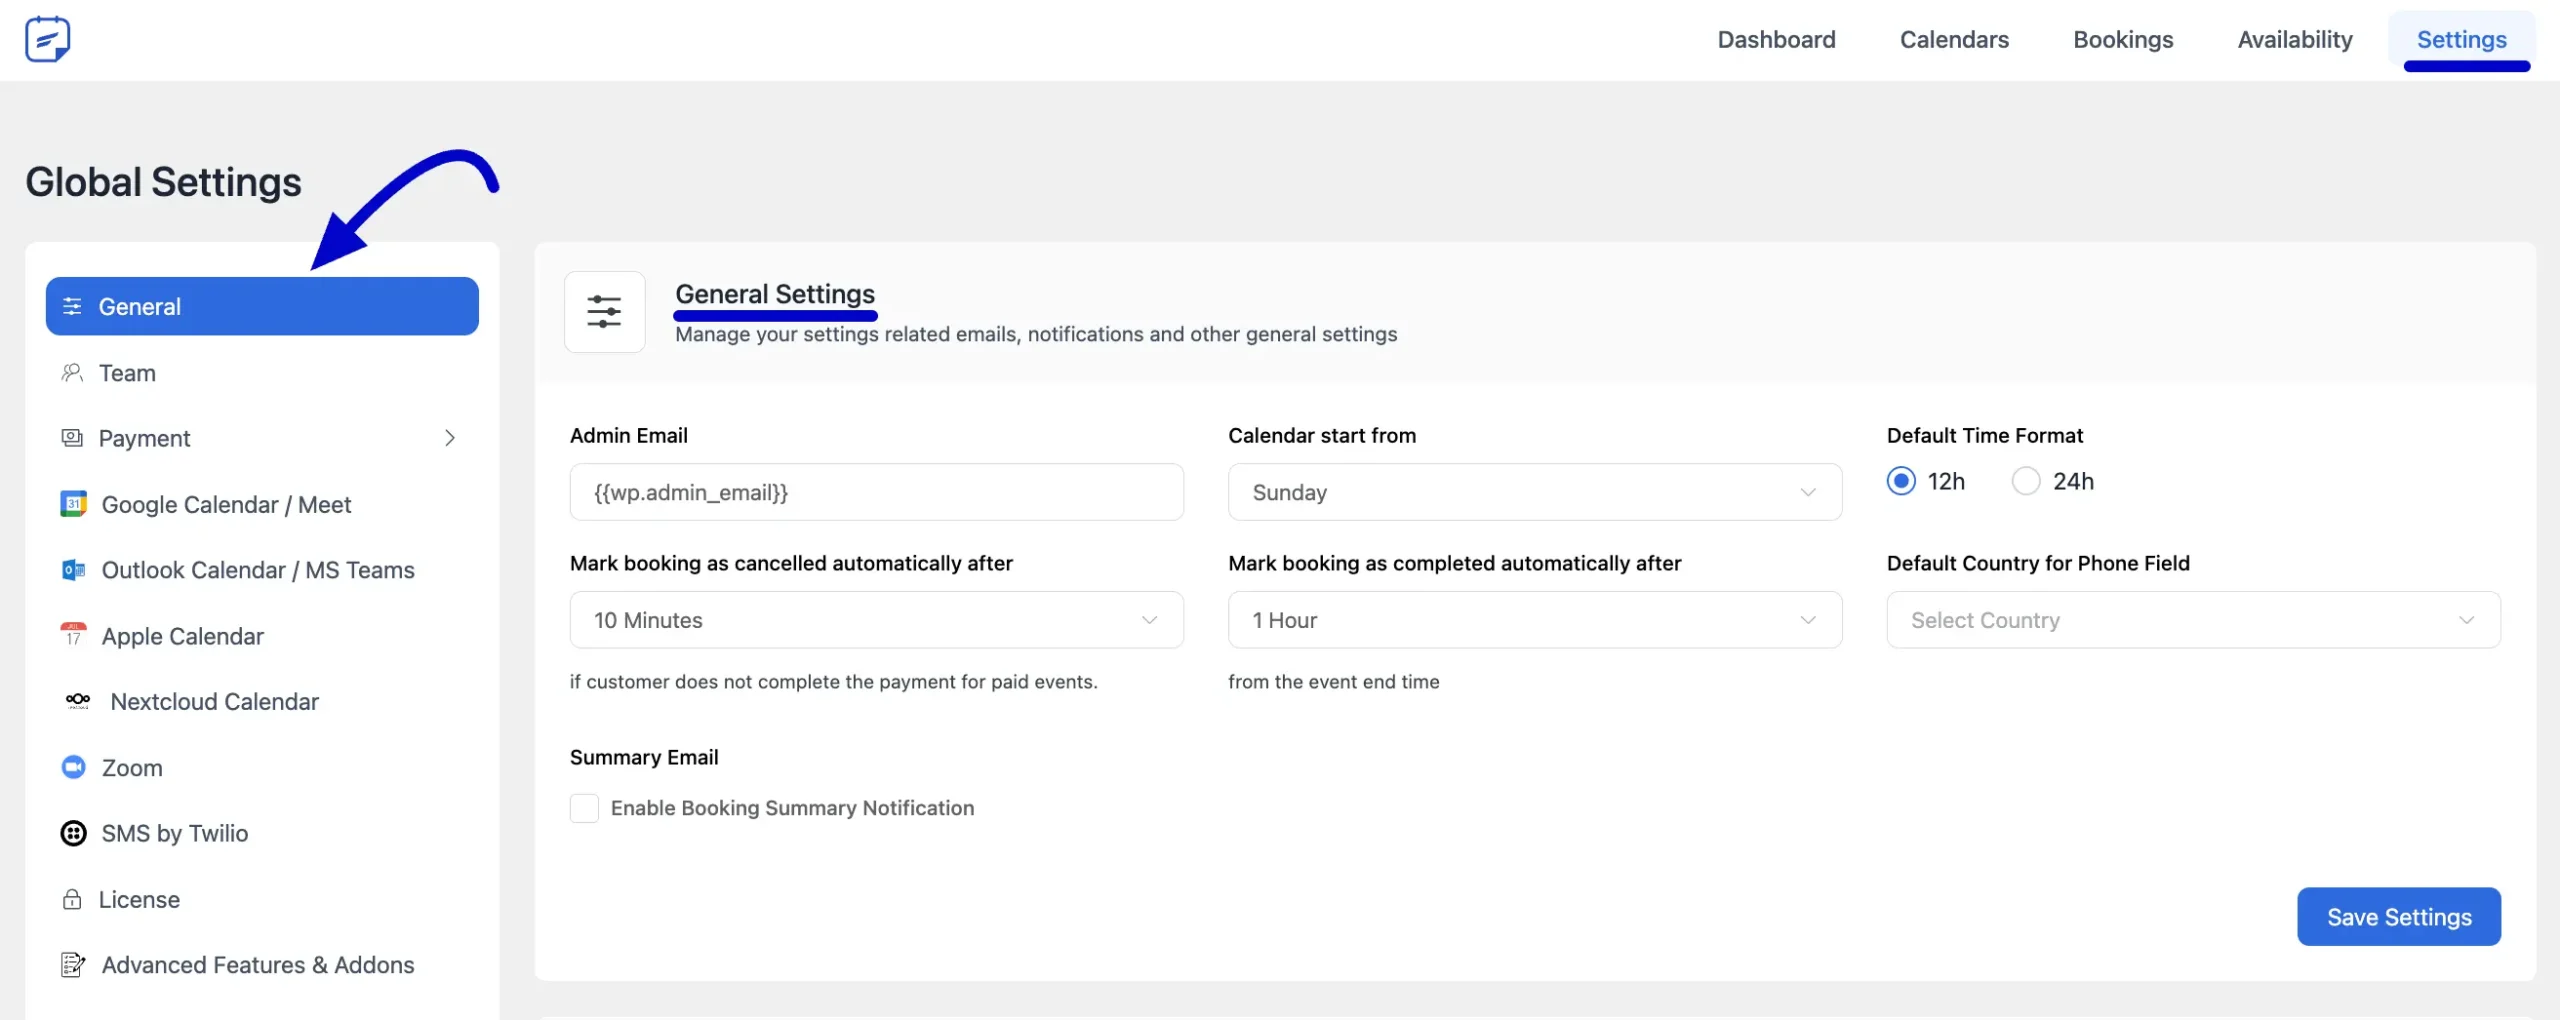
General Settings #
Go to the Settings tab from your FluentBooking dashboard. This will take you to the Global Settings page. From the left sidebar, click on General to get started.
In the General Settings section, you’ll find key options to help you manage how your bookings work. Here’s what you can configure:
- Admin Email: Set the email address where admin notifications will be sent for new bookings, cancellations, or updates.
- Calendar Start From: Choose which day of the week your calendar view should start with (e.g., Sunday or Monday).
- Default Time Format: Select your preferred time format, either 12-hour (AM/PM) or 24-hour clock.
- Mark Booking as Cancelled Automatically After: If a booking isn’t confirmed (e.g., unpaid or not manually approved) within a set time, it will be automatically marked as cancelled.
- Mark Booking as Completed Automatically After: Automatically mark bookings as completed after a certain amount of time has passed since the scheduled appointment.
- Default Country for Phone Field: Set a default country code (like +880 for Bangladesh) in the phone number field to help users fill in their number easily.
- Summary Email: Get automated booking summary emails on a daily or selected weekday, depending on your settings. This keeps you up-to-date with your latest bookings.
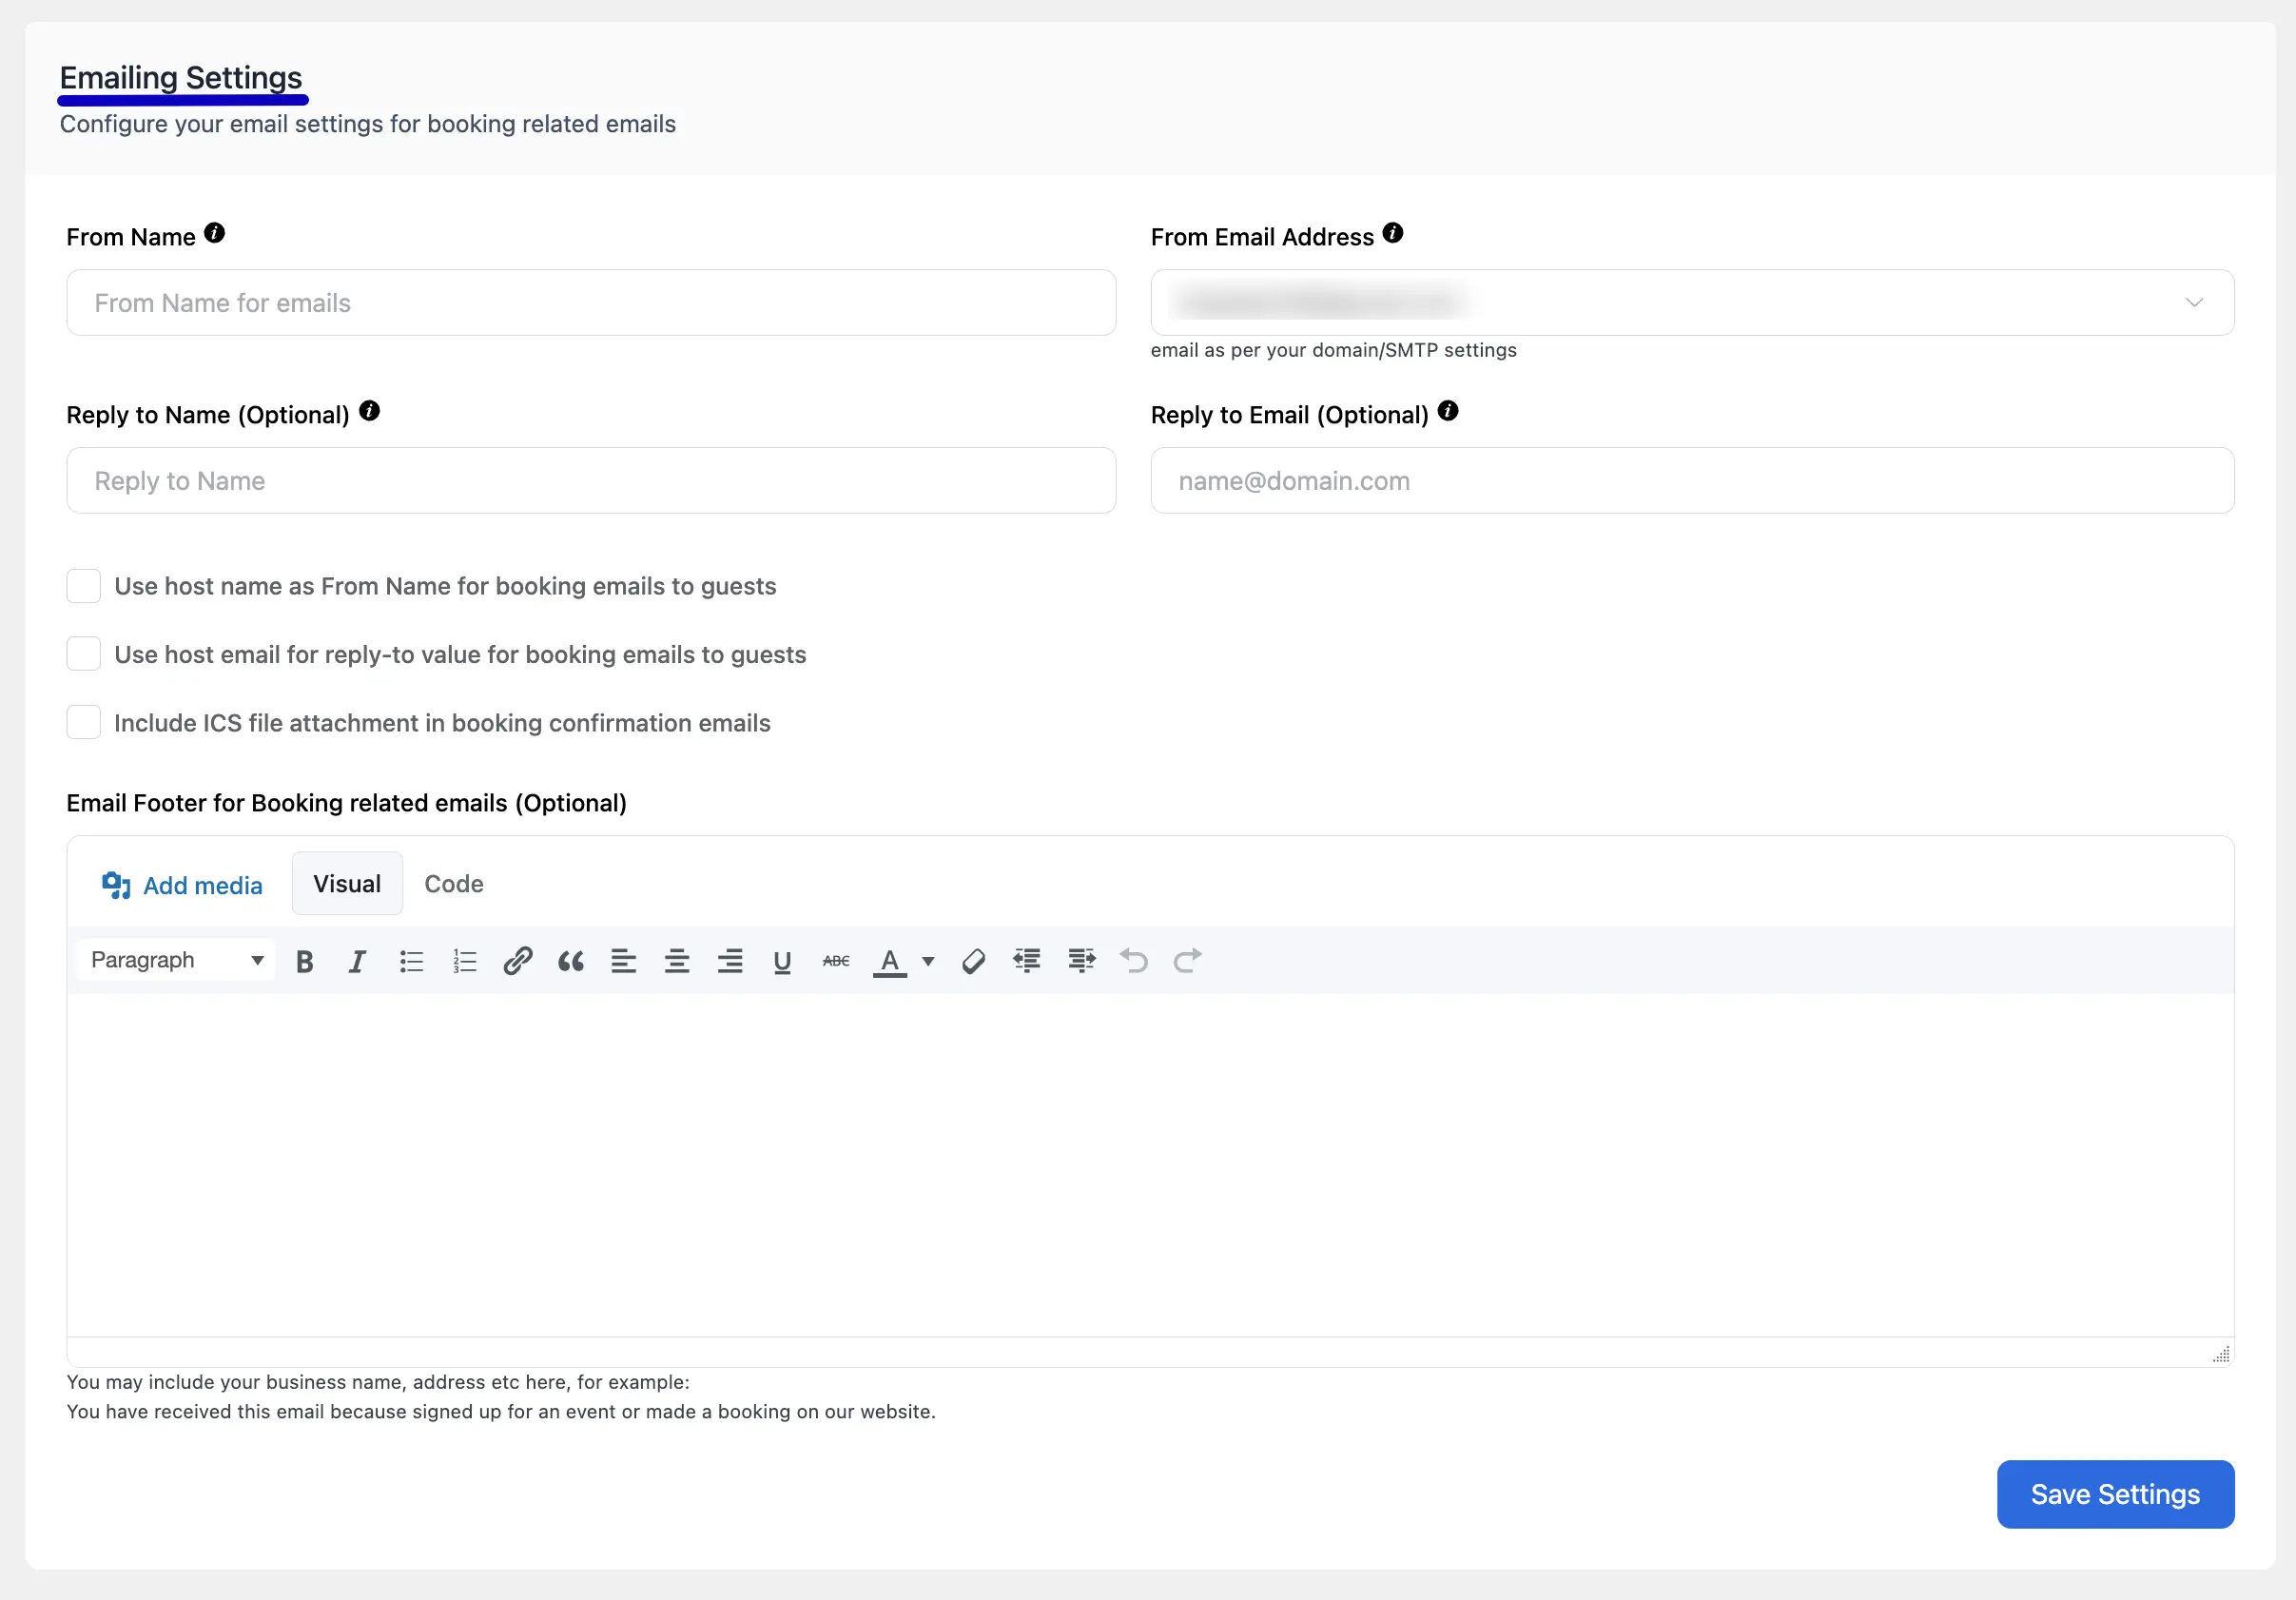
Email Settings #
The Email Settings section lets you configure how emails are sent from FluentBooking. Here’s a breakdown of each option:
- From Name: The name that appears as the sender in all booking-related emails (e.g., confirmations, reminders, cancellations).
- From Email Address: The email address shown as the sender of your booking emails.
- Reply-To Name: The name users will see when they hit “Reply” to a booking email.
- Reply-To Email: The email address where replies from guests will be sent.
- Use Host Name as From Name for Booking Emails to Guest: When enabled, the host’s name will automatically be used as the sender name in emails sent to guests.
- Use Host Email for Reply-To Value for Booking Emails to Guest: When enabled, the host’s email will be used as the Reply-To email address for guest messages.
- Include ICS File Attachment in Booking Confirmation Email: Enable this to attach an .ics (calendar) file to confirmation emails, allowing guests to easily add the booking to their calendars.
- Email Footer for Booking-Related Emails: Customize the footer text that appears at the bottom of all booking-related emails.
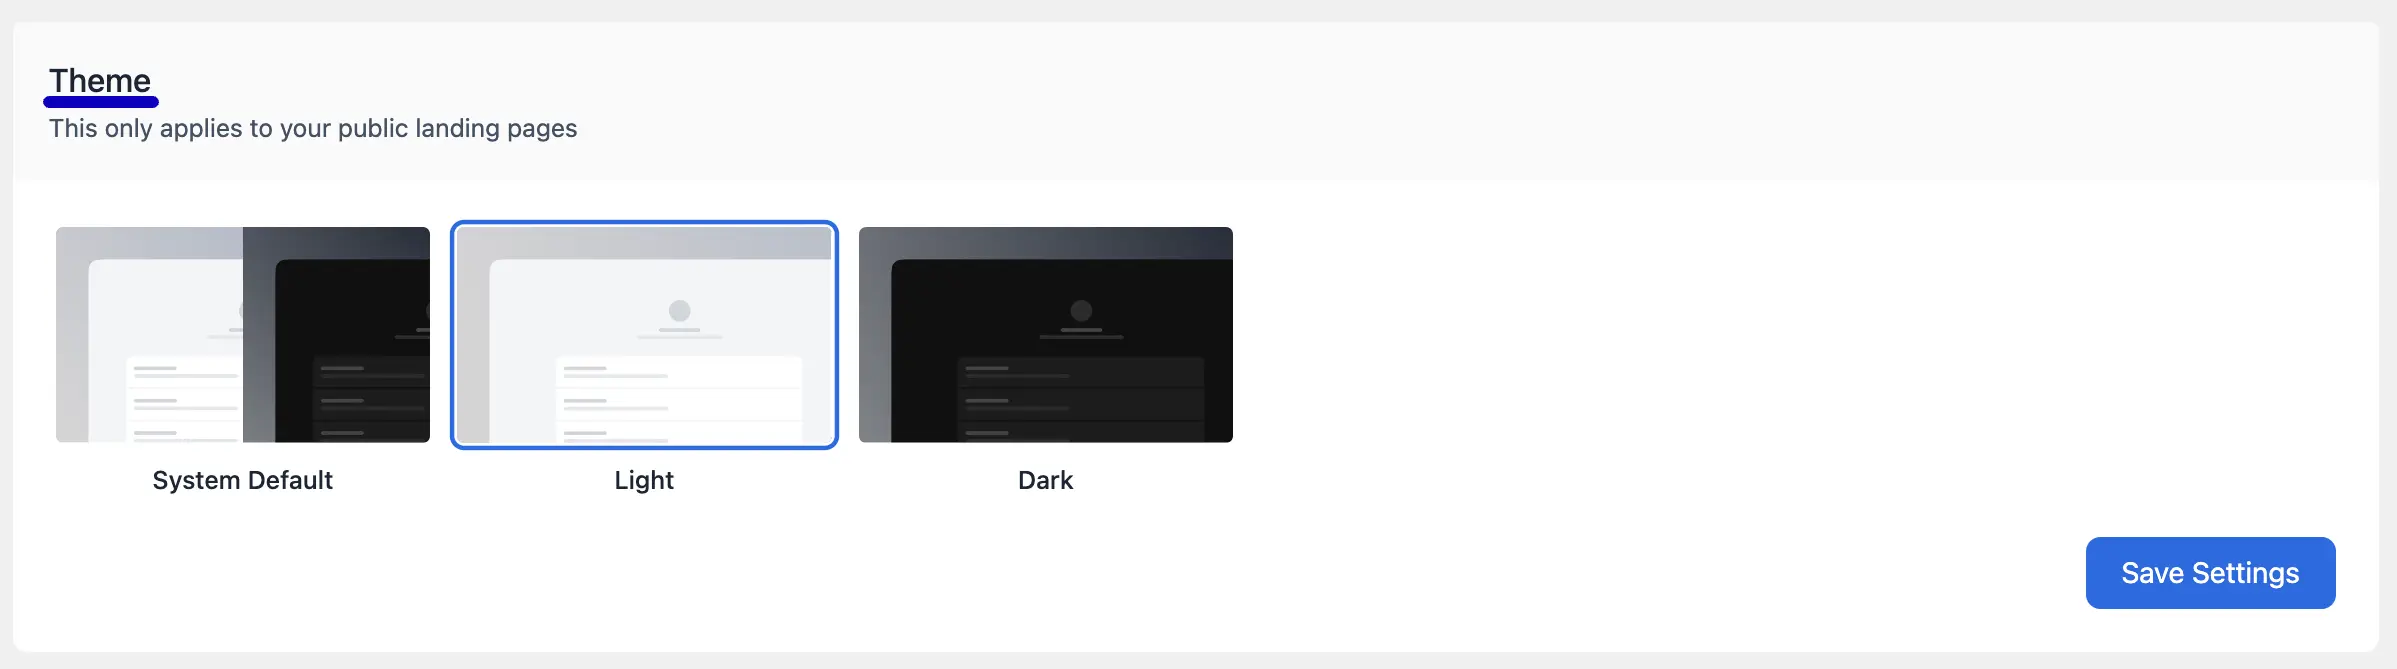
Theme #
In the Theme settings, you can choose how your booking page appears to users. You have three options:
- Light Mode: Displays the booking page with a light theme.
- Dark Mode: Shows the booking page in a dark theme.
- System Default: Automatically adapts to the user’s device theme preference.
This allows you to create a more personalized and accessible experience for your users.
You’ve successfully configured your global settings, creating a more consistent booking experience.
If you need any further assistance with this article, feel free to contact our support team. We’re always happy to help!


Hello, how to translate the plugin to other language?
I need to show the days of the week in Spanish as well as the different texts shown on buttons etc in the Calendar.
Hey Mark,
Please use the Loco Translate plugin.
It’s possible to change Host email address by other email
If the host want to change is email address i’ts possible ?
Hey Maeva,
Sorry, it’s not possible.
When I change the admin email for a new one, it doesn’t work. Emails are not delivered to the new address… they continue delivering to the wp admin address.
Hey Isa.
Please submit a ticket here.
Where can we change the content of the email templates? If we for example want to change the green tick to the company icon in all emails, or add a line of text that is the same in all confirmation emails, how do we go about it? We have not found the global templates in the global settings, so the guess is we need to find the actual templates in the plugins folder. So the question is: What is the recommended procedure if we want to move the email templates to the child theme?
Hi Bjorn,
The global settings are only available for the email footer. If you want to change the content, you need to do it manually for every event.