
FluentBooking allows you to send automatic email notifications for various actions like booking confirmation, reminders, rescheduling, and cancellations. This notification will be received via email.
In this guide, you’ll learn how to easily set up these email notification settings for each of your booking events.
If you want to manage notifications for all bookings, check out the Global Email Settings in our full documentation.
Set up Email Notification #
Go to your FluentBooking dashboard. From the top navigation bar, click on Calendars. This section shows all your hosts and booking events. Next, find the booking event you want to update.
Once you’ve found it, click the Edit button next to it to open the settings and customize your email notifications.
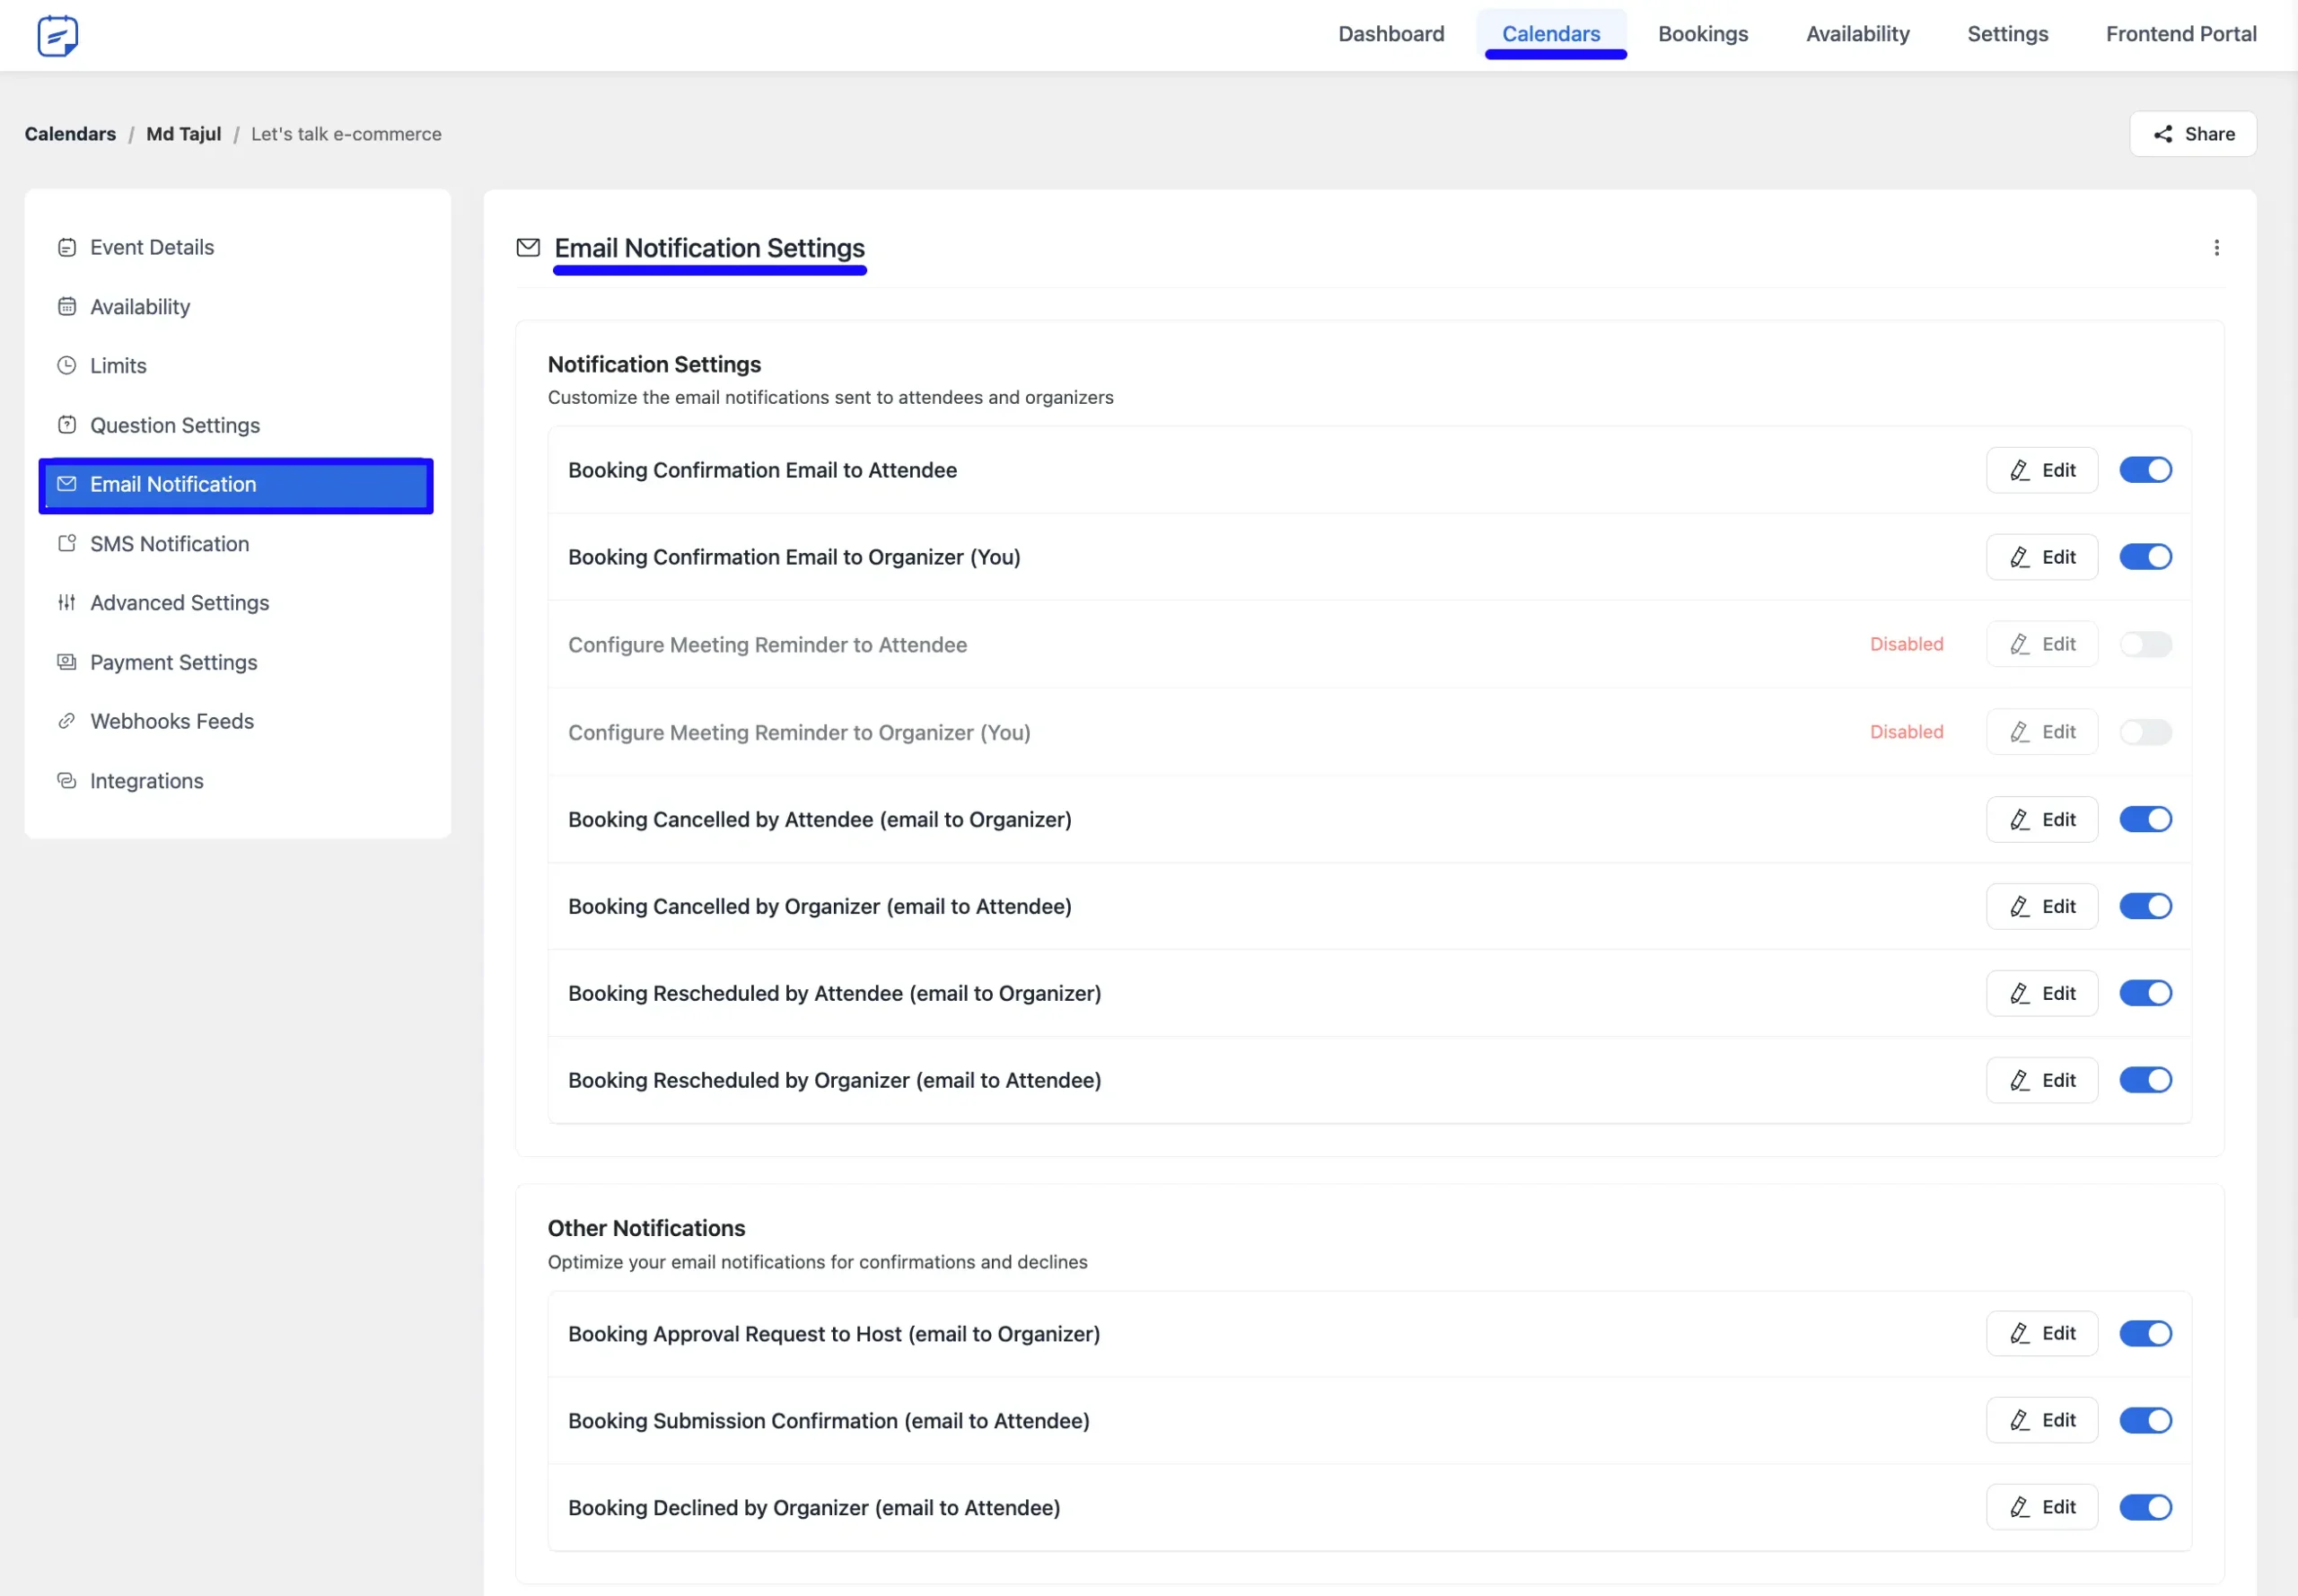
A new page will appear. Next, click on the Email Notification section from the left side bar.
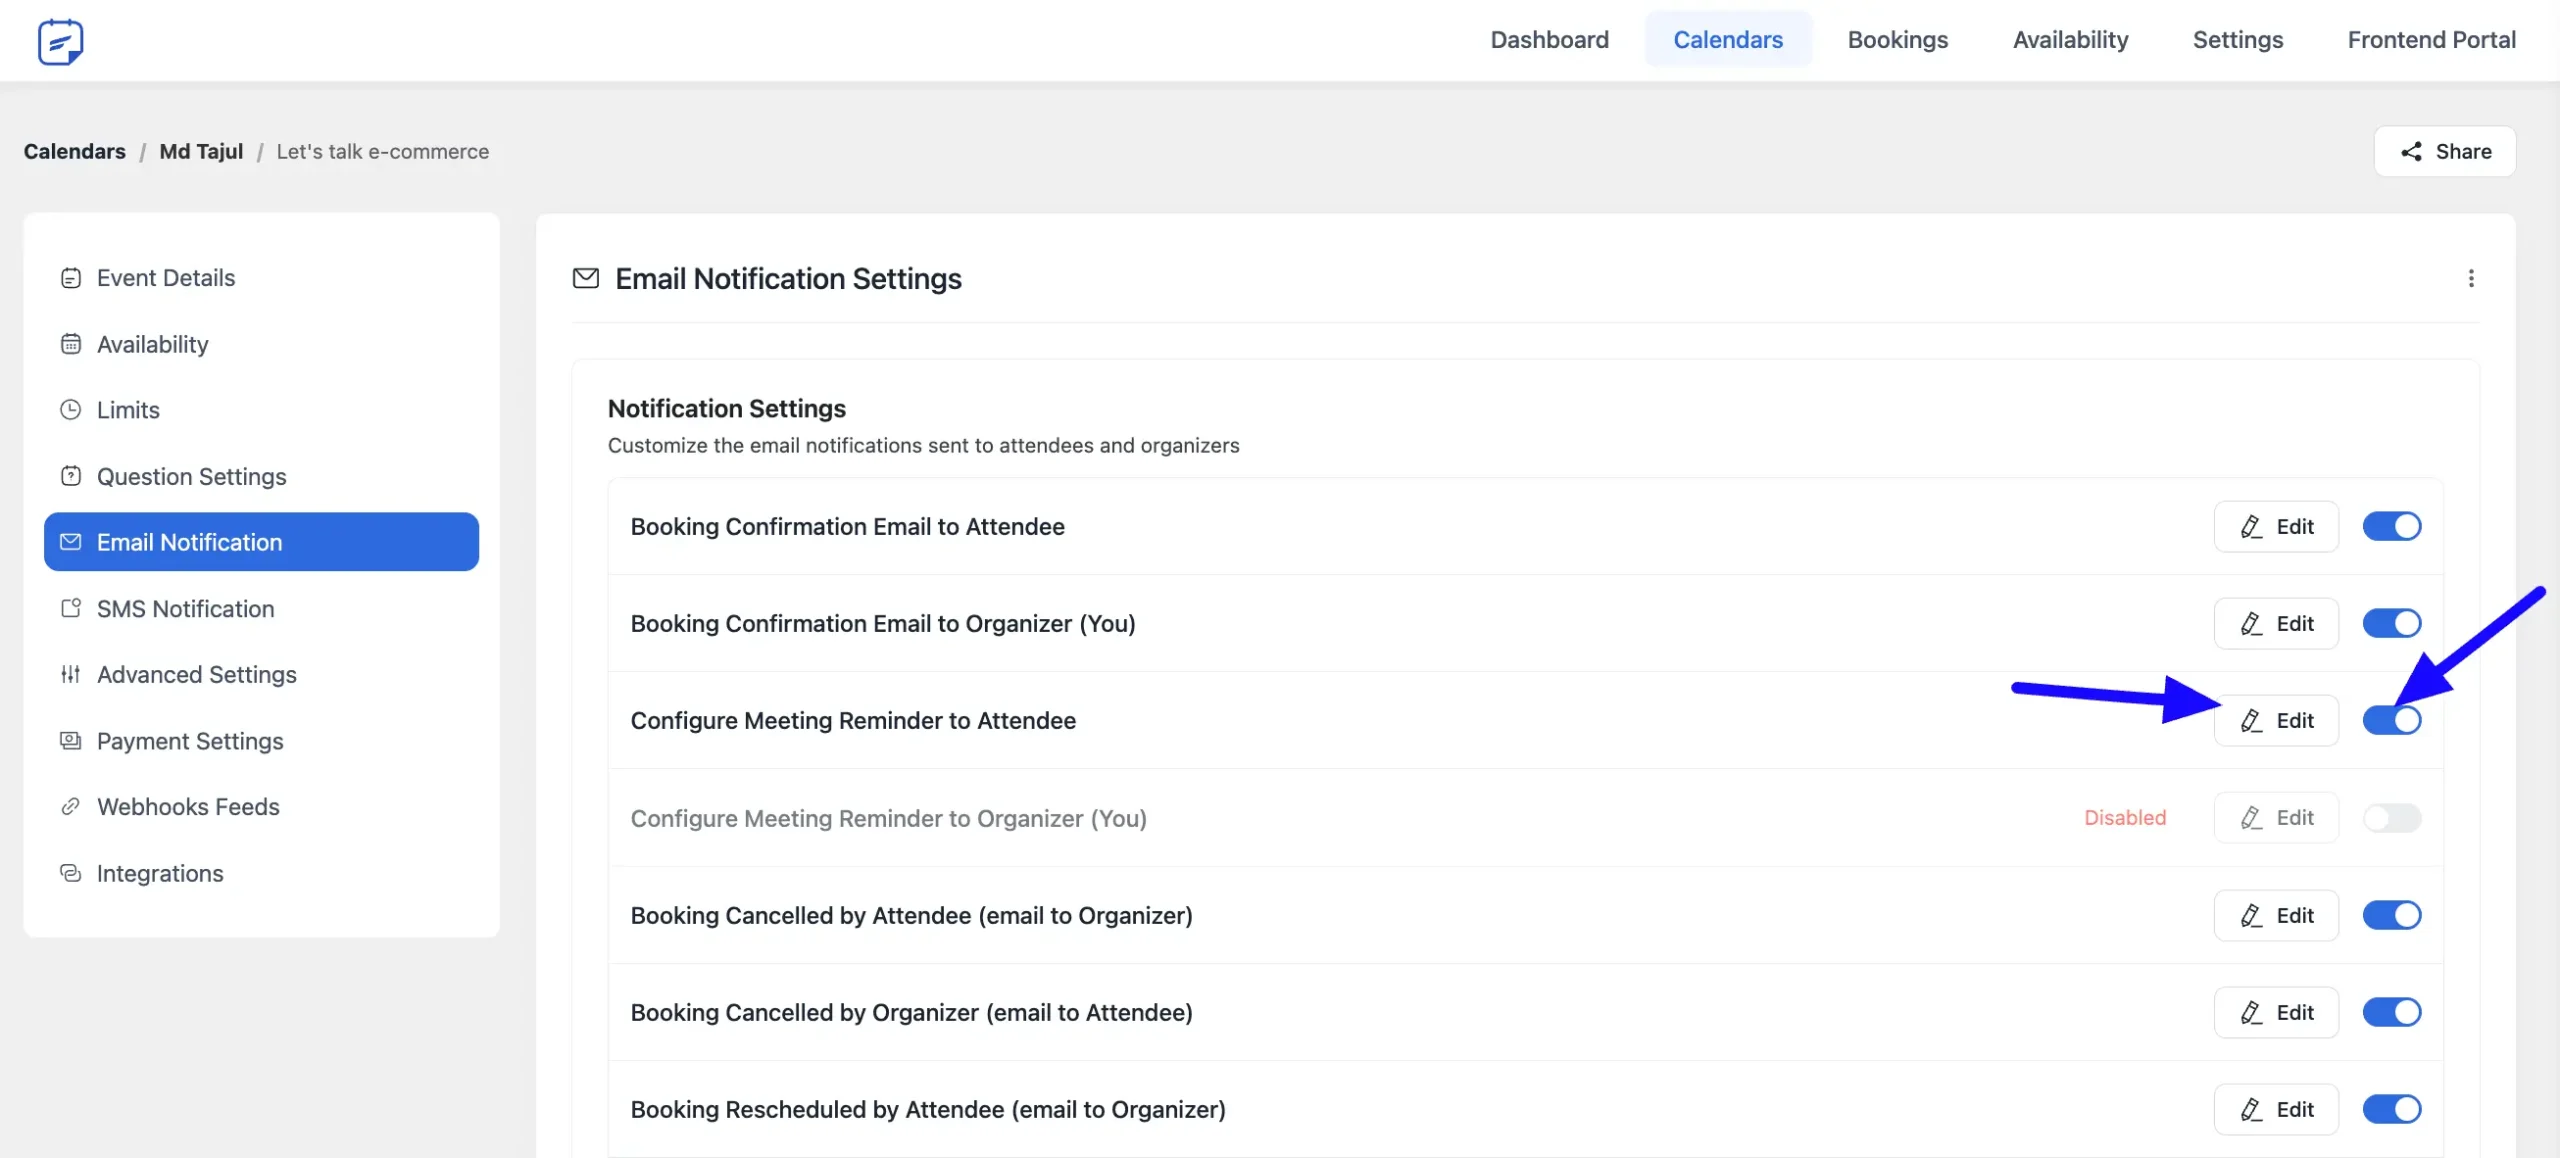
Here, you will find some default notification templates already set up for you. Some notifications are meant for the ‘Organizer’ and some for the ‘Attendee’. You can easily turn on or off the notifications you’d like to receive or send.
Customization Notification Settings #
Want to add a personal touch to your notifications? Click the Edit icon, and a pop-up will appear, allowing you to customize the email’s subject and content.
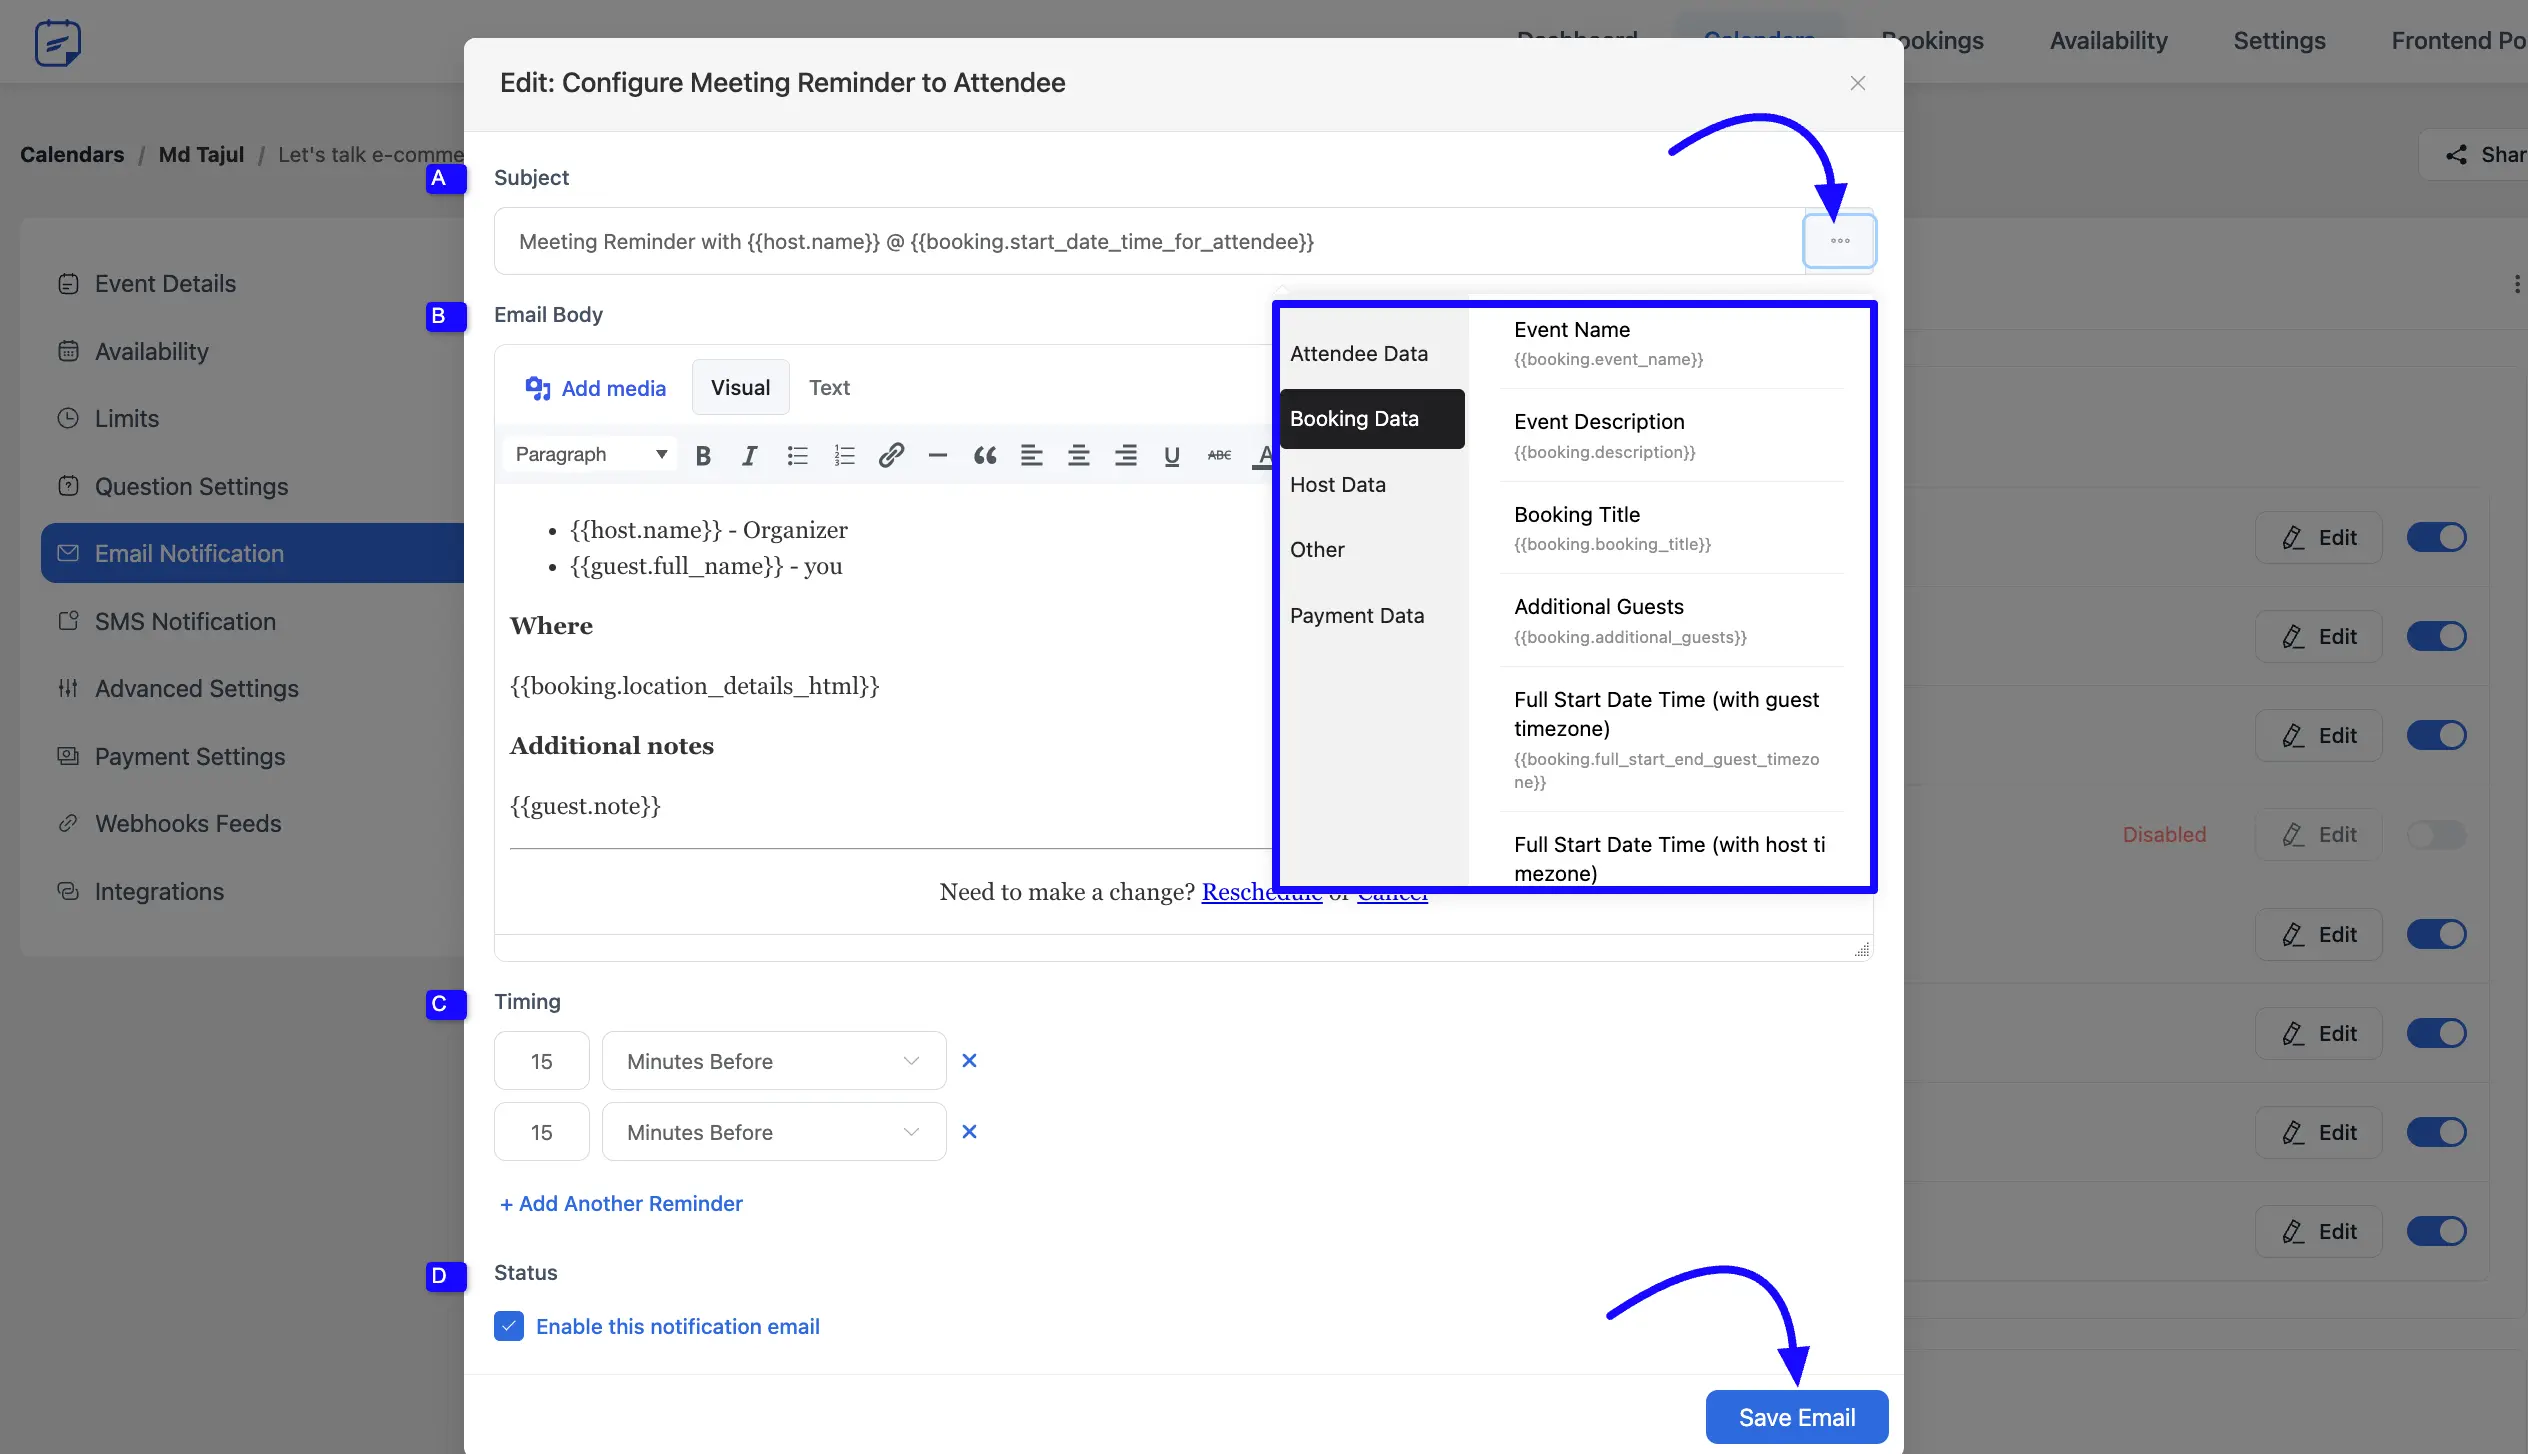
A. Subject: Type the subject of your email. Our notification editor comes with a bunch of shortcodes that will allow you to get all the information related to the booking. Just click on the three-dot icon to insert shortcodes as needed.
These shortcodes will come in four categories:
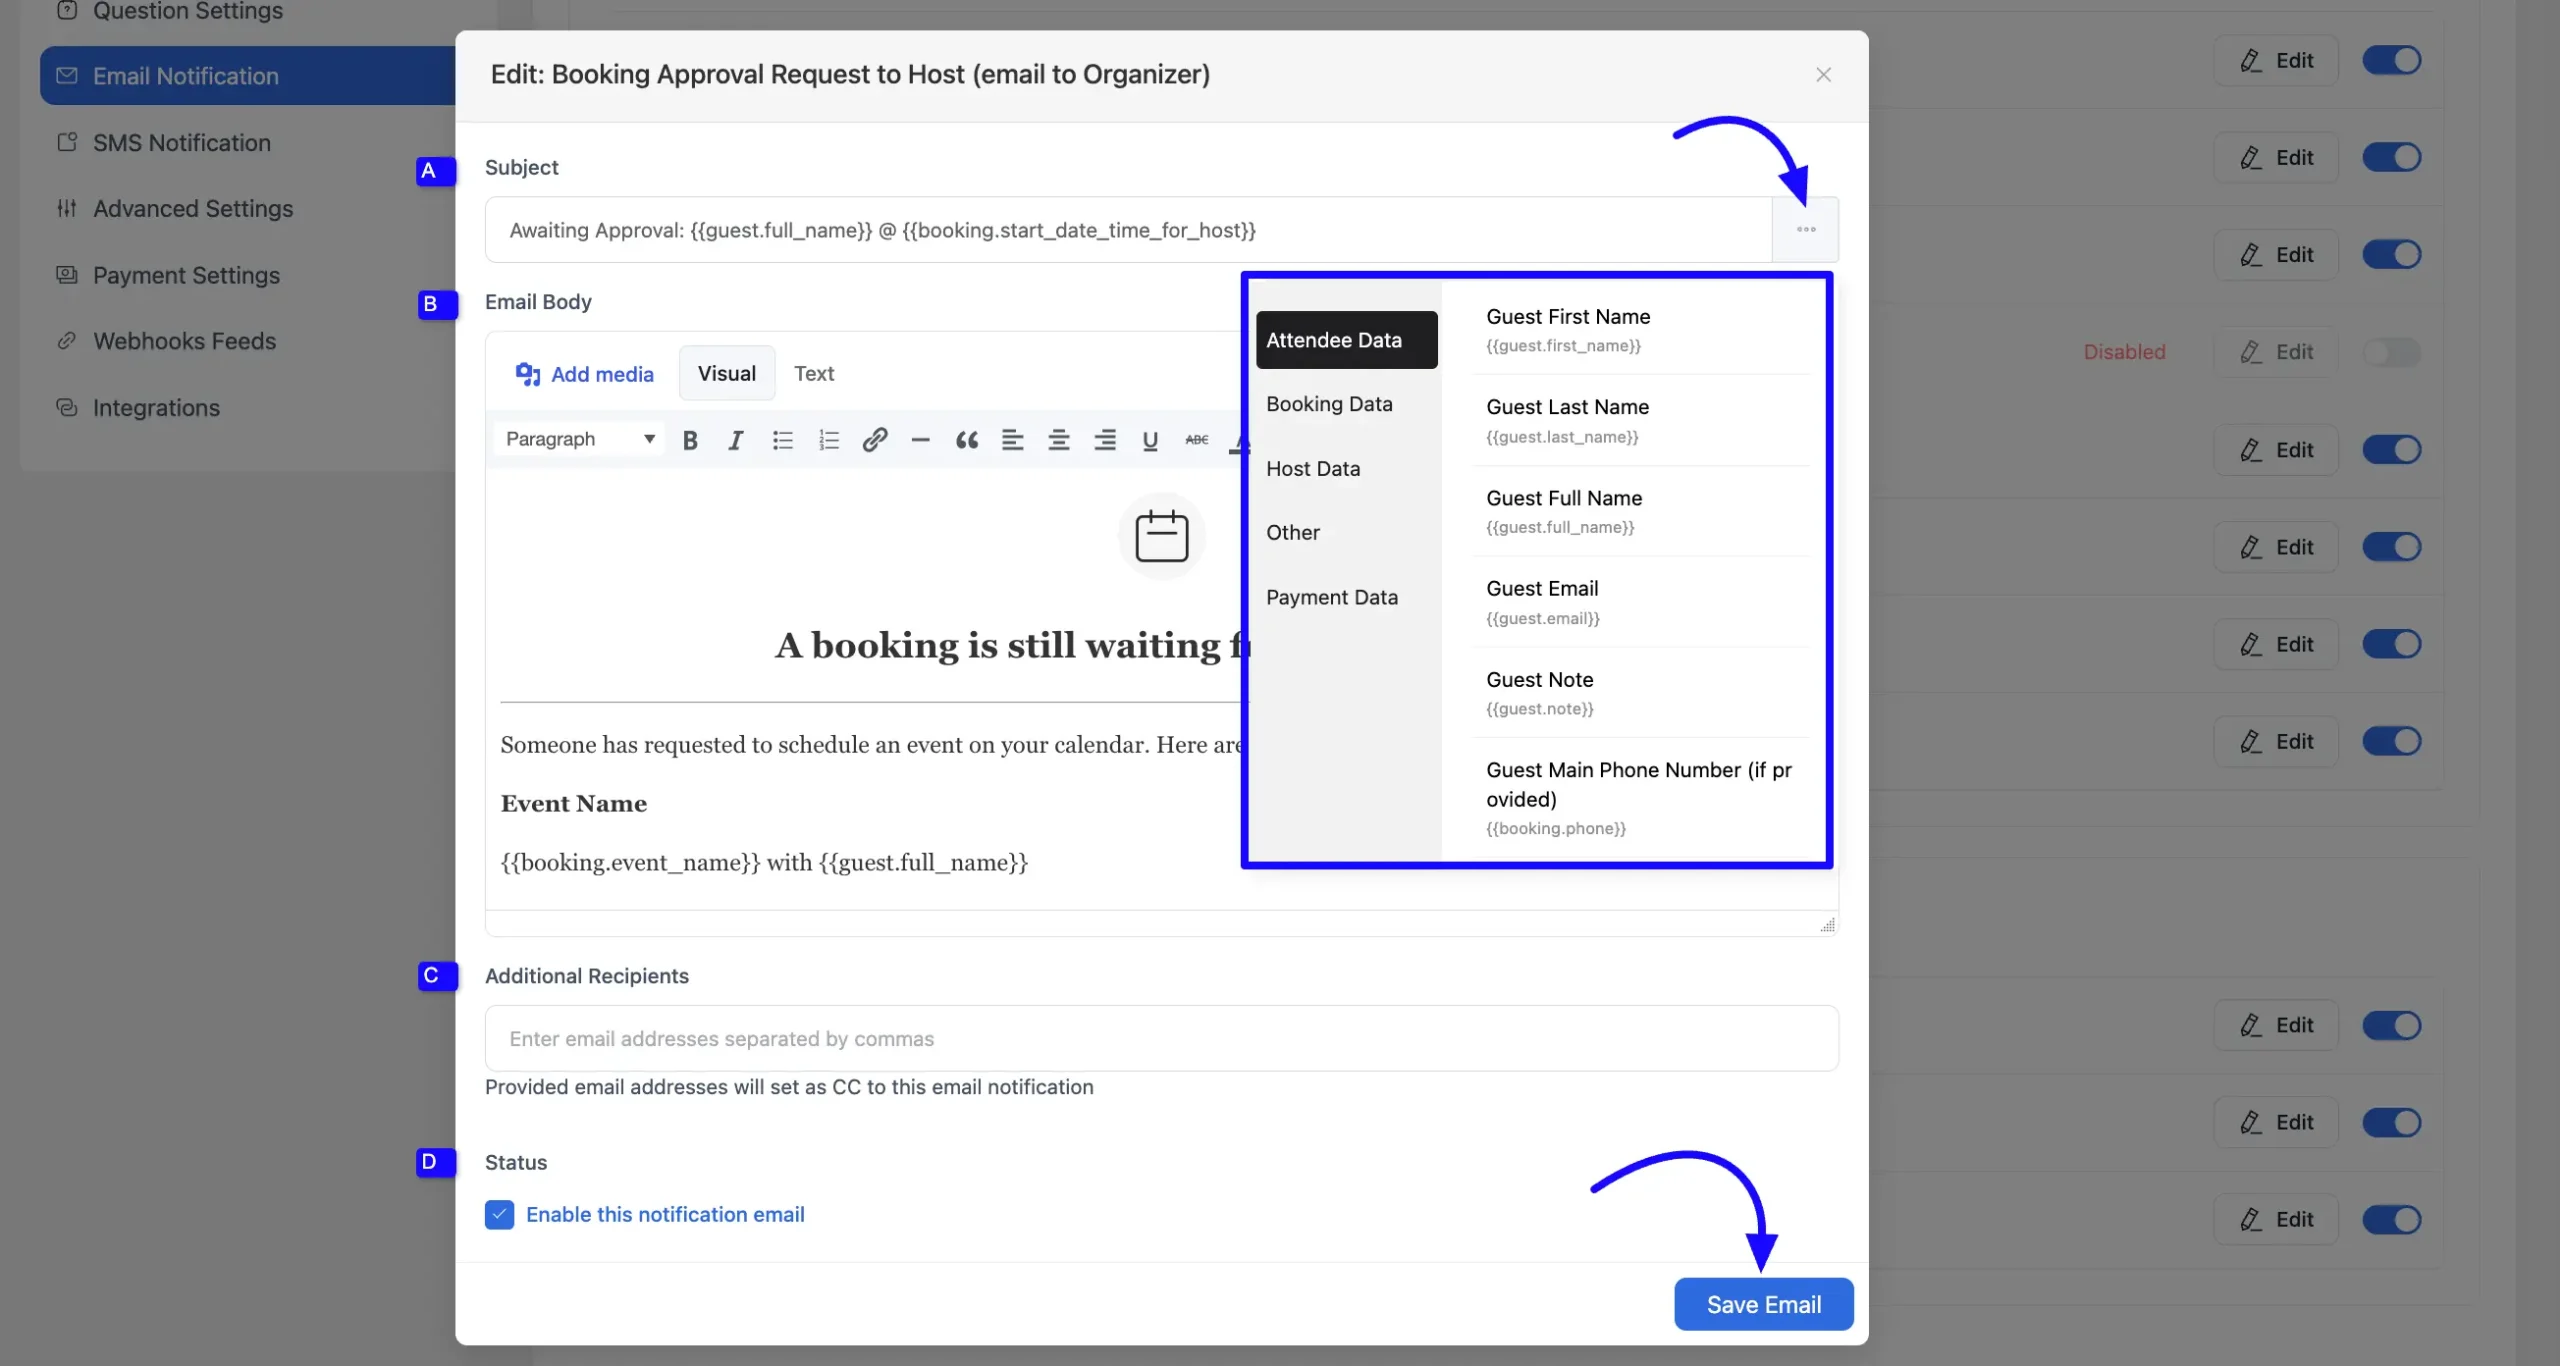
- Attendee Data: It will contain the Attendee’s data, such as name, email, timezone, notes, etc.
- Booking Data: It will contain all the booking-related data such as event name, description, event time and timezone, location, etc.
- Host Data: It will contain host information such as name, email, and timezone.
- Others: It will contain all the other relevant data of the events.
- Payment Data: It will contain all the payment related data of the events.
B. Email Body: Write your message in the email body. You can also use shortcodes here to personalize the content.
C. Timing: Choose when the email should be sent. You can schedule reminders before the event. To add more than one reminder, click the Add Another Reminder button. If you want to delete any reminder, just click on the Cross icon.
D. Status: Make sure to turn on the notification so the email will be sent.
Once everything is set up, click the Save Email button to save your email notification.
Customize Other Notification Settings #
You can set and customize the questions for booking cancellations and reschedules here.
These questions let you ask your users why they are canceling or rescheduling their booking, helping you better understand their reasons.
A. Subject: Write the subject line for your email.
B. Email Body: Add your message in the email body. You can personalize it as needed.
C. Additional Recipients: If you want to send this email to more people, just add multiple email addresses here.
D. Status: Make sure to turn on the notification so the email gets sent.
Once everything looks good, click the Save Email button to save your changes.
You’re now all set to enjoy FluentBooking’s notification features. Furthermore, you can edit the templates as per your needs, and the changes will reflect only on your particular events.
If you have any questions or need assistance, feel free to get in touch with us.


Is it possible to have a post-meeting email built in? I’d love to have an automated follow-up email after the meeting thanking them.
Hey Rebecca,
You can use the ‘Booking Completed’ trigger in FluentCRM to send a personalized follow-up email right after a meeting is finished.
How to customize a message after attendee clicks Submit button?
Hey CA,
Can you please explain what exactly you’re referring to?
When someone books, i dont receive any notification despite putting in my email.
Hey Eric,
Please submit a ticket here.
Hello, is it possible to have a list of all the possible shortcodes in FluentBooking? (especially concerning reservation dates and the different formats with examples…) It would be great to integrate this into the resources. Thanks
Hey Marlène,
That’s a great idea! I’ll discuss this with the team 🙂
This is what I’m looking for just now, too. What does each of these date time formats look like? Please can you point me to where this is in the documentation? Thanks.
Hey Sara,
Could you please elaborate on what exactly you would like to know?
After I, as a host, confirm a booking in the email, it is registered as confirmed in fluentbooking, but the confirmation email to me (the host) or the recipient is not always generated.
There is also no option in the backend to generate this for an already generated booking.
As a result, the recipient does not know whether the booking has been definitively accepted.
Can you fix this asap please.
Hey Johan,
This might be an issue from your side. However, we are not clear why it’s happening. Please submit a support ticket here
I have the same problem the host doesn’t receive the notification in the email but the guest receive the notification
Hi Ryohu,
I have discussed this issue with the development team, and they will look into it. If you are still facing this problem, please submit a ticket here.
If someone makes an appointment, can I only manage the booking through the admin interface? Notifications are set up for the wp-admin email address, but no notifications are received. All other emails work through FluentSMTP. The client receives the notification, but the organizer does not. Is this normal behavior? The organizer’s email is not found in the email logs either.
Hi Tibi,
Your issue is quite unusual, and I suggest you submit a ticket for a closer look.
I have the same problem the host doesn’t receive the notification in the email but the guest receive the notification