FluentBooking enables you to create a One-off event, designed for a single occurrence. With a One-off event, you can set up a specific event for your attendees. Additionally, you can organize a group event, which also applies to a single occasion.
In this guideline, we’ll provide a detailed overview of how to create a Single One-off event and explore the features available for this event type.
Create a Single One-off Event #
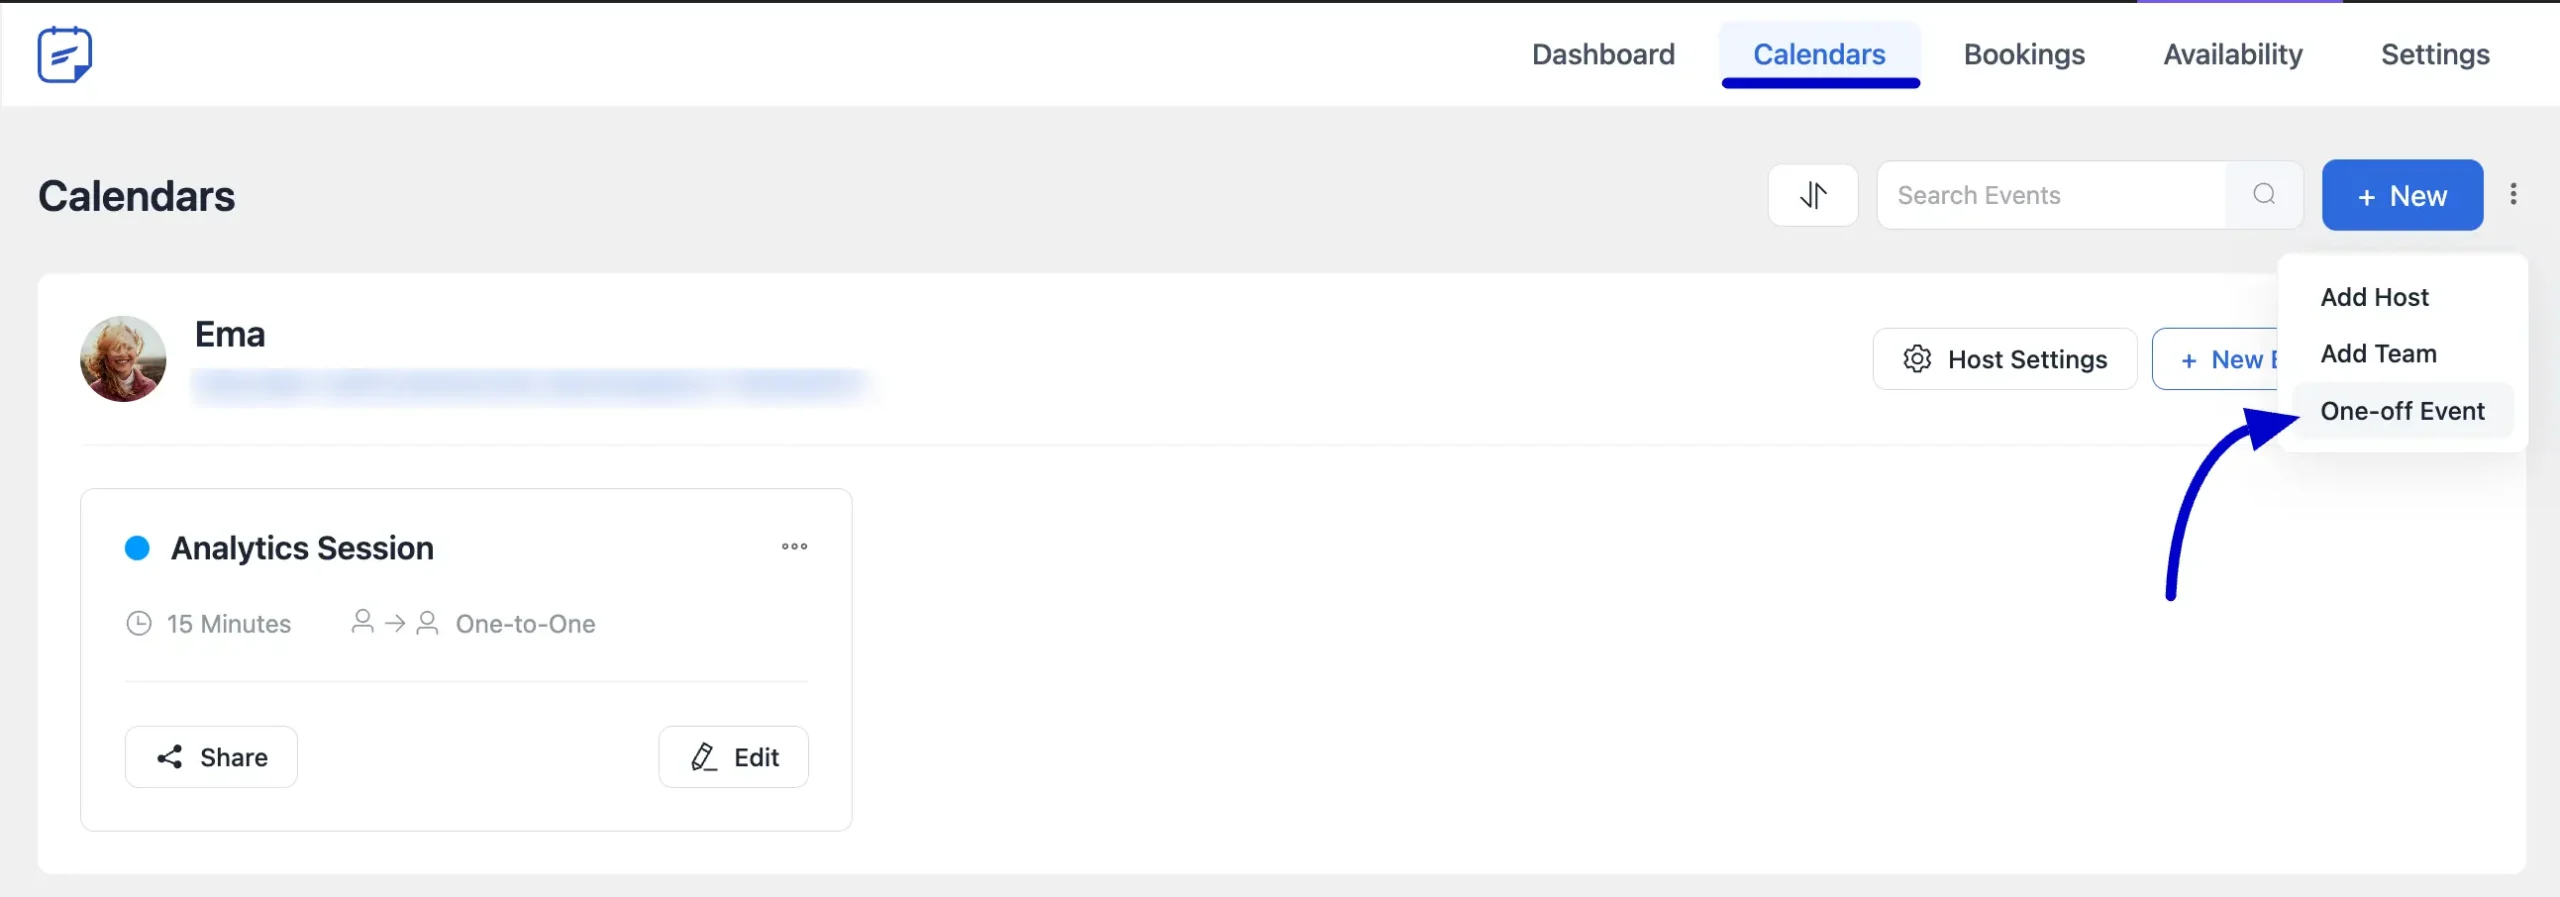
To create a One-off Event, navigate to the Calendars section in the FluentBookings navbar. In the top right corner, click the New button, and then select the One-off Event option from the drop-down menu.
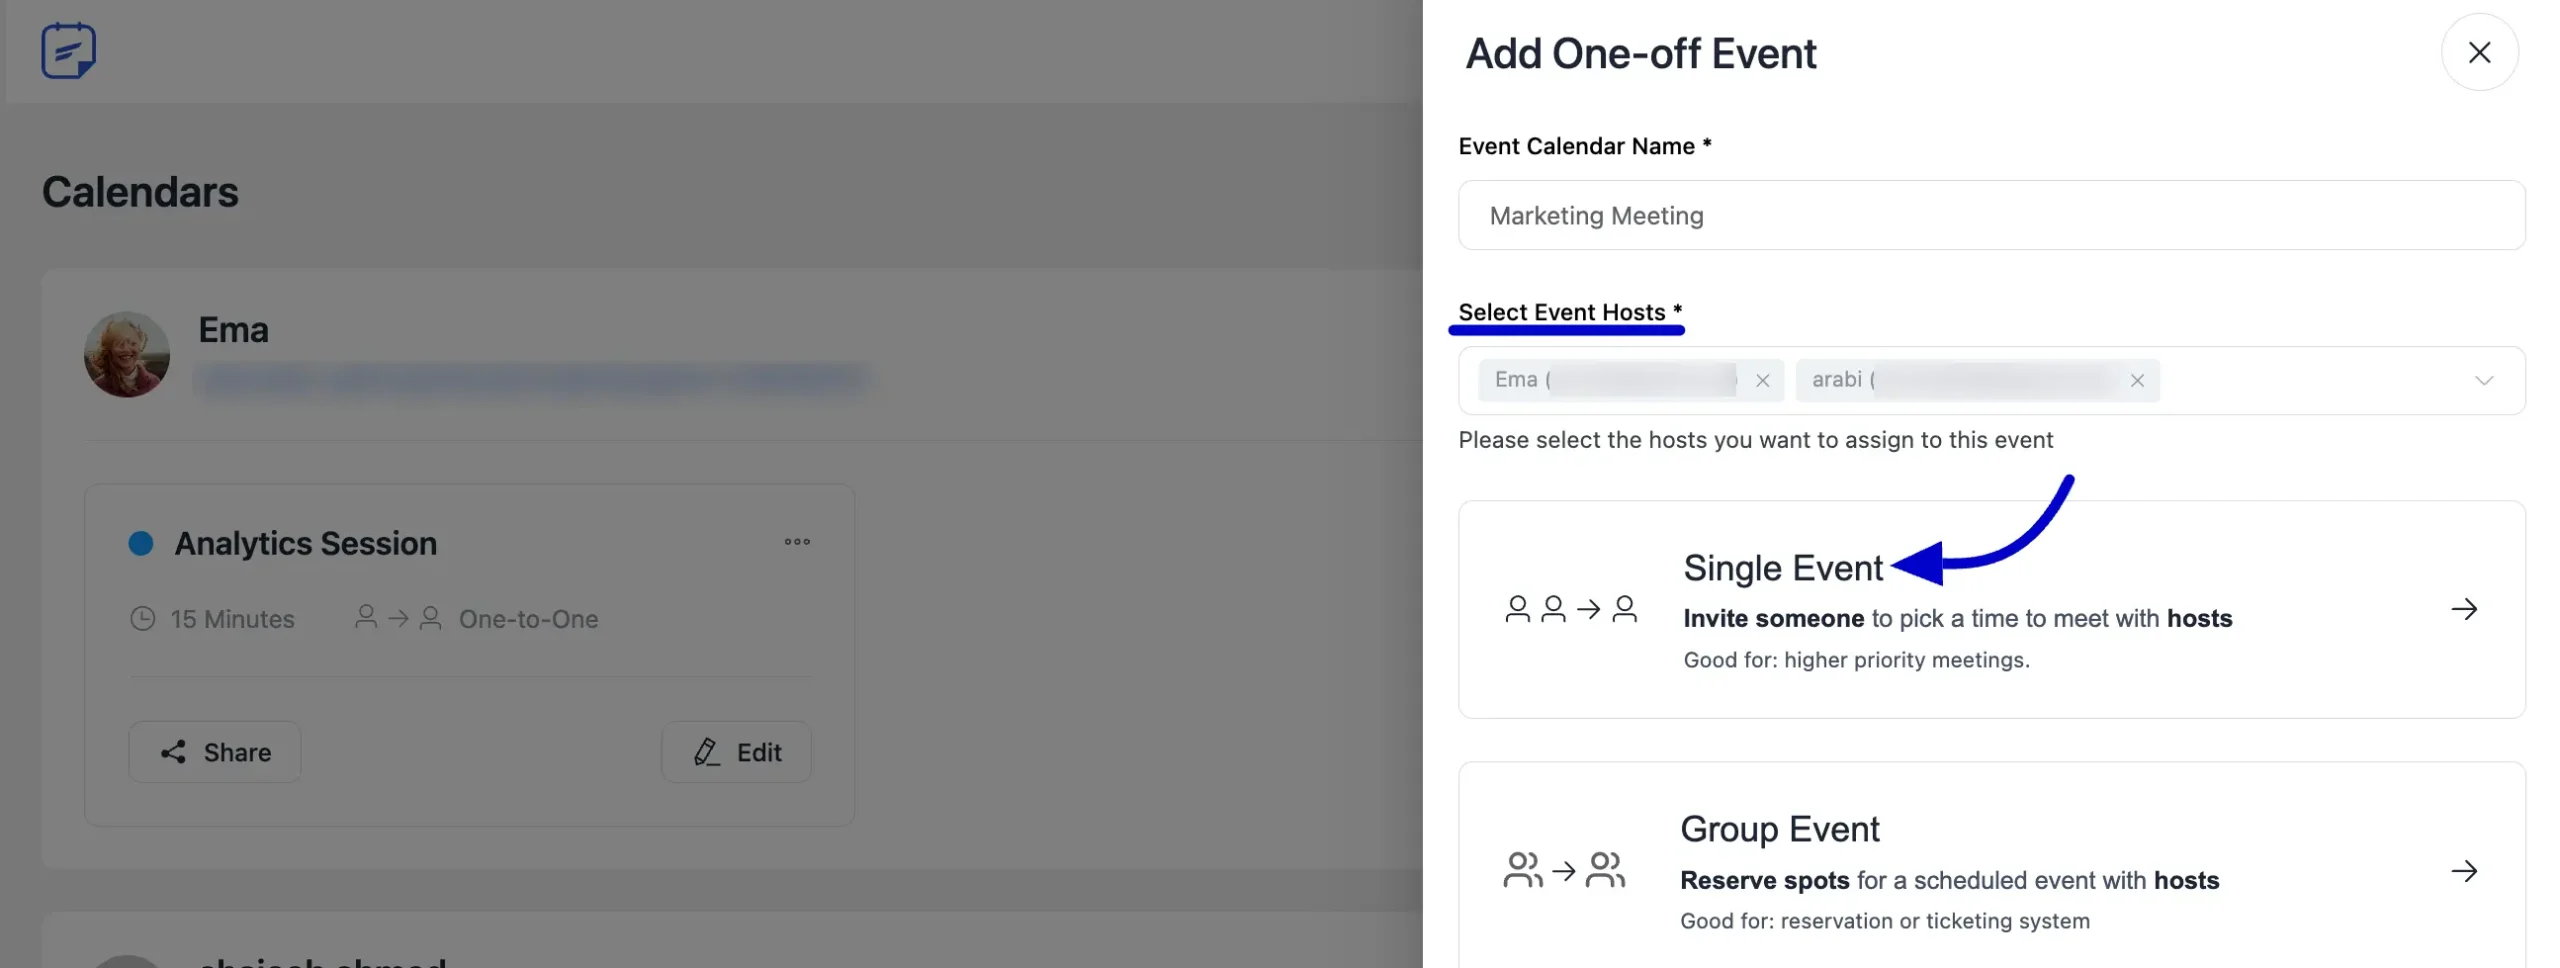
A pop-up will appear from the left side, where you’ll need to enter the event name and choose the hosts for the meeting. Here, you can opt to create either a Single One-off Event or a Group One-off Event.
Select Single One-off Event, and you’ll be redirected to the event details page for further customization.
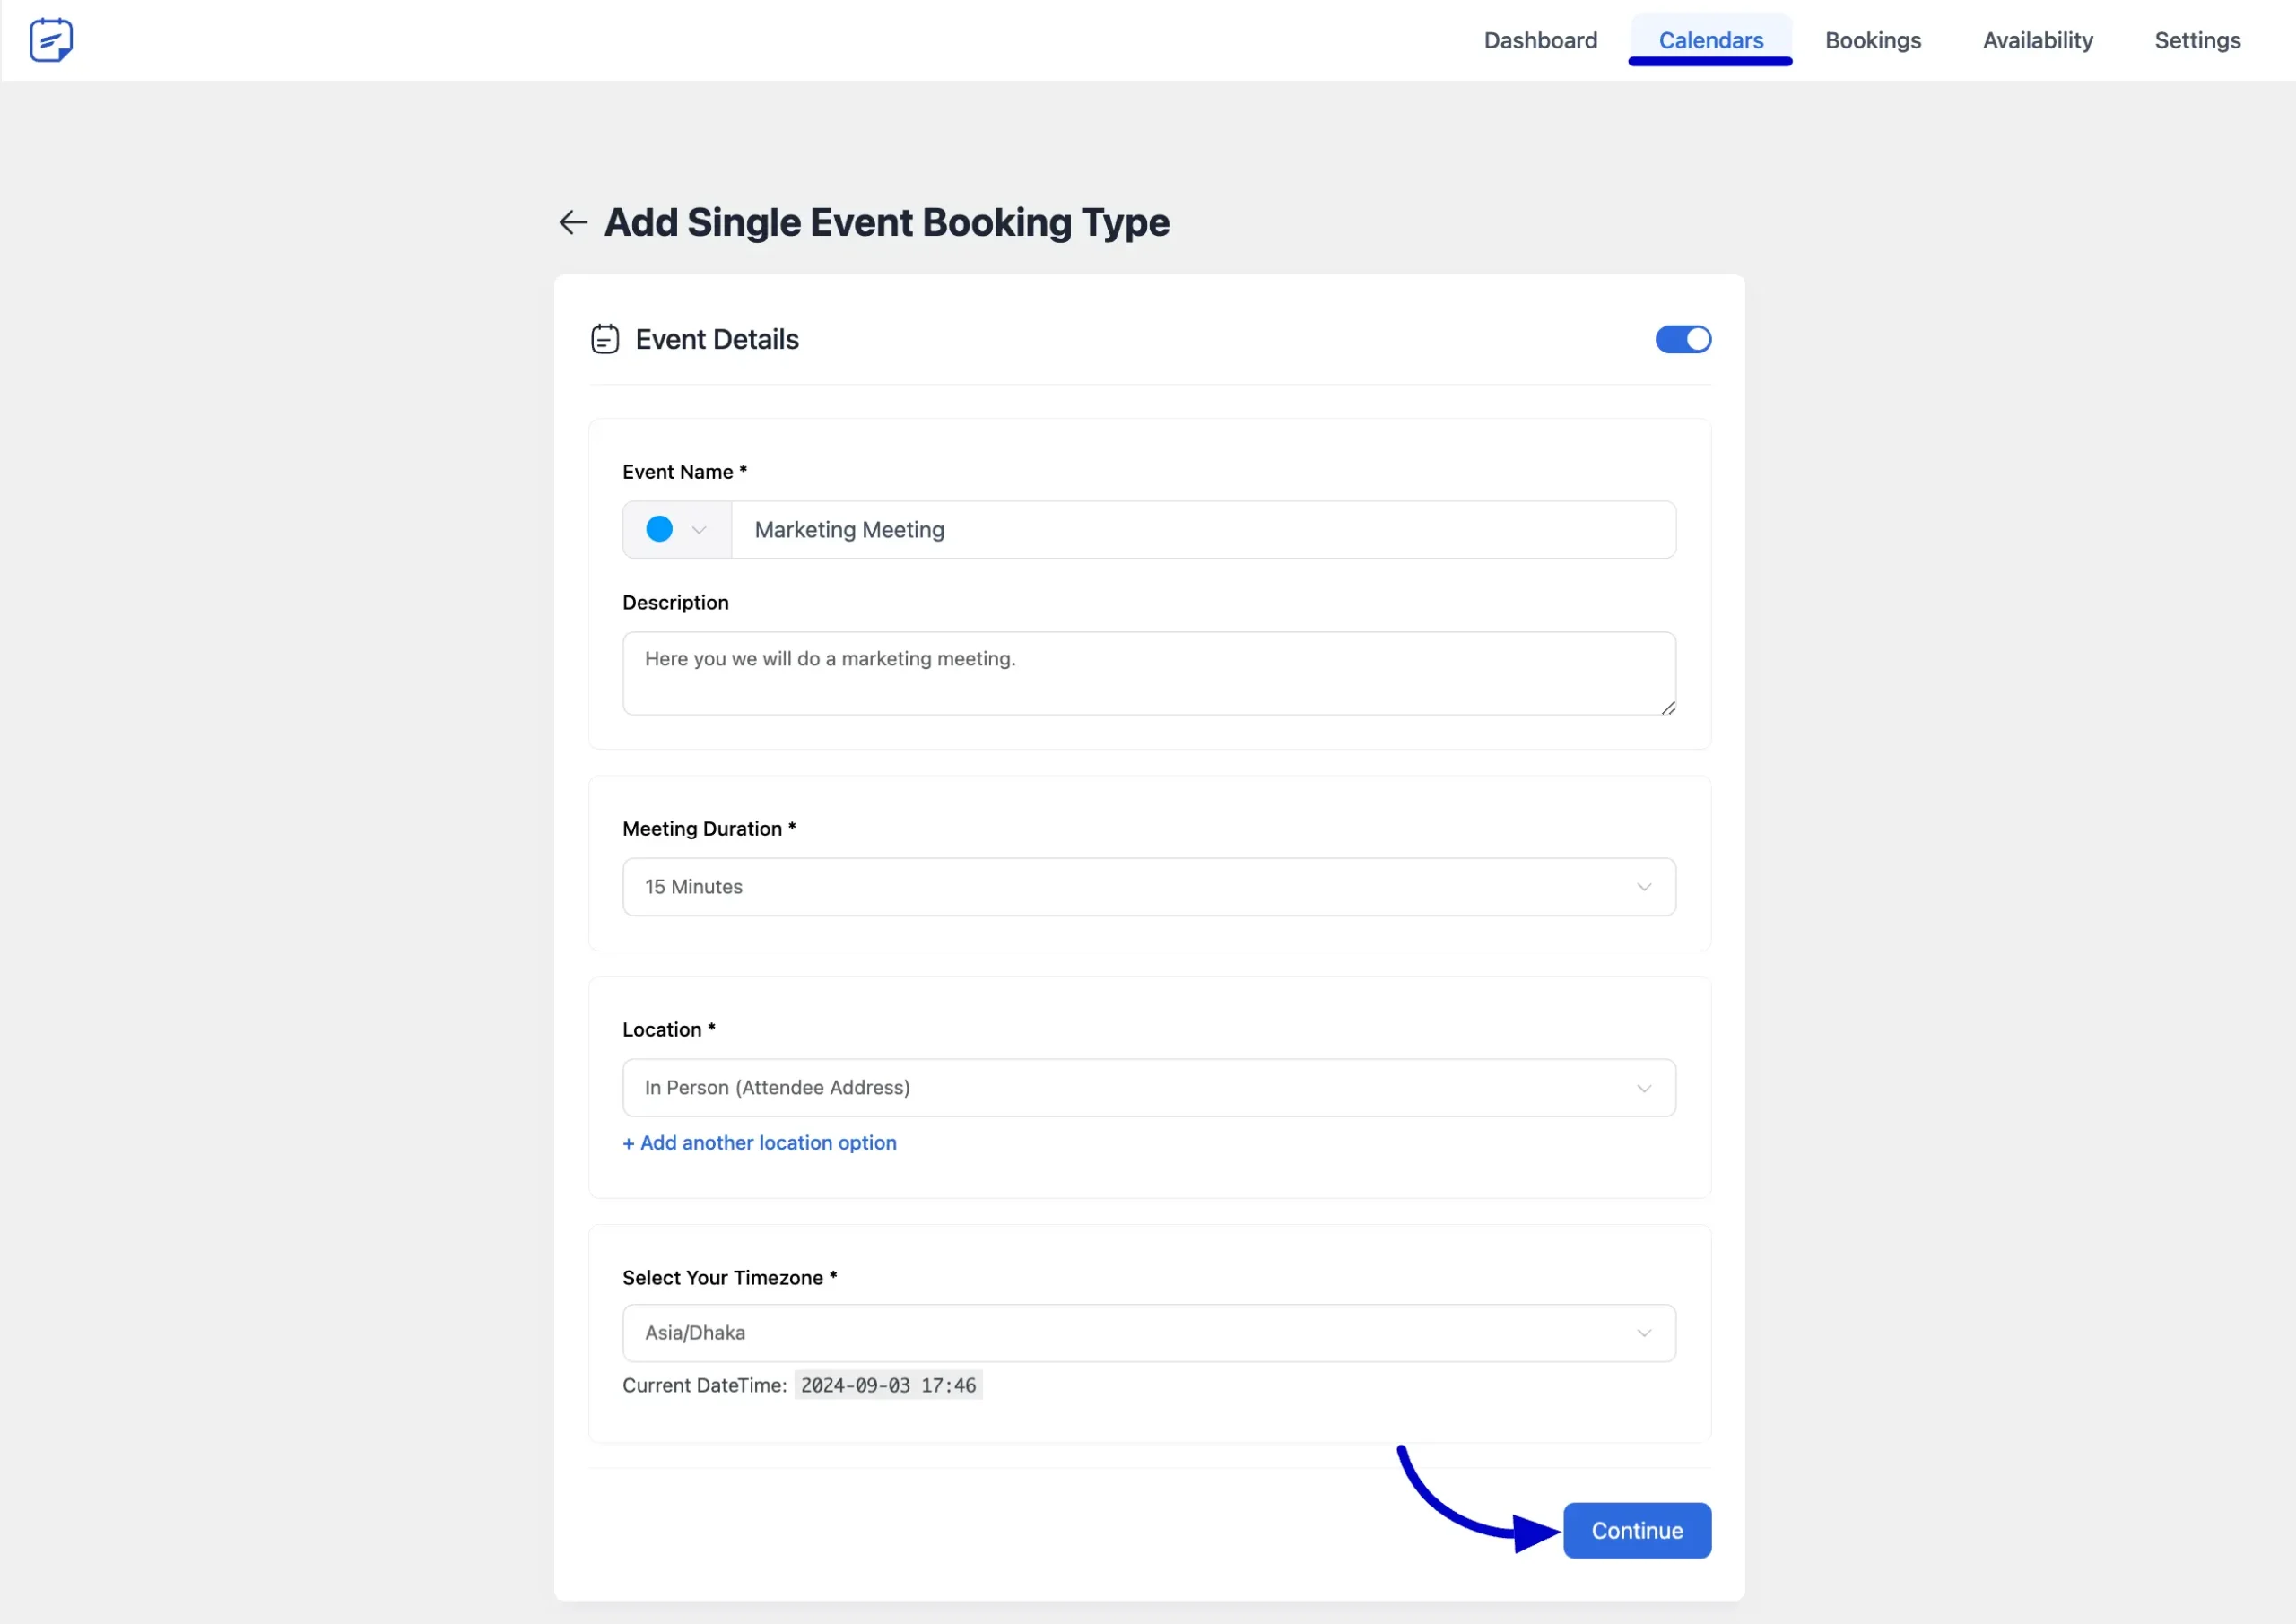
The event detail page will appear. Enter the necessary details about your event and click the Continue button to proceed.
Manage Hosts #
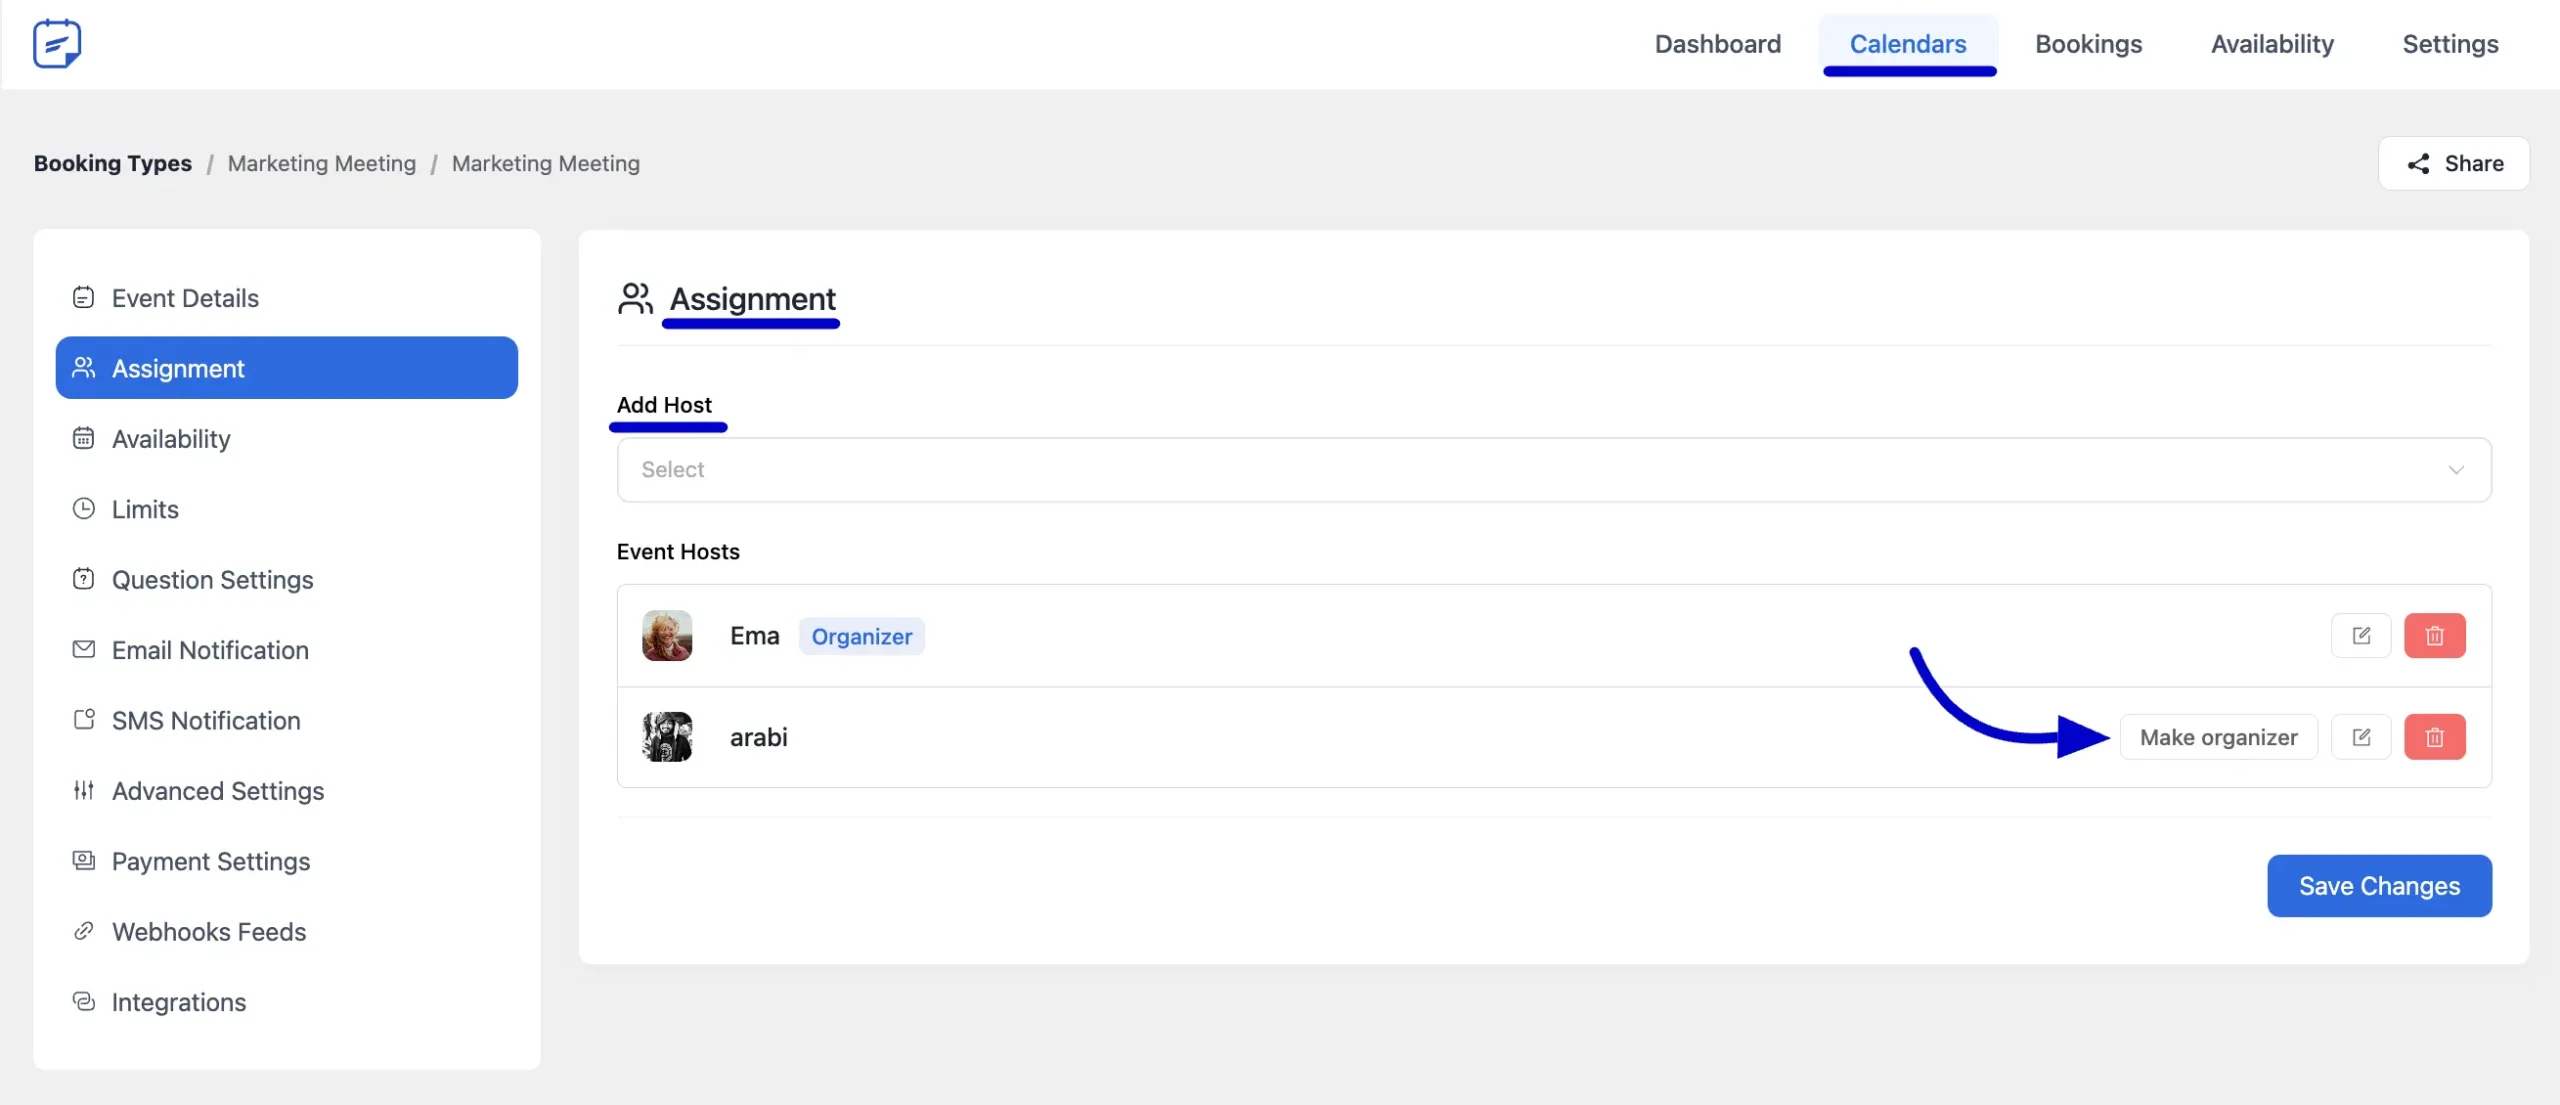
In the Assignment section, you can manage the hosts for your meeting. If needed, you can add more hosts using the Add Hosts dropdown field.
In the Event Hosts section, you’ll see the hosts already added to your event. To designate a host as an Organizer, simply click the Make Organizer button, then click Save changes to apply your updates.
Define Availability #
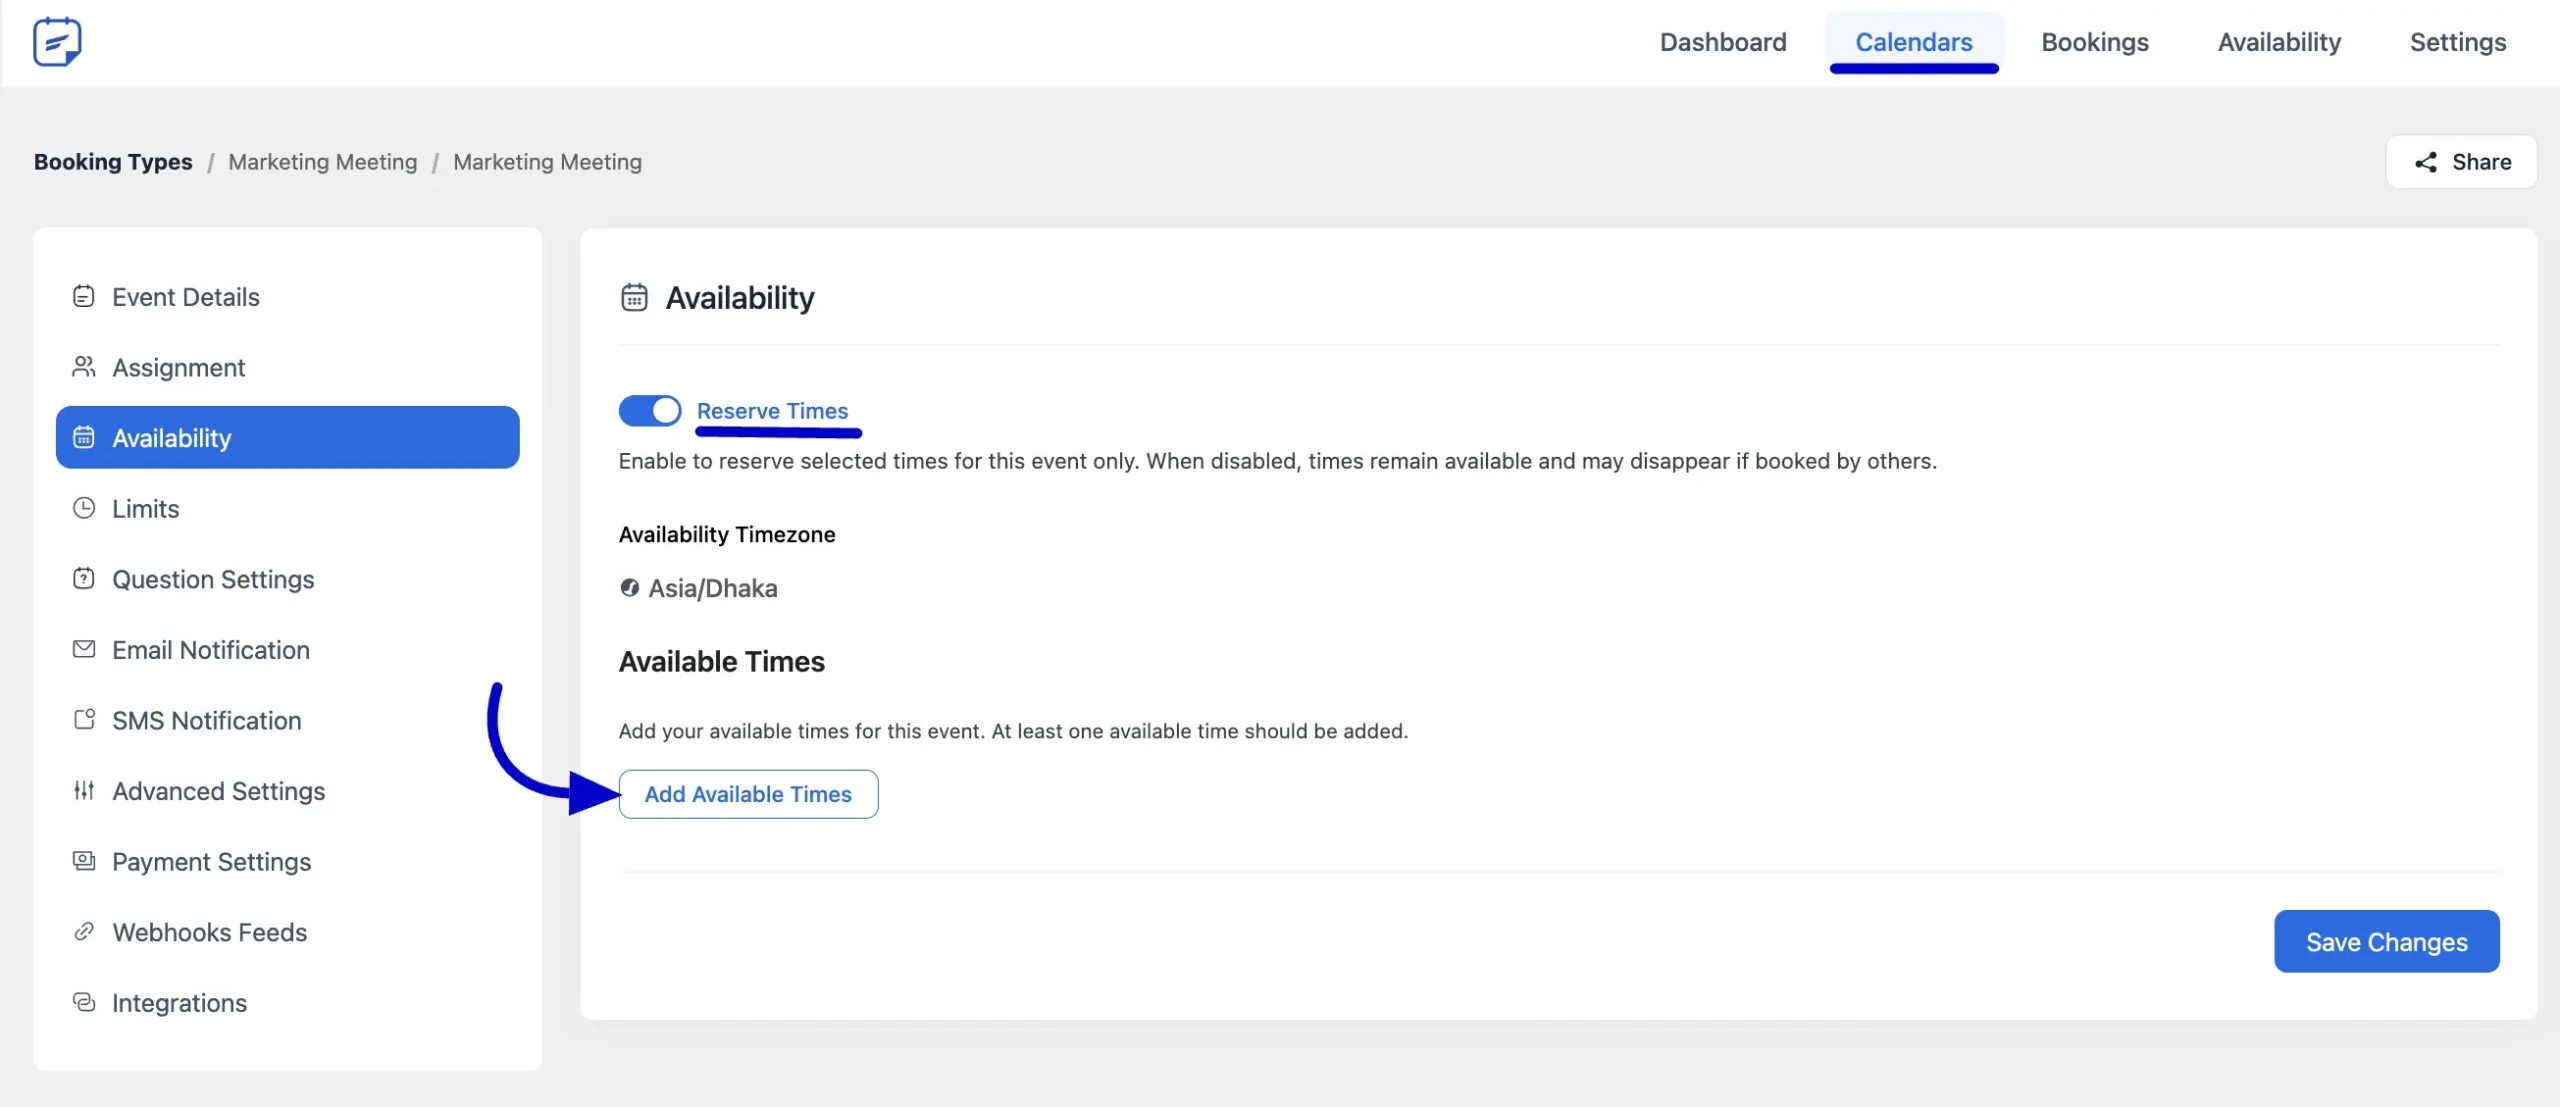
In the Availability section of your Single One-off Event, you can define the event’s available time slots.
If you enable the Reserve Time option, the host’s availability will be exclusively reserved for this event. Once an attendee selects a booking time, such as 9:00 – 9:30, that time slot will be blocked, preventing the host from being booked for any other events during that period.
To set the availability time, click the Add Available Times button.
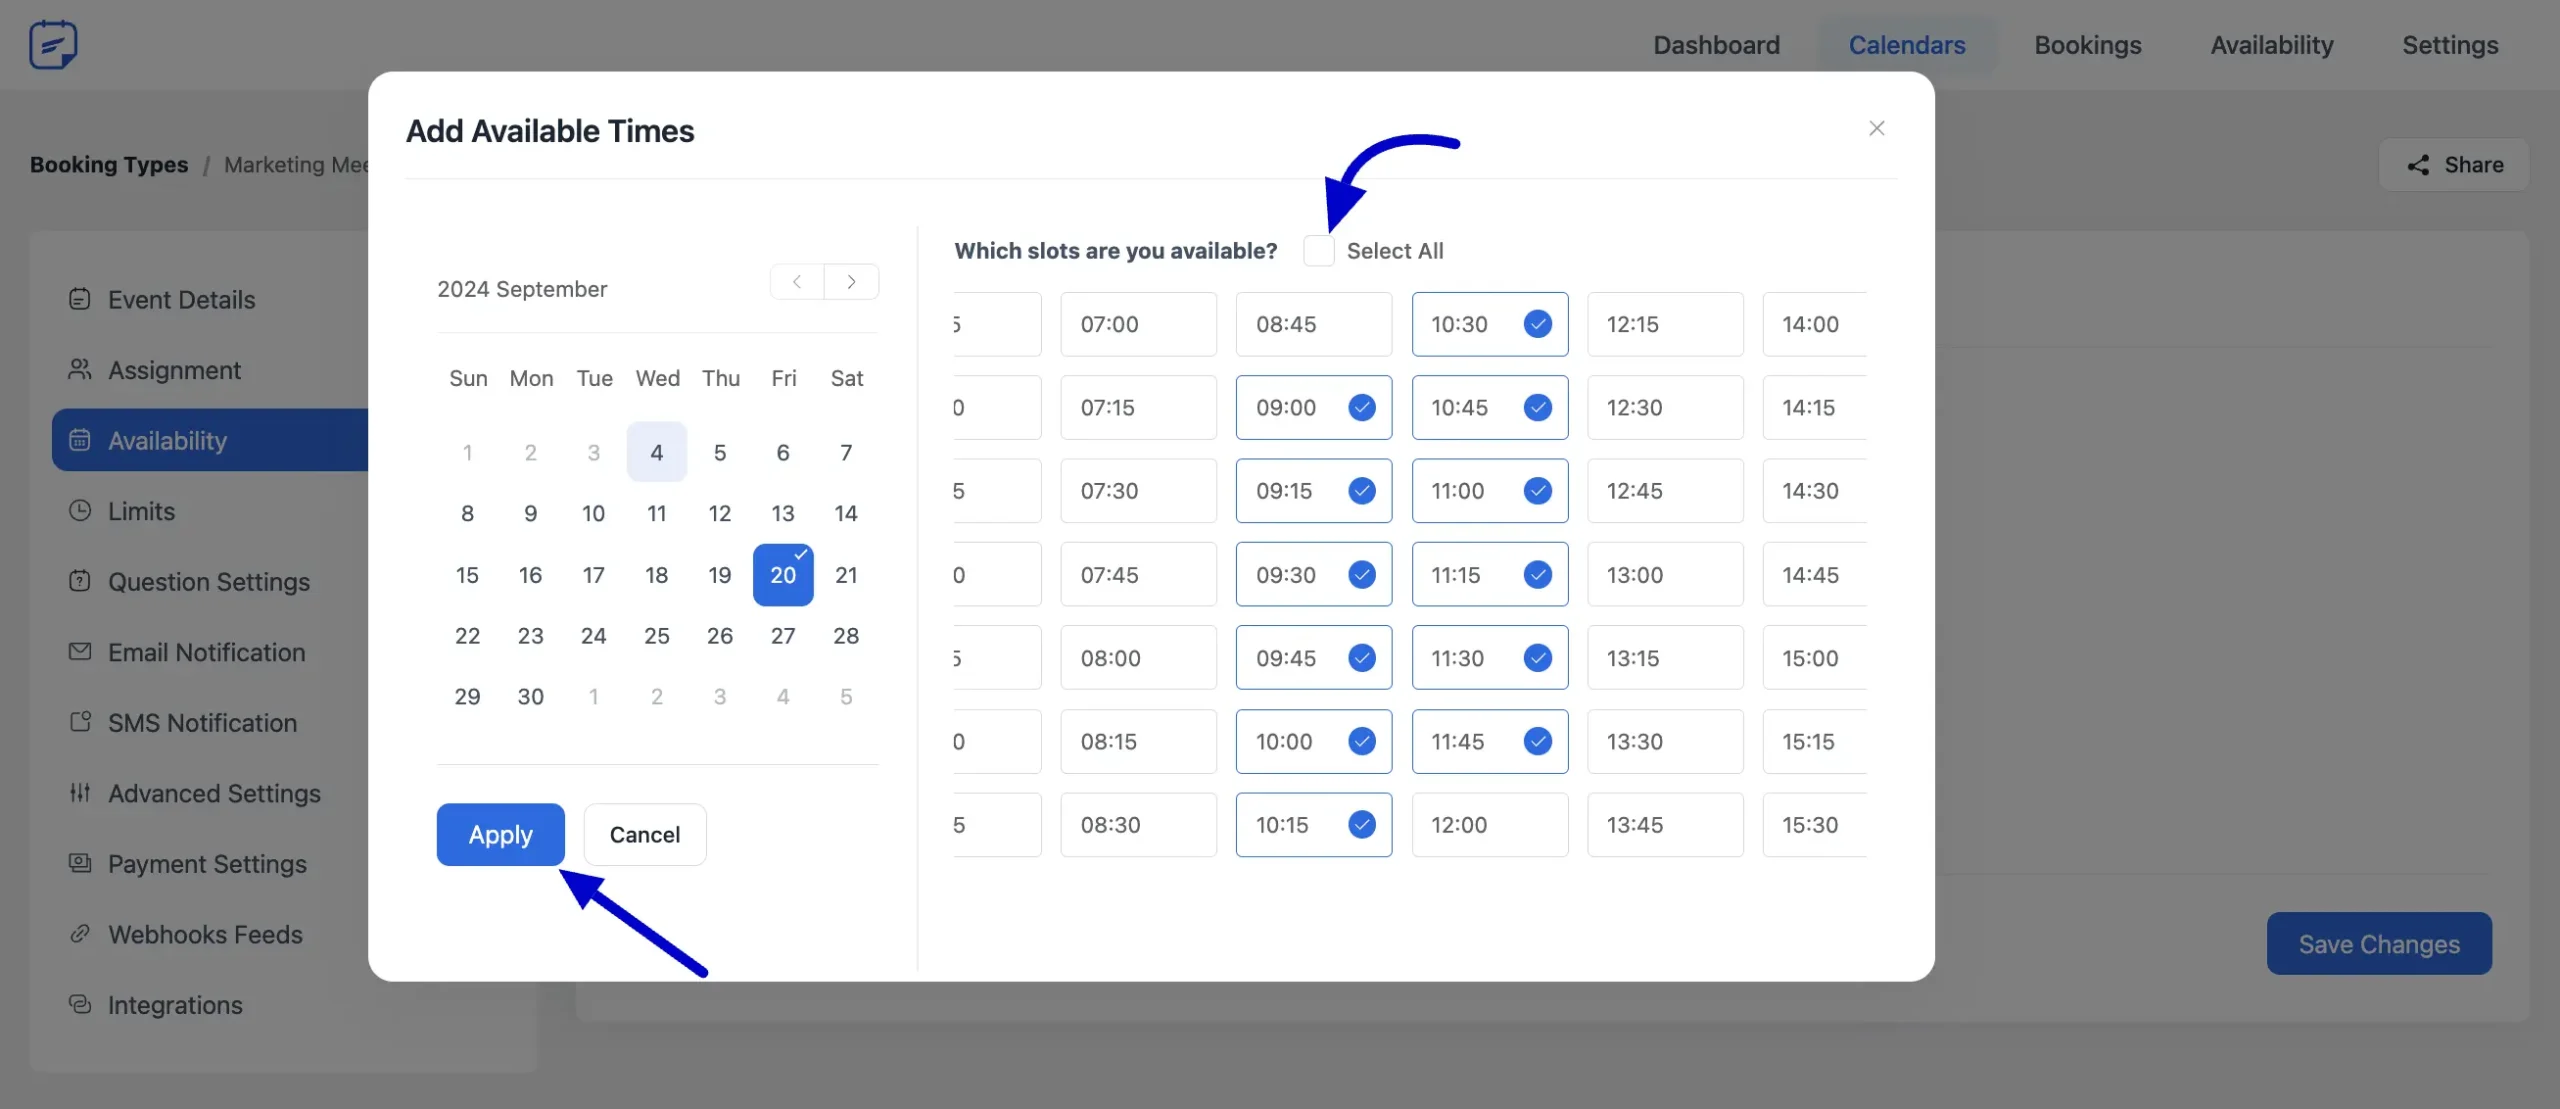
A pop-up will appear for selecting the availability time for the booking. From here, you can choose multiple time slots or Select All available slots. Once you’ve made your selections, click the Apply button to save the changes.
Allow Additional Guests #
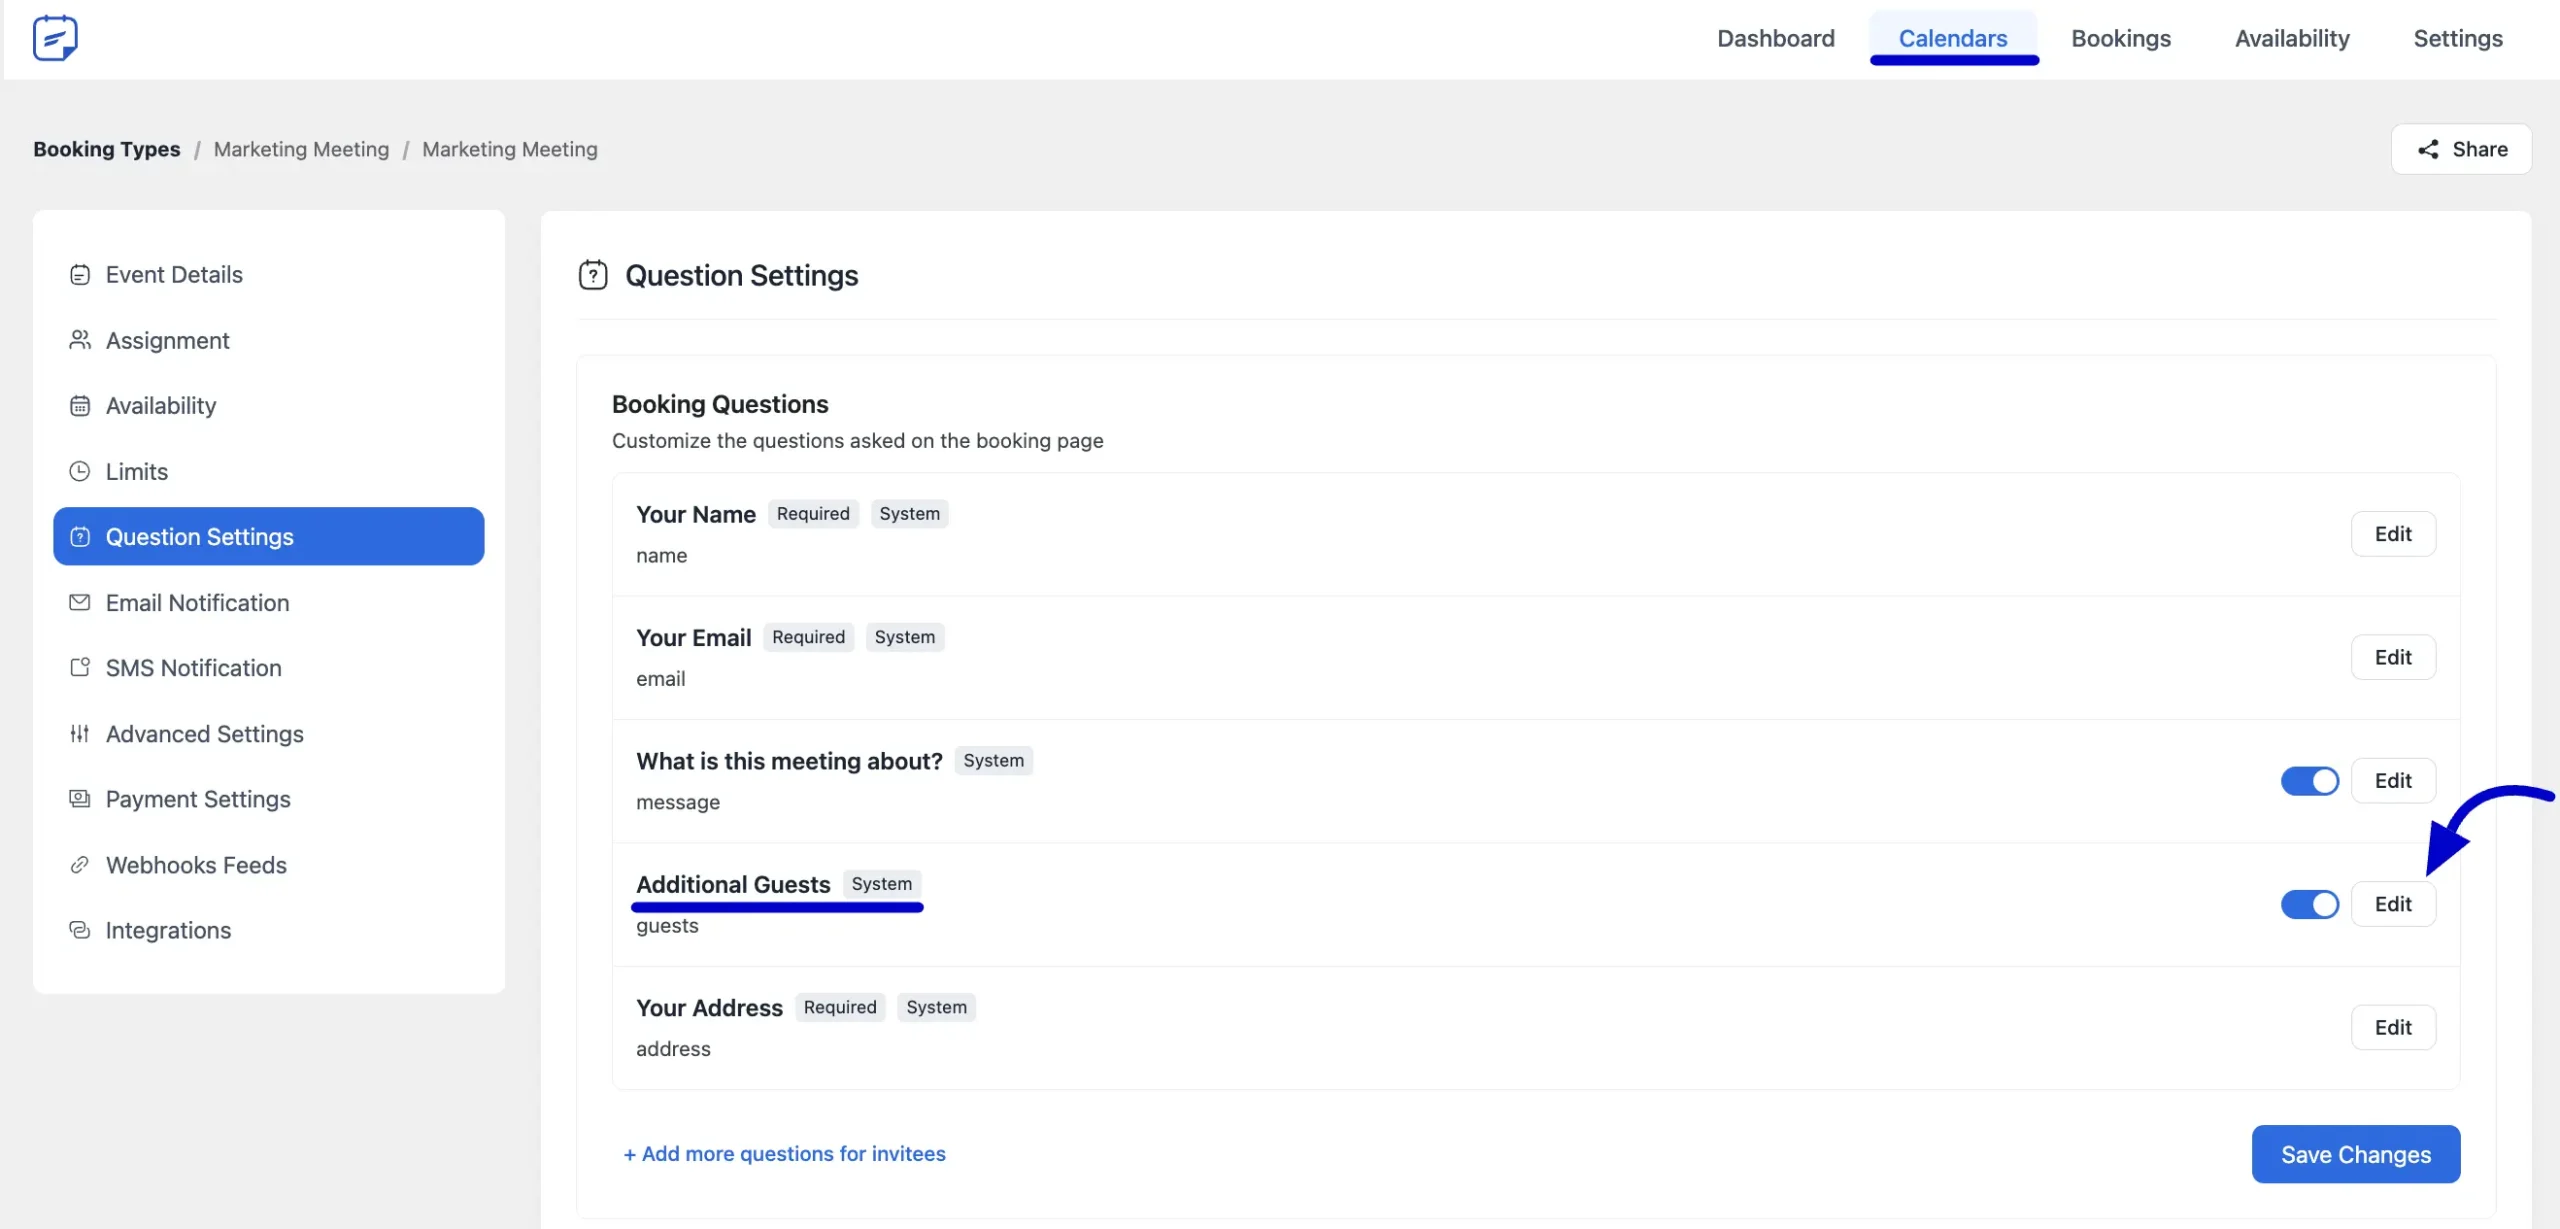
A Single One-off Event is designed for a single attendee. However, if you want to allow more attendees to join your meeting, enable the Additional Guest option in the Question Settings. Click the Edit button to adjust the settings for this feature.
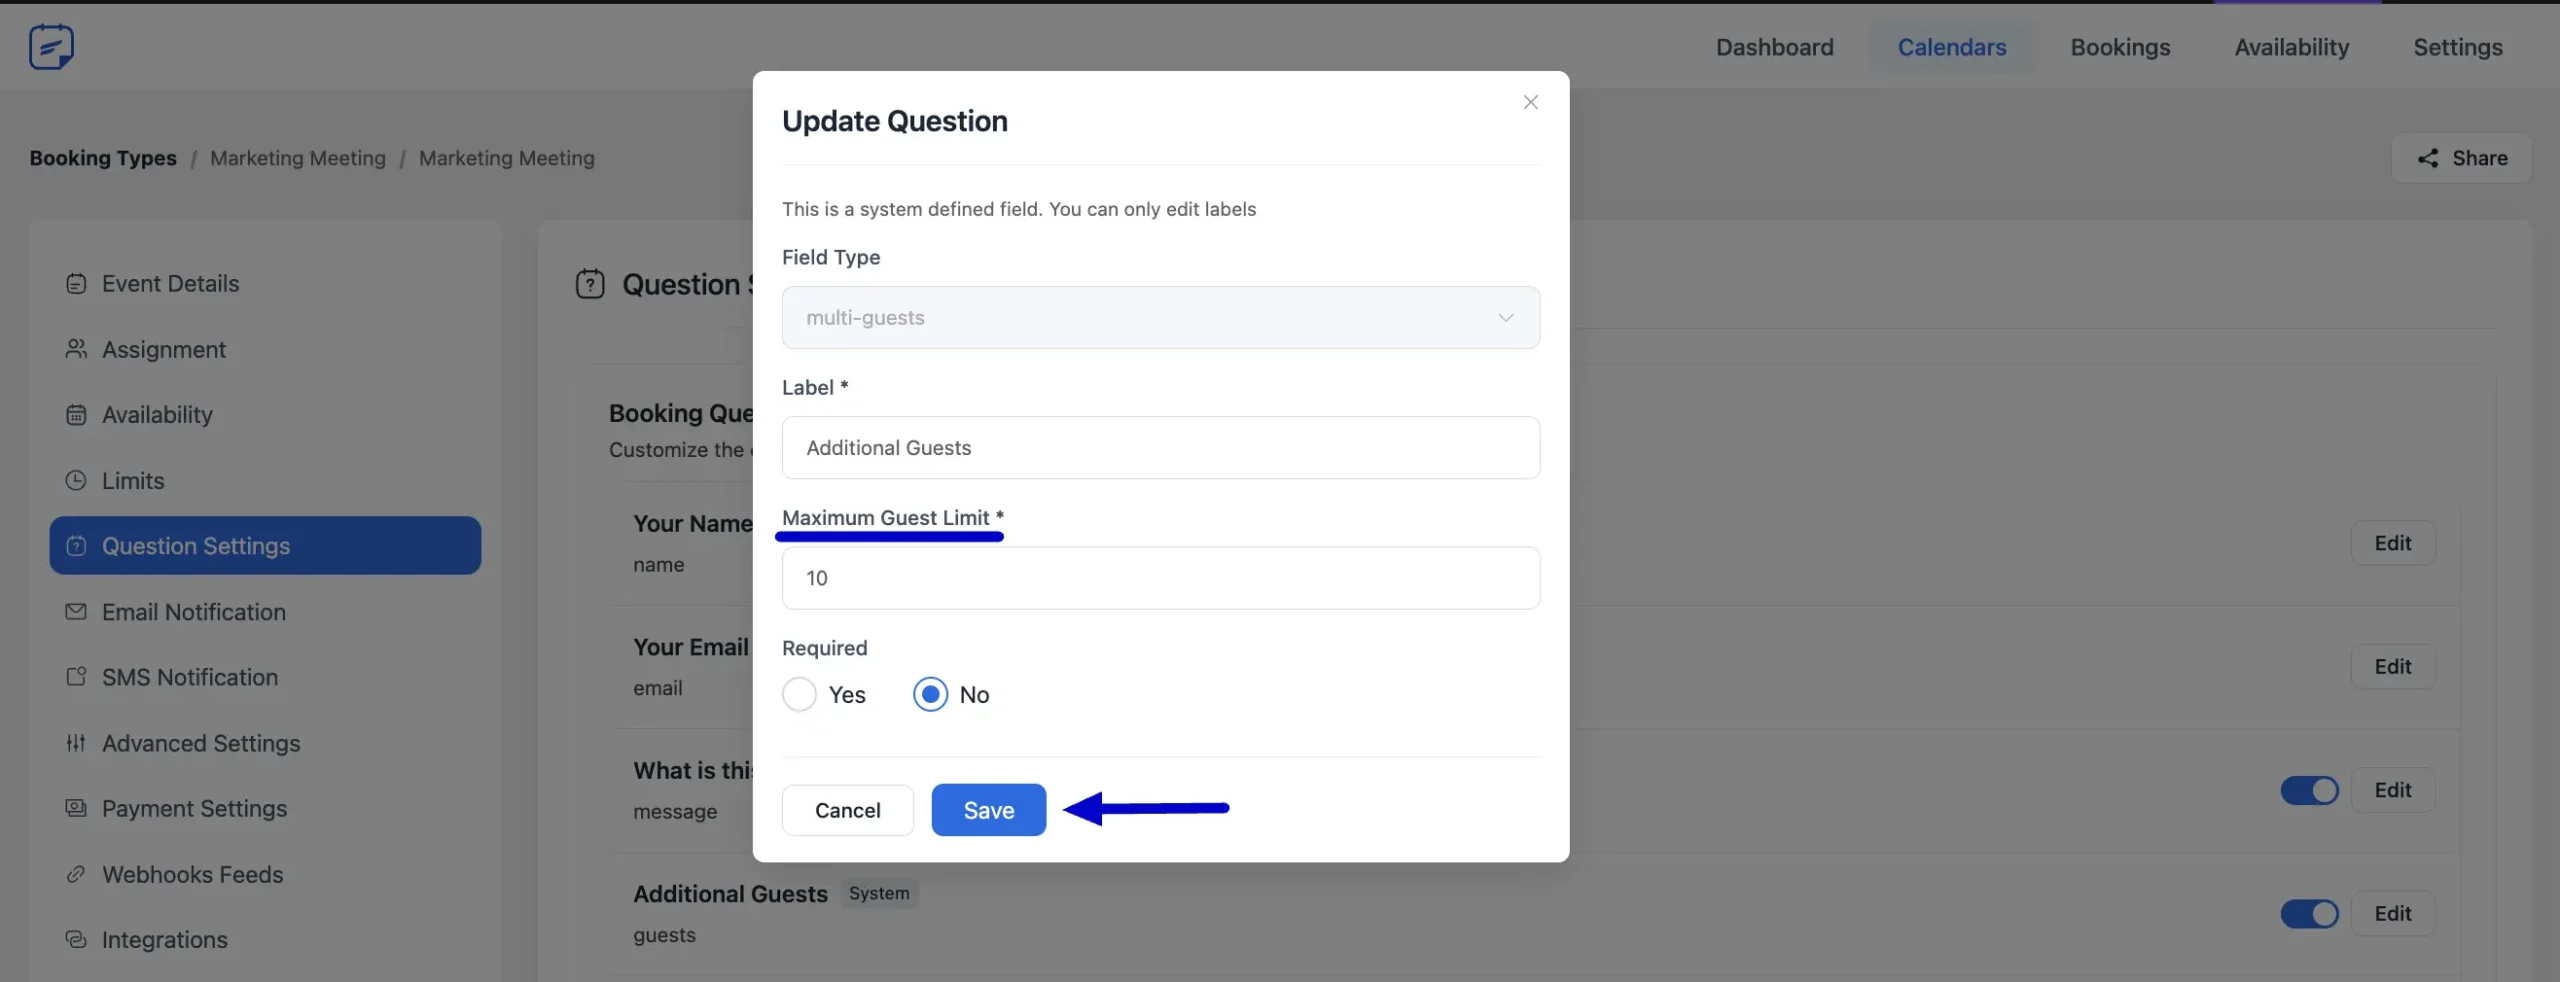
A pop-up will appear, allowing you to configure the Field Type, Label Name, Maximum Guest Limit, and Required option. Adjust these settings as needed and click the Save button to apply your changes.
The remaining settings for the booking event are similar to those of other events.
Share the Event #
To share this booking event, click the Share button of the event in the Calendars section. A pop-up will appear, allowing you to choose how you want to share the event for attendees to make their bookings.

Please be aware that the booking event will disappear from your calendar once an attendee books it, as it is a Single One-off Event. This event is designed for a single occurrence only, so it will no longer appear in the calendars after it has been booked.
This concludes the information on the Single One-off Event in FluentBooking. If you have any additional questions about this guideline, please don’t hesitate to contact us.


