
FluentBooking makes it easy to add bookings yourself, which is perfect for scheduling appointments over the phone or in person. This guide will walk you through the simple steps to manually create a booking directly from your dashboard.
Accessing the Manual Booking Form #
Go to the Bookings section from the top navigation bar in your FluentBooking dashboard. Click on the Plus (+) icon button. A pop-up titled “Create Booking Manually” will appear. Click on it to continue.

Filling Out the Booking Details #
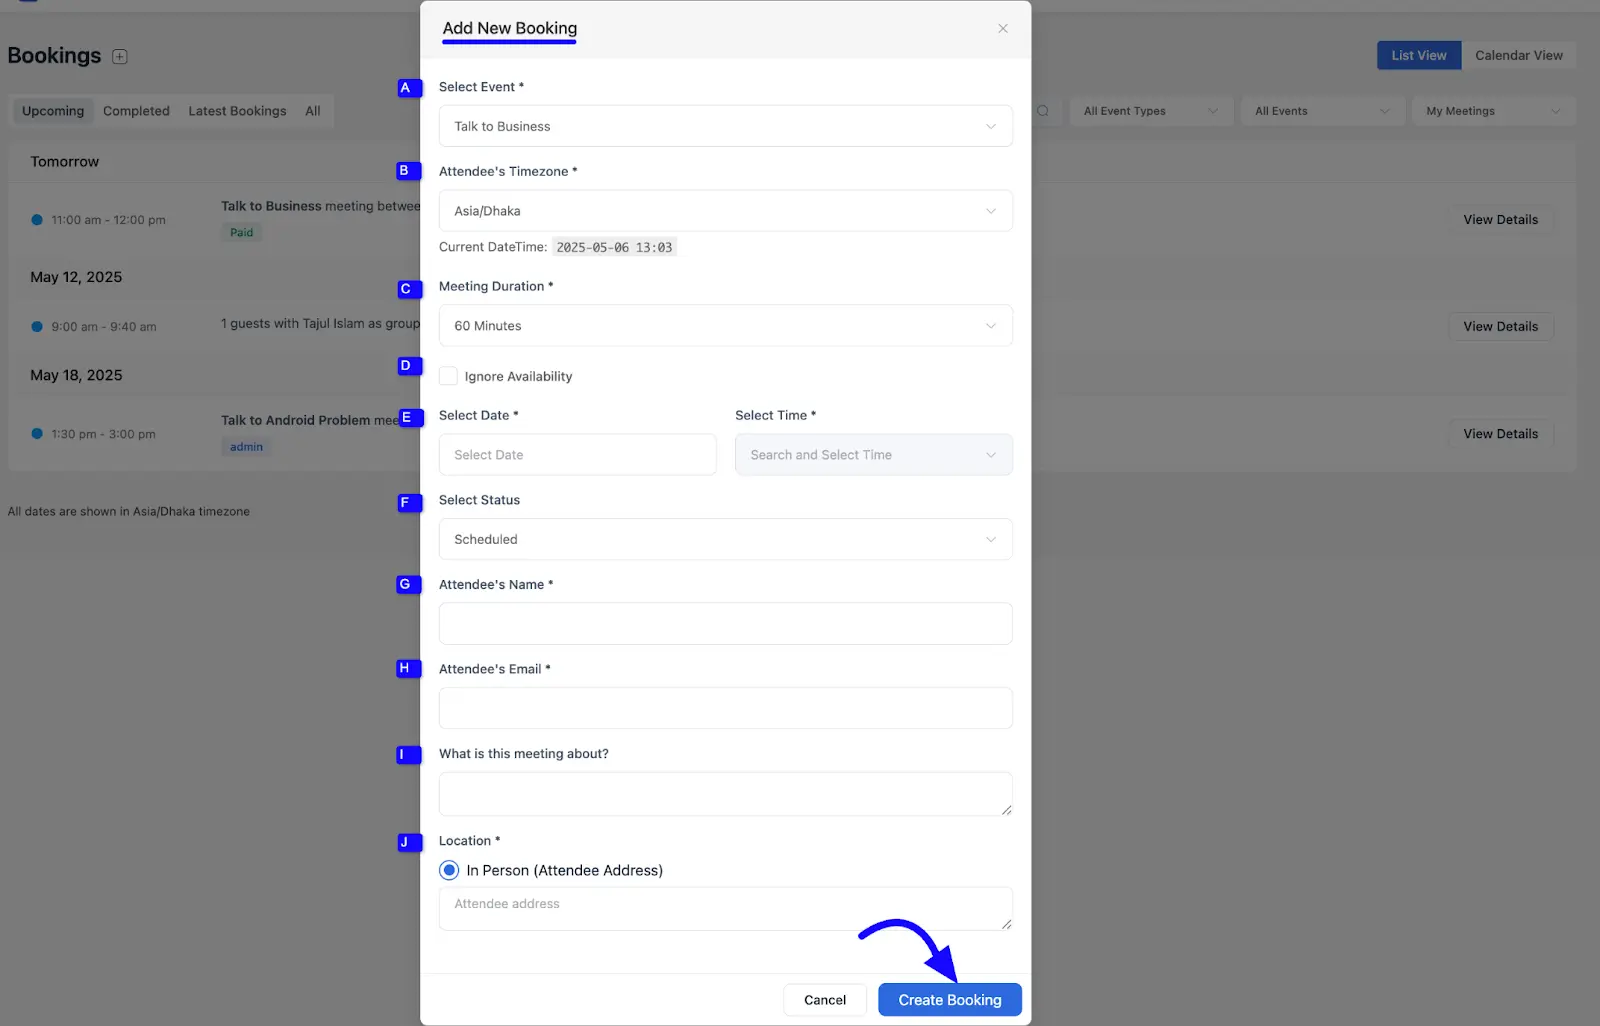
The Add New Booking form will open. You need to fill in the following information to create the appointment:
A. Select Event: Choose the event from the dropdown option.
B. Attendee’s Timezone: Select the timezone of the attendee.
C. Meeting Duration: Pick the meeting duration. The available durations will match the selected event.
D. Ignore Availability: Check this box if you want to override normal availability for this booking.
E. Select Date and Time: Choose the desired date and time from the calendar and time selector.
F. Select Status: Set the status of the booking to Scheduled, Pending, or Complete.
G. Attendee’s Name: Enter the attendee’s full name.
H. Attendee’s Email: Provide the attendee’s email address.
I. What is this meeting about: Write a short description of the purpose of the meeting.
J. Location: Enter the attendee’s address or meeting location.
Confirming the Booking #
After you have entered all the necessary details, click the Create Booking button.
A success notification will appear to confirm that the booking has been created. The new appointment will now be visible in your main Bookings list.
If you want to change your mind, click Cancel instead.
Congratulations, you have successfully created a manual booking! You can now manage this appointment just like any other booking on your list.
If you have any further questions, concerns, or suggestions, please do not hesitate to contact our support team. Thank you.


