

FluentBooking makes it easy to integrate PayPal as a payment gateway, enabling the acceptance of online payments. By offering PayPal as a payment option, you can provide a secure and convenient checkout experience for your customers.
This integration allows you to accept payments globally, ensuring secure transactions with PayPal’s trusted infrastructure.
The PayPal Payment feature is only available in FluentBooking Pro. You’ll need the FluentBooking Pro plugin to access this feature.
Enable PayPal Payment #
Before proceeding, make sure the main global Payment Module is enabled from the Payment Setting.
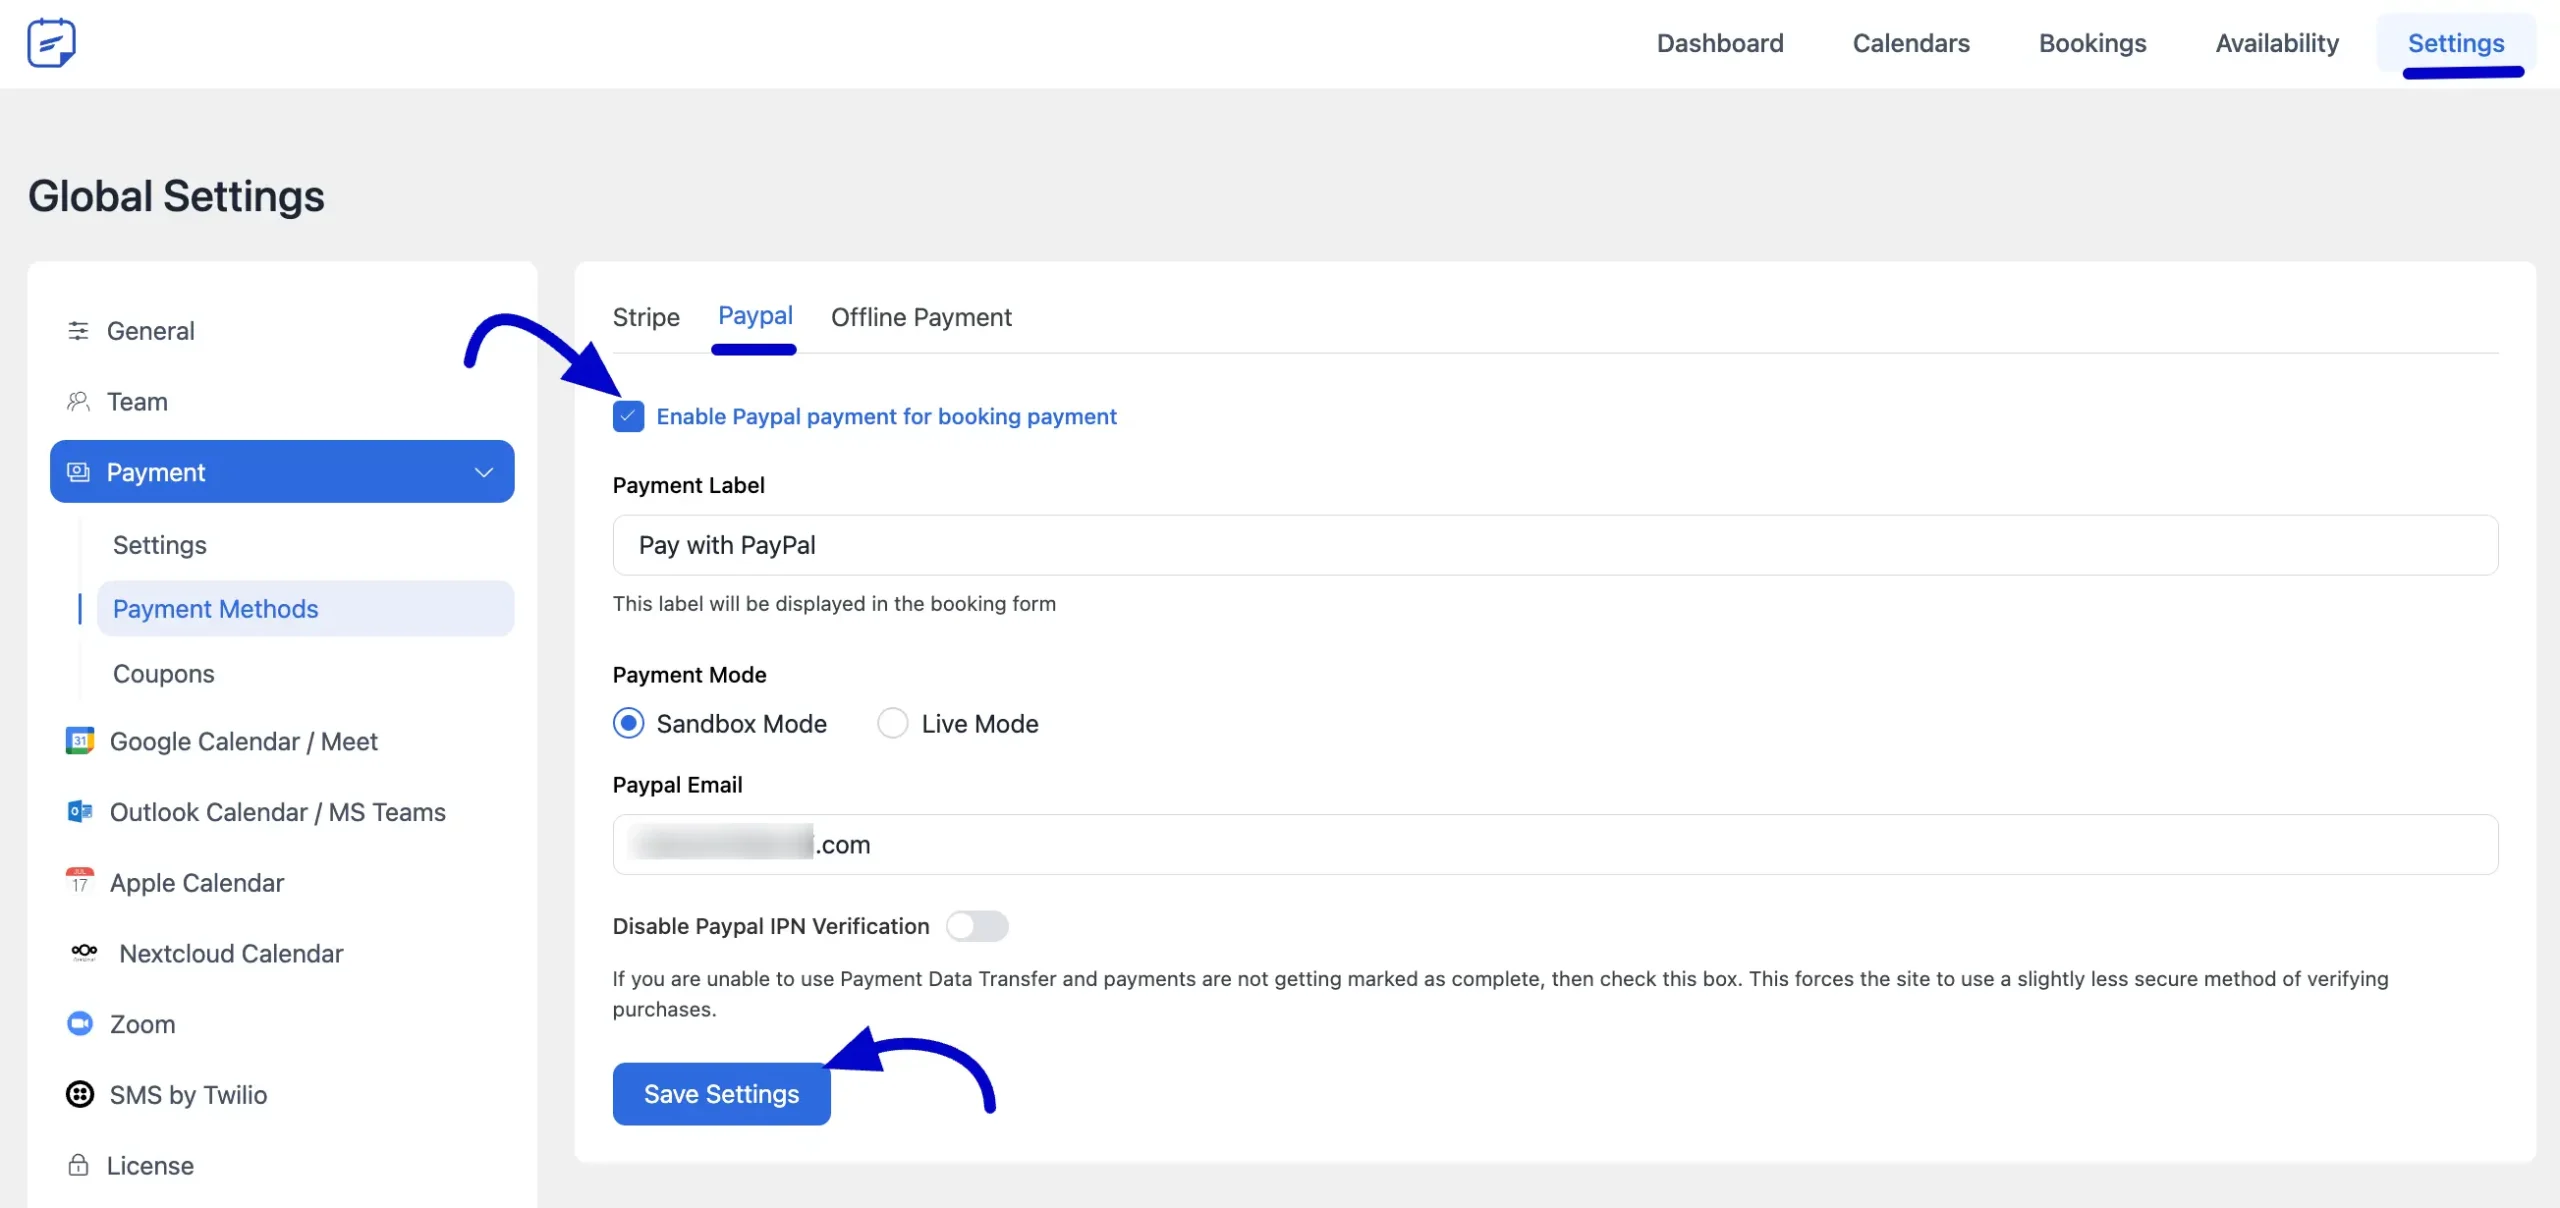
Go to the WordPress admin dashboard, navigate to FluentBooking > Settings, and select PayPal. Now, check on the Enable PayPal Payment for Booking Payment to enable the PayPal Payment option.
Payment Label: You can customize the text your clients will see on the booking form. The default is (Pay with PayPal).
Payment Mode: Here, you will see two Payment Modes.
- Sandbox Mode: Only for testing purposes.
- Live Mode: Take Live payment for your events.
PayPal Email: Here, you just need to give your PayPal business email address only.
Disable PayPal IPN Verification: If you are unable to use Payment Data Transfer and your payments are not being marked as complete, then toggle to Disable PayPal IPN Verification. Enabling this option forces the site to use an alternative verification method, which is slightly less secure but ensures that purchases are processed and marked as complete.
Configure PayPal Payment for Booking Forms #
Once PayPal is enabled, the next step is to configure it in your booking forms.
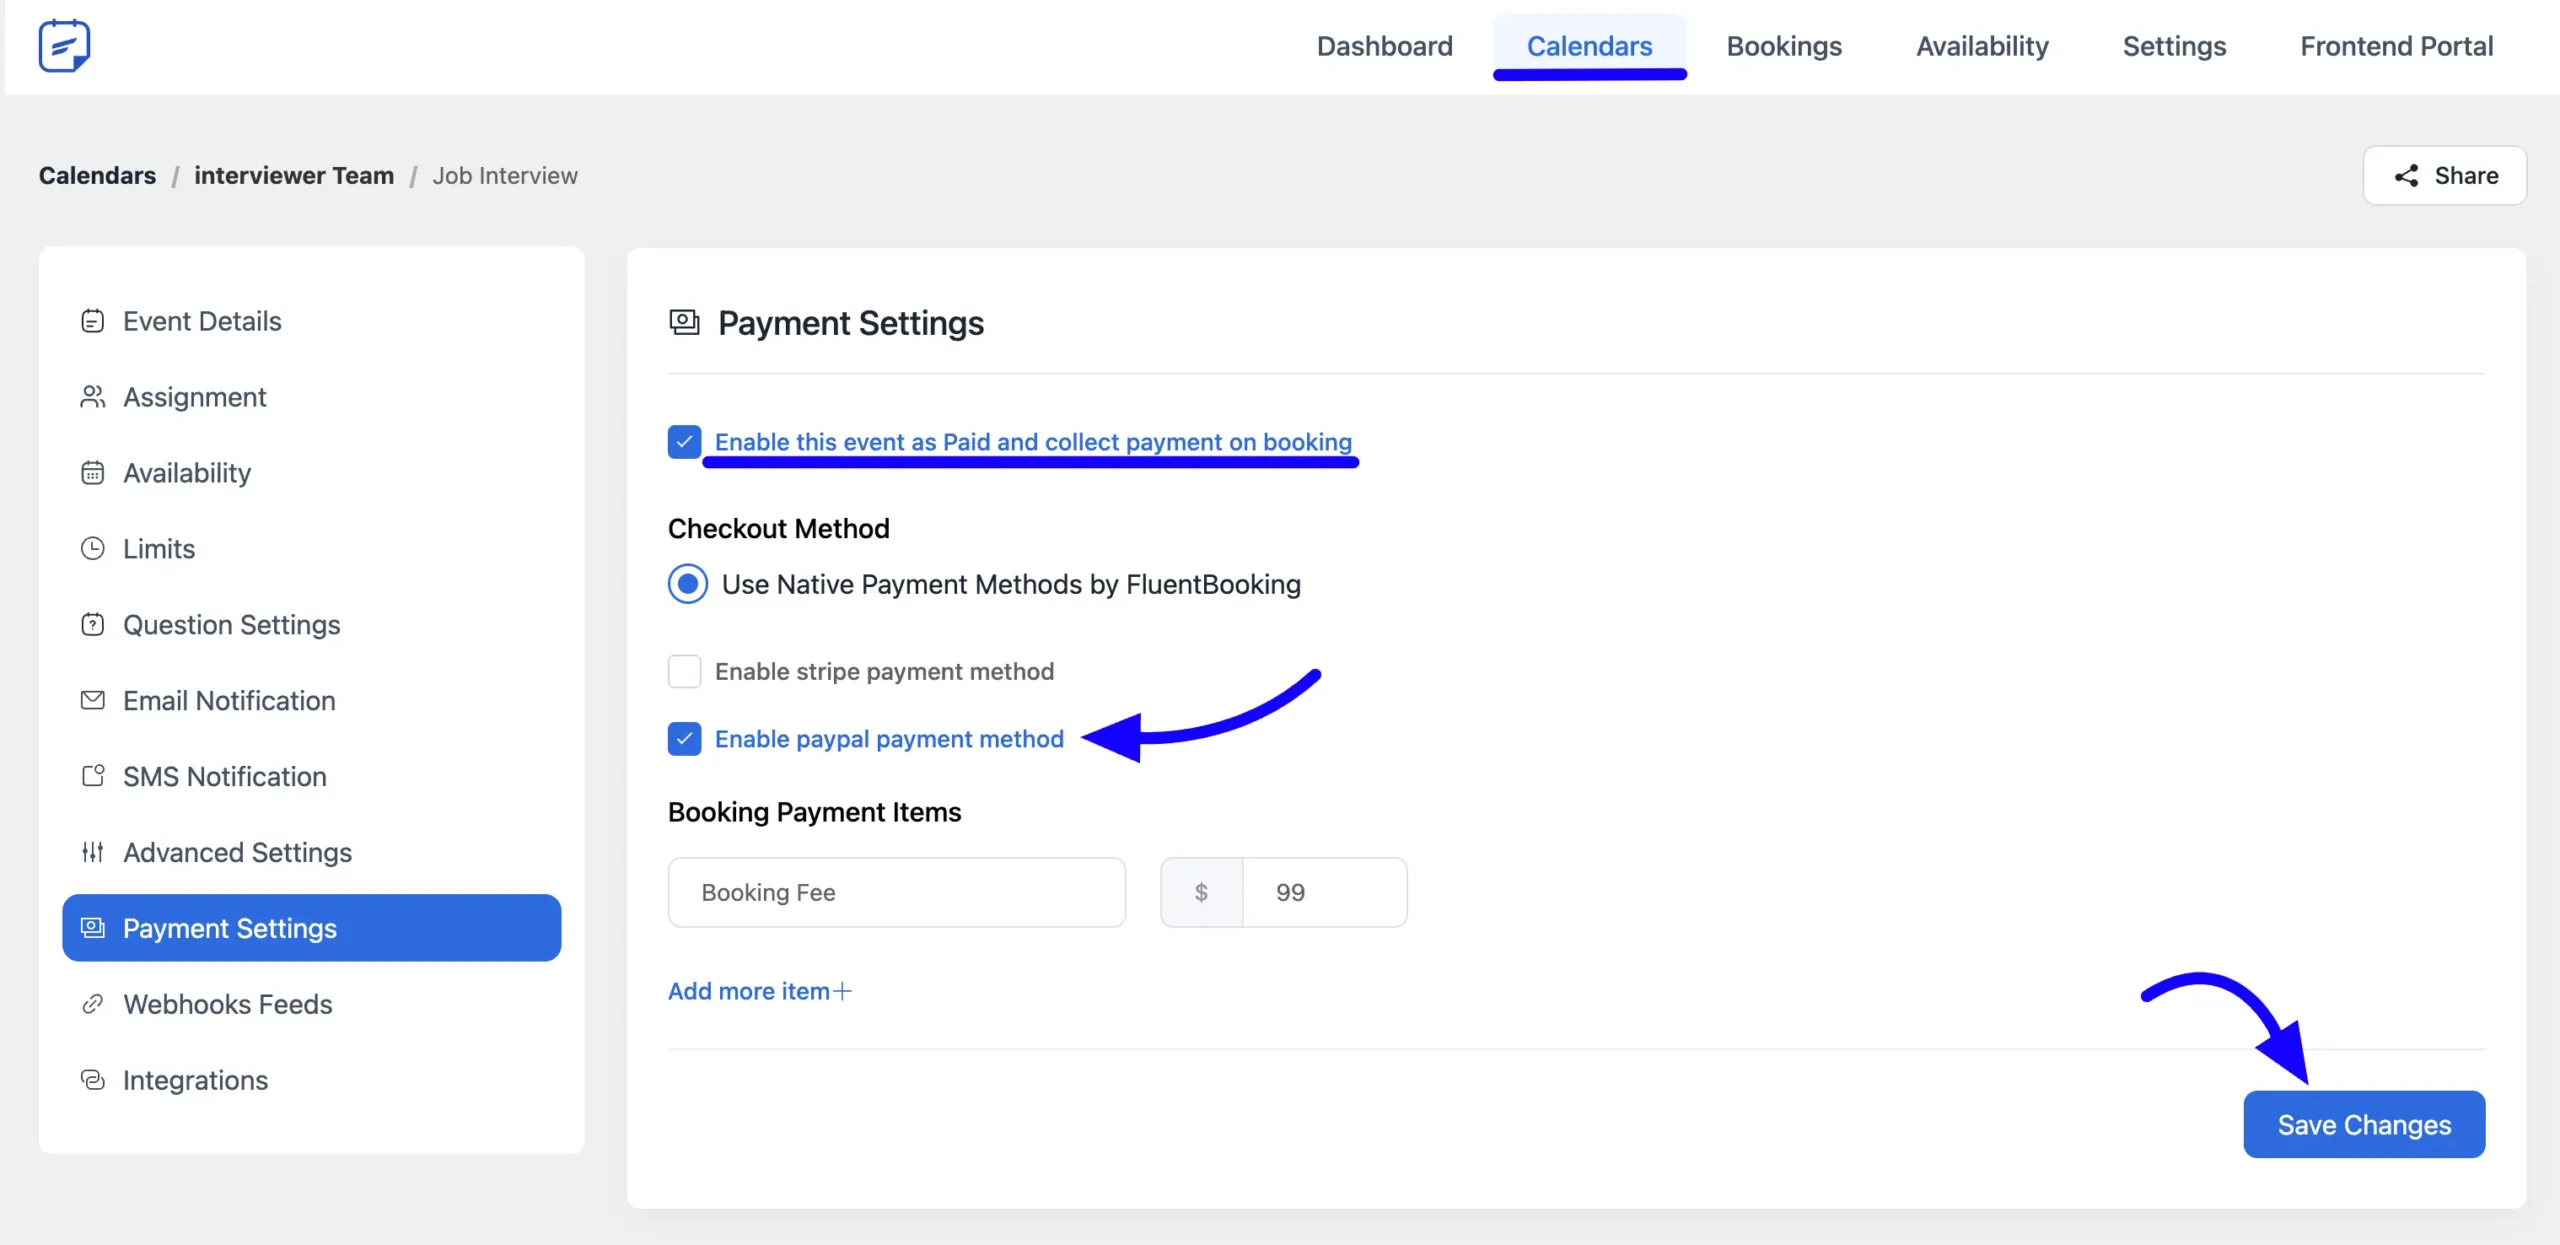
Go to FluentBooking > Calendars select the booking event form you want to PayPal, and click on the Edit button.
Now, select Payment Settings from the left sidebar and check the Enable this event as Paid and collect payment on booking checkbox.
For the Checkout Method, choose the Use Native Payment Method by FluentBooking option.
Next, check the box for Enable PayPal Payment Method to activate PayPal as your payment option.
In the Booking Payment Item section, you can set the payment item’s name and price. Simply enter the Name and Price in the dedicated fields. Click on the Add More Items button if you want to add more items.
Finally, click the Save Settings button to save your changes.
If you have any questions, suggestions, or need further assistance regarding this documentation, please don’t hesitate to contact us. We’re here to help!


