
Want to know which marketing campaigns are driving the most appointments? FluentBooking’s UTM tracking feature allows you to see exactly where your clients are coming from.
By adding UTM parameters to your booking links, you can track the source, medium, and campaign for every booking, helping you make smarter decisions to grow your business.
Generating Your Trackable Link #
Follow these step-by-step processes to create a booking link with UTM parameters.
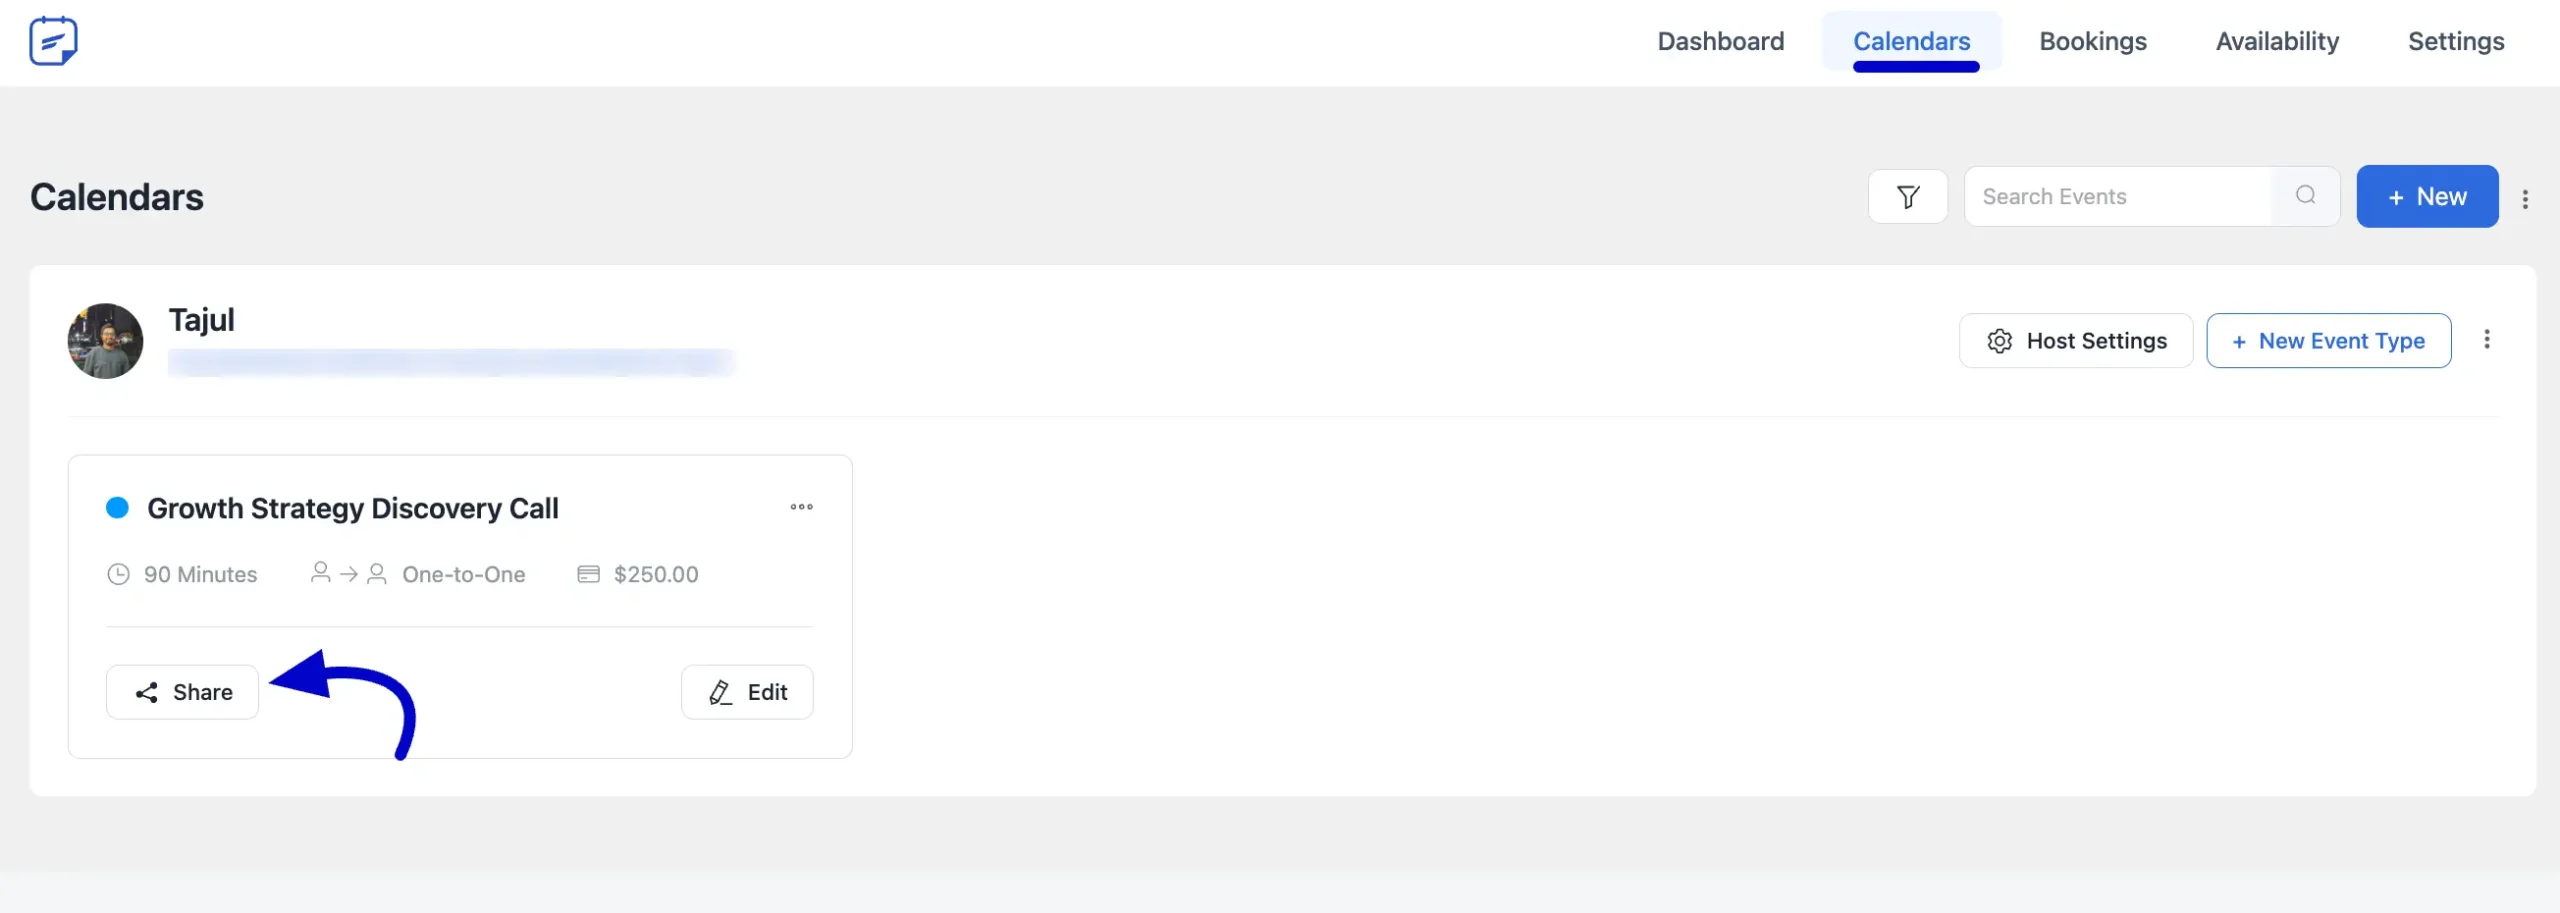
From your WordPress dashboard, navigate to FluentBooking → Calendars. Next, find the specific booking event you want to share and click the Share button.
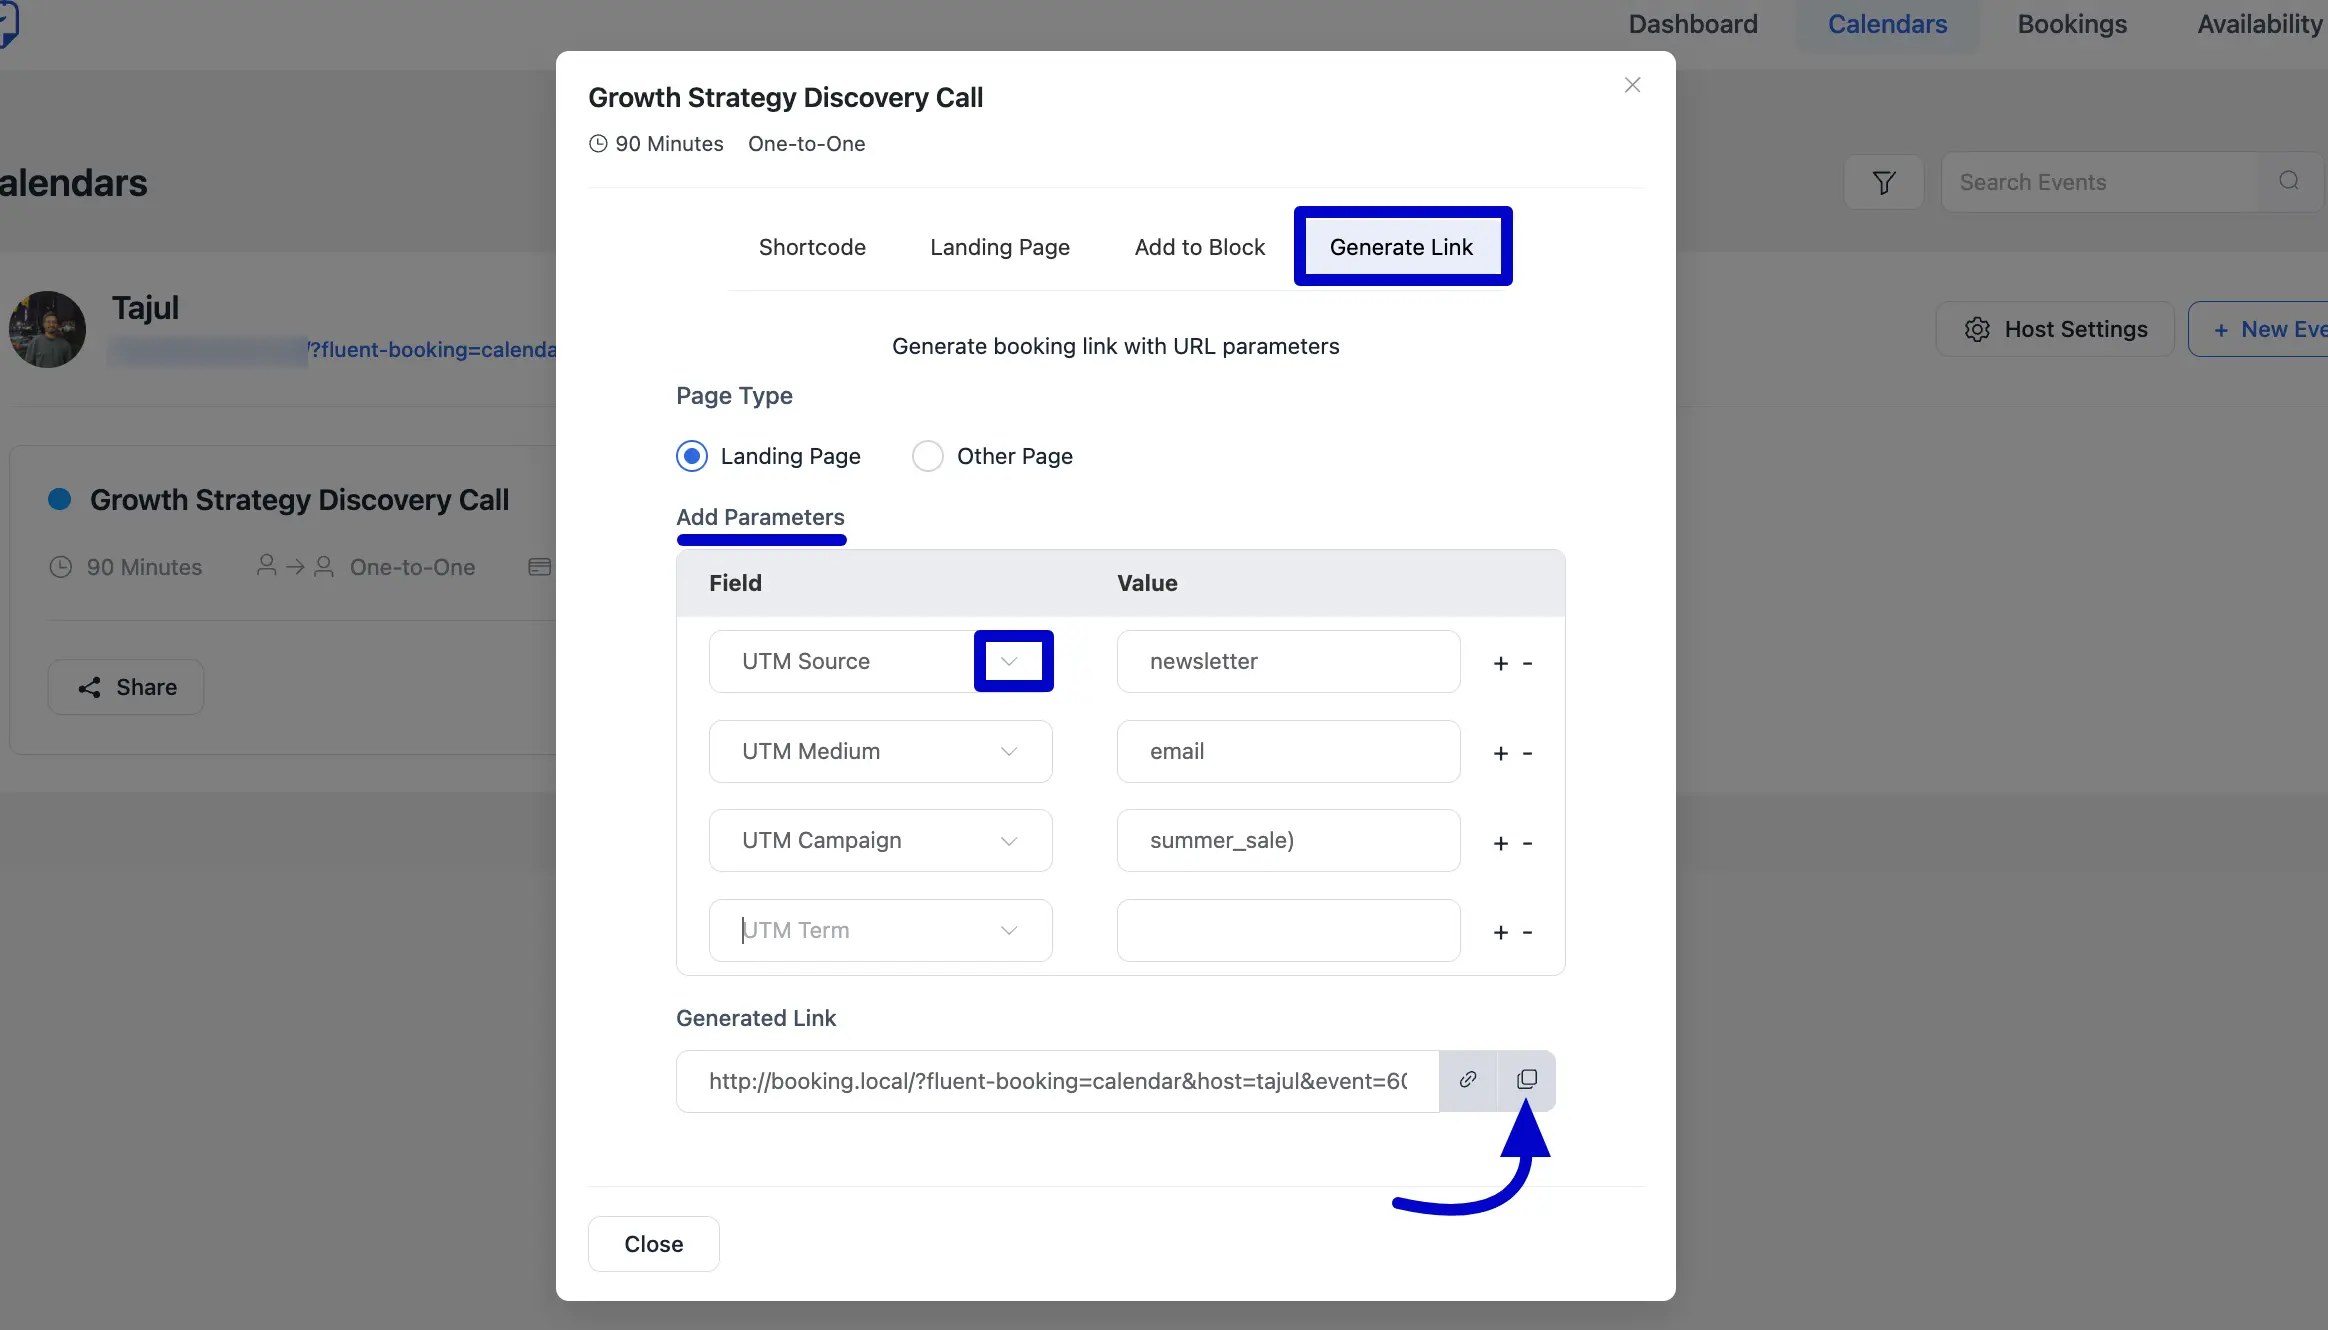
A pop-up will appear. Click on the Generate Link tab. Now, find the Add Parameter section. Then, fill in the Fields and Values to track your campaign details from the dropdown options.
To know more about the Generate Link, read this article.
- UTM Source: Identify the source of your traffic (e.g., Facebook, Newsletter).
- UTM Medium: Specify the marketing medium (e.g., cpc, email).
- UTM Campaign: Name your specific campaign (e.g., summer_sale).
- UTM Term: Add any keywords you are tracking.
- UTM Content: Differentiate links or ads within the same campaign, which is useful for A/B testing (e.g., blue_button, red_link).
Once you’ve added the parameters, click the Copy button to grab your new trackable link.
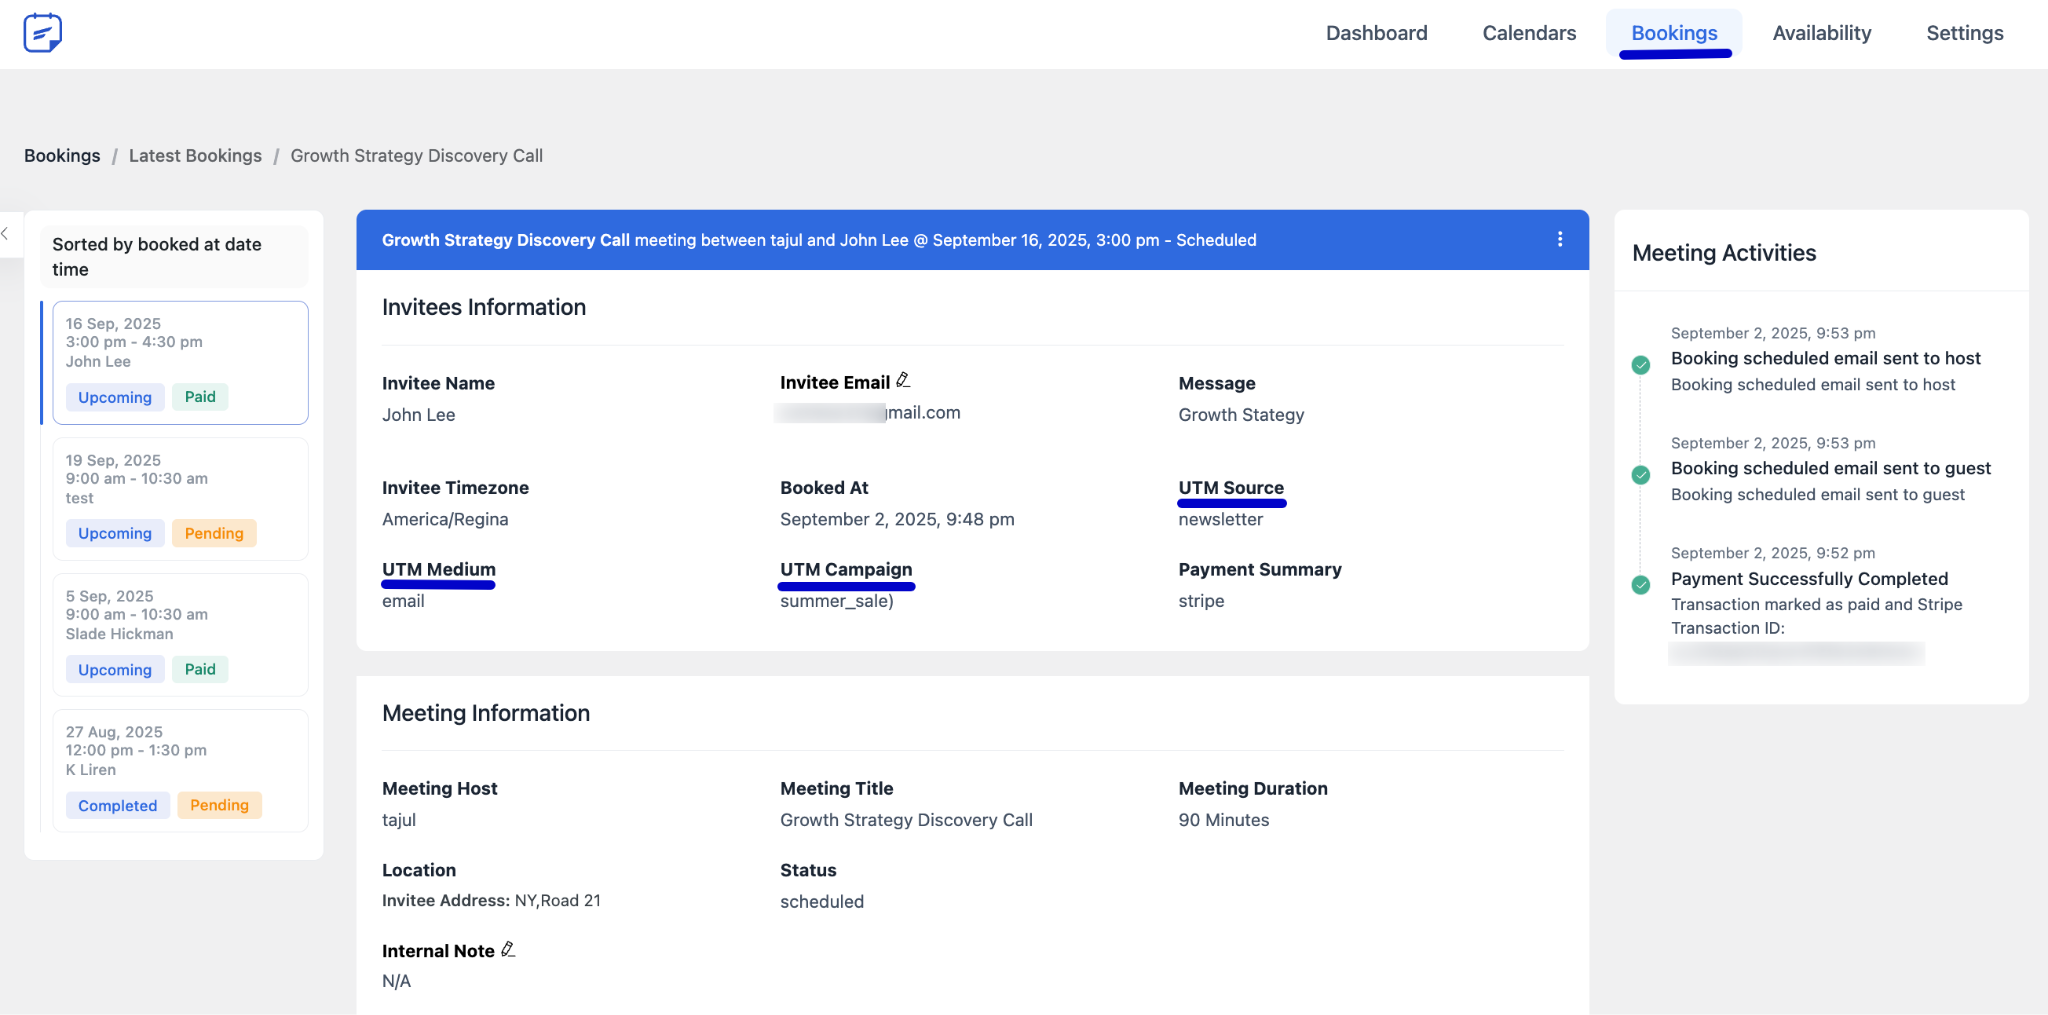
Viewing UTM Data in Bookings #
After a client uses your link to book an appointment, you can view the tracking data.
First, navigate to FluentBooking→ Bookings from your dashboard. Next, click on any booking made with your UTM link. Then, check UTM Information, the source, medium, and campaign details will be clearly displayed within the booking information.
Congratulations! You can now track your marketing efforts and understand exactly which channels bring you the most clients.
If you need assistance, don’t hesitate to contact our support team.


